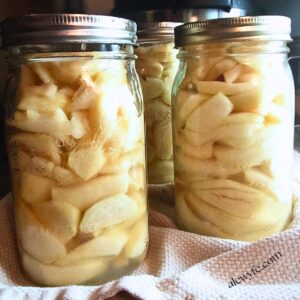
Canning Apple Slices for Baking
This tested method for canning baking apples in a light syrup is so easy, and quite versatile. These simple canned apple slices are a true pantry workhorse. The basic recipe uses a light simple syrup with lemon, but I like to add a cinnamon stick to add a bit of spice... or refer to the post for even more flavor infusion ideas. I've doubled the quantity of the syrup ingredients, as I always run out when making this recipe as originally written. If you end up with extra syrup after packing your apples in jars, save it in the fridge and use it for baking, mixing drinks, or sweetening iced tea and coffee drinks.
Equipment
- canning jars, rings, and new lids
- jar lifters or tongs or jar rack with handles
- large heavy-bottomed jam or sauce pot (to make simple syrup and poach apples)
Ingredients
- 10 - 12 lbs Granny Smith or other firm baking apples
- 2 tsp Ball Fruit-Fresh ( or other vitamin C powder) (dissolve in 2-3 quarts of water)
Simple syrup:
- 2 cups sugar
- 4 cups water (or apple juice)
- 2 tbsp lemon juice
- 1 large cinnamon stick (optional, see recipe for other spice ideas)
Instructions
prepare canning pot & jars:
- Wash your canning jars and rings with hot, soapy water and rinse well.
- Inspect the jars for cracks, nicks, or defects in the sealing surface, and discard any damaged jars.
- Fill your canning pot with water and bring it up to a low simmer. You can pre-heat and sterilize your jars if you like, though it isn't necessary as long as they're clean.
prepare simple syrup:
- In a large non-reactive pot, add the sugar, lemon juice, and optional spices.
- Pour in the water (or apple juice) and stir until the sugar dissolves.
- Bring up to a simmer on medium heat while you prepare the apples.
- Reduce the heat to low and keep syrup hot until apples are ready.
peel and slice apples:
- Prepare a 4-8 quart container with a quart or two of cold water and either a splash of lemon juice, a teaspoon of ascorbic acid powder, or several crushed vitamin C tablets.
- This is will protect the cut apple slices from browning and discoloring.
- Wash the apples before slicing.
- Using a sharp paring knife or peeler, peel each apple (optional), core it, and cut into 1/4"-1/2" slices.
- I like to leave some of the peels on for texture, but if your fruit has been waxed or don't like peels in your pies, you should peel them completely.
- I often make a second, small bowl of the vitamin C water to dunk the apple as I peel and slice it. This will wash off any small bits of seed, core, or peel. Then, transfer the apple slices to the large container of acidulated water.
- Immediately dunk the apple slices into the vitamin C water to prevent the apples from oxidizing and browning.
- Keep working in batches until all of the apples have been peeled and sliced.
blanch the apple slices:
- Bring the pot of simple syrup back up to a boil.
- Drain the apples from the lemon or vitamin C water, or remove them with a slotted spoon or strainer.
- Blanch the sliced apples in the hot syrup, simmering them on medium-high heat for 5 full minutes after the syrup boils again.
- Stir the apples gently several times, and cover the pot to steam any apples that are not submerged.
fill jars:
- Remove the pot from the heat, and immediately pack the hot apple slices into the prepared and preheated canning jars.
- Use a jar funnel if you have one to keep the jar rims cleaner, and carefully spoon the blanched apple slices into the jars.
- Leave 1/2" headspace in the jars.
- Using a de-bubbling tool, chopstick, or thin spatula, stir gently to remove air bubbles. Top up jars with more syrup, boiling water, or hot apple juice if needed after removing any large air bubbles.
- Wipe the jar rims with a damp, clean cloth to remove any residue.
water-bath process:
- Using jar tongs or a jar rack, carefully place the filled jars of apple pie filling into the hot water bath.
- Make sure the jars are covered by at least one and preferably two inches of boiling water. Top up the pot with hot water from a kettle if necessary.
- Cover the pot, checking until the pot of water has returned to a rolling boil.
- Start a timer for 20 minutes once the water bath is boiling, and cover the pot.
- Adjust the processing time for elevations higher than 3001 ft (see chart in recipe notes for longer processing times for higher elevations).
- After the 20 minutes are up, turn off the heat, and set another timer for 5 minutes, leaving the pot covered and the jars undisturbed.
cool, check seals, store:
- Remove the jars from the canner when the 5 minute timer is done, and set them on a folded towel or wire rack to cool. Use your jar tongs again or the jar-lifter rack… I prefer removing the jars individually with jar tongs so they don't clang together, break, or drip as much, even if I'm using a jar lifter rack.
- Leave the jars undisturbed overnight (or until completely cooled, at least 8-12 hours).
Tried this recipe?Let us know how it was!
