Roasted Tomatillo Salsa Verde
This is a beginner-friendly water bath canning recipe for a delicious and zesty green salsa. Adapted from the Ball Canning roasted salsa verde recipe so that a #10 can of tomatillo puree can be substituted for the roasted tomatillo if you are making this out of season or don't have access to fresh tomatillos. If you are canning this recipe, you can increase the amount of lime juice or tomatillo but do not increase the other ingredients (any low-acid ingredients can be reduced to taste and spices omitted, but not the lime and tomatillo). If you are freezing the salsa or using it fresh, feel free to modify or adjust any ingredients to taste.
Ingredients
- 6.7 lbs tomatillos (6 lbs 10 oz) (or substitute #10 can of tomatillo puree)
- 3 medium onions (white or yellow) (cut into wedges)
- 3 large jalapeno or serrano peppers (or equivalent volume of other green peppers)
- 8 garlic cloves
- 7 oz lime juice bottled or fresh squeezed
- 4 tsp salt
- ⅓ cup cilantro washed, chopped, and gently packed
- 2 tsp ground cumin
- 1 tsp ground coriander
- 1 tsp ground black pepper
Instructions
- Preheat the oven to 425 ℉. Remove the husks from the tomatillos and wash them and the peppers, and cut the onions into wedges, removing the peels and trimming the root end. Peel the garlic. Cut any very large tomatillos in half or quarters so that they're all roughly uniform in size.
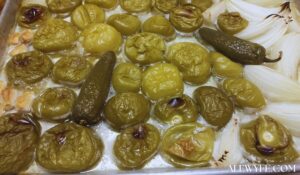
- Roast the tomatillos, onions, peppers, and garlic on rimmed sheet pans or a shallow roasting dish. You can roast the tomatillos on one pan and the other ingredients on another pan to get a deeper roast on the tomatillos without burning the other ingredients, or check the pans as they roast and remove the garlic before it burns. This will take 20-40 minutes, depending on how deeply roasted you want your vegetables to be.

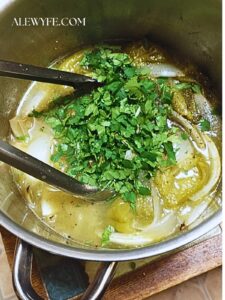
- Pull or trim the stems from the top of the roasted peppers. If you want a very mild salsa, you can remove the seeds as well. Using a spatula or metal bench scraper, transfer the roasted vegetables into a large pot with a heavy bottom. Pour the lime juice into the roasting pan to deglaze it, and scrape up the caramelized bits, then carefully pour this mixture into the pot. Add the salt, cilantro, and spices.

- Puree the mixture with an immersion blender. Alternately, you can puree this mixture in batches in a regular blender or food processor, then return to the stock pot.
- Place the stockpot on medium heat, and bring the salsa up to a simmer, stirring regularly. Simmer for a few minutes before filling your jars.
- If you are not canning this salsa, let cool slightly and transfer into freezer containers, or store in the fridge for up to a week.
Water-Bath Canning Instructions
- Fill your canner with enough water to cover the tops of the jars by at least one inch, cover the pot, and bring up to a boil. Wash and sanitize your pint or smaller jars, and prepare your lids. Do not boil the lids (unless you are using reusable lids- follow manufacturer instructions for those).
- Using a canning funnel (if possible) fill the jars with the hot salsa mixture, leaving ½" headspace. Work quickly and keep mixture hot while filling jars.
- Using a thin non-metallic spatula, thin wooden spoon, or jar tool, remove air bubbles from the jars and adjust headspace as needed.
- Wipe jar rims. I use a paper towel or clean lint-free towel dipped in hot water, followed with a clean towel dampened with distilled vinegar. Clean jar rims mean safe seals! Place your prepared lids on the jars and secure with rings (check rings for dents and discard any damaged rings).
- Using jar tongs, transfer the hot jars into the boiling water canner (or stockpot) and make sure there is at least an inch of water over the jars (top up from a hot kettle of water if needed).
- Process in your boiling water bath for 20 minutes (increase as needed for elevations above 1000 ft). Make sure the water is boiling hard the whole time- do not start the timer until the pot is boiling.
- When the time is up, turn off the burner under the pot, wait 5 minutes, and then carefully remove the jars with jar tongs (or remove the jar rack, if you used one). Place them on a towel-covered or wooden surface and leave undisturbed until completely cool (if it's cold or drafty, you may want to cover the jars with a towel so they cool evenly). Do not tighten the bands (unless you are using reusable lids- follow manufacturer instructions if so).
- After jars have cooled completely (12-24 hours) remove the bands and check for seals. Refrigerate any jars that did not seal and use promptly. Gently wash jars or wipe with a damp cloth, label, and store in a cool, dark pantry. For best quality, enjoy home-canned goods within 12-18 months.
Tried this recipe?Let us know how it was!