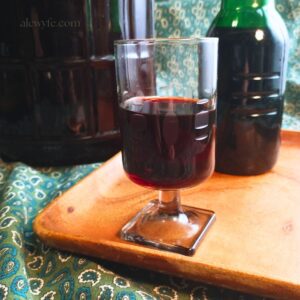
Dried Elderberry Wine
This dried elderberry wine is a delicious beginner-friendly recipe to brew at home from simple ingredients that are available year-round.
Equipment
- 1 1 ½ gallon or larger stockpot with lid (large enough to hold one gallon of water + sugar and dried berries)
- 1 gallon jar or wide mouth fermenter
- 1 lid with airlock for gallon jar, or butter muslin & twine
- 1 gallon jug or demijohn
- 1 lid or stopper with airlock for jug
- 1 fine mesh drawstring nylon brewing bag
- 1 stainless or plastic spoon
- hydrometer & test jar or refractometer
- siphon tubing & racking cane or autosiphon
- no-rinse brewery cleaner & sanitizer
Ingredients
- 1 gallon water
- 3 ¼ lbs sugar
- ¼ lb dried elderberries
- 1 oz dried currants (optional)
- 1 oz fresh or frozen elderberries (optional)
- 1 oz honey
- 1 tsp yeast nutrient (Wyeast wine yeast nutrient or similar)
- 1 tsp acid blend or citric acid
- 1 each KMS Campden tablet
- 1 packet wine or champagne yeast
Instructions
prep equipment & dissolve sugar
- Clean and sanitize all of your equipment.
- Fill the stockpot with one gallon of water and begin to bring to a boil over medium-high heat.
- While the water is heating, weigh out the sugar and add it to the pot of hot water. If you are adding honey, add that now.
- Stir to dissolve and periodically until the pot just comes up to a boil.
- Turn the heat down to low to just maintain a simmer. Place a lid on the pot.
infuse dried berries in syrup
- Add the dried elderberries (and currants and/or fresh elderberries, if you are adding them) to a clean and sanitized nylon brewing bag. I like to add either glass fermentation weights or a sanitized 4 oz mason jar to help keep the bag submerged in the fermenter.
- Add the fruit bag to the boiled sugar mixture, and stir. Use a stainless spoon to press the bag down into the liquid until it is submerged (it may still float up if you haven’t added weights, this is ok.
- Let the fruit simmer and steep for a minute, then turn off the heat.
cool and transfer must to fermenter
- Keep the pot covered and remove from the heat.
- While the pot of elderberry wine must is cooling, sanitize your primary fermenter (either a one gallon glass jar or small food grade bucket with an airlock, or crock and muslin cover).
- Once the wine must has cooled enough to safely pour into your primary container without cracking the glass or melting the plastic, use a sanitized spoon to transfer the bag of dried fruit to your fermenter.
- Carefully pour the steeped liquid over the brew bag into the container.
- Once the has completely cooled, take a hydrometer reading (or make sure to use a temperature chart to adjust the reading if you take it while your must is still warm). Write the specific gravity (SG) down in your brew-log or on a label on the fermenter.
- Crush one campden tablet (KMS) over the cooled must, and cover with the lid and airlock or tightly secure a fabric cover (you want to let out CO2 but keep out fruit flies… I prefer a lid and airlock but some people like to do a more open traditional fermentation).
pitch yeast & ferment
- Wait 24 hours for the campden tablet to work, then add your packet of wine yeast. Sprinkle it over the top of the wine must (or re hydrate according to manufacturer’s instructions and pitch into your fermenter).
- Replace the lid and airlock. Place in a warm, dark place and check on it frequently. It should show signs of fermentation after 6-12 hours, with vigorous bubbling in the airlock within 48 hours. If it isn’t fermenting, check the temperature and move it into a warmer place. If it still doesn’t take off, you may need to repitch with a fresh packet of wine yeast.
remove fruit bag & first racking
- After about two weeks, or when the fermentation has greatly slowed (between 10-20 days), check the SG and make note of it.
- Using a sanitized spoon or clean hands, remove the nylon bag from the fermenter, and squeeze to extract all the liquid (usually you avoid squeezing the bag when steeping fruits but this one is an exception. You probably want nitrile gloves or you will have purple-stained hands, though).
- Rack (siphon from fermenter into jug) into your secondary fermentation container (probably a glass jug or carboy). Replace the airlock.
check SG, rack again (if needed) & bulk age
- If your wine has thrown a lot of sediment in the container, you can carefully rack it into a clean and sanitized fresh jug. This is optional, for better clarity or an extended bulk aging (between 2-6 months).
- You may want to add a trace amount of sulphites if you are doing a long aging before bottling (rinse the jug with sulphite solution before racking, or add a fraction of a campden tablet).
- When your wine is perfectly clear and the SG has not dropped in at least two weeks, rack & bottle and cork or cap. Make sure it’s fermented all the way before bottling. This, plus added clarity, is a good reason to let your wines age in the jug before bottling them.
bottle your wine
- Bottle your finished elderberry wine in sanitized swing top or wine bottles with corks. Swing top bottles are convenient and good for short term storage. Bottles with corks are better if you plan to age your wine for several years.
- Wash and scrub your bottles with a bottle brush or bottle washer, rinse well, and then sanitize with a no-rinse sanitizer. Sulphite solution is good for bottling wines as it will both sanitize the bottles and add a bit of protection to the wine against oxidation at bottling.
cellar & age
- Label & cellar-age your dried elderberry wine for at least 6 month to a year somewhere cool and dark. It is safe to drink immediately but tastes much better with time!
- Bottles with natural corks need to sit upright for a day or two before being turned on their sides for storage to make sure they don’t leak (they need time to fully expand after being compressed in the corker).
Notes
If you want to bottle your wine with residual sweetness (or especially if you want to back-sweeten them with additional honey or sugar), you should add wine stabilizer (potassium sorbate) to keep it from re-fermenting in the bottles.
A little bit of bottle fermentation can add sparkle, but a lot can push out the corks, or worse, make bottle grenades, or at the least, add sediment to your wine you worked so hard to get clear.
Tried this recipe?Let us know how it was!
