BREW: How to Make Wine from Dried Elderberries
- Dried Elderberry Wine Ingredients
- Equipment Needed for a One-Gallon Batch
- How to Make Dried Elderberry Wine
- How to Store and Age Dried Elderberry Wine
- Dried Elderberry Wine
Dried elderberry wine is a fantastic beginner-friendly wine recipe to brew at home. It’s well-suited to small-batch brewing, or can be easily scaled up to larger batches. The ingredients are simple and easy to acquire, and the wine can be made in any season, since the fruits are dried.
Elderberries are high in tannins and have a deep color and intense flavor, so this is a wine that you definitely want to give time to mellow and mature. Brew a batch now, bottle it in three to six months or so, and give it at least a full year before drinking, if you can wait that long!
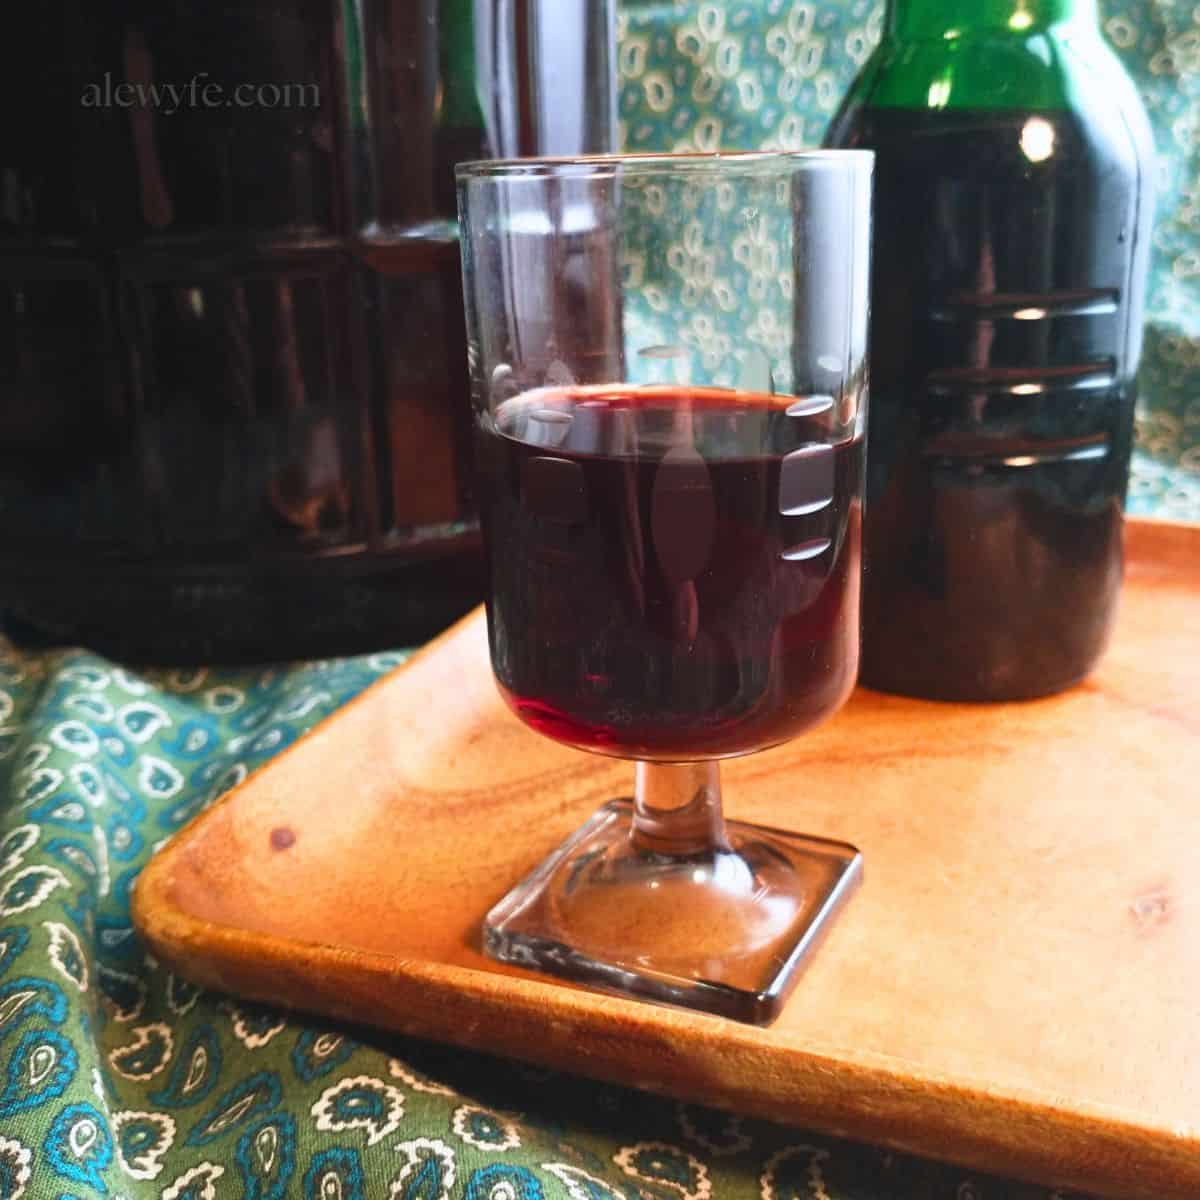
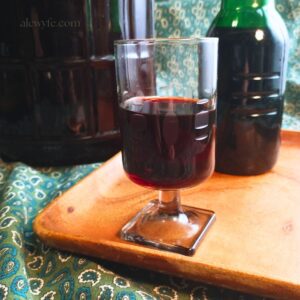
Trust us, it’s worth the wait. I’m currently enjoying a small glass of the batch I made a few years ago, and I wish I had made more! It has mellowed and now has an intense port-like flavor that is quite nice to sip on a cold day.
You can certainly drink your elderberry wine sooner, but if you try it young and aren’t a fan (I didn’t love mine, which is why I don’t have more batches going, mea culpa), give it time. Hide it from yourself and try it again in a year or three and it just might surprise you! Properly aged, it’s one of my favorite country wines now.
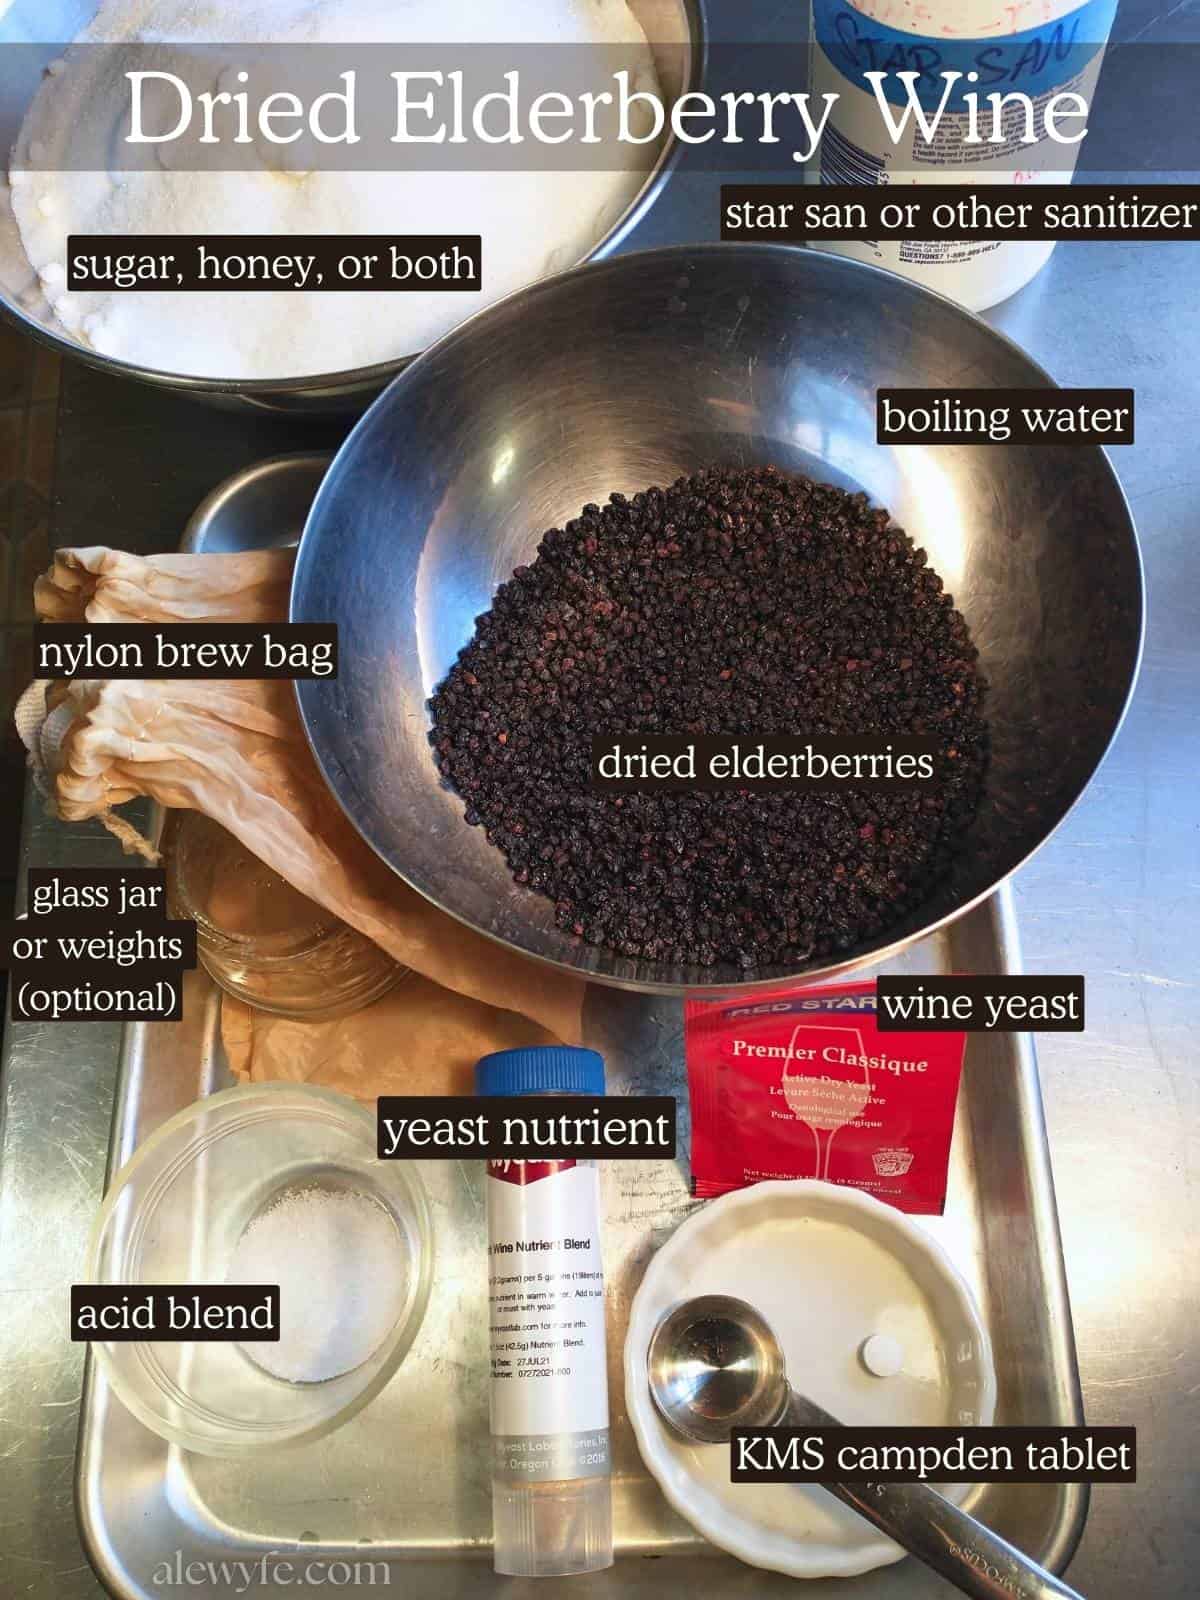
Dried Elderberry Wine Ingredients
Sugar:
Use plain white table sugar (sucrose) for dried elderberry wine. You can substitute an equal weight of honey for a dried elderberry mead. I usually make this with sugar, but add a tiny bit of honey for complexity, and to add minerals and micronutrients for the yeast. You can safely leave it out and use just plain sugar if you don’t have honey, are on a budget, or want to keep your brew vegan.
Dried elderberries:
This is a great wine to brew in winter or when other fruits aren’t in season. You can use your own home-grown or foraged dried elderberries or purchase them from an herbal supplier or homebrew shop. It’s best to use the freshest dried elderberries you can find, as they have a brighter color and flavor. As they age, they get darker and more sherry-like or raisiny.
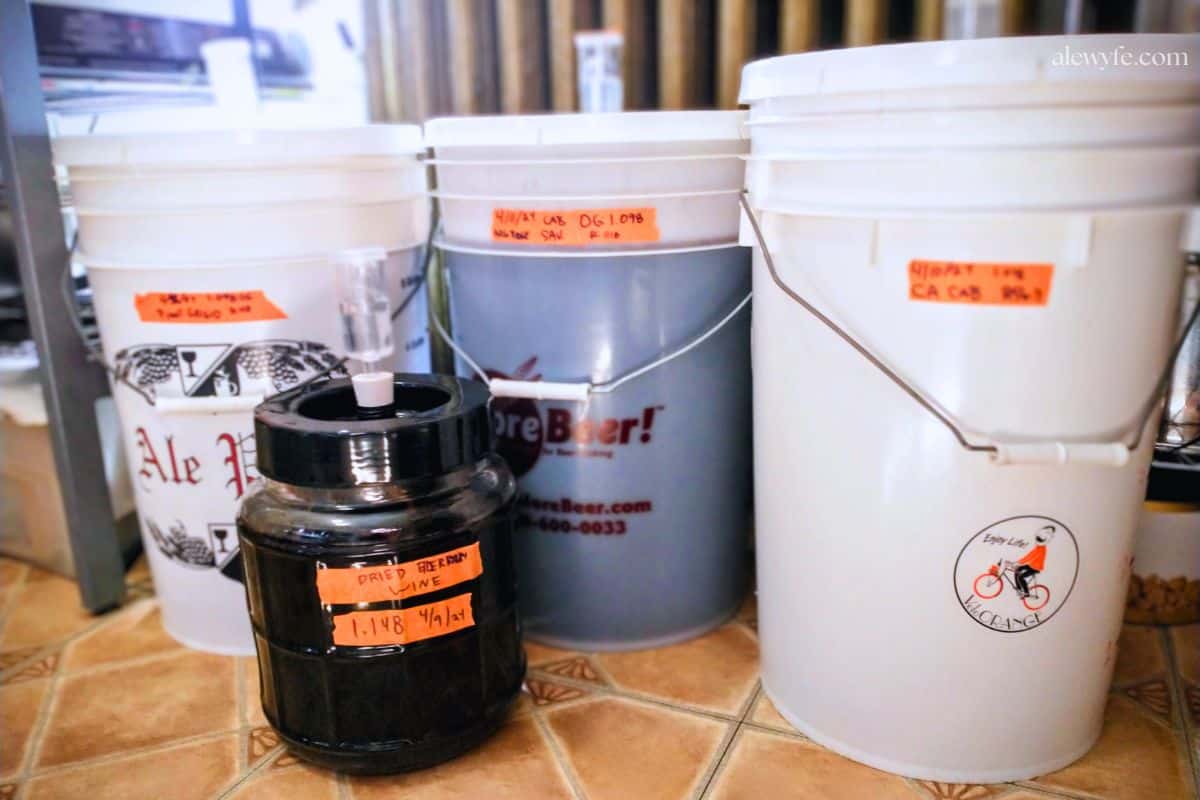
In this batch, I had a tiny bit of fresh elderberries from the bushes in our yard stashed in our freezer… about one oz. Not enough to brew a batch of anything on their own, but I added them in. Yours will come out just fine without them… I have made this before with only dried fruit and it’s delicious, after some time in the cellar.
I like to add some dried currants for additional flavor and body. You could also substitute chopped raisins, or leave these out entirely. Up to you!
Yeast nutrient:
Optional but recommended… there are varying formulas available, from plain DAP (food grade diammonium phosphate crystals, which supply nitrogen to the yeast) to proprietary blends of trace minerals and vitamins. I like the Wyyeast blends for wine or beer making (different formulas) or Fermax but you can use what you prefer or is available locally.
Acid blend:
Traditional recipes often include lemon, orange, or other citrus to add needed acidity to balance the sweetness and tannins from the sugar and dried berries, but because they vary in acidity, it’s hard to get a consistent result.
Acid blend (a white powder you can get from wine and brewing suppliers) is a balanced blend of tartaric acid from grapes, citric acid from citrus, and malic acid from apples (although it’s now usually made as a by-product of fermenting other sugars rather than extracted directly from fruits).
A little goes a long way. Start with a teaspoon per gallon… you could always add more after your wine has fully fermented if you think it needs it for balance… you don’t want to make your wine must too acidic so you don’t stress your yeast and end up with a stuck fermentation.
If you prefer, you could use lemon juice instead of the acid blend. Start with one tablespoon per gallon unless you have a way to test pH.
Campden tablet:
KMS sulfite tablet (or equivalent measured dose of powder). Inhibits growth of wild yeasts, bacteria, and molds that could spoil your wine and lets the preferred yeast strain get a head start.
Most commercial wine yeast is bred to be relatively tolerant of sulphites, but you want to let the tablet work for 24 hours before pitching your yeast into your brew. This will ensure that it has enough time to inhibit or kill the unwanted organisms without possibly killing or stunting your wine yeast.
Do not use more than the recommended amount of sulphites, as this may prevent your wine from fermenting, leave off-flavors, or give whoever drinks it a headache! A little goes a long way and more is definitely not better!
Sulphites are already present in trace amounts in a lot of fruits and other foods, so the small amount that remains after bottling should be fine (unless you have a severe allergy, in which case, you probably can’t drink any wine anyway and aren’t reading this).
Wine or Champagne yeast:
You can use dry wine yeast or a “smack-pack” pouch of liquid yeast. There are lots of different strains of yeast available for fermenting different styles of wine or accenting various flavors. This is a deeply colored and richly flavored red wine, so choose a yeast strain accordingly.
I recommend Montrachet (now called Premiere Classique) for your elderberry wine. You could also use Premier Rouge, or an equivalent strain from your preferred yeast company.
Champagne yeast (EC-1118) is best saved for stuck fermentations and very high alcohol meads, though if you want a quick, fast fermentation and a very dry wine, it will work.
Store your wine yeast in an airtight container in the refrigerator. Properly stored, your yeast will remain effective even after the expiration date, though older yeast packets may have a sluggish initial fermentation, so you may want to make a yeast starter rather than pitching dry yeast into your wine must.
Equipment Needed for a One-Gallon Batch
small stockpot or brewing pot:
You’ll need a stainless or enamel pot of at least one and a half gallons in volume.
1-2 gallon wide mouth jar or fermenter:
You can make this batch in a one gallon jar, although you will want to keep an eye on the fermentation to make sure the airlock doesn’t get clogged while the fermentation is bubbling and foaming vigorously during the first few days.
I have a one and a half gallon wide mouth fermenting jar that is perfect for one gallon batches of wine, beer, and mead. You can also use a small food-safe bucket with an air-tight lid fitted with an airlock.
1 gallon glass jug or demijohn:
Once the initial vigorous fermentation has completed and you have removed the elderberries (and currants or raisins, if you used them) you want to siphon the wine into a narrow mouthed glass jug with an airlock and stopper.
This minimizes the surface area that is exposed to the air so that your wine doesn’t oxidize and is less likely to be contaminated by outside yeasts or bacteria.
You can buy one gallon jugs, or reuse glass jugs that held juice or cooking wine. You can also divide the batch between two half-gallon beer growlers, though you’ll need twice as many airlocks.
Airlock & stopper:
I prefer the three-part airlocks with removable tops for primary fermentation. They’re easy to clean out if the fermentation is very vigorous and bubbles up more than just CO2 into the airlock. You can use either these or the one-piece molded bubble chamber style for secondary fermentation.
Some people prefer the twisty-tube ones for secondary fermentation and bulk ageing, as the liquid inside them evaporates more slowly and is less likely to dry out. They also make your fermentation room look even more like a mad scientist’s lab, and who doesn’t want that? They’re very difficult to clean if sediment from an active fermentation gets into them though, so save them for your longer ageing projects.
Reusable nylon brew bag or cheesecloth brew bag:
If you are going to be brewing often, I recommend getting a few heat-resistant nylon drawstring brewing bags. These can be washed, boiled, and sanitized to reuse many times.
You can also get disposable cheesecloth fine mesh brew bags from homebrewing suppliers, though the mesh may not be fine enough to keep the dried elderberries from escaping before they are fully rehydrated.
You could just leave the elderberries loose in the fermenter, but I wouldn’t recommend this as removing them from the wine is very difficult and they will clog your racking cane and tubing or filter funnel when you transfer your elderberry wine into your glass carboy for secondary fermentation & bulk aging.
Hydrometer & test jar:
A hydrometer is a glass or plastic instrument used to determine the specific gravity, and thus, the potential alcohol and final alcohol percentage of your wine. It’s best to measure these instead of winging it, to avoid problems like a stuck fermentation (from an SG that is too high or low for your yeast) or worst case, exploding bottle bombs, if you bottle too soon!
If you are careful about sanitation, you can float your hydrometer directly in your wine must, but best practice is to use a sanitized wine thief or turkey baster to transfer a small amount of must to a narrow test jar.
Siphon tubing or auto-siphon:
While you can get away with carefully pouring your wine with small batches or when you are just starting out, you’ll want to get some clear food-grade tubing and ideally, a small racking cane or auto-siphon.
These racking canes and tubing come in various sizes. I have a small mini-siphon for one gallon batches like this one, though if you primarily do five-gallon batches of wine and home-brew, you can also use the medium diameter (5/16″) full-length auto-siphon for this if you’re careful and don’t want to purchase and store another bit of kit.
This way you can siphon your wine from the fermenter into your jug for clarifying and aging, and avoid stirring up all the lees (dead yeast and other sediment) so you end up with beautiful, crystal clear wine. Siphoning, rather than carefully decanting through a filter funnel, also avoids oxidation from overly aerating your wine while pouring it from one container to another.
Stainless or plastic spoon:
I use a stainless spoon to stir the pot of sugar and water until it dissolves. It’s important that anything that comes into contact with your wine must after it cools should be clean and sanitized with food-safe cleaner
No-rinse sanitizer & cleaner:
You can use dish soap and hot water to clean your equipment if you rinse everything very well, then a food-safe no-rinse sanitizer, but it’s better to use a brewery cleaner like One-Step or P.B.W. (Powdered Brewery Wash).
These cleaners are very similar to Oxiclean, but more powerful and without the fragrances which can linger or cause off-flavors. They are very good at cleaning dirty bottles and removing labels, as well as cleaning buildup from brewing equipment like tubing and airlocks.
I keep a spray bottle of pre-mixed StarSan handy for spraying brewing equipment and topping up airlocks. You can also use campden tablets or powdered sulphite dissolved in water as a sanitizer.
Bottling bucket with spigot (optional):
If you are just doing small batches, you can use a sanitized funnel after carefully decanting or siphoning your wine off of the lees (sediment), but a bottling bucket with a spigot in the side and a bottling wand attached with a bit of tubing makes this job a lot easier if you’re going to be brewing and bottling a lot of wine, beer, or mead.
The bottling wand has a valve on the bottom that opens to fill a bottle when you press it against the bottom or side of the glass. You can also attach the bottling wand to the siphon tubing after racking the finished wine off of the sediment and into a clean jug.
How to Make Dried Elderberry Wine
step one: prep equipment & dissolve sugar
- Clean and sanitize all of your equipment.
- Fill the stockpot with one gallon of water and begin to bring to a boil over medium-high heat.
- While the water is heating, weigh out the sugar and add it to the pot of hot water. If you are adding honey, add that now.
- Stir to dissolve and periodically until the pot just comes up to a boil.
- Turn the heat down to low to just maintain a simmer. Place a lid on the pot.
step two: infuse dried berries in syrup
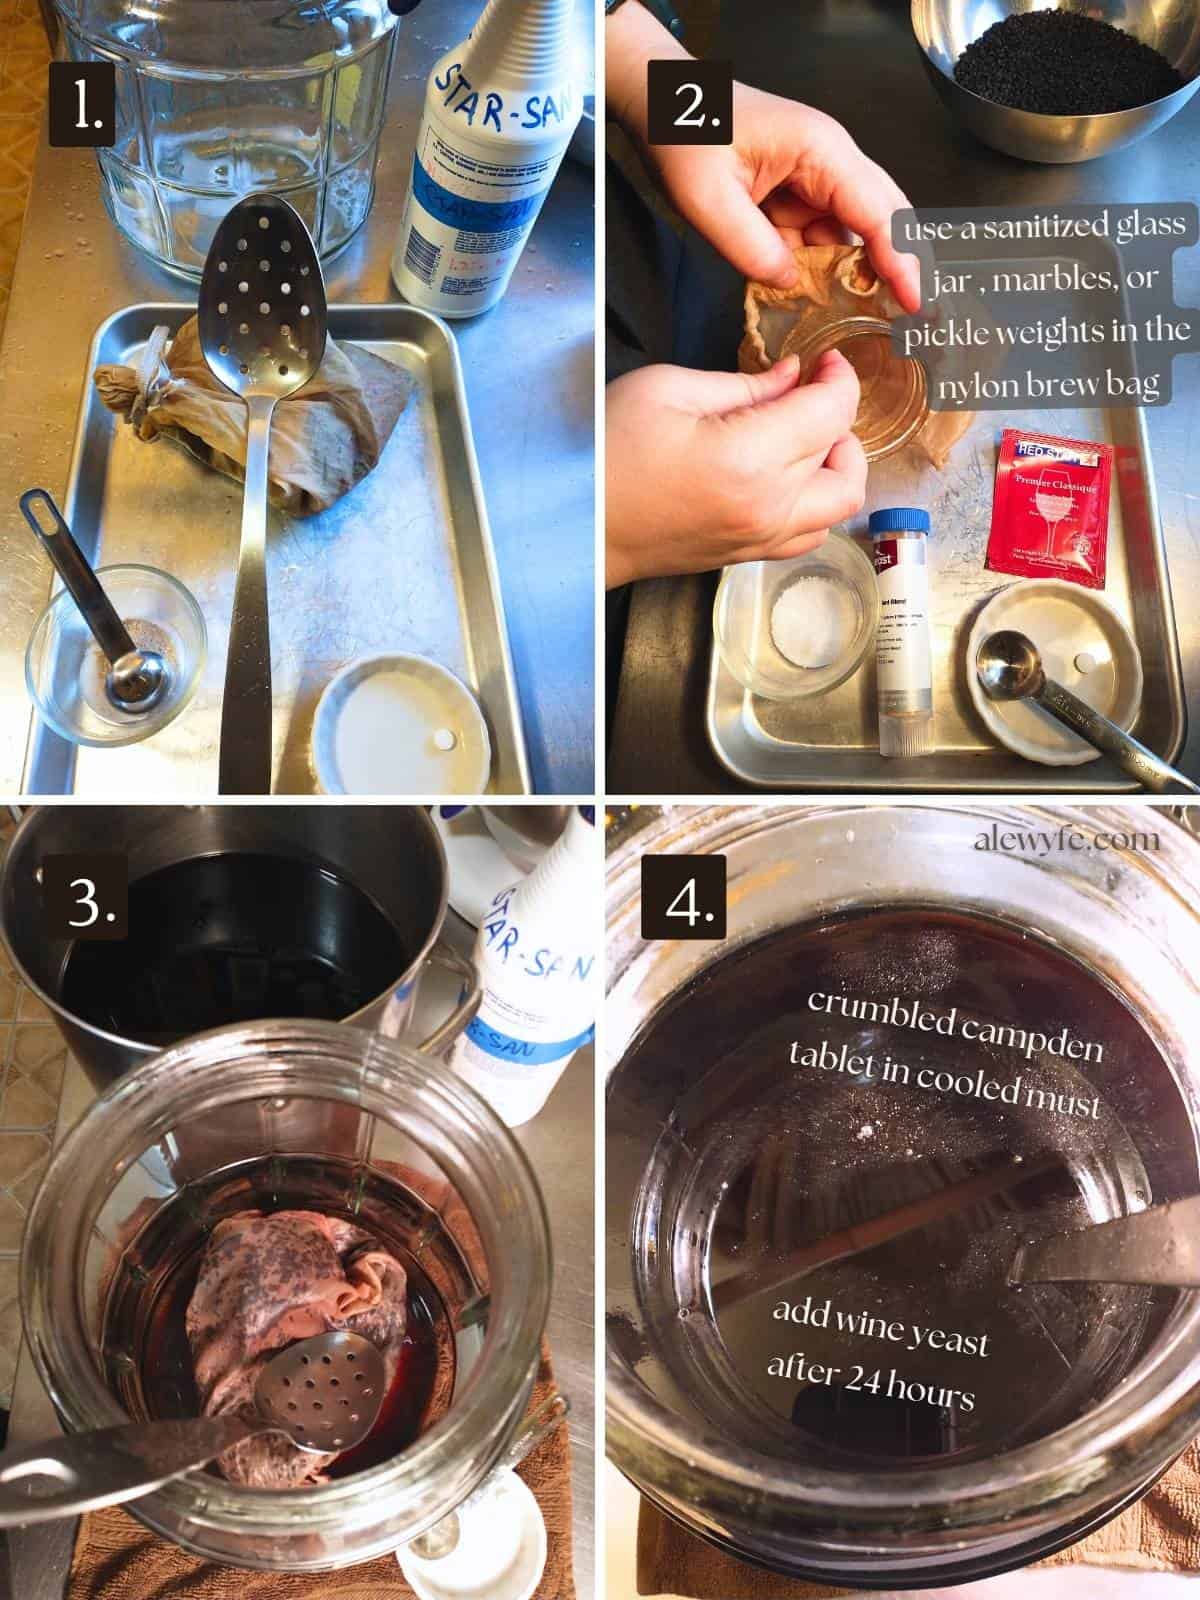
- Add the dried elderberries (and currants and/or fresh elderberries, if you are adding them) to a clean and sanitized nylon brewing bag. I like to add either glass fermentation weights or a sanitized 4 oz mason jar to help keep the bag submerged in the fermenter.
- Add the fruit bag to the boiled sugar mixture, and stir. Use a stainless spoon to press the bag down into the liquid until it is submerged (it may still float up if you haven’t added weights, this is ok.
- Let the fruit simmer and steep for a minute, then turn off the heat.
step three: cool and transfer must to fermenter
- Keep the pot covered and remove from the heat.
- While the pot of elderberry wine must is cooling, sanitize your primary fermenter (either a one gallon glass jar or small food grade bucket with an airlock, or crock and muslin cover).
- Once the wine must has cooled enough to safely pour into your primary container without cracking the glass or melting the plastic, use a sanitized spoon to transfer the bag of dried fruit to your fermenter.
- Carefully pour the steeped liquid over the brew bag into the container.
- Once the has completely cooled, take a hydrometer reading (or make sure to use a temperature chart to adjust the reading if you take it while your must is still warm). Write the specific gravity (SG) down in your brew-log or on a label on the fermenter.
- Crush one campden tablet (KMS) over the cooled must, and cover with the lid and airlock or tightly secure a fabric cover (you want to let out CO2 but keep out fruit flies… I prefer a lid and airlock but some people like to do a more open traditional fermentation).
step four: pitch yeast & ferment
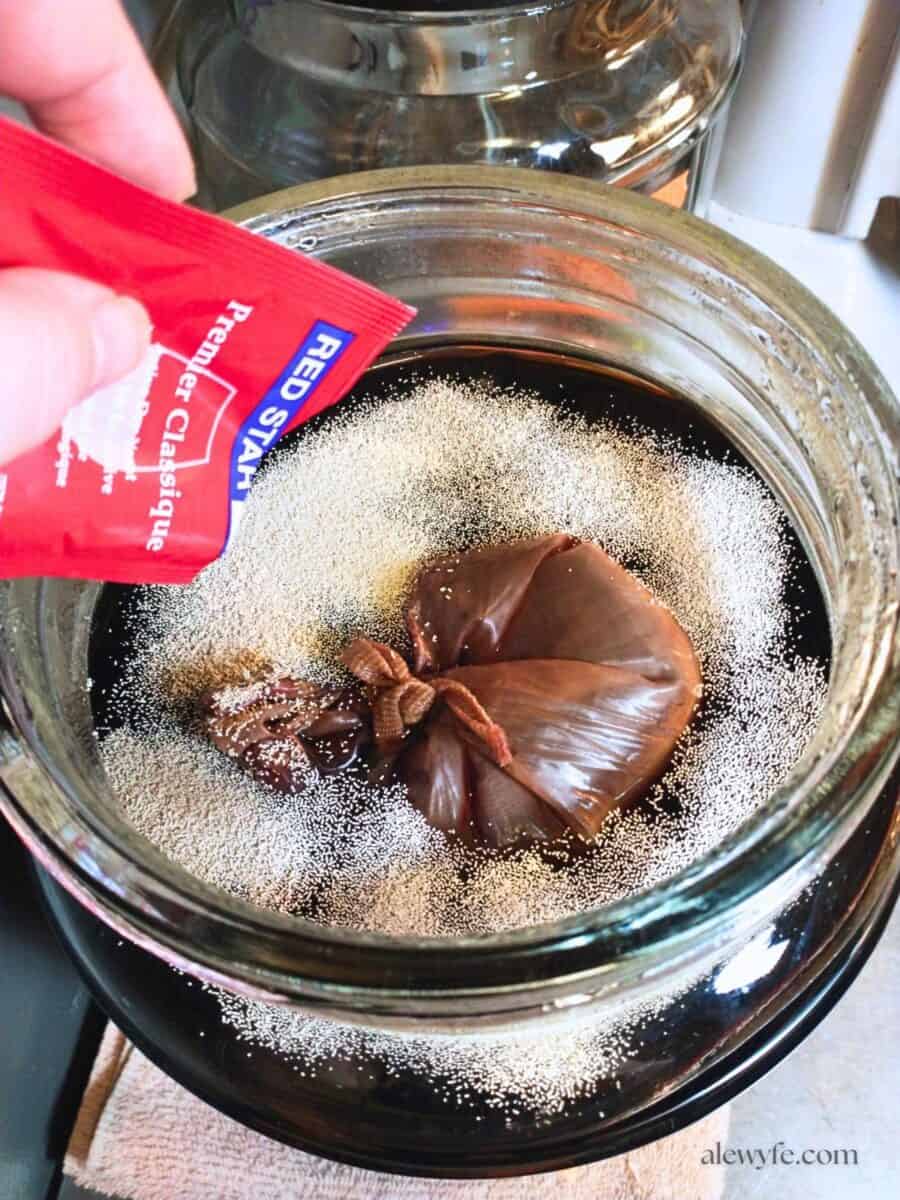
- Wait 24 hours for the campden tablet to work, then add your packet of wine yeast. Sprinkle it over the top of the wine must (or re hydrate according to manufacturer’s instructions and pitch into your fermenter).
- Replace the lid and airlock.
- Place in a warm, dark place and check on it frequently. It should show signs of fermentation after 6-12 hours, with vigorous bubbling in the airlock within 48 hours. If it isn’t fermenting, check the temperature and move it into a warmer place. If it still doesn’t take off, you may need to repitch with a fresh packet of wine yeast.
step five: remove fruit bag & first racking
- After about two weeks, or when the fermentation has greatly slowed (between 10-20 days), check the SG and make note of it.
- Using a sanitized spoon or clean hands, remove the nylon bag from the fermenter, and squeeze to extract all the liquid (usually you avoid squeezing the bag when steeping fruits but this one is an exception. You probably want nitrile gloves or you will have purple-stained hands, though).
- Rack (siphon from fermenter into jug) into your secondary fermentation container (probably a glass jug or carboy).
- Replace the airlock.
step six: check SG, rack again (if needed) & bulk age
- If your wine has thrown a lot of sediment in the container, you can carefully rack it into a clean and sanitized fresh jug. This is optional, for better clarity or an extended bulk aging (between 2-6 months).
- You may want to add a trace amount of sulphites if you are doing a long aging before bottling (rinse the jug with sulphite solution before racking, or add a fraction of a campden tablet).
- When your wine is perfectly clear and the SG has not dropped in at least two weeks, rack & bottle and cork or cap your containers. Make sure it’s fermented all the way before bottling. This, plus added clarity from the longer time for fine sediments to drop out, is a good reason to let your wines age in the jug before bottling them.
- Make sure your wine is fermented to dryness or that you add stabilizer to stop further fermentation before bottling. A little bit of bottle fermentation can add sparkle, but a lot can push out the corks, or worse, make bottle grenades, or at the least, add sediment to your wine you worked so hard to get clear!
- If you want to bottle your elderberry wine with residual sweetness (or especially if you want to back-sweeten it with additional honey or sugar), you should add wine stabilizer (potassium sorbate) before adding wine conditioner or your preferred sweetener to prevent your wine from refermenting in the bottles.
step seven: bottle your finished wine
- Bottle your finished elderberry wine in sanitized swing top or wine bottles with corks. Swing top bottles are convenient and good for short term storage. Bottles with corks are better if you plan to age your wine for several years.
- Wash and scrub your bottles with a bottle brush or bottle washer, rinse well, and then sanitize with a no-rinse sanitizer. Sulphite solution is good for bottling wines as it will both sanitize the bottles and add a bit of protection to the wine against oxidation at bottling.
- If you are bottling more than a few bottles, you should try to buy or borrow a bench-top or floor-corker. Some homebrew shops will rent them out. Hand-held swing-style corkers are much more difficult to use than beer bottle cappers!
step eight: wipe, label, & store your wine
- Label & cellar-age your dried elderberry wine for at least 6 month to a year.
- Bottles with natural corks need to sit upright for a day or two before being turned on their sides for storage to make sure they don’t leak (they need time to fully expand after being compressed in the corker).
How to Store and Age Dried Elderberry Wine
While your dried elderberry wine is safe to drink as soon as it is done fermenting, it will taste best if you give it some time in the bottle to age. Even more than most country wines, the tannins in dried elderberries can be a bit harsh if you try to drink it too young. Six months of aging will benefit it, and a year is even better.
Many fruit and flower wines can’t stand up to extended aging, but dried elderberry wine is an exception. Those same tannins that might be harsh when the wine is first bottled protect it and give it a good structure that just gets better with time (under good storage conditions). It’s a good idea to make at least a little bit of elderberry wine each year (at least) so you can stash some bottles away for future you to enjoy and compare!
Like most wines, your homemade elderberry wine will age most gracefully between 55-70 F (ideally in the mid-range of that). Your wine will age faster at warmer temperatures and more slowly at cooler temperatures.
If your bottles have metal caps, avoid very high humidity, which can cause the caps to rust. If you corked your wine with natural corks, keep an eye on the humidity level in your storage space- too dry, and the corks can dry out and become brittle, but an excess of damp can encourage mold.
If you don’t have a proper wine cellar, basement, or wine fridge with perfect conditions, put your bottles of elderberry wine in a dark place with a cool, stable temperature if possible, like an out of the way closet. Avoid direct or indirect sunlight, places with rapid temperature variations (the cabinet next to the oven or dishwasher, for example, or an unheated garage).
Store bottles with swing top or crown caps (beer bottles) upright. Wine bottles with natural corks should be stored on their side to keep the corks moist. Bottles with synthetic corks can be stored upright or on their sides.

Dried Elderberry Wine
Equipment
- 1 1 ½ gallon or larger stockpot with lid (large enough to hold one gallon of water + sugar and dried berries)
- 1 gallon jar or wide mouth fermenter
- 1 lid with airlock for gallon jar, or butter muslin & twine
- 1 gallon jug or demijohn
- 1 lid or stopper with airlock for jug
- 1 fine mesh drawstring nylon brewing bag
- 1 stainless or plastic spoon
- hydrometer & test jar or refractometer
- siphon tubing & racking cane or autosiphon
- no-rinse brewery cleaner & sanitizer
Ingredients
- 1 gallon water
- 3 ¼ lbs sugar
- ¼ lb dried elderberries
- 1 oz dried currants (optional)
- 1 oz fresh or frozen elderberries (optional)
- 1 oz honey
- 1 tsp yeast nutrient (Wyeast wine yeast nutrient or similar)
- 1 tsp acid blend or citric acid
- 1 each KMS Campden tablet
- 1 packet wine or champagne yeast
Instructions
prep equipment & dissolve sugar
- Clean and sanitize all of your equipment.
- Fill the stockpot with one gallon of water and begin to bring to a boil over medium-high heat.
- While the water is heating, weigh out the sugar and add it to the pot of hot water. If you are adding honey, add that now.
- Stir to dissolve and periodically until the pot just comes up to a boil.
- Turn the heat down to low to just maintain a simmer. Place a lid on the pot.
infuse dried berries in syrup
- Add the dried elderberries (and currants and/or fresh elderberries, if you are adding them) to a clean and sanitized nylon brewing bag. I like to add either glass fermentation weights or a sanitized 4 oz mason jar to help keep the bag submerged in the fermenter.
- Add the fruit bag to the boiled sugar mixture, and stir. Use a stainless spoon to press the bag down into the liquid until it is submerged (it may still float up if you haven’t added weights, this is ok.
- Let the fruit simmer and steep for a minute, then turn off the heat.
cool and transfer must to fermenter
- Keep the pot covered and remove from the heat.
- While the pot of elderberry wine must is cooling, sanitize your primary fermenter (either a one gallon glass jar or small food grade bucket with an airlock, or crock and muslin cover).
- Once the wine must has cooled enough to safely pour into your primary container without cracking the glass or melting the plastic, use a sanitized spoon to transfer the bag of dried fruit to your fermenter.
- Carefully pour the steeped liquid over the brew bag into the container.
- Once the has completely cooled, take a hydrometer reading (or make sure to use a temperature chart to adjust the reading if you take it while your must is still warm). Write the specific gravity (SG) down in your brew-log or on a label on the fermenter.
- Crush one campden tablet (KMS) over the cooled must, and cover with the lid and airlock or tightly secure a fabric cover (you want to let out CO2 but keep out fruit flies… I prefer a lid and airlock but some people like to do a more open traditional fermentation).
pitch yeast & ferment
- Wait 24 hours for the campden tablet to work, then add your packet of wine yeast. Sprinkle it over the top of the wine must (or re hydrate according to manufacturer’s instructions and pitch into your fermenter).
- Replace the lid and airlock. Place in a warm, dark place and check on it frequently. It should show signs of fermentation after 6-12 hours, with vigorous bubbling in the airlock within 48 hours. If it isn’t fermenting, check the temperature and move it into a warmer place. If it still doesn’t take off, you may need to repitch with a fresh packet of wine yeast.
remove fruit bag & first racking
- After about two weeks, or when the fermentation has greatly slowed (between 10-20 days), check the SG and make note of it.
- Using a sanitized spoon or clean hands, remove the nylon bag from the fermenter, and squeeze to extract all the liquid (usually you avoid squeezing the bag when steeping fruits but this one is an exception. You probably want nitrile gloves or you will have purple-stained hands, though).
- Rack (siphon from fermenter into jug) into your secondary fermentation container (probably a glass jug or carboy). Replace the airlock.
check SG, rack again (if needed) & bulk age
- If your wine has thrown a lot of sediment in the container, you can carefully rack it into a clean and sanitized fresh jug. This is optional, for better clarity or an extended bulk aging (between 2-6 months).
- You may want to add a trace amount of sulphites if you are doing a long aging before bottling (rinse the jug with sulphite solution before racking, or add a fraction of a campden tablet).
- When your wine is perfectly clear and the SG has not dropped in at least two weeks, rack & bottle and cork or cap. Make sure it’s fermented all the way before bottling. This, plus added clarity, is a good reason to let your wines age in the jug before bottling them.
bottle your wine
- Bottle your finished elderberry wine in sanitized swing top or wine bottles with corks. Swing top bottles are convenient and good for short term storage. Bottles with corks are better if you plan to age your wine for several years.
- Wash and scrub your bottles with a bottle brush or bottle washer, rinse well, and then sanitize with a no-rinse sanitizer. Sulphite solution is good for bottling wines as it will both sanitize the bottles and add a bit of protection to the wine against oxidation at bottling.
cellar & age
- Label & cellar-age your dried elderberry wine for at least 6 month to a year somewhere cool and dark. It is safe to drink immediately but tastes much better with time!
- Bottles with natural corks need to sit upright for a day or two before being turned on their sides for storage to make sure they don’t leak (they need time to fully expand after being compressed in the corker).