BAKE: Soft Rye Sandwich Rolls
- Recipe & Serving Ideas for Rye Sandwich Rolls
- Soft Rye Sandwich Roll Ingredients
- Kitchen Equipment Needed
- How to Make Soft Rye Sandwich Rolls
- Storage & Make Ahead Tips
- Soft Rye Sandwich Rolls
These homemade deli rye sandwich rolls are pillow-soft, easy to bake, and packed with dark rye flavor! These bake up into soft flavorful rye rolls with a hint of onion tang and savory caraway seeds, and deep richness from cocoa and molasses.
Because the dough is made with a blend of rye and wheat flour, the rolls are tender but with enough structure to stand up to thickly stacked sandwich fillings or even drippy burgers or sausages.
The rye-blend straight dough is quick and easy to mix, and simple to shape into simple or fancy rolls (or you can even bake them in mini-loaf pans). It’s one of my favorite yeast roll recipes, and can be shaped into a variety of savory dinner or sandwich rolls, from simple large or small round rolls, cloverleaf rolls, knots, or your favorite shape.
Recipe & Serving Ideas for Rye Sandwich Rolls
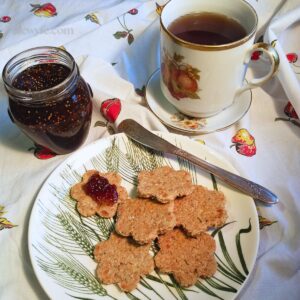
My favorite way to bake these rye rolls is to keep it simple, and make them in basic rounds, proofed and baked on sheet pans. These make perfect sandwich rolls you can split for deli sandwiches piled high with cold cuts, sliced roasted meats, and cheeses. Or use them as rye hamburger buns, or for Reuben sandwich rolls topped with corned beef, swiss cheese, kraut, and thousand island dressing.
You can even shape them into smaller balls, proof them close together on sheet trays so that they touch as they rise, and bake into connected mini-rolls. You can use these for slice-and-bake slider buns that you can substitute in your favorite party sandwich recipes (instead of King’s Hawaiian rolls). Try filling them with sliced ham and swiss, turkey and cheddar, smoked chicken and pepper jack… there are so many combinations that taste great with these soft rye rolls.
If you make slightly larger portions and roll the dough out into a snake-like shape instead of round rolls, you can make hearty hot dog or sausage buns. These are especially good rolls for bratwurst & sausages. Try them with grilled beer brats, thuringer sausages, smoked polish, or homemade pork or game sausages. Split the rolls half-way after baking and top with homemade sauerkraut, cranberry mustard, or horseradish beet relish!
You can get creative with this forgiving and easy-to-work dough, and use it to bake richly-flavored runza (savory stuffed buns, usually filled with cooked ground beef and cabbage or kraut), kolaches, fusion-flavored stromboli or calzones, and other filled bread recipes with a non-traditional twist! I’ll share a recipe with tips for my favorite way to do this soon!

Soft Rye Sandwich Roll Ingredients
flour:
This dough uses all purpose flour and dark rye flour (also called pumpernickel flour). The all purpose flour provides structure to the dough, which makes it easier to handle, softer, and sturdier than an all-rye or high-percentage rye dough. The rye flour, of course, gives you that delicious nutty flavor and whole-grain goodness!
A small amount of vital wheat gluten helps boost the protein content of the dough, making it easier to shape and giving it a bit of lift when proofing so you get fluffy rolls, not rocks!
water:
Use lukewarm tap-water. I like to use water than has been boiled and cooled in my yeast doughs, to make sure any remaining chlorine is removed. Commercial yeast is pretty resilient though, so you can use regular or filtered tap water if you don’t have time for this step.
vegetable oil:
A few tablespoons of oil help keep these rolls tender and soft, and help them retain moisture. It also makes the dough easier to work and shape.
Rye doughs can be sticky, and the little bit of oil makes this dough a lot easier to handle! Use a neutrally-flavored oil, like canola, grapeseed, or a vegetable blend.
yeast:
Use instant or active dry yeast interchangeably for these rye rolls. Active dry yeast should be proofed (added to the liquid ingredients) before mixing the dough. Instant yeast can be added with the dry ingredients, but briefly proofing it is also fine.
flavorings & other ingredients:
Molasses & cocoa powder give the dough a light caramel color and rich flavor. Onion powder (or dried onion flakes) add a tangy sharp note, and kosher salt adds flavor, and helps with the texture of the dough.
Do not use onion salt instead of onion powder, though if all you have is onion salt, you could substitute this in lieu of the regular salt. Do not pre-soak the onion salt with the proofing yeast, as the salt can retard the growth of the yeast if you add it to the liquid you use when you are re-hydrating the yeast. If you must use onion salt, add it with the dry ingredients.
molasses or egg wash:
If you want your rolls to bake up with a glossy sheen, and especially if you plan to top them with poppy seeds, sesame seeds, caraway, or everything bagel seasoning, you’ll want to brush them with an egg-wash before you bake them.
We’re using an egg wash with a bit of molasses added, for an even richer color and flavor. I add about a tablespoon or so of molasses to the beaten egg to add a deeper color to the rolls. If you don’t want to use egg, you can also use just a thinned wash of molasses and a splash of water or milk.
I like to do this after shaping the rolls and before proofing them, which helps keep the dough from drying and forming a tough crust that can limit their rise.

Kitchen Equipment Needed
stand mixer (optional):
While you can mix these rolls by hand, if you have a stand mixer, they’re even easier to make! If you’ve got it, use it, otherwise you can use a large mixing bowl and a dough whisk or wooden spoon, and then knead by hand.
sheet trays (baking sheets):
I use uncoated half-sheet sized baking sheets for most of my baking. You can also use your favorite cookie sheets.
silicone baking liner or parchment:
Using a silicone baking sheet liner or parchment is a game-changer for easy cleanup when you’re baking, without using pans with non-stick coatings that can flake or leach nasty stuff that you don’t want in your food.
bench & bowl scrapers:
These are optional, but make working with sticky rye dough easier. If you bake a lot, you should get one or both! You can use a spatula to scrape the bowl as you work, but the curved plastic of a bowl scraper makes this job even easier.
When working with doughs of all kinds, a good sturdy bench scraper is your best friend! Use it to move and manipulate dough, cut into portions, and of course, scrape it off the countertop when it starts to stick.
pastry brush:
If you are going to give your rolls an egg-wash so that they bake up nice and glossy (and so that any garnishes like caraway or sesame seeds, or bagel seasoning, will stick) you’ll want a pastry brush. I like to use silicone brushes, as they’re easy to get clean, and soft so they won’t dent the proofing rolls.
How to Make Soft Rye Sandwich Rolls

soak dried onion & measure dry ingredients:
- Add the dried onion powder or flakes to a large mixing bowl or the bowl of your stand mixer.
- Pour over the boiling or hot water, and let the mixture soak and cool to lukewarm, or 77-100F (25-38C) if you want to be more exact. Make sure the liquid has cooled sufficiently before adding the yeast in the next step, and that if you are using onion flakes, that they have softened.
proof yeast & mix wet ingredients:
- If you are using active dry yeast (or fresh yeast, though that’s hard to find) you’ll want to proof your yeast by dissolving it in liquid before adding the dry ingredients.
- Add the molasses and yeast, and let sit a few minutes until the yeast is soft and slightly foamy. If you are using instant yeast, you can skip this step and add it with the dry ingredients.
- Add the canola (or other vegetable oil) to the bowl.
add dry ingredients:
- While the onion and hot water mixture is cooling, measure out the flours, vital wheat gluten, cocoa powder, salt, and caraway seeds (if you’re using them) into another medium mixing bowl, and stir or whisk them to combine.
- Once the liquid ingredients are mixed, add the dry ingredients in two or three additions to the liquid ingredients.
mix dough:
- To mix by hand: Use a dough whisk or sturdy spoon to incorporate all the dry ingredient into the wet, and then knead the dough gently in the bowl with wet or oiled hands, or use your bowl scraper to lift and fold the dough until it comes together. It will be somewhat sticky and wet.
- To use a stand mixer: Fit the dough hook on your mixer. Stop and scrape down the sides and horn of the bowl with a spatula or bowl scraper, and mix on low-medium speed until the dough comes together.
- This is a rather soft and wet dough, but you can add a few additional tablespoons of flour to get the dough to come together. It will not form a solid ball, and will still cling to the sides of the bowl while you are kneading it. It will get easier to work after the first rise, so don’t add too much flour now trying to get a firm dough.

first rise:
- Place the dough into an oiled bowl or proofing container and cover.
- Let rise until roughly doubled. This will vary with temperature (of the dough and of the room), but should be about 30-40 minutes.
punch down:
- Use your bowl scraper to give the dough a fold in the bowl to punch it down and deflate it.
- This will build strength in the dough, and re-energizes the yeast by removing built-up CO2.
second rise:
- Cover the dough again, and let it rise until roughly doubled a second time, another 30-40 minutes.
- The dough in picture 7. above is slightly overproofed, but still made very light rolls, so don’t worry if you also let yours get away from you!
- The dough should hold an indentation when poked rather than springing back, or deflating completely.
portion dough:
- Turn the dough out onto a lightly floured clean surface.
- Using a bench scraper, cut or pinch the dough into roll-sized portions. If I am using baking rings to separate the rolls, I portion this into 11 rolls per batch, as that’s how many of these 4″ rings fit onto a half-sheet pan, but otherwise I portion them into 12 rolls.
- Cover the portioned dough with plastic wrap, a well-floured tea towel, or a baking couche.
- Let the dough rest for a few minutes to relax before shaping.

shape dough:
- Prepare your baking pans to proof the rolls before shaping. You can use nonstick pans, or line your sheet trays with parchment or silicone baking liners. For cloverleaf rolls, butter or spray a muffin tin thoroughly.
- To shape simple round rolls that will keep their shape, take a piece of dough, and gently squeeze the outer cover of the roll taut, using your thumbs to tuck the dough from the outer layers into the center of the roll. You want to gently stretch the outer covering of dough, aligning the gluten strands to make a structure that will support the dough into a smooth ball as it rises.
- One way to picture this motion is like folding socks into a ball, rolling and tucking them into the center. While this is not nice for the elastic of your socks, but this stretching builds strength in the gluten when you do this for your dough.
- Lay the shaped rolls with the smooth, stretched side up, and the tucked side down. Place them a few inches apart, with or without baking rings, for separate rolls, or closer together or almost touching for soft-sided squared off rolls.
- To make hot dog or sausage rolls, you can simply snake the balls of dough out into long rolls, or if you are familiar with tucking and shaping baguette dough, do this to flatten, then roll and tuck the dough into small little cigar-shaped loaves. You can bake these almost touching on the sides for softer sided rolls, or separately with more space between them for buns that are crustier on the sides.
- For cloverleaf rolls, divide each roll into three or four small balls, then place them together into a well-buttered muffin tin.
glaze rolls:
- Brush the shaped rolls with a mixture of molasses and water, with or without a beaten egg added.
- Adding an egg to the glaze will make the rolls glossier and shinier, but you can leave it out and use just molasses-water if you prefer to avoid egg (allergies or dietary reasons).
top with seeds (optional):
- If you like, after brushing the rolls with glaze, garnish them with a sprinkling of sesame seeds, caraway seeds, poppy seeds, or everything bagel seasoning.

proof rolls:
- Loosely cover the pans with plastic wrap (or place the trays in a proofing box if you have one).
- Let the rolls rise in a warm place until they are light and almost doubled in size. The dough should still be elastic, and somewhat springy if gently prodded.
- This last rise will take between 35 minutes to an hour (less time in a warmer kitchen, more time in a cold room).
bake & cool:
- Preheat your oven to 375℉.
- Bake the rolls on a rack in the center of the oven for 15 to 20 minutes.
- The rolls will be golden brown. If you want to be sure they are done, check the internal temperature with a thermometer- they should be at least 190℉ in the center.
Storage & Make Ahead Tips
These rolls are most delicious when they are freshly baked but you can make them up to three days ahead of time. Store your baked rye rolls at room temperature, not in the fridge.
Or, you can wrap the rolls well and freeze them for up to three months. Let the rolls cool completely before wrapping them to freeze.
You can mix this dough in advance, and chill it overnight before rising and shaping. Allow extra time for the dough to warm up and rise if you are working with cold dough.


Soft Rye Sandwich Rolls
Equipment
- stand mixer (optional)
- parchment paper or silicone baking mats
Ingredients
- 1 tbsp dried onion powder (not onion salt. substitute: dried onion flakes)
- 1 ½ cups lukewarm water
- 3 tbsp vegetable oil
- 2 ½ cups all-purpose flour
- 1 ¼ cups dark rye or pumpernickel flour
- 2 tbsp cocoa powder
- 1 tbsp vital wheat gluten
- 1 tbsp molasses
- 2 tsp instant yeast (substitute active dry yeast)
- 2 tsp kosher salt
molasses egg wash & optional garnish
- 1 large egg, beaten
- 1 tbsp molasses
- 1 tbsp water
- sesame, caraway, or poppy seeds, or bagel seasoning optional
Instructions
soak dried onion & measure dry ingredients:
- Add the dried onion powder or flakes to a large mixing bowl or the bowl of your stand mixer.
- Pour over the boiling or hot water, and let the mixture soak and cool to lukewarm, or 77-100F (25-38C) if you want to be more exact. Make sure the liquid has cooled sufficiently before adding the yeast in the next step, and that if you are using onion flakes, that they have softened.
proof yeast & mix wet ingredients:
- If you are using active dry yeast (or fresh yeast, though that’s hard to find) you’ll want to proof your yeast by dissolving it in liquid before adding the dry ingredients.
- Add the molasses and yeast, and let sit a few minutes until the yeast is soft and slightly foamy. If you are using instant yeast, you can skip this step and add it with the dry ingredients.
- Add the canola (or other vegetable oil) to the bowl.
add dry ingredients:
- While the onion and hot water mixture is cooling, measure out the flours, vital wheat gluten, cocoa powder, salt, and caraway seeds (if you're using them) into another medium mixing bowl, and stir or whisk them to combine.
- Once the liquid ingredients are mixed, add the dry ingredients in two or three additions to the liquid ingredients.
mix dough:
- To mix by hand: Use a dough whisk or sturdy spoon to incorporate all the dry ingredient into the wet, and then knead the dough gently in the bowl with wet or oiled hands, or use your bowl scraper to lift and fold the dough until it comes together. It will be somewhat sticky and wet.
- To use a stand mixer: Fit the dough hook on your mixer. Stop and scrape down the sides and horn of the bowl with a spatula or bowl scraper, and mix on low-medium speed until the dough comes together.
- This is a rather soft and wet dough, but you can add a few additional tablespoons of flour to get the dough to come together. It will not form a solid ball, and will still cling to the sides of the bowl while you are kneading it. It will get easier to work after the first rise, so don’t add too much flour now trying to get a firm dough.
first rise:
- Place the dough into an oiled bowl or proofing container and cover.
- Let rise until almost doubled. This will vary with temperature (of the dough and of the room), but should be about 30-40 minutes.
punch down:
- Use your bowl scraper to give the dough a fold in the bowl to punch it down and deflate it.
- This will build strength in the dough, and re-energizes the yeast by removing built-up CO2.
second rise:
- Cover the dough again, and let it rise until roughly doubled a second time, another 30-40 minutes.
- The dough should hold an indentation when poked rather than springing back, or deflating completely.
portion dough:
- Turn the dough out onto a lightly floured clean surface.
- Using a bench scraper, cut or pinch the dough into roll-sized portions. If I am using baking rings to separate the rolls, I portion this into 11 rolls per batch, as that’s how many of these 4″ rings fit onto a half-sheet pan, but otherwise I portion them into 12 rolls.
- Cover the portioned dough with plastic wrap, a well-floured tea towel, or a baking couche.
- Let the dough rest for a few minutes to relax before shaping.
shape dough:
- Prepare your baking pans to proof the rolls before shaping. You can use nonstick pans, or line your sheet trays with parchment or silicone baking liners. For cloverleaf rolls, butter or spray a muffin tin thoroughly.
- To shape simple round rolls that will keep their shape, take a piece of dough, and gently squeeze the outer cover of the roll taut, using your thumbs to tuck the dough from the outer layers into the center of the roll. You want to gently stretch the outer covering of dough, aligning the gluten strands to make a structure that will support the dough into a smooth ball as it rises.
- One way to picture this motion is like folding socks into a ball, rolling and tucking them into the center. While this is not nice for the elastic of your socks, but this stretching builds strength in the gluten when you do this for your dough.
- Lay the shaped rolls with the smooth, stretched side up, and the tucked side down. Place them a few inches apart, with or without baking rings, for separate rolls, or closer together or almost touching for soft-sided squared off rolls.
- To make hot dog or sausage rolls, you can simply snake the balls of dough out into long rolls, or if you are familiar with tucking and shaping baguette dough, do this to flatten, then roll and tuck the dough into small little cigar-shaped loaves. You can bake these almost touching on the sides for softer sided rolls, or separately with more space between them for buns that are crustier on the sides.
- For cloverleaf rolls, divide each roll into three or four small balls, then place them together into a well-buttered muffin tin.
glaze rolls & garnish:
- Brush the shaped rolls with a mixture of molasses and water, with or without a beaten egg added.
- Adding an egg to the glaze will make the rolls glossier and shinier, but you can leave it out and use just molasses-water if you prefer to avoid egg (allergies or dietary reasons).
- If you like, after brushing the rolls with glaze, garnish them with a sprinkling of sesame seeds, caraway seeds, poppy seeds, or everything bagel seasoning.
proof rolls:
- Loosely cover the pans with plastic wrap (or place the trays in a proofing box if you have one).
- Let the rolls rise in a warm place until they are light and almost doubled in size. The dough should still be elastic, and somewhat springy if gently prodded.
- This last rise will take between 35 minutes to an hour (less time in a warmer kitchen, more time in a cold room).
bake & cool:
- Preheat your oven to 375℉.
- Bake the rolls on a rack in the center of the oven for 15 to 20 minutes.
- The rolls will be golden brown. If you want to be sure they are done, check the internal temperature with a thermometer- they should be at least 190℉ in the center.
Nutrition
Liked this? Try these related recipes!
- Quick Pizza Dough (for deep dish, pan, or thin crust pizza)
- Homemade Pumpkin Crumpets
- Southern Cast-Iron Skillet Cornbread
- Homemade Herb & Cheese Oatcakes
- Sesame Seed Flax Crackers (gluten free!)
- How to Infuse your own Aquavit
- Deviled Eggs with Dill, Preserved Lemon, and Capers
- Smoked Trout & Herb Cream Cheese Spread (or Dip)
- Venison Burgers with Bacon, White Cheddar, & Caramelized Sweet Onion