Sauerkraut is a traditional staple food for a reason. It’s a delicious way to naturally preserve fresh vegetables and even fruits into and through the winter months, and is more digestible and nutritious than it’s component parts. It contains more vitamin C than fresh cabbage, and gut-healing pro-biotic healthy bacteria and pre-biotic fiber. And believe it or not, it’s really easy to learn how to make real, nourishing lacto-fermented sauerkraut at home!
Homemade fermented pickled sauerkraut is made by shredding fresh produce (usually fresh heads of cabbage or a cabbage and fruit or vegetable blend, although you can use this technique for fermenting lots of different kinds of produce), salting them, and if necessary, adding a bit of water (or sometimes whey) to make enough brine to cover the vegetables and protect them from the air.
The salt inhibits the growth of harmful organisms like mold and dangerous bacteria, while creating a perfect environment for the friendly lactic acid bacteria that are all around us (they’re already on the produce) to grow.
You can kickstart this process with a bit of juice from a healthy, active fermentation (like a previous batch of homemade or store-bought kraut, as long as it hasn’t been canned or otherwise pasteurized to kill off the living organisms) or whey from cultured dairy products (like cultured cheese or yogurt). But you really don’t need to add anything! It’s better to not risk contaminating a new batch if you aren’t sure how clean the previous cultures are anyway… but once you have good, healthy ferments going, you can use them to jumpstart your new batches and get them going a little bit faster. Neat, right?
The most important part of getting this, and any, lacto-ferment right is the salt ratio. You want a 2-3% salt ratio to encourage a healthy fermentation. Too much salt, and not only will your kraut be too salty to be edible, the L.A.B. (lactic acid bacteria) will have a hard time growing. Just enough salt, and they will flourish, while keeping mold and harmful bacteria from spoiling your preserves.
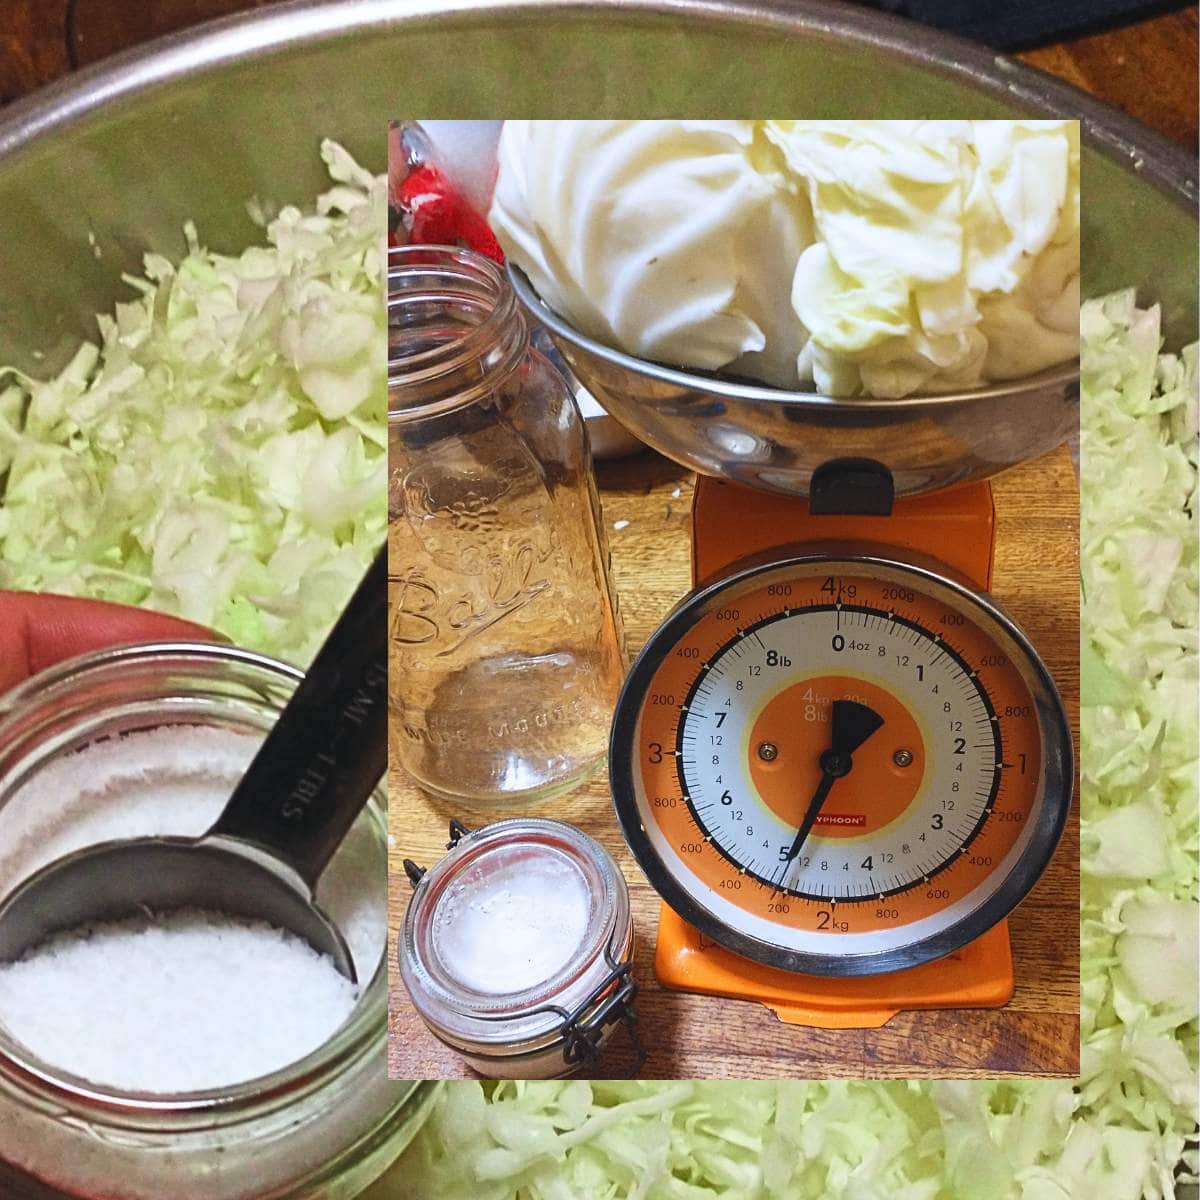
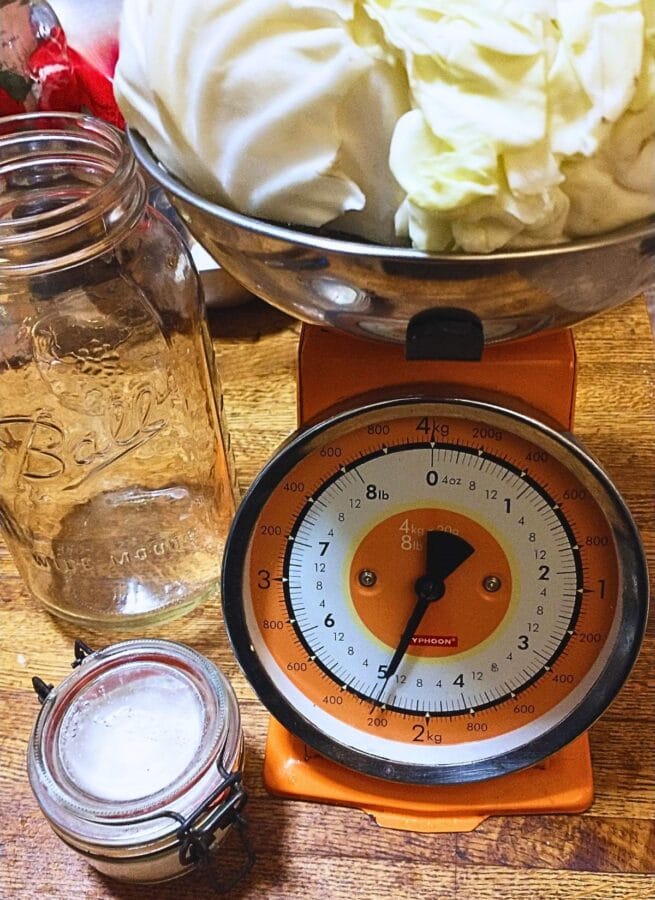
A kitchen scale will make this soooo much easier, more accurate, and more likely to succeed. You can make kraut without one, but it’s easier if you weigh everything (either weigh all the veggies together, or weigh each as you prep them and add to get your total weight).
Either work quickly to tare the weight of the bowl, or use a bowl of known weight and subtract that from the total weight. I have a large stainless mixing bowl that I know weighs one pound, so that makes calculations easy- grate or shred all the veggies into that bowl, weigh it, subtract a pound, and use that to calculate the salt.
Ingredients for Homemade Sauerkraut
When the cabbage is $0.19/lb, we buy a LOT… 36 lbs in this photo! (shopping like the German-Irish-Ulster Scot peasant stock that I am and buying allll the discount produce… don’t worry, I left plenty for the next guy too). This made a ton of kraut, canned sweet and sour pickled cabbage, and slaw for days, if by days, you mean months? Seriously this stuff keeps forever in the fridge.
Cabbage:
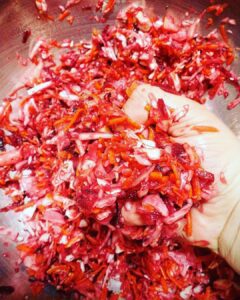
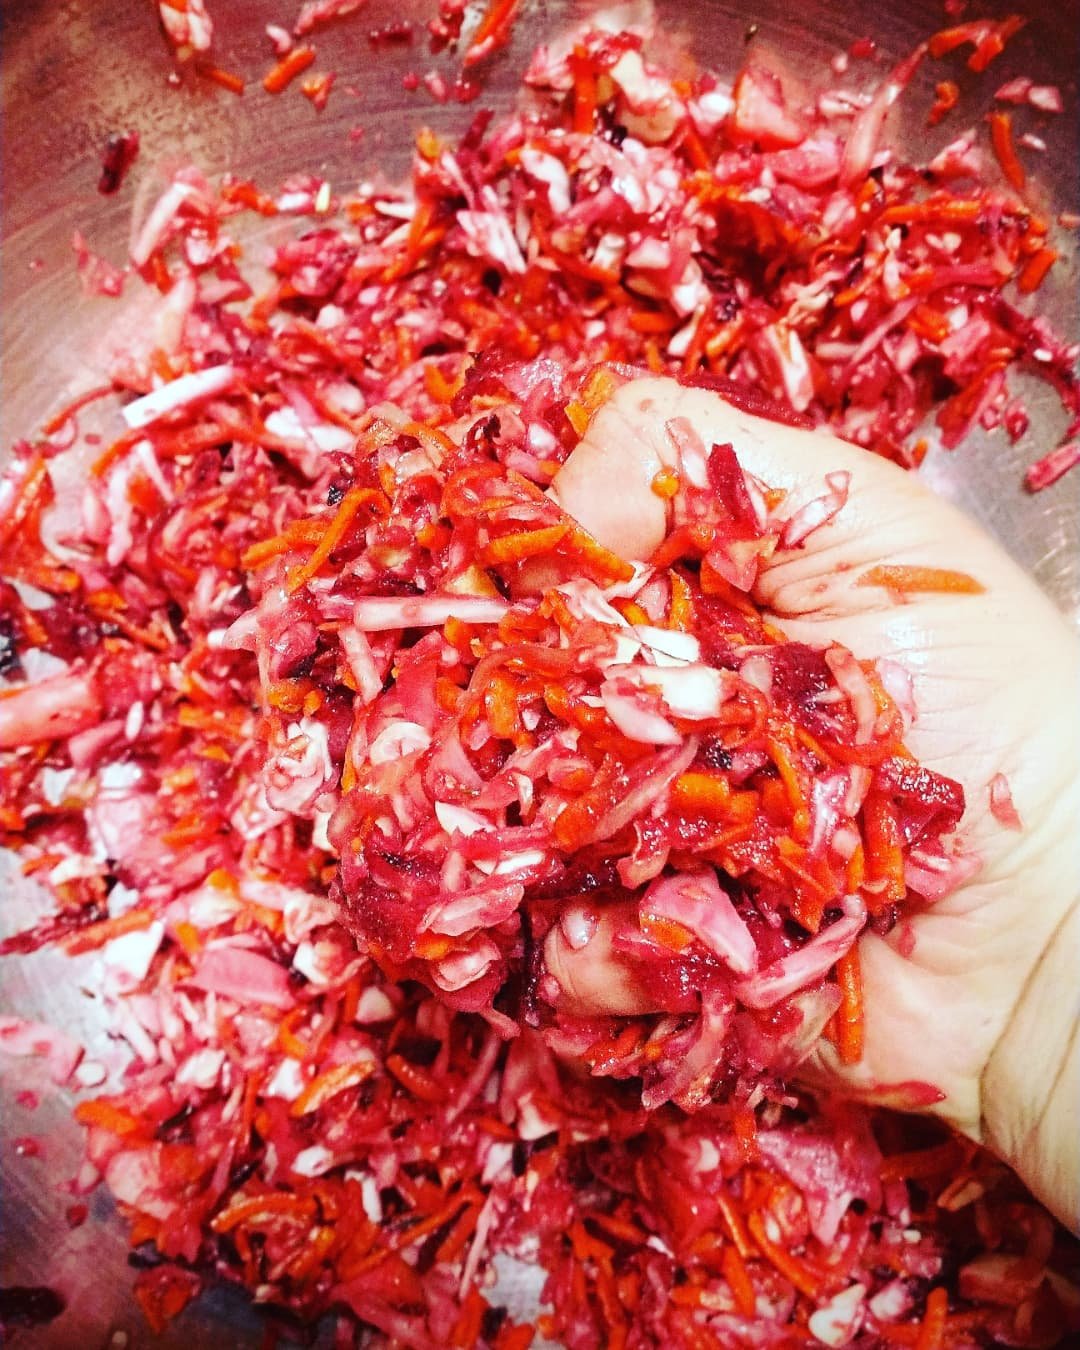
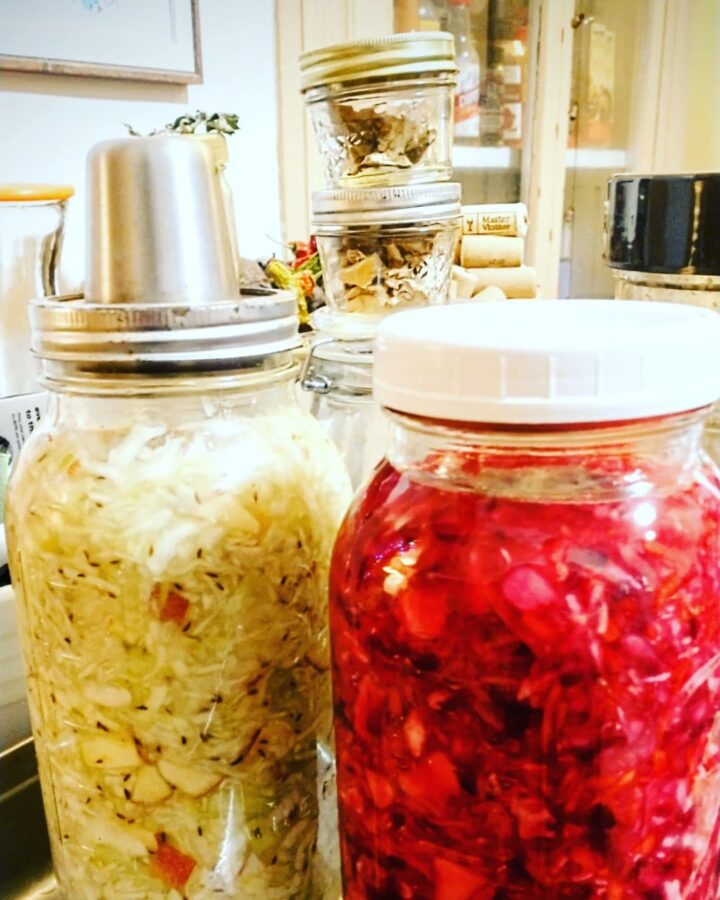
Savoy or regular cabbage works here, either green or red. Green cabbage will give you traditional kraut, and red or purple cabbage will turn a bright, pretty pink color when the lactic acid from the fermentation process reacts with the anthocyanins that give this vegetable its bright color. Pink kraut is more nutritious (those same colorful compounds are rich in vitamins and antioxidants) but they’re both really, really good for you!
You can find cabbage and almost any market at any time of year, but it’s especially inexpensive in the fall and around St. Patrick’s day, when it is often on sale. That’s a good time to stock up and make a big batch of sauerkraut!
Salt:
You can use kosher salt, canning and pickling salt, or sea salt here. Avoid iodized salt for best flavor. For perfect results, you need a scale. Use two to three percent salt by weight. Weigh your total vegetables (after peeling)… convert to ounces, and multiply by 0.02 to determine your salt, by weight.
You can wing it with a few tablespoons per layer and tasting the final product to make sure it’s salty enough to ferment without spoiling (or TOO salty to ferment properly or taste good), but until you are familiar with the process it’s best to weigh your ingredients and take out any guesswork!
Plus, different types of salt have very different volume measurements. A tablespoon of kosher salt weighs a bit less than a tablespoon of fine sea salt! These differences aren’t huge unless you are scaling up to very large batches, but if you have a scale it can’t hurt to weigh them.
You can find conversion charts and tools online but get a scale if you can!
For example, if you have two pounds of shredded cabbage:
2# cabbage x 16 oz/lb = 32 oz
32 oz cabbage x 0.02=0.64 oz salt
32 oz cabbage x 0.03=0.96 oz salt
So, for your two pound batch of kraut, you want to add between 0.64 and 0.96 oz of salt. You can add a bit more salt if you like, especially in warmer or hot weather, but don’t use less than the 2% (0.02) quantity.
Translation to common volume measurements:
1 Tbsp. to 1 1/2 Tbsp Kosher Salt per 2 lbs of shredded cabbage
(one tablespoon = three teaspoons, if you need to convert for different weights… but just weighing everything is easier if you have a scale!)
Water:
If your cabbage is not particularly juicy, or if you are blending it with chopped or shredded root vegetables, you may have to add some water to your mixture to get enough brine to fully submerge your vegetables. It’s best to use non-chlorinated water, since chlorine and other additives added to keep the water potable can interfere with the growth of the good bacteria you want to flourish.
You can easily get around this by boiling the water and then cooling it, or leaving it out overnight in a clean container to let the chlorine evaporate. You can also run the water through a good water filter, or use bottled distilled or spring water.
I’ve used tap water before without problems, but still try to use cooled water from our tea kettle just in case for topping up kraut brines (and for rehydrating yeast for baking or brewing). It’s an easy step that makes me feel better, but don’t sweat it, it will probably be fine either way! This is one of the easiest and least temperamental fermentation projects you can do.
Ginger, chili, or other optional seasonings:
You can leave your kraut plain, or spice it up! I often like to add up to a few tablespoons of freshly grated or frozen ginger, garlic, chili flakes or minced fresh chili peppers, pink peppercorns, dill, mustard, or caraway seeds… just not all of the above! Stick with one or two compatible flavor add-ins until you are familiar with the process, then mix it up and get as wild as you like!
Equipment & Method for Making Fresh Sauerkraut
Sharp knife & cutting board, box grater, slaw board/mandoline, or food processor with grater & shredder plates:
You can shred your cabbage and veggies in many ways. I like to use a knife and cutting board to peel and prep them, then slice into appropriate sized pieces and feed them into a food processor to quickly shred them. For big batches, this is a huge time and labor saver!
If you don’t have a food processor or vegetable shredding attachment for your stand mixer, you can use a box grater, kraut or slaw board, or a mandoline. Watch your fingers and shred carefully! A cut-resistant glove is helpful if you have one and are doing it by hand.
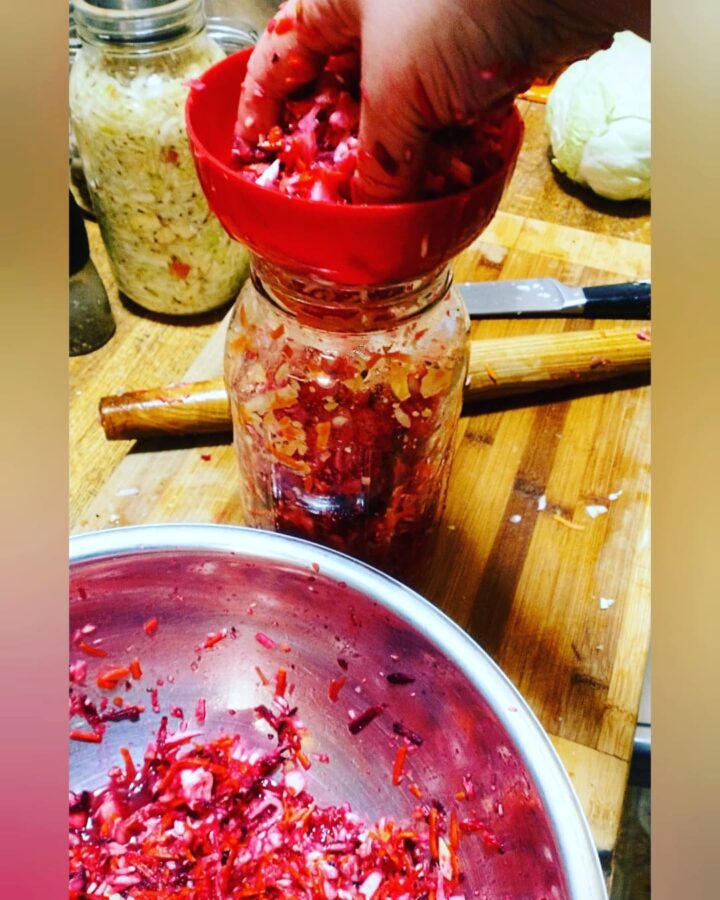
As you fill your mixing bowl or bucket with shredded cabbage, sprinkle in the salt and mix or massage it into the cabbage. You can use tongs or your hands (just make sure that they’re very clean, or use nitrile gloves, especially if you have cuts on your hands, because one, gross, and two, the salt will sting!).
At this point, you’d add any flavor mix-ins like ginger, garlic, and spices. Sample and taste the fresh mixture- it should be lightly salty, but not overpoweringly so. Remember that the flavor will change as the mixture ferments. Some flavors will intensify, some may mellow. Experiment before you make a big batch of something with a bold spice combination!
Kraut tamper, wooden french rolling pin, wooden dowel, etc:
You want to pack the kraut mixture into the jar to remove as much air as possible. You can buy or make specialty tampers designed especially for packing ferments into jars or crocks, or improvise with what you have on hand. I use the end of a French-style rolling pin (no handles, just a smooth tapered pin with wide ends) but you could use a piece of large wooden dowel, a sturdy wooden spoon, a spatula, or even your hands.
Be careful if you are using glass jars to ferment and use only just enough pressure to remove the air without cracking your jars! It’s a good idea to put a soft kitchen towel down under your jars if you’re using glass jars to help protect them while you are packing them, especially if you have some overzealous helpers or are using the expensive half-gallon jars.
Pickle weights, plastic bag filled with brine, or a plate that fits in your crock under the lid:
You want to keep your vegetables submerged under the brine as best you can, as any that dry out and are exposed to air could mold and spoil the batch. Prevent this by topping up with brine as needed, using a clean and sanitized spatula or spoon to push down any stray bits, and using weights in the jars.
You can buy glass weights or stainless springs designed to fit into mason jars for this purpose, and most fermenting crocks come with weights for the top. I also save the plastic inner lids that come in some brands of olives and preserved grape leaves that are designed for the same purpose (it’s a clear plastic sturdy perforated disc that just fits in a wide mouth jar below the shoulder… you have to bend it a bit to get it in place but it works quite well!).
Airlocks, “Pickle Pipes”, or Plastic jar lids:
A lid with an airlock is best, as it will allow CO2 from your ferment to bubble out but keeps out outside air that might contaminate your pickles, and especially fruit flies and other nasties.
There are many styles of airlocks, from specially designed lids with vents like the popular “Pickle Pipes” (say that ten times fast), traditional three-part or chamber-style airlocks like those used in brewing (installed through a drilled plastic lid fitted with a rubber or silicone grommet seal, and filled with water, brine, or vodka to let air bubble out but not in).
There are also stainless steel ones designed for pickling that incorporate a spring press that also serves as a fermentation weight along with the airlock. I have one of these three-part stainless airlocks from Kraut Source (on the jar of cabbage and apple kraut on the left side of this photo), and it’s great and incredibly sturdy, but expensive! There are some other similar products from Ball and Trellis that have the stainless spring along with either a stainless or plastic “waterless airlock”, which is a vented lid with a silicone gasket that does a good job of letting air out without letting air or fruit-flies in.
I have also had good luck with just using a plastic mason jar lid sealed just tightly enough to keep out fruit flies but loose enough that gasses can escape. You could cover that with a cloth for extra protection, but you’d need to change it out regularly as it will probably get wet.
You’ll want to put your jars in a metal or plastic tray and keep an eye on them for the first few days… if you have a good, active and healthy fermentation, they may overflow! Rinse off and top up any airlocks with potable water or brine solution as needed. An empty #10 can is a good size for a half-gallon mason jar if you don’t have enough trays or don’t want to give up some of your kitchenware to your fermentation projects!
Time & Temperature
“If I, could put time, in a bottle…”
The second most important ingredient in your fermented sauerkraut (after the salt) is time! The bacteria need time to do their work. How much time? Well, that depends.
The most important variable is temperature. Higher temperatures will give you a faster fermentation, but can result in a softer, less crunchy finished kraut or off-flavors. Lower temperatures will give you a slower ferment, but too cold too soon can risk spoilage as well- you want to keep those lactic acid producing bacteria (LAB) happy and growing until your preserve is sufficiently acidic to preserve it. The sweet spot (or is it the sour spot?) is somewhere between 50F – 70F, though you can also make successful ferments at warmer temperatures.
Most fermentations will be very active within 48 hours, and complete within 7-14 days. If you are canning your sauerkraut, let it go for the full two weeks, and/or check the pH to make sure it is sufficiently acid to safely can (below 4.6 pH). You can do this with pH papers, though a digital meter is more accurate (but also more expensive and requires calibration).
How to Use Your Homemade Lactofermented Sauerkraut
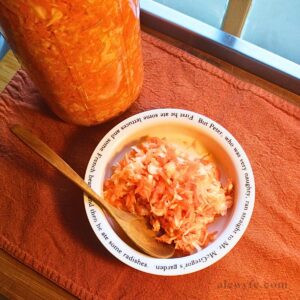
This tart and crunchy condiment is better than the soggy and bland stuff that you might be familiar with if you’ve only ever had store-bought kraut.
You can keep it in the fridge or a cold cellar or pantry for months… if you don’t eat it all right away, that is! Even if you can it at home to make it shelf-stable, it usually stays pretty crunchy! Look for a guide to water-bath canning kraut in a future post.
I especially like this homemade kraut paired with or in:
Sauerkraut is a traditional staple food for a reason. It’s a delicious way to naturally preserve fresh vegetables and even fruits into and through the winter months, and is more digestible and nutritious than it’s component parts. You can scale this recipe up to make a large batch or down, just keep the ratios of salt to cabbage the same (you can use slightly more salt to taste but not less).
water (if needed to make sufficient brine)(boiled and cooled, spring, or filtered water)
Instructions
Remove any wilted outer leaves from the cabbage. Wash, core, quarter, and weigh the cabbage and record weight (if more or less than 2 lbs).
Shred or slice the cabbage finely using a knife and cutting board, a box grater, mandoline, slaw board, or food processor.
Mix the cabbage and salt and any additional seasonings in a large mixing bowl or food-safe bucket. Massage and mix well with tongs or clean hands… the salt will pull moisture from the cabbage as it sits.
Carefully pack the shredded cabbage and salt mixture into clean and sanitized mason jars, fermenting crocks, or a food safe bucket with a lid and airlock. Tamp down well to release as much trapped air as possible.
If the cabbage has not released enough liquid to cover itself, add a bit of water to top up the brine mixture. Weight down the top of the jars with pickle weights, a clean plate, or a sealed bag of light brine (salt + water, so if it leaks it will not dilute your brine solution).
Cover with a lid and airlock, or a loosely fitting lid and cloth. Check the airlock daily and clean it and top up with brine or boiled and cooled water as needed to maintain a liquid seal in the airlock during fermentation. Place the jars somewhere cool and out of direct sunlight- 50-75℉ is fine, with 65-70℉ being ideal. You can ferment in warmer temperatures if you must, but increase the salt slightly, and the texture of the kraut may be mushy if it's too hot or develop off-flavors.
Most fermentations will finish within 7-14 days. If you will be canning this, it's best to let it go the full 2 weeks. If you will be storing it in the fridge, you can taste and check for sourness and consistency. When it tastes the way you want it, cap with a regular lid (plastic or stainless is best, as metal jar rings tend to rust quickly if they come in contact with the brine). Store in the fridge (best/safest) or a cool root cellar or pantry.