PRESERVE: How to Dehydrate Celery & Make Homemade Celery Salt
- Why should you dehydrate celery?
- How to use dehydrated celery & celery salt
- Dehydrated celery salt ingredients
- Kitchen equipment needed
- How to dehydrate celery
- How to make homemade celery salt
- Pantry storage tips & shelf-life
- How to Dehydrate Celery & Make Homemade Celery Salt
Why should you dehydrate celery?
Have you ever wondered how to dry celery, or how to make your own celery salt? You totally can! It tastes fresher, and is a lot more budget-friendly than those tiny overpriced tins at the grocery store!
What about just making sure you always have celery on hand for soups and braises, or stocking up when there are good sales around the holidays? Tired of finding sad, limp celery in the back of your crisper drawer that you didn’t use fast enough? It’s so easy to dry celery; you never have to waste it again!
If you have a dehydrator, it’s so simple. It only takes a few minutes of prep time (longer if you blanch it, but still quick), then you let your food dryer do it’s thing. You can even use your oven, though this method is less efficient and takes a bit more babysitting to make sure it doesn’t burn.
A lot of the mass in fresh celery is water, so when you dehydrate it, you can store a lot of flavor and veggie-goodness in a very small amount of space. You can fit a whole head of celery in less than a pint jar after drying it!
This is especially handy if you are trying to keep a deep working pantry in a small space, or if you want to make your own lightweight instant meals for backcountry adventures like hiking, camping, and hunting trips, or for emergency preparedness.
It’s what Big Celery™️ doesn’t want you to know! (about… small celery? that’s the joke? because it gets a lot smaller? boooooo hissssssss boooooooo, okay, okay, tough crowd huh? Anyway… let’s do this!)

How to use dehydrated celery & celery salt
Dried Celery Recipe Ideas:
- Make your own instant mirepoix mix- add two parts dried onion to one part each dried celery and dried carrots. Rehydrate with boiling water or broth before using, or toss directly in simmering soups and stews.
- Rehydrate and substitute for regular celery, or throw it into the soup to re-hydrate as it cooks.
- Add a tablespoon to ramen packets (simmer for a few minutes before adding the noodles if you are cooking them on a stove-top, or add directly to your ramen before adding hot water for cup-noodles).
- Add to baked or stove top rice pilaf or seasoned rice meals (like rice-a-roni or similar packets).
- Use it in homemade chicken, meat, or vegetable broths when you don’t have fresh celery on hand.
- Add to homemade stuffing mixes or to boost the flavor of store-bought stuffing mix.
- Use your dried celery in instant pot, crock pot, or dutch oven meat braises or bean dishes.
- Make your own dried soup, sauce, and risotto mixes for meal-in-a-jar gifts, emergency preparedness, or healthy homemade convenience meals or DIY backpacking and camping meals.
Celery Salt Recipe Ideas:
- Celery salt is one of the classic toppings on a Chicago-style hot dog.
- Use as a finishing salt for grilled or roasted meats.
- Sprinkle on homemade deviled eggs instead of paprika.
- Add to or garnish homemade potato salad, or perk up bland deli salads.
- Season roasted baby potatoes or other root vegetables.
- Add to creamy soups or mac & cheese.
- Use it to make a homemade poultry seasoning… add white pepper and dried herbs like thyme, marjoram, savory, rosemary, or others, to taste.
- Try it sprinkled on popcorn, baked potatoes, or crackers with cream cheese.
Dehydrated celery salt ingredients
Celery:
Use whole fresh celery stalks and leaves. Trim the root ends, and the tops if they are shriveled. Wash the individual stalks well, especially at the base, to remove any grit, then pat them dry.
Salt:
You can just dehydrate and store the sliced or powdered celery, but to make your own homemade celery salt seasoning, you’ll want to blend your dehydrated celery with salt.
You can use any flaky or fine salt that you like. I prefer either flaky kosher salt or fine ground sea salt. You could also use Himalayan pink salt, though your celery salt will have a pinkish color.
Kitchen equipment needed
Food dehydrator or oven and trays:
This is easiest to do with a food dehydrator, though you can also use an oven on a very low setting with the door propped slightly open. This method is less consistent, and more energy intensive, and definitely something you’d only want to do in cold weather (when you can benefit from the additional heat and humidity in your kitchen).
I like to use silicone mesh tray liners on my food dehydrator trays, which keeps the celery bits from sticking or falling through the trays. They will shrink a whole lot as they dry.
Food processor, mandolin, or sharp knife & cutting board:
A food processor with a slicing blade is the easiest and fastest way to make thin, uniform slices for dehydrating. Stack up as many stalks of celery in the feed tube of your processor (or stand mixer slicing attachment). Use the pusher to feed the celery into the slicer blades, and empty the hopper before it overfills.
You can also use a mandoline slicer (use cut-resistant gloves for safety, or at least use the safety holder included with your mandoline), or a sharp chef’s knife and large cutting board. Slice the celery into thin half-moon shapes across the grain of the strings, ideally about 1/8″ thick.
How to dehydrate celery

wash celery:
- Trim and wash the celery stalks.
- Remove all traces of grit and dirt from the celery, especially at the base of the stalks.
- Let the celery stalks drain and pat them dry with a clean kitchen towel.
slice or dice:
- Using a food processor fitted with a slicer blade, feed the celery stalks in to slice them uniformly and thinly.
- Alternately, you can use a mandoline slicer, or a sharp knife and a cutting board. It’s important to aim for uniformity and make the slices no more than 1/4″ thick so that they dry evenly without trapping moisture in the center.
- You can also cut the stalks in halves or thirds lengthwise (parallel to the celery strings) before slicing and then dice your celery (perpendicular to the strings) for smaller pieces. This is especially nice if you are making a homemade dried mirepoix mix with your dehydrated celery, or if you want celery flavor but with smaller vegetable pieces that re-hydrate more quickly.
blanch (optional, for longer storage):
- Blanching is an optional step that will help preserve color and nutrients for longer storage. If you will be using your dried celery within six months or so, you could skip this step, but for longer storage (up to 2 years) it’s recommended.
- You can steam blanch in a colander or do a quick boiling water bath dunk. You are not trying to cook the vegetables, just set the color.
- Steam or dunk the celery in the boiling water bath for about a minute, then cool rapidly in an ice bath. It should still be fairly crisp, not soft.
- Work in small batches so that the water stays hot- you want to keep the water at a full boil if you are water-blanching, and do a thin even layer if you are steam-blanching.
- Have your ice-bath ready before you start blanching so that you don’t overcook your celery.
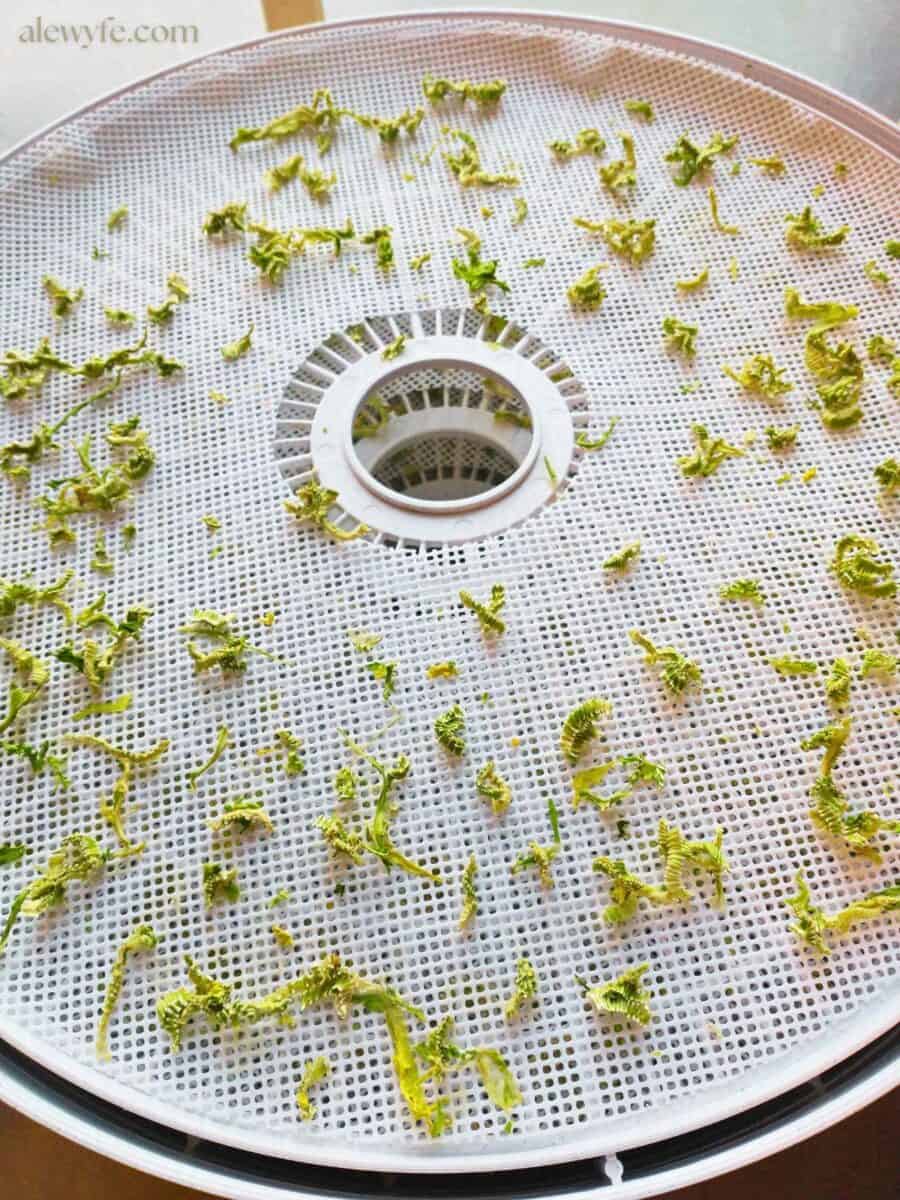
dehydrate:
- Spread the celery slices out in an even single layer on your dehydrator trays (or sheet pans, if you are oven drying).
- I like to use silicone mesh liners in my dehydrator trays, which keeps the celery from sticking to the trays or falling through them. The pieces will shrink a lot!
- Most dehydrators will finish drying celery in 6-12 hours at 135 deg F.
- If you are oven-drying, set you oven to the lowest temperature (usually 150 deg F) and prop the door open (best only done in winter, and not very efficient).
- Your batch size and how closely the slices are spaced will affect the drying time, so adjust as needed. Dehydration times will also vary with the power of your dehydrator… check your dehydrator manual for guidelines if you have one, but know that these are usually optimistic estimates unless you live in the desert!
- It’s better to over-dry than under-dry, especially with veggies like celery that you will be re-hydrating or powdering before use.
- Dry them until they are completely dry, and pieces break with a snap. They will be shriveled and a fraction of their beginning size.
condition:
- This is a good practice with all home dehydrated foods, and will help prevent mold in storage and equalizes moisture content in your dried foods for more consistent quality.
- Place your freshly dehydrated food into a clear glass jar with a tightly fitting lid.
- Do not overfill the jar. You want the jar less than 2/3rd full, with room to shake and move the produce around. Split into several jars if necessary.
- Leave the dried food in the jar for several days or up to a week, shaking the jar periodically and checking for condensation and clumping that indicate uneven drying.
- If you see condensation in the jar, immediately return to the dryer or oven.
package & store:
- After conditioning, divide your dried celery into storage containers and seal.
- You can pack in glass jars (new or reused) with tightly fitting lids, airtight plastic containers, and vacuum or mylar bags.
- Glass jars and mylar bags are best for long-term storage (plastic is porous and will let oxygen in over time, even with a vacuum seal or moisture absorber packets).
- Some people like to freeze-treat their home dried foods for additional protection against pests or spoilage. This is not the same as freeze-drying, but may extend shelf-life. If you have room in your freezer, you can store your dried foods there. Make sure the bag is sealed and airtight, or you may create problems with condensation when you remove the bags from the freezer.
How to make homemade celery salt
make celery powder:
- Blend about a half cup of dried celery stalks and leaves.
- A blender or spice grinder is best for this, though you can use a food processor and then sift out the larger pieces.
add salt:
- Add an equal part of salt to the dried celery powder.
- Mix or shake well to combine. You can mix it carefully with the blender in small pulses, but don’t make the salt super-fine unless you prefer that!
Pantry storage tips & shelf-life
Once you are sure that your dried celery is conditioned and absolutely dry, you can store it in glass jars or mylar bags. Store your dried foods somewhere cool and dry, and out of direct sunlight. Poor storage conditions will shorten the useful life of your dried foods.
Properly stored dried celery can last up to two years with good quality and nutritional value. After that, the flavor and nutrients will decline, though it will still be safe to eat if properly stored.
Discard any dried foods that show evidence of mold (toss the entire container, as spores spread and are not always visible in the rest of the food). This is a good reason to store your dried foods in smaller containers when possible, so that you can use a little at a time without exposing your whole batch to air and moisture. It will also contain problems so that you don’t have to throw out a whole batch if only one bag or jar was affected.
Blanching before dehydrating will help extend the shelf life, so if this matters to you, don’t skip that step!
For longer term storage, vacuum seal your jars of containers, or use an oxygen absorber in the bags. You can also freeze vacuum sealed bags to preserve freshness, but be careful of condensation when you remove the bags from the freezer. Let them warm to room temperature before opening.


How to Dehydrate Celery & Make Homemade Celery Salt
Equipment
- food dehydrator (you can also use your oven but this is less efficient)
- food processor (this is fastest, but you can also use a mandoline or sharp knife)
- mandoline (alternative to food processor or slicing by hand)
- blender (for making celery powder or salt, or use a spice grinder or food processor & wire sifter)
Ingredients
- 1 large celery (whole heads or hearts)
- salt (flaky kosher salt, fine sea salt, or your favorite) (optional, for celery salt)
Instructions
wash celery:
- Trim and wash the celery stalks.
- Remove all traces of grit and dirt from the celery, especially at the base of the stalks.
- Let the celery stalks drain and pat them dry with a clean kitchen towel.
slice or dice:
- Using a food processor fitted with a slicer blade, feed the celery stalks in to slice them uniformly and thinly.
- Alternately, you can use a mandoline slicer, or a sharp knife and a cutting board. It’s important to aim for uniformity and make the slices no more than 1/4″ thick so that they dry evenly without trapping moisture in the center.
- You can also cut the stalks in halves or thirds lengthwise (parallel to the celery strings) before slicing and then dice your celery (perpendicular to the strings) for smaller pieces. This is especially nice if you are making a homemade dried mirepoix mix with your dehydrated celery, or if you want celery flavor but with smaller vegetable pieces that re-hydrate more quickly.
blanch (optional, for longer storage & better quality):
- Blanching is an optional step that will help preserve color and nutrients for longer storage. If you will be using your dried celery within six months or so, you could skip this step, but for longer storage (up to 2 years) it’s recommended.
- You can steam blanch in a colander or do a quick boiling water bath dunk. You are not trying to cook the vegetables, just set the color.
- Steam or dunk the celery in the boiling water bath for about a minute, then cool rapidly in an ice bath. It should still be fairly crisp, not soft.
- Work in small batches so that the water stays hot- you want to keep the water at a full boil if you are water-blanching, and do a thin even layer if you are steam-blanching.
- Have your ice-bath ready before you start blanching so that you don’t overcook your celery.
dehydrate the celery:
- Spread the celery slices out in an even single layer on your dehydrator trays (or sheet pans, if you are oven drying).
- I like to use silicone mesh liners in my dehydrator trays, which keeps the celery from sticking to the trays or falling through them. The pieces will shrink a lot!
- Most dehydrators will finish drying celery in 6-12 hours at 135 deg F.
- If you are oven-drying, set you oven to the lowest temperature (usually 150 deg F) and prop the door open (best only done in winter, and not very efficient).
- Your batch size and how closely the slices are spaced will affect the drying time, so adjust as needed. Dehydration times will also vary with the power of your dehydrator… check your dehydrator manual for guidelines if you have one, but know that these are usually optimistic estimates unless you live in the desert!
- It’s better to over-dry than under-dry, especially with veggies like celery that you will be re-hydrating before use or powdering (where they need to be completely dry).
- Dry them until they are shriveled, hard, and pieces break with a snap. They will shrink down to a fraction of their original size & volume.
condition your dried celery:
- This is a good practice with all home dehydrated foods, and will help prevent mold in storage and equalizes moisture content in your dried foods for more consistent quality.
- To condition: place your freshly dehydrated food into a clear glass jar with a tightly fitting lid.
- Do not overfill the jar. You want the jar less than 2/3rd full, with room to shake and move the produce around. Split into several jars if necessary.
- Leave the dried food in the jar for several days or up to a week, shaking the jar periodically and checking for condensation and clumping that indicate uneven drying.
- If you see condensation in the jar, immediately return to the dryer or oven and dry again for a few more hours before re-conditioning.
package & store:
- After conditioning, divide your dried celery into storage containers and seal.
- You can pack in glass jars (new or reused) with tightly fitting lids, airtight plastic containers, and vacuum or mylar bags.
- Glass jars and mylar bags are best for long-term storage (plastic is porous and will let oxygen in over time, even with a vacuum seal or moisture absorber packets).
- Some people like to freeze-treat their home dried foods for additional protection against pests or spoilage. This is not the same as freeze-drying, but may extend shelf-life. If you have room in your freezer, you can also store your dried foods there. Make sure the bag is sealed and airtight, or you may create problems with condensation when you remove the bags from the freezer.
How to make homemade celery salt
make celery powder:
- Blend about a half cup of dried celery stalks and leaves.
- A blender or spice grinder is best for this, though you can use a food processor and then sift out the larger pieces.
add salt:
- Add an equal part of salt to the dried celery powder.
- Mix or shake well to combine. You can mix it carefully with the blender in small pulses, but don’t make the salt super-fine unless you prefer that!
More pantry staples and food preservation recipes:
- Meyer Lemon Salt: How to Make Homemade Citrus-Infused Salts
- How to Make Salted Lemon Pickles
- Spiced Golden Pickled Eggs (easy refrigerator pickle recipe)
- How to Make Chicago-Style Giardiniera
- How to Make Butter-Swim Biscuit Mix for Fresh Biscuits in a Flash!
- Southern Cornbread Dressing with Fresh Cranberries & Herbs
- Smoky White Bean Soup with Pork & Collards (Instant Pot Recipe)