PRESERVE: How to Dehydrate Peas
- Why should you dehydrate peas?
- How to use dehydrated peas
- Kitchen Equipment Needed
- How to Dehydrate Fresh Peas
- How to Dehydrate Frozen Peas
- Pantry storage tips & shelf-life
- How to Dry Peas
Why should you dehydrate peas?
If you have a dehydrator, putting up dried peas is one of the easiest vegetables you can do, especially if you are using frozen peas. Peas fresh from your garden are a bit more work to dry, but if you have enough that you’re not just devouring them while standing in between the rows I envy you!
It only takes a few minutes of prep time (a bit longer if you have fresh peas, but still quick), then you let your food dryer do its thing. You can even use your oven, though this method is less efficient, slower, and takes a bit more babysitting to make sure it doesn’t burn.
Note that these are not the same as the freeze-dried peas sold for snacking and instant meals, which is a much more complicated (and expensive) process. You can buy home-scale freeze-dryers now, but they’re very expensive!
While regular dehydrated peas are not quite as tender or bright as fresh, frozen, or freeze-dried peas, you retain a lot more nutrients than canning, which just gives you mushy brown jars of sadness after a lot of work, IMO. I know, some people like canned peas? More for them, but it’s a hard pass from me.
A lot of the mass in fresh vegetables and fruits is water, so when you dehydrate them, you can store a lot of flavor and veggie-goodness in a very small amount of space. You can fit a whole bag of peas in less than a pint jar after drying them!
For dried peas, you can expect about a 4:1 yield. For every 20 lbs of fresh peas, you’ll end up with about 5-5 1/2 cups of dried peas (or about 4 ounces from a one lb bag of frozen peas).
Removing most of the water preserves the peas so that they’re shelf-stable for up to four years, sitting in your pantry waiting for you to toss them in a pot of soup.
This is especially handy if you are trying to keep a deep working pantry in a small space, or if you want to make your own lightweight instant meals for backcountry adventures like hiking, camping, and hunting trips, or for emergency preparedness. Yes, you can buy commercially dehydrated vegetables for these meals, but it’s a LOT cheaper to do your own at home.
How to use dehydrated peas
- Rehydrate with boiling water or broth before using, or toss directly in simmering soups and stews.
- Rehydrate your dried peas and substitute for regular peas in pasta and side dishes.
- “Cold-soak” to rehydrate while backpacking or other times when you might need to save fuel in a limited power situation (emergencies, etc). Soak the peas in cold potable water for 8-12 hours before cooking. If you’re backpacking, reusable silicone stasher-type bags or lightweight plastic screw-top containers are popular for this.
- Add a tablespoon to ramen packets (simmer for five to ten minutes before adding the noodles if you are cooking them on a stovetop, or add directly to your ramen before adding hot water for cup-noodles, although they may be a bit chewy if you didn’t rehydrate them first).
- Add to baked or stove top rice pilaf or seasoned rice meals (like rice-a-roni or similar packets). Add a bit of extra water if you did not rehydrate your peas first (best with baked brown rice pilaf or other dishes that have a long cooking time).
- Use it in homemade or packet-sauce curries and stir-fries.
- Add to homemade stuffing mixes or to boost the flavor of store-bought stuffing mix.
- Use your dried peas in instant pot, crock pot, or dutch oven meat braises or bean dishes. No need to rehydrate first for this, but make sure you have a bit of extra liquid to account for the water the peas will absorb.
- Make your own dried soup, sauce, and risotto mixes for meal-in-a-jar gifts, emergency preparedness, or healthy homemade convenience meals or DIY backpacking and camping meals!
Kitchen Equipment Needed
Food dehydrator or oven and trays:
This is easiest to do with a food dehydrator, though you can also use an oven on a very low setting with the door propped slightly open.
The oven method is less consistent, and more energy intensive, and definitely something you’d only want to do in cold weather (when you can benefit from the additional heat and humidity in your kitchen).
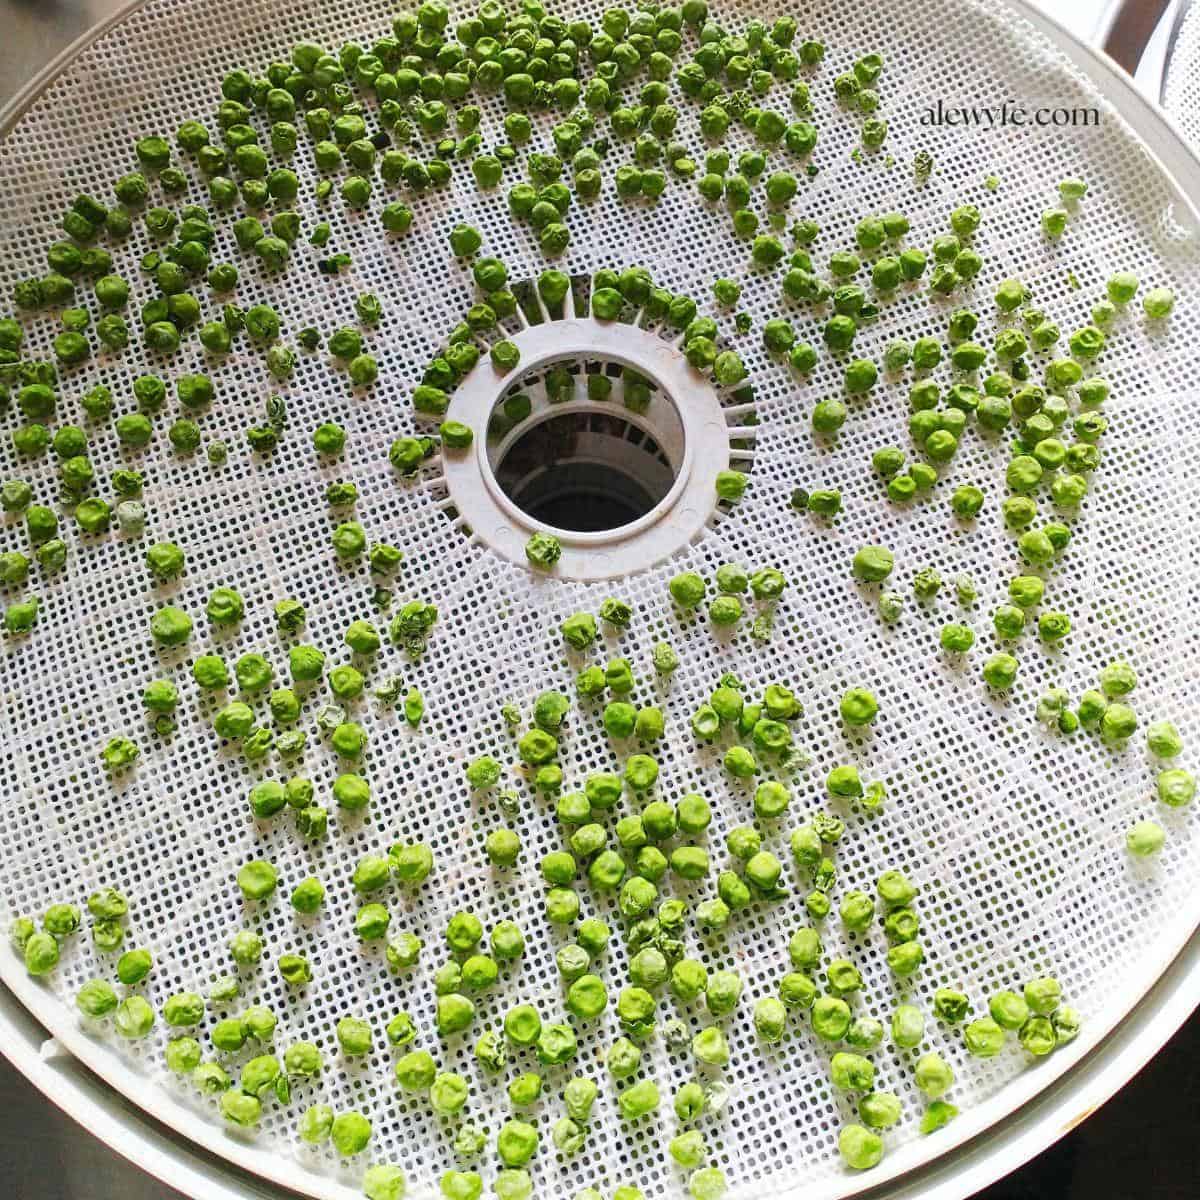
I like to use silicone mesh tray liners on my food dehydrator trays, which keeps the vegetable bits from sticking or falling through the trays. They will shrink a whole lot as they dry.
How to Dehydrate Fresh Peas
hull & wash peas:
- Trim and wash the peas.
- Snap the peas and remove them from the pods.
blanch (optional, for longer storage):
- You don’t need to blanch frozen peas, as they were already blanched before being frozen… skip to the dehydrating step if you are using frozen peas.
- Blanching is an optional step that will help preserve color and nutrients for longer storage. If you will be using your dried peas within three months or so, you could skip this step, but for longer storage (up to 2 years) it’s recommended.
- You can steam blanch in a colander or do a quick boiling water bath dunk. You are not trying to cook the vegetables, just set the color.
- If you are water-blanching, you can add a teaspoon of citric acid per gallon of water as a preservative, but this may dull the color.
- Have your ice-bath ready before you start blanching so that you don’t overcook your peas.
- Steam the peas for 3-5 minutes, or submerge in the boiling water bath for about 2-3 minutes, then cool the peas rapidly in an ice bath.
- They should still be fairly firm and snappy, not soft or mushy.
- Work in small batches so that the water stays hot- you want to keep the water at a full boil if you are water-blanching, and do a thin even layer if you are steam-blanching.
dehydrate:
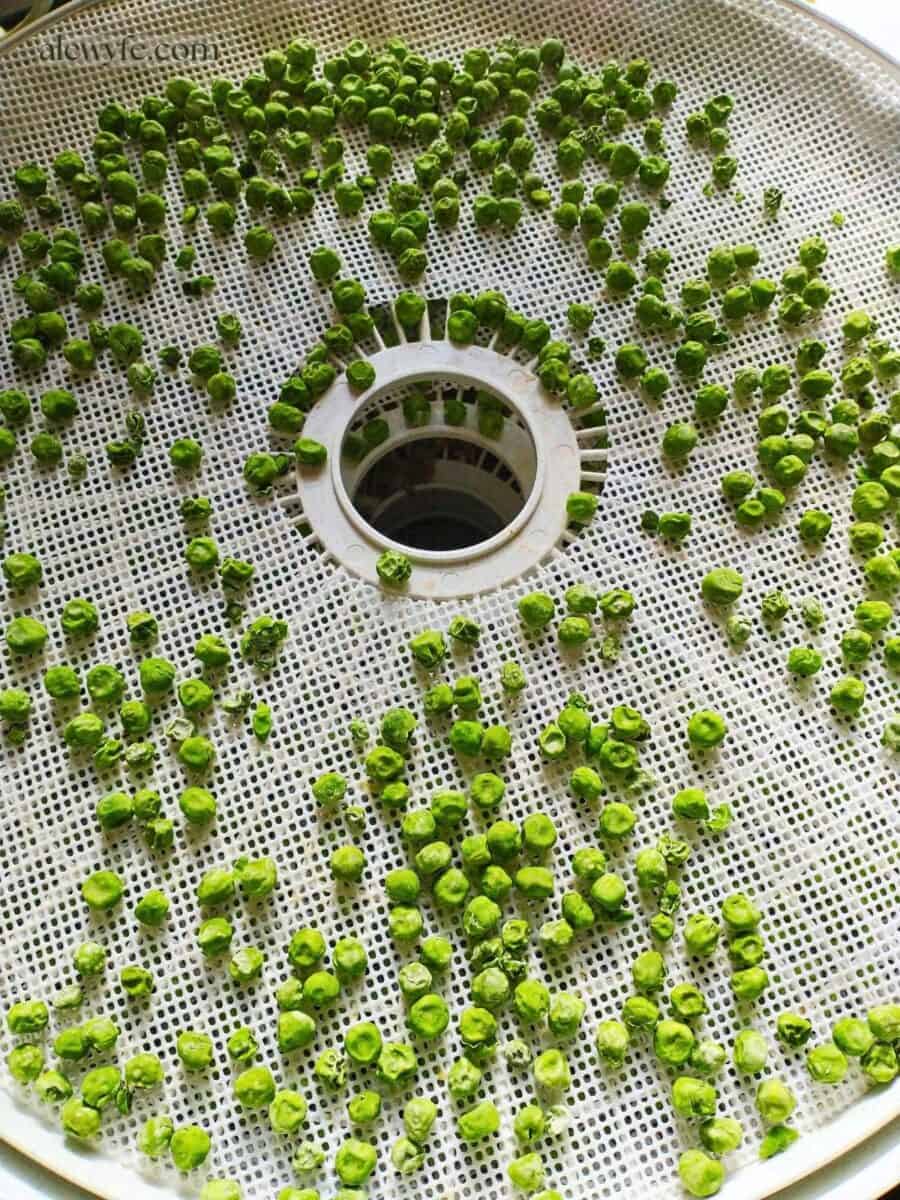
- Spread the peas out in an even single layer on your dehydrator trays (or sheet pans, if you are oven drying).
- I like to use silicone mesh liners in my dehydrator trays, which keeps the peas from sticking to the trays or falling through them. The pieces will shrink a lot!
- Most dehydrators will finish drying peas in 8-12 hours at 135 deg F.
- If you are oven-drying, set you oven to the lowest temperature (usually 150 deg F) and prop the door open (best only done in winter, and not very efficient). Oven dehydrating takes about twice as long, about 16-20 hours, though this will depend on your oven and the humidity.
- Your batch size and how closely the slices are spaced will affect the drying time, so adjust as needed. Dehydration times will also vary with the power of your dehydrator… check your dehydrator manual for guidelines if you have one, but know that these are usually optimistic estimates unless you live in the desert!
- It’s better to over-dry than under-dry, especially with veggies like peas that you will be re-hydrating before use. However, check your dried peas frequently towards the end of their drying time, as the sugars in them can scorch if they are dried too long or at too high heat.
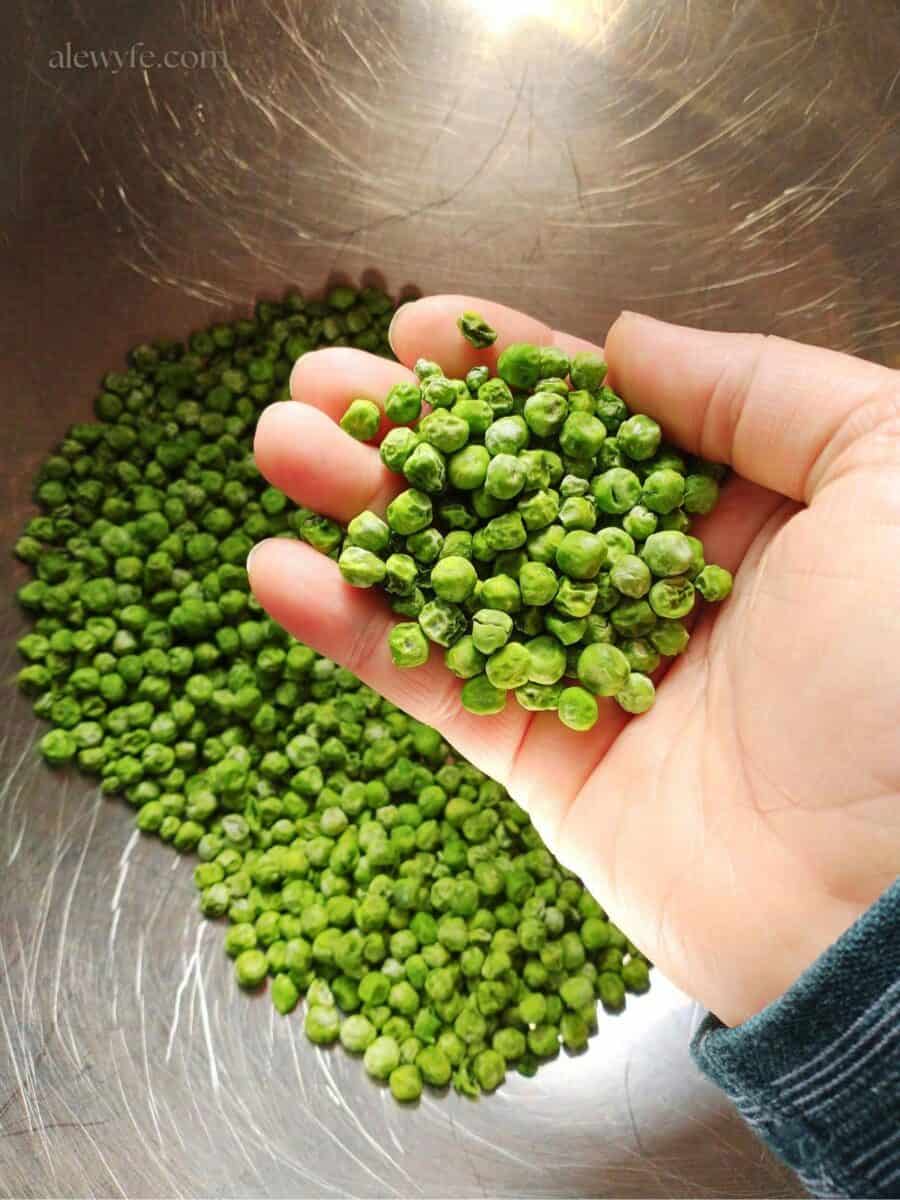
- Dry them until they are completely dry all the way through. They will be shriveled and a fraction of their beginning size, but should still have a nice bright color.
condition:
- This is a good practice with all home dehydrated foods, and will help prevent mold in storage and equalizes moisture content in your dried foods for more consistent quality.
- Place your freshly dehydrated food into a clear glass jar with a tightly fitting lid.
- Do not overfill the jar. You want the jar less than 2/3rd full, with room to shake and move the produce around. Split into several jars if necessary.
- Leave the dried food in the jar for several days or up to a week, shaking the jar periodically and checking for condensation and clumping that indicate uneven drying.
- If you see condensation in the jar, immediately return to the dryer or oven.
package & store:
- After conditioning, divide your dehydrated peas into storage containers and seal.
- You can pack in glass jars (new or reused) with tightly fitting lids, airtight plastic containers, and vacuum or mylar bags.
- Glass jars and mylar bags are best for long-term storage (plastic is porous and will let oxygen in over time, even with a vacuum seal or moisture absorber packets).
- Some people like to freeze-treat their home dried foods for additional protection against pests or spoilage. This is not the same as freeze-drying, but may extend shelf-life. If you have room in your freezer, you can store your dried foods there. Make sure the bag is sealed and airtight, or you may create problems with condensation when you remove the bags from the freezer.
How to Dehydrate Frozen Peas
dehydrate:
- Frozen peas are some of the easiest things to dehydrate. They require no additional prep and are ready to dehydrate right out of the package.
- They’ve already been blanched, and there’s no need to thaw them first.
- Spread the frozen peas in a thin single layer on your dehydrator trays, and follow the remaining steps above to dehydrate and condition the frozen peas.
- They may take a bit longer to dry, as they’re starting from frozen (but you save time from not snapping and blanching them).
Pantry storage tips & shelf-life
Once you are sure that your dried peas are conditioned and absolutely dry, you can store them in glass jars or mylar bags, or airtight plastic containers. Store your dried foods somewhere cool and dry, and out of direct sunlight. Poor storage conditions will shorten the useful life of your dried foods.
Properly stored dried peas can last up to four years with good quality and nutritional value. After that, the flavor and nutrients will decline, though they will still be safe to eat if properly stored.
Discard any dried foods that show evidence of mold (toss the entire container, as spores spread and are not always visible in the rest of the food). This is a good reason to store your dried foods in smaller containers when possible, so that you can use a little at a time without exposing your whole batch to air and moisture. It will also contain problems so that you don’t have to throw out a whole batch if only one bag or jar was affected.
Blanching before dehydrating will help extend the shelf life, so if this matters to you, don’t skip that step, or use frozen peas!
For longer term storage, vacuum seal your jars of containers, or use an oxygen absorber in the bags of dried peas. You can also freeze vacuum sealed bags to preserve freshness, but be careful of condensation when you remove the bags from the freezer. Let them warm to room temperature before opening.

How to Dry Peas
Equipment
- food dehydrator (you can also use your oven but this is less efficient)
Ingredients
- 4 lbs fresh or frozen peas
Instructions
hull & wash peas:
- Trim and wash the peas.
- Snap the peas and remove them from the pods.
blanch (optional, for longer storage):
- You don't need to blanch frozen peas, as they were already blanched before being frozen… skip to the dehydrating step if you are using frozen peas.
- Blanching is an optional step that will help preserve color and nutrients for longer storage. If you will be using your dried peas within three months or so, you could skip this step, but for longer storage (up to 2 years) it’s recommended.
- You can steam blanch in a colander or do a quick boiling water bath dunk. You are not trying to cook the vegetables, just set the color.
- If you are water-blanching, you can add a teaspoon of citric acid per gallon of water as a preservative, but this may dull the color.
- Have your ice-bath ready before you start blanching so that you don’t overcook your peas.
- Steam the peas for 3-5 minutes, or submerge in the boiling water bath for about 2-3 minutes, then cool the peas rapidly in an ice bath. They should still be fairly firm and snappy, not soft or mushy.
- Work in small batches so that the water stays hot- you want to keep the water at a full boil if you are water-blanching, and do a thin even layer if you are steam-blanching.
dehydrate:
- Spread the peas out in an even single layer on your dehydrator trays (or sheet pans, if you are oven drying).
- I like to use silicone mesh liners in my dehydrator trays, which keeps the peas from sticking to the trays or falling through them. The pieces will shrink a lot!
- Most dehydrators will finish drying peas in 8-12 hours at 135 deg F.
- If you are oven-drying, set you oven to the lowest temperature (usually 150 deg F) and prop the door open (best only done in winter, and not very efficient). Oven dehydrating takes about twice as long, about 16-20 hours, though this will depend on your oven and the humidity.
- Your batch size and how closely the slices are spaced will affect the drying time, so adjust as needed. Dehydration times will also vary with the power of your dehydrator… check your dehydrator manual for guidelines if you have one, but know that these are usually optimistic estimates unless you live in the desert!
- It’s better to over-dry than under-dry, especially with veggies like peas that you will be re-hydrating before use. However, check your dried peas frequently towards the end of their drying time, as the sugars in them can scorch if they are dried too long or at too high heat.
- Dry them until they are completely dry all the way through. They will be shriveled and a fraction of their beginning size, but should still have a nice bright color.
condition:
- This is a good practice with all home dehydrated foods, and will help prevent mold in storage and equalizes moisture content in your dried foods for more consistent quality.
- Place your freshly dehydrated food into a clear glass jar with a tightly fitting lid.
- Do not overfill the jar. You want the jar less than 2/3rd full, with room to shake and move the produce around. Split into several jars if necessary.
- Leave the dried food in the jar for several days or up to a week, shaking the jar periodically and checking for condensation and clumping that indicate uneven drying.
- If you see condensation in the jar, immediately return to the dryer or oven.
package & store:
- After conditioning, divide your dehydrated peas into storage containers and seal.
- You can pack in glass jars (new or reused) with tightly fitting lids, airtight plastic containers, and vacuum or mylar bags.
- Glass jars and mylar bags are best for long-term storage (plastic is porous and will let oxygen in over time, even with a vacuum seal or moisture absorber packets).
- Some people like to freeze-treat their home dried foods for additional protection against pests or spoilage. This is not the same as freeze-drying, but may extend shelf-life. If you have room in your freezer, you can store your dried foods there. Make sure the bag is sealed and airtight, or you may create problems with condensation when you remove the bags from the freezer.
More pantry staples and food preservation recipes:
- How to Dehydrate Celery & Make Homemade Celery Salt
- Meyer Lemon Salt: How to Make Homemade Citrus-Infused Salts
- How to Make Salted Lemon Pickles
- Spiced Golden Pickled Eggs (easy refrigerator pickle recipe)
- How to Make Chicago-Style Giardiniera
- How to Make Butter-Swim Biscuit Mix for Fresh Biscuits in a Flash!
- Southern Cornbread Dressing with Fresh Cranberries & Herbs
- Smoky White Bean Soup with Pork & Collards (Instant Pot Recipe)