CANNING: How to Make Traditional Beef or Venison Mincemeat
- Beef or Venison Mincemeat Ingredients
- Kitchen Equipment Needed
- How to Can Traditional Mincemeat with Beef or Venison
- Storage and Safety Tips
- Traditional Beef or Venison Mincemeat
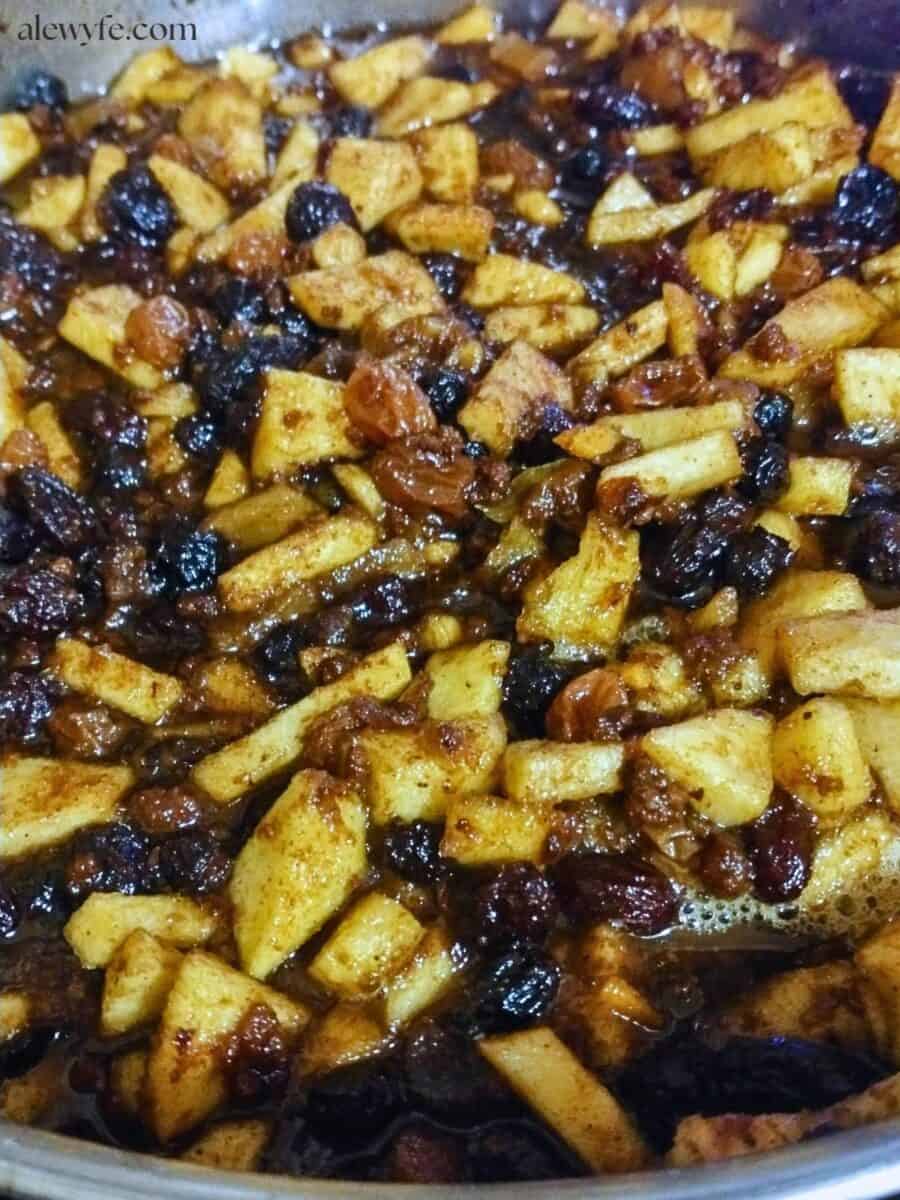
This old-fashioned recipe for canning traditional mincemeat contains both ground meat and suet, but don’t worry, it doesn’t taste particularly meaty. It’s very substantial and delicious, and makes the most delicious mince pies, tarts, and pastries. This style of mincemeat filling has a hearty richness that more contemporary fruit-only fillings lack. I know, it might sound weird to modern palates, but it’s really quite tasty and you should give it a try!
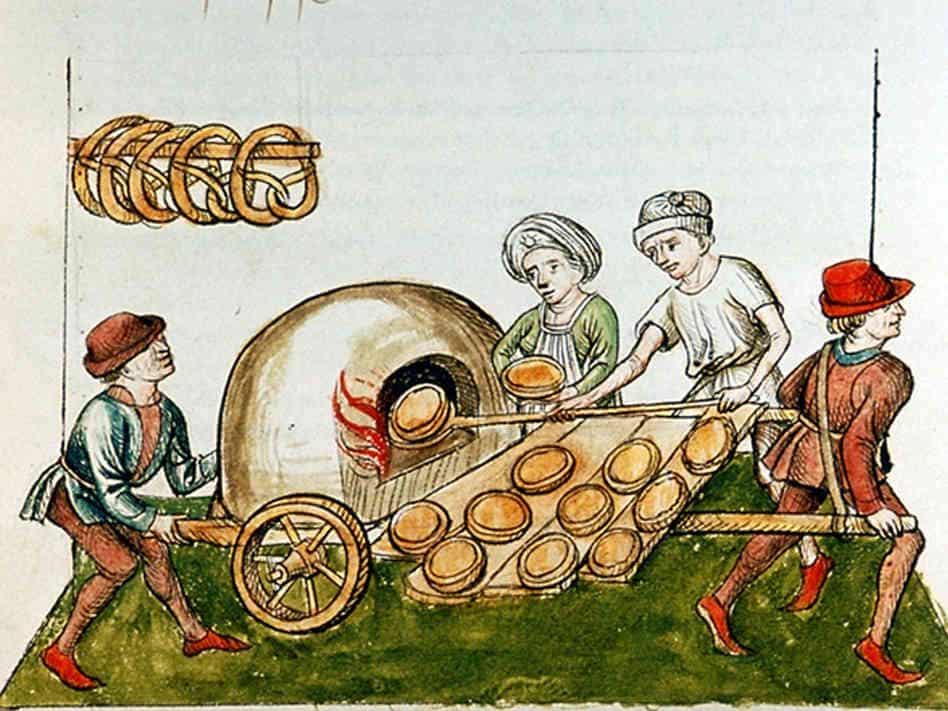
Have you ever wondered how the dried fruit filling for mincemeat pies got its name? The original recipes, with published examples dating back to the 1400’s (in “The Forme of Cury”, from the kitchens of Richard II), included minced meat and suet, seasoned with spices and sweetened with dried fruit and honey.
By the Victorian era, pies with just fruit and suet or only sweetened dried fruits were beginning to gain in popularity, though the traditional mincemeat pies were still common. The fillings get sweeter as time passes, reflecting the availability of cheaper sugar imported from the colonies. The older type of meat and fruit pie was falling out of favor by the end of the Victorian era, and probably a final casualty of wartime rationing when meat was scarce and expensive. Most folks stuck to the newer, fruit-only recipes going forwards, and almost all commercially available mincemeat fillings and mince pies now are sans meat (though may still contain suet).
But this is a real mincemeat pie filling, echoing the flavors of winter holiday tables of many centuries past. And if you pressure can it, you can give jars as homemade gifts that don’t have to be refrigerated so you can wrap them up and put them under your tree, or add to a gift basket for a nice host or hostess gift to take to holiday parties. Make your Christmas or Yule pies extra special with this authentic mincemeat… it’s so good!
The spiced dried fruit and meat filling, often steeped in brandy or sweet wine, was baked in a sturdy pastry “coffin”, “case”, or crust, and was a way to preserve meat without refrigeration. The alcohol and spices added flavor but also helped preserve the filling.
It’s also important to remember when considering historic recipes and methods of food preservation that they are often incompatible with modern buildings (and our greater understanding of food safety and how to prevent, say, dying of dysentery before Epiphany).
While I don’t recommend that you rely on the spirits and spices to keep your pies fresh today, you can put up pretty jars of old-fashioned mincemeat filling safely if you have a pressure canner!
There is no alcohol added to this filling recipe before canning, but you can add a few tablespoons of brandy, rum, sherry, or sweet wine when you open the jars. Stir it in before using the filling if you want your pies to have a bit of a spirited kick!
Beef or Venison Mincemeat Ingredients
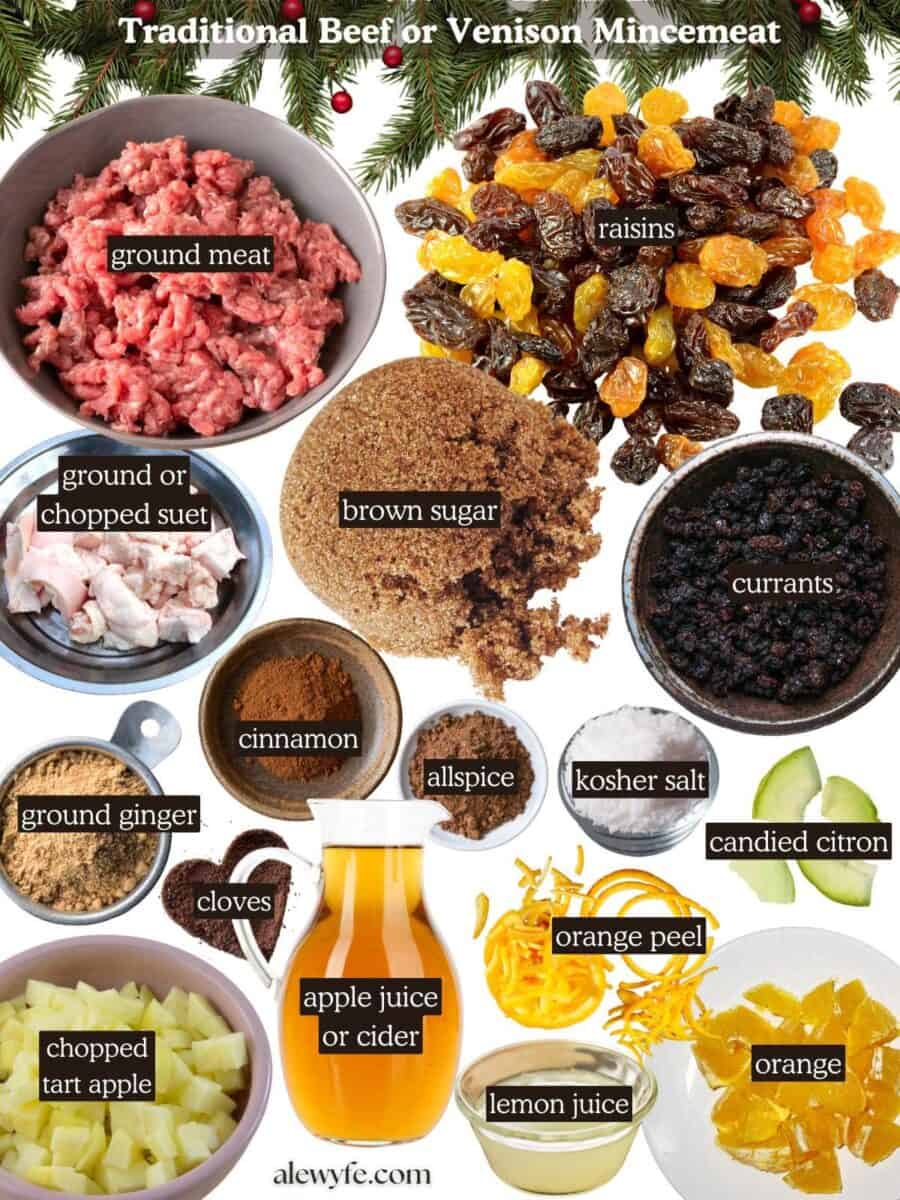
Ground Beef, Pork, or Venison:
The original Ball canning recipe calls for ground beef, though you could also use ground venison, mutton, lamb, or elk, or lean ground pork, or a combination of meats. Do not use ground poultry like chicken or turkey if you are canning your mincemeat.
Ground or chopped suet:
This is going to be a harder ingredient to find if you don’t buy large cuts of beef or have a butcher shop or meat counter that can get it for you. Suet is unrendered beef tallow, or fatty beef trimmings. You can save the fat cap from beef roasts or hopefully you have a full-service meat counter that can sell you some food-grade suet!
The best fat to use for this is true suet, which is the clean, whiter visceral fat around the kidneys. The pork equivalent is leaf lard, which is a good substitute if you can find it un-rendered, though the flavor is slightly different, and suet is firmer and has a different mouthfeel.
You’ll want to chop it very finely, or preferably, run it through a meat grinder. You could also dice it and then use a food processor to chop it into crumbly pieces. Do this when it is very cold or almost frozen. You don’t want to make a paste, just a fine chop or coarse grind.
Apples:
You can use any sweet or tart apples, or a blend. If you have a choice, use a firm, tart baking apple. This is a rich, heavily spiced filling and a brightly flavored tart apple that will hold it’s shape works better here.
Raisins:
You can use regular dark raisins, golden raisins, or a blend. I prefer an equal mix of dark and golden raisins.
Pretty much all raisins are seedless now, but traditionally you’d have had to remove the seeds before drying the grapes or pick them out of the raisins before making this filling. When you look at historic recipes that instruct you to “stone” the raisins, this is what they mean (not NEARLY as fun as it sounds, ammirite). Aren’t you glad you’re not doing that? Talk about tedious… though it makes you appreciate the amount of work that went into making these pies in the past!
Currants:
The original recipe calls for two pounds of dried currants. Dried zante currants are actually not currants at all, but tiny raisins. If you cannot find currants, you could substitute more raisins (chopped finely to match the texture and density) in a pinch, but don’t swap other dried fruit if you are canning your mincemeat.
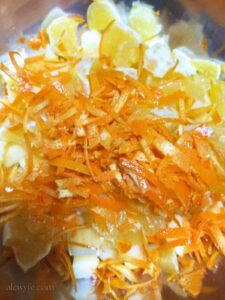
Citrus:
This recipe uses candied citron peel, fresh orange peel, chopped fresh orange pulp (seeds and any coarse membranes removed) and lemon juice. Citrus fruits are in season in the winter, and add a bright flavor and aroma to the filling. Candying the peel tames the bitterness and makes the whole rind edible to make the most of your citrus fruits. It also preserves the flavor of tart citrus for enjoying out of season, or to make a product that is more easily shipped, especially handy pre-refrigeration.
If you don’t have or can’t find candied citron, you can substitute commercial or homemade candied lemon or orange peel (slice thin strips of fresh citrus peel and simmer them in a heavy simple syrup until they are soft and totally saturated with the sugar syrup. Simmer on very low heat until the syrup is very thick, or 230 F. Let them cool and dry on a rack or piece of parchment, and save the candy orange syrup for flavoring pastries and teas).
Citrus fruits would have been an expensive imported treat in the UK and other cooler northern climates when these fruity mincemeat pies were most popular.
In the 17th & 18th century, it was fashionable on wealthy estates to grow them indoors in heated glass houses called Orangeries, though of course not many people had access to these, or the fruits!
If yours was also a family that put an orange or clementine in the Christmas stockings, perhaps you know a bit about this history and what a rare and luxurious treat this fruit we take for granted would have been not too long ago!
Cider or Juice:
Use either sweet apple cider, apple juice, or white grape juice in your mincemeat. This adds moisture to the filling and a bit of sweetness balanced with acidity and tannins from the fruit. Yum.
Brown Sugar:
Light or dark brown sugar, packed to measure. The earliest mince pies were lightly sweetened with honey and fruits, but as sugar became more available, the amounts increased.
Honey is anti-microbial, and in the right concentrations, sugar does help act as a preservative as well, though the pressure canner is going to take care of that for us (and make sure we don’t give our guests botulism for Christmas, the worst White Elephant gift ever).
If you are not canning your filling, you can adjust the quantities of the sugar and other ingredients if you like, but if you are canning it, it’s best to stick to the recipe as written (with only adjustments made to the spice mix if you like, and the proportion of light to dark raisins).
Spices:
This mincemeat pie filling is flavored with a blend of sweet spices and a bit of salt. Ground cinnamon, nutmeg, allspice, ginger, and cloves season this sweet filling. These would have been very expensive (and kept under lock and key), so not all households would have added all of the spices, but you can! Ah, smells (and tastes) like Christmas!
Eggs may be like $17 a dozen right now and you might have to sell your blood (literal or figurative) to make rent, but your spice cabinet? Go look at it. Yes, even if you have a fairly regular assortment of seasonings, odds are that your modern pantry would make a medieval duchess WEEP envious tears. So you’ve got that going for you, which is nice? I think I’ll go out and buy a few more whole nutmegs, maybe another pound of peppercorns or bag of brown sugar. And why not, they keep for AGES.
BRB, gonna go boil up some cinnamon sticks and orange peels just to make it smell nice, not even to eat it. Look at the RICH GUY over here. I bet she puts vanilla in everything? She’s got pounds of salt in her cupboard? I KNOW. *dramatic braid toss* What could a nutmeg cost, like, three shillings? I care not!

Kitchen Equipment Needed
Pressure Canner:
No pressure canner? No problem, but you won’t be able to make your mincemeat shelf-stable. You can still make this traditional mincemeat recipe, but you’ll want to simmer the mixture on the stove or in a crock-pot for several hours instead of canning, and then refrigerate the jars of mincemeat for short term use or freeze the filling for longer storage.
If you need to can your mincemeat and don’t have a pressure canner, you’ll need to use a tested fruit-only recipe without meat or suet that is safe for water-bath canning.
You absolutely must use a pressure canner to safely can this traditional mincemeat. If you don’t have a pressure canner, you can freeze it, or use a water-bath safe tested recipe for a vegetarian version. Do not try to water-bath can low-acid foods!
You also can’t safely can this in an Instant Pot- they do not reliably build up enough pressure to safely can foods, especially low-acid foods like meat and veggies that require consistent pressure and long processing times. Botulism isn’t worth the risk… always pressure can low-acid foods like meats and vegetables in a suitable pressure canner.
I love my big All-American pressure canner, but any pressure canner that is large enough to hold at least four quart jars and that has a pressure weight and/or a tested pressure gauge will work (although you may need to adjust the batch size for your canner, or can the sauce in several batches).
For more information about canning basics and equipment, check out our introductory article:
CANNING: Equipment Guide- What Do I Need to Start Canning at Home?

Large Stockpot or Electric Roaster:
You’ll need a large, heavy bottomed stockpot or rondeu to simmer your filling. It’s best to use a pot with a thick bottom so that your thick, sugary filling doesn’t scorch. I prefer to use a stainless or enameled pot, though a large cast iron dutch oven would also work. If your pot has a thin bottom, spend extra attention stirring your filling and adjusting the heat if necessary if it begins to burn or stick.
Meat Grinder or Stand Mixer with Meat Grinder Attachment (optional):
If you have pre-ground meat, you can skip this. I like to grind my own meat whenever possible to have control over the quality and size of the grind, and am often working with venison that we processed ourselves. If you don’t have access to a grinder, or your meat is already ground, no worries, the recipe will still be great!
I use a meat grinder attachment for my KitchenAid, though you can use a stand-alone grinder if you have one, a hand grinder, or have your meat processor grind your venison, beef, or pork for you.
You can make serviceable minced meat working in batches with a food processor, but it takes care to get an even grind without making paste. You could also make mince by hand with a sharp chef’s knife, but that would be a LOT of work for a recipe of this volume! I strongly recommend either using pre-ground meat or using an actual meat grinder.
How to Can Traditional Mincemeat with Beef or Venison
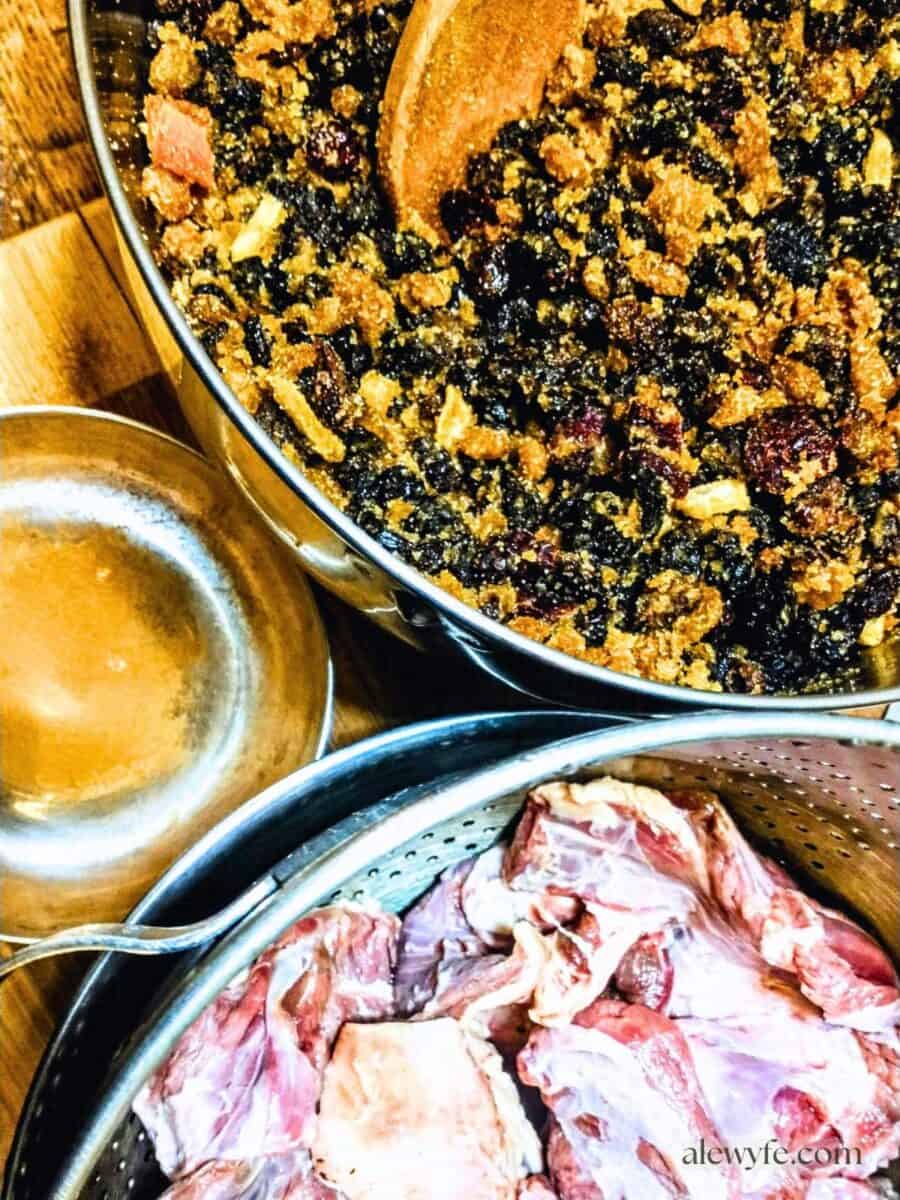
Brown the Meat:
- Preheat a large heavy pan or sauce pot. Heat the pan over medium-high heat so that the meat will sear and brown instead of just steaming.
- Crumble the ground meat into the hot pan. Work in batches if necessary to not crowd the pan. You may need to add it to the pan gradually unless you are using a wide roasting pan or rondeau.
Simmer Mincemeat:
- In a pot large enough to hold all ingredients, combine the crumbled cooked meat with the suet, dried fruits, lemon and apple juice, and all the spices and seasonings.
- Adjust seasoning as needed, adding a bit more salt or spices to taste if needed.
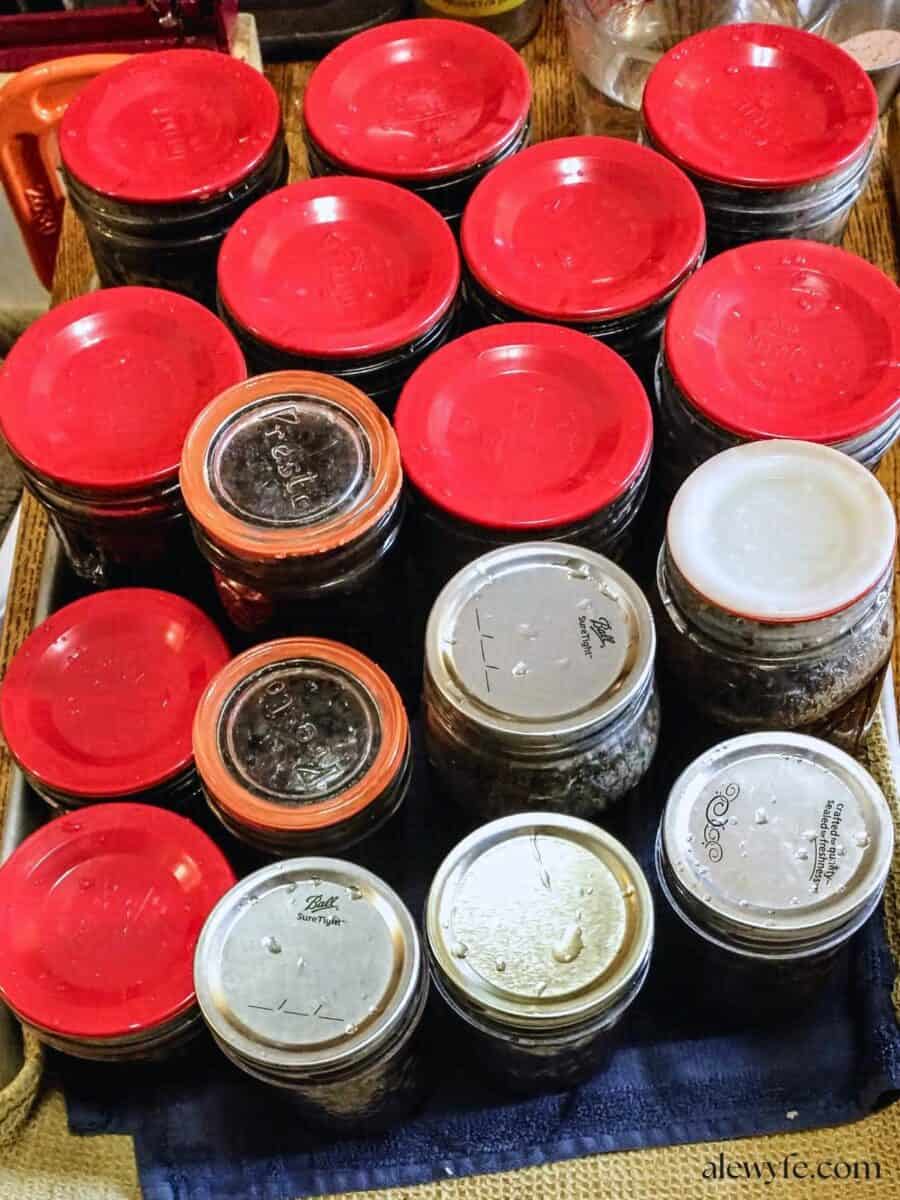
Prep Canner and Fill Jars:
- Wash and preheat your jars, and get your lids and rings ready. Fill your pressure canner with the recommended amount of water (check your canner manual, but at least several inches for this long processing time) and preheat it.
- Using a jar funnel, fill your quart or pint jars with your mincemeat. Leave 1″ of headspace below the rim at the top of the jar. Try to remove the dried bay leaves from the sauce as you fill the jars if you can find them, but you can also remove them after canning.
- Wipe the jar rims and top with new canning lids (or properly prepared reusable lids). Tighten the rings finger-tight (or according to manufacturer directions).
Process the Jars:
- Place the hot jars in the preheated pressure canner and seal the lid. Heat on medium heat. Vent the canner for 10 minutes once it starts steaming, then add the weight and bring the canner up to pressure over medium low heat.
- Process at 10 lbs of pressure (weighted canner) or 11 lbs (dial gauge). Adjust as needed using a canning altitude chart for elevations over 1000 sf (15 psi on a weighted canner or see chart in recipe notes).
- Process for one hour and thirty minutes (90 minutes) for pints, quarts, or mixed batches of pints and quarts.
- Reset the timer to zero and restart the count if the canner drops below the minimum processing pressure during this time.
Cool the Jars:
- Turn off the heat after the processing time is up. Let the canner rest undisturbed until the pressure returns to zero- do not remove the weight early to vent the steam faster.
- As soon as the pressure releases, carefully remove the lid. Wait another couple minutes, then remove the jars with jar tongs or hot pads, and place them on a towel or cooling rack. Cover with a towel if there are cold drafts.
- Leave undisturbed overnight or for at least 8-12 hours when the jars are fully cooled.
Check Seals
- After the jars of mincemeat have completely cooled at least overnight, remove the rings, check for seals, and wash the jars with warm, soapy water.
- Refrigerate any jars of mincemeat that did not seal and use those jars promptly. You could also reprocess them with new lids within 24 hours of the first processing.
Storage and Safety Tips
Remove the rings, check for seals, and wash the jars with warm, soapy water. Refrigerate any jars of canned mincemeat that did not seal and use those jars promptly. You could reprocess them with new lids within 24 hours of the first processing.
However, since the canning time is so long, the reprocessed jars will lose quality, and the flavor will suffer, I prefer to refrigerate any unsealed jars of filling and use those jars first rather than reprocess. You can also transfer to freezer-safe containers and freeze.
Label the jars and store in a cool, dark place. For best quality, enjoy most home-canned goods within 12-18 months, although they will be safe to eat while the seals are intact. Nutritional value and flavor declines slightly with longer storage (or improper storage conditions). Discard the contents of any jars that lose seals in storage, smell off, are bubbling, or hiss when opened, and sterilize the jar before using them again.


Traditional Beef or Venison Mincemeat
Equipment
- jar tongs & funnel
Ingredients
- 5 cups cooked ground venison or beef beef (about two pounds, crumbled and browned)
- 1 quart ground suet (about one pound)
- 3 lbs raisins (a mixture of golden and dark raisins)
- 2 lbs dried currants
- 3 quarts chopped, peeled, cored, tart apples (about 12 medium)
- 1 quart apple cider or white grape juice
- 4 ½ cups packed light or dark brown sugar
- 8 oz candied citron or orange peel
- 1 ½ cups chopped orange pulp (about two large oranges, remove seeds)
- ⅓ cup finely minced orange peel (about one large orange)
- ¼ cup lemon juice
- 1 tbsp salt
- 1 tbsp ground cinnamon
- 1 tbsp ground allspice
- 2 tsp freshly grated or ground nutmeg
- 1 tsp ground cloves
- ¼ tsp ground ginger
Instructions
Brown the Meat:
- Preheat a large heavy pan or sauce pot. Heat the pan over medium-high heat so that the meat will sear and brown instead of just steaming.
- Crumble the ground meat into the hot pan. Work in batches if necessary to not crowd the pan. You may need to add it to the pan gradually unless you are using a wide roasting pan or rondeau.
Simmer Mincemeat:
- In a pot large enough to hold all ingredients, combine the crumbled cooked meat with the suet, dried fruits, lemon and apple juice, and all the spices and seasonings.
- Adjust seasoning as needed, adding a bit more salt or spices to taste if needed.
Prep Canner and Fill Jars:
- Wash and preheat your jars, and get your lids and rings ready. Fill your pressure canner with the recommended amount of water (check your canner manual, but at least several inches for this long processing time) and preheat it.
- Using a jar funnel, fill your quart or pint jars with your spaghetti sauce. Leave 1″ of headspace below the rim at the top of the jar. Try to remove the dried bay leaves from the sauce as you fill the jars if you can find them, but you can also remove them after canning.
- Wipe the jar rims and top with new canning lids (or properly prepared reusable lids). Tighten the rings finger-tight (or according to manufacturer directions).
Process the Jars:
- Place the hot jars in the preheated pressure canner and seal the lid. Heat on medium heat. Vent the canner for 10 minutes once it starts steaming, then add the weight and bring the canner up to pressure over medium low heat.
- Process for a full 90 minutes for pints, quarts, or mixed batches of pints and quarts.
- Turn off the heat after the processing time is up. Let the canner rest undisturbed until the pressure returns to zero- do not remove the weight early to vent the steam faster.
- As soon as the pressure releases, carefully remove the lid. Wait another couple minutes, then remove the jars with jar tongs or hot pads, and place them on a towel or cooling rack. Cover with a towel if there are cold drafts.
- Leave undisturbed overnight or for at least 8-12 hours when the jars are fully cooled.
Check Seals
- After the jars have completely cooled at least overnight, remove the rings, check for seals, and wash the jars with warm, soapy water.
- Refrigerate any jars of mincemeat that did not seal and use those jars promptly. You could also reprocess them with new lids within 24 hours of the first processing.
Notes
Dial Gauge Altitude Adjustment Chart:
- 0- 1,000 11 psi
- 1,001- 2,000 11 psi
- 2,001- 4,000 12 psi
- 4,001- 6,000 13 psi
- 6,001-8,000 14 psi
- 8,001-10,000 15 psi
Loved this? Try these other holiday recipes!
- Yule Moon Crescent Cookies
- How to Make Old-Fashioned Pinwheel Cookies
- Spekulatius (or Spekulaas) Shaped Spice Cookie
- Yule Love these Homemade Spritz Cookies (no cookie press needed)
- Soft Blackstrap Molasses Spice Cookies
- Spiced Cranberry Nut Biscotti
- Cranberry Apple Crumble Pie
- Spiced Cranberry Mustard
- Five Alarm Beef or Venison Chili (Pressure Canning or Freezer Meal-prep recipe)
- French Onion Soup (Pressure Canning or Freezer Meal-Prep recipe)
- Cajun Red Beans and Sausage (Pressure Canning Recipe)
- Chipotle Barbacoa Beef or Venison (Pressure Canning recipe)
- How to Make Fresh Pasta from Scratch
You start with making minced meat and then switch to filling jars with spaghetti sauce. I don’t get it? Just looking for psi and time for minced/ liverwurst canning. Thanks
Ope… the “spaghetti sauce” was a typo (from coping that step of filling the jars over from another of my recipes and missed that edit). Fixed now, thanks for letting me know!
As for a time and psi for liverwurst, that’s a very different product than this mincemeat recipe, so you can’t substitute one for the other. The density, pH, and heat penetration will be different than this recipe which has fruit and other ingredients as well as the minced meat. I’m not sure there is a safe home processing time for such a dense meat puree, especially if it’s a cured product. I would recommend freezing liverwurst rather than attempting to can it. There are safe pressure canning instructions for cooked ground sausage crumble, or cut links or patties of fresh sausage, but I would not recommend canning liverwurst or other pates from both a food safety and product quality standpoint.
If you want a processing time for plain “mince” meaning ground meat, that’s a different process. I don’t have instructions for that published currently (yet), but the short version is that you need to cook the ground meat first as crumbles, patties, or meatballs, (do not raw-pack ground meat), top up with water, stock, or tomato juice. Pack in jars with 1″ of headspace, and then pressure can at 10 PSI (adjusted for altitude) for 90 minutes for quarts, 75 minutes for pints. Do the longer time for a mixed canner load of pints and quarts, and process smaller jars for the same time as pints.
Hope that helps!