CANNING: Equipment Guide- What Do I Need to Start Canning at Home?
- An Illustrated Guide to Basic Canning Equipment
- Water-Bath Canning Equipment & Supplies
- Pressure-Canning Equipment & Supplies
- Recommended Safe-Canning Resource Guides
- Read More about Canning Basics & Guides!
An Illustrated Guide to Basic Canning Equipment
There are a few specialized tools that will make your life easier if you are going to be canning a lot, and this canning equipment guide will cover them in one comprehensive list.
Don’t get overwhelmed if this looks like a lot! All you really need to get started are a big pot that is taller than your canning jars, clean canning jars and rings, and new canning jar lids… and of course some fresh produce and a safe canning recipe!
But, having a few more specialized or sturdy kitchen tools will make this job easier and safer, and I’m going to explain what they are and how they work in this guide.
Note: the links in this canning equipment guide are Amazon affiliate-links, so if you end up buying any of them there we’d appreciate it if you use them so we can earn a small commission at no additional cost to you (these are all things that we use and recommend. This is not a sponsored post, just a review and guide to stuff we use and like).
Or just use this guide as a visual aid for finding these things locally, or second-hand if you can!
Most people start with water-bath canning high-acid foods like tomatoes, fruits, jams and jellies, pickles, salsas, and chutneys, so I will start this list there with the basics that will be enough for most hobby canners and then get into more specialized tools and supplies.
The good news is once you have this stuff, and a bit of practice, the only thing you need to start pressure-canning low-acid foods (like non-pickled vegetables, meat, fish, stocks, beans, certain soups, and tested meal-in-a-jar recipes) is a pressure canner. The best ones aren’t cheap, but will also last basically forever, so it’s a buy-once, cry-once scenario, unless you luck out and find one second-hand. More about that later… let’s start with the basics!
Water-Bath Canning Equipment & Supplies
Water-Bath Canner or Large Stockpot:
You’ll need a large sturdy pot, ideally stainless steel or enameled, that is deep enough to cover your jars with at least an inch of boiling water and room at the top to prevent boil-overs. You can probably use a stock-pot you already have at home for small batches of jams or salsa in pint or half-pint jars, but if you are going to be doing larger batches or larger jars of pickles and fruit, you want a large canning pot!
You can get by with a cheaper aluminum pot if you’re just canning in it, but a non-reactive pan made of heavier-gauge metal (especially with a thick bottom for even heat) is a lot more useful and can also be used for cooking food (without ending up with brown tomato sauce or metallic-tasting food).
It’s an essential piece of equipment for any serious cook, homesteader, homebrewer, or DIY kitchen craft enthusiast.
You can often find these at thrift stores, estate or garage sales, or restaurant supply stores, and sometimes sold as a kit with some basic canning tools already included, like this classic enamelware pot (like the one your mom or granny might have had, if you grew up around this sort of thing). They’re also a nice basic black and white speckle pattern that will match almost any kitchen (especially if like me, you’re going to store it on top of your cabinets where it’s visible all the time). Enameled pots need to be handled with a bit more care than a stainless pot (if the enamel chips, the steel underneath can rust or pit) but are also a lot less expensive and have their own rustic charm.
The set in the link above is really nice, as it comes with not only the basics like a jar rack, tongs, and funnel, but also an enameled colander for washing produce and another enameled two-pot blanching set that nests together (the colander also nests in the top of the blanching pot, so you could also use it for steaming veggies or reheating rice). If you don’t need those extras, you can get a more basic (and less expensive) set that doesn’t include them!
What else can you do with your canning pots?
If you don’t already have a nesting strainer-pot like this one in your kitchen, you will find uses for this alllll the time. I have a couple smaller similar strainer pots from Ikea that we use almost daily for cooking pasta or blanching produce, and that have stacking steamer inserts that sit on top that I use for dumplings and steamed buns, or even making an improvised cheese or tofu press. Unfortunately they don’t make the sets we have anymore! (Sad-trombone sound… you can find them on ebay though!).
These aren’t uni-taskers… you can also use these pots for stockpots (especially big batches of stock, chicken soup, or ragu to pressure can), seafood or crawfish boils, big batches of mulled wine or cider for holiday parties, even making cheese or yogurt!
I use my big water-bath canning pots filled with warm water as incubators for mason jars of yogurt, buttermilk, creme fraiche, or other cultured dairy products. I cover them with a thick towel if I’m going to leave them overnight and wake up to freshly set yogurt. If it’s really cold you may need to stick a thermometer in the water bath and top up with hot water occasionally, but it’s a lot simpler than storing a dedicated appliance or fussing with my Instant Pot (and doesn’t use any electricity).
I also have used my big water-bath canning pots to make a bain marie (water bath) for soapmaking and infusing oils for salves, not directly in the pot, but in a large stainless steel bowl that nests in the top. Put hot or slightly simmering water in the pot underneath, and set a big stainless mixing bowl on top to melt base oils or beeswax, or warm up your soapmaking oils to the appropriate temperature to combine with your lye bath.
You’ll definitely find a lot more ways to use these pots than just canning. Bobbing for apples, perhaps, in some far-off future world where we aren’t grossed out by dunking our heads open-mouthed in a communal pot for slobbery apples in the same pot as a bunch of other people? Yeah, no, maybe that’s something best left in past. But definitely do mull that big batch of cider to share with your friends and family at your next fall gathering!
Canning Accessories:
If you don’t buy an all-in-one kit (especially if you already have a workable stockpot), you’ll want to pick up some canning tools and accessories. You can usually buy these together in a set for less than buying them individually, unless you already have some of these.
Jar Tongs:
These are basically indispensable tools if you are going to do any amount of canning. It’s the best and safest way to move hot jars into and out of the water bath or pressure canner. You can use regular tongs on empty jars but it’s still risky and a good way to get burned or to break or chip your jars.
This style of jar tongs has a curved silicone-coated part that grabs the jar (especially right below the lid where there’s a rim between the lid ring and jar shoulder.
These are somewhat of a uni-tasker but nothing else does this job as well, and they’re definitely worth the little bit of space they take up in your canning drawer! They make handling hot jars sooo much safer and easier.
Jar Rack:
If your canning pot didn’t come with a jar rack, it’s a handy tool! You either need one of these racks, or another trivet or false bottom to prevent the bottoms of the jars from sitting directly on the bottom of the canner to prevent them from scorching or breaking. You can also use a silicone trivet (like for an Instant Pot) or a wire rack that fits the bottom of the pot.
There are also flat metal disks with perforations to allow heat transfer and water or steam movement through the canner that you can use to separate layers if you are doing a double-stack of smaller jars or have a very large canner which can be used on the bottom of your pot.
I use both- one of those perforated discs as a false bottom and then a wire rack on top, which helps keep the jars in place and protect them from getting scorched or breaking from banging around in the boiling water.
Canning Funnel:
Save yourself a ton of frustration and get one of these. Not only will you used it for canning, but any task where you are pouring from a bag into a jar or container… We use ours for:
- filling our coffee bean canister without spilling them everywhere
- decanting dry goods and pasta into storage containers
- putting away leftovers (especially liquids like stock or soup to store in jars or other small containers in the fridge)
- straining infused liqueurs
- making cold-brew or other beverages.
It’s a seriously handy piece of kitchen equipment! I have a plastic one that came in a multi-piece set of canning supplies, and an antique aluminum one that is pretty dinged up but still functional. If I were buying a new one though, it would be this NorPro stainless one… they make good restaurant-quality kitchen equipment and this one should last.
Spatula or Debubbling Tool:
You can really use any thin flexible spatula for this, or even a butter knife if you’re careful not to bang the bottom of the jar or chip the rim with it. The handy part of a purpose-built debubbling tool like this is the other end, which has graduated measurements to check the “head-space”, or distance from the jar rim to the top of whatever product you are canning.
This varies based on the recipe and accuracy does matter here, especially to get a good rate of sealing (the amount of liquid vs air can affect the vacuum seal in the jar). You don’t need a specialized tool to measure this but it can make it easier, especially until you train your eye what each amount of head-space looks like in a jar!
Tongs:
Most canning tools come with a set of flimsy wire tongs with a coated handle and a center rivet. I have a set of those and they sit in my canning drawer, almost never used. I reach instead for one of the two pairs of professional stainless tongs that are hanging up on the utensil rack next to our stove.
The best pair I have are these Adcraft professional kitchen tongs (that came with my culinary school knife roll and tool kit), which have a slight pincer grip. They’re awesome for handing for handling hot food, charring peppers over a grill, grabbing jars or lids from hot water (don’t boil modern canning lids though, that’s old advice, they just need to be clean as the coatings on the lids have changed over time and are softer now, and can be damaged by pre-boiling… if you feel you have to heat them, keep them below a simmer).
Anyway, every cook and kitchen needs at least one set of sturdy, springy stainless tongs and these are the winners. Get another set to keep with your grilling tools if you like… they come in three lengths- I’d get the 12″ ones that I have or the longer ones if you have a deep pot or also want to use them for grilling.
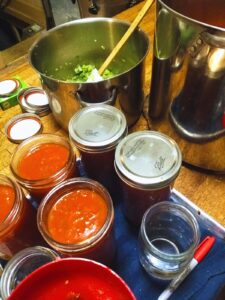
A Sturdy Ladle
“Ladle, ladle, ladle, this kitchen tool can stay”… Another tool every kitchen should have is at least one stout stainless ladle, or ideally, an assortment of two or three in different sizes.

This sturdy stainless steel ladle is made by Vollum, and you’ll be calling it “my precioussssssssss” in no time (no wait, that’s the Gollum ladle, which can only be obtained after an arduous and perilous trek, not ordered on Amazon for same-day delivery).
These are the go-to tool for:
- serving soups and sauces or filling canning jars
- filling jars with fruit purees (paired with your jar funnel)
- topping up raw or hot pack jars of veggies or fruits with syrup, brine, or hot water,
- and adding or removing hot water from your canning kettle if you overfilled it slightly.
Remember that mulled cider or spiced glühwein you were going to make in your big new canning pot? You’re going to want this to serve it from your big speckled or shiny pot! That handy hook on the side keeps it from falling into the depths of your cavernous canning pot, hooray (just don’t burn your fingers if you leave it in the pot!).
A Kitchen Timer:
Timing is critical for safe canning, both for blanching, simmering jams and salsas, and especially for tracking processing time to make sure your canned goods are safe! You can use the timer on your phone, oven, or a separate kitchen timer.
I especially love these super-simple visual timers, and have one for the kitchen and a second one for my desk in my office and use both of them constantly, both for timing kitchen tasks and canning and also for staying on track when writing, cleaning, and doing other tasks (we’re a neuro-spicy household and these things are invaluable productivity and motivational tools).
If you have ADHD (or are trying to can while multitasking or especially parenting, or are otherwise time-blind) and you don’t have one of these, stop what you’re doing right now and go get one, I’m not even kidding (plus if you don’t do it now, you won’t, right?).
The downside is that they’re not terribly loud, and don’t keep beeping continuously until you shut them off, but the trade-off of being incredibly easy to set and to read from across the room is worth it. I’d recommend getting the silicone covers for these to help them stand up to bumps and falls in a busy kitchen and help keep them cleaner.
I also like to keep a notepad or index cards handy or use the little dry-erase board on our fridge to make note of processing start and end times, and any adjustments to the recipe that I want to remember for later.
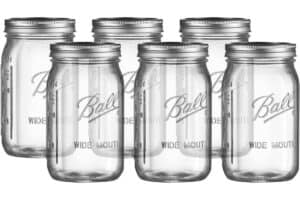
Mason Jars and Canning Jar lids and rings:
The ubiquitous Ball mason jar with a two-piece metal lid is the most common, and definitely what you should be using if you are starting out. The jars come in standard sizes (from 4 oz up to 64 oz, though those half-gallon jars have very limited canning applications and are more often used for fermenting and dry pantry storage or making infusions, cold brews, and teas).
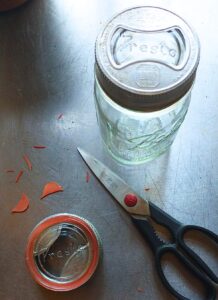
For canning, you’ll need a new metal canning lid each time you can something, as the sealing compound on the rim is designed for a single use. You’ll find rebel canning advice for restoring or reusing those lids, but let’s save that for an actual apocalypse and just buy new lids in bulk so you always have some on hand when you’re ready to can!
It’s just not worth risking either food poisoning, or wasting your food and hard work with lost seals, to save fifty cents. I’ve had better results with name-brand lids than the off-brand no-name stuff you can buy online, which are sometimes fine and sometimes so flimsy or poorly shipped that they’re practically unusable.
Use new canning jar lids and check your canning rings for dents. Discard any lids or rings with dents or rings that are too rusted (or use them for crafts). Dented rings can interfere with getting a good seal, especially if they’re dented at the top where the sealing compound meets the jar rim.
Reusable lids (not the same as reused lids… we’re going to talk about these next) are especially prone to seal-failure if you process them with dented rings. I’ve found that regular lids are a bit more forgiving, but if you’re like most people who have canned more than once, you’re swimming in jar rings, since you get new ones every time you buy more jars!
About Reusable Lids, Vintage, and Euro-Style Canning Jars
(Note: none of the following canning jars or lids are USDA-approved)
If you do want to experiment with reusing lids, make an investment in the ones that are designed for that. There are a few companies manufacturing plastic-resin lids that use a rubber seal like Tattler or Harvest Guard that work with standard regular or wide-mouth jars and rings.
There’s definitely a learning curve to tightening the bands correctly and getting the seals on these right, but I’ve had good results with them so far.
I’d recommend practicing getting a good seal with these lids by first canning water, then lower-value foods (tomatoes or fruit from your garden, or jams that store well in the fridge) before risking your next batch of long-simmered ragu or expensive meat or fish or precious game meat.
I’d also recommend picking either Tattler or Harvest Guard and sticking with them, as they look almost identical but the rubber seals are not the same, so it would be a nightmare to keep straight if you have a mixed collection.
Vintage Glass “Universal” Lids
I have a collection of older traditional three-piece vintage glass mason jar lids with a metal “butterfly” ring and rubber seals, and have been experimenting with them (Shhhhhh… don’t tell the Canning Police). They’re similar to the Gem, Jewel, or Crown jars that are still commonly used in Canada.
The original rubber seals for those #10 “universal” vintage glass lids that fit standard mason jars (when used with the taller vintage zinc or aluminum butterfly rings) are no longer manufactured, so you have to experiment with modified Weck or Tattler rubber seals, neither of which are a perfect fit.
The processing technique for these is similar to Tattler or Harvest Guard lids, but the lid snugness before and after processing is a lot harder to get right. I have a high rate of failure with these lids, even after experimenting with band tension, but they’re still fun to try out, and I’m getting better results after a lot of practice.
I often will do one or two of these in a batch of canning, so that if they fail to seal, it’s not a big deal. I just pop those jars in the fridge and use them first. But when they seal, they seal really, really well!
The non-original rubber seal diameter or thickness of the trimmed Weck or thinner Tattler rubber rings definitely don’t help my seal rates… But, it’s nice that there is only glass and rubber seal in contact with the food, which I prefer to the plastic lids or the liners and sealing compound in modern lids.
Don’t try canning with the old one-piece zinc and glass lids- this DEFINITELY isn’t safe! Save those for your sewing notions or dry storage of herbs and pantry goods, if you want to use them.
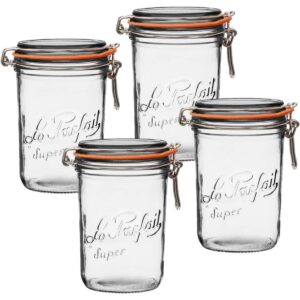
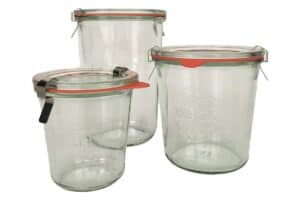
You can also find glass-lidded jars with wire bails like the European Le Parfait, Bormoli Rocco, and Kilner, or Weck jars with metal clips. Make sure they are the heat-resistant borosilicate glass that can be used for canning, and not look-alike pantry storage jars.
None of these are USDA-approved for canning, but are regularly used in other countries for preserving foods. As long as you follow safe processing directions, I feel comfortable canning with these Euro or vintage style jars and lids.
Unlike the one-part screw top lids, you can determine that the jar has created a vacuum when you unlatch the wire bail on the completely cooled jars. But there’s definitely a learning curve or a possibility of a weaker seal, so they’re better left to canners with more experience, and for relatively safer high-acid foods.
If you use the terrine-style jars with the wire bail seals or Weck jars with clips, remember to remove the lid clips or un-clamp the bail to check for seals after the jars have completely cooled (at least 8 and up to 24 hours after processing), and store them that way.
If you leave the wire bails clamped, it’s possible for a false seal to form (when the jar loses the vacuum seal in storage, but the lid seems sealed because it is stuck to the rim with food residue). This is one of the same reasons you should store your regular canned goods without the metal rings, and to not stack jars.
Just like with regular canning jars, you should promptly refrigerate or reprocess any jars that didn’t seal, and discard the contents of any that lose the vacuum in storage, as this can be a sign of spoilage, and if not, the contents could be contaminated with harmful bacteria or mold (the jars can be sterilized and reused, of course).
Pressure-Canning Equipment & Supplies
Pressure Canner
This is an investment, but if you buy the right one you’ll only have to do it once! I recommend an All-American canner if you can get one and have a gas stove… they’re expensive, yes, but will outlast you and because they have a metal-on-metal seal, you never have to worry about finding replacement gaskets.
They’re US-made in Wisconsin and parts are backwards-compatible… I was able to order a new pressure gauge, and parts to replace the safety valve petcock on my Granny’s old canner with a weight, which makes canning much easier and safer- the threading for the parts is the same. This is a sturdy piece of equipment that is designed to be maintainable and to last for generations.
Although, those new brightly colored 921’s like the Saffron one below are swoon-worthy (they also come in neutral Barley, bright Kiwi, a smoky Storm grey, and a Berry Blue if you don’t love orange kitchenware like I do, or of course, the slightly less expensive classic shiny aluminum that will mellow to a dull patina over time like the one I have).
The new enamel ones are quite a bit more expensive though, so you pay for that bling. If I ever win the lottery, I won’t tell anyone, but there will be signs…
If you pick up an old one from a relative or an estate sale, either take it to your local county extension office to have the gauge checked, or replace it with a new one. Unfortunately a lot of extension offices no longer do testing, so replacement may be your only option, but they’re pretty inexpensive.
I recommend only buying a canner that has both a dial gauge and a weight, like the modern All-American canners.
On this style of canner, the pressure gauge is there as a safety measure to let you know when you should start listening for the weight (or to let you know that the canner isn’t venting properly and is dangerously over-pressurized, which can cause siphoning in your jars or worse if you don’t adjust the heat!).
It also is an indicator that the pressure has released when the canner is cooling, so you don’t remove the weight too early and risk steam burns or rapid pressure changes in your jars.
A “happy” All-American canner should sound like this (note, if you have a Presto or other canner, follow your manufacturer’s recommendations, which may be different- some canner weights are designed to constantly jiggle at pressure):
You can also hear from across the room that your canner is at the right pressure, without having to sit and watch a dial for an hour or more, which is enormously helpful. Ain’t nobody got time for that, right? Just stay within earshot once you’re familiar with your stove settings and your canner, and you can hear that all is well, and that the weight is happily venting just enough and not too much.
If you don’t have the budget right now (or ever) for an All-American Canner, or if you have an induction stove and need something stainless-clad, a lot of people love their Presto canners.
I don’t have experience with them, but they’re a good alternative option if you need something less expensive, lighter weight, or induction-compatible! They’re a fraction of the price of a new All-American, and can be a great first canner or auxiliary or back-up canner if you occasionally make double batches or need to process a lot of meat, fish, or vegetables on multiple burners.
Why Do I Need a Pressure Canner? Can’t I Just Can in My Instant-Pot?
Nope! If you’d like a longer explanation of why you need a pressure canner, not a pressure cooker or Instant Pot to can low-acid foods, you should read this detailed article on the subject from the National Center for Home Food Preservation (note- they just updated their website and I’m having a hard time finding that article that was linked there… drop me a note in the comments if you know where it went!).
The TL;DR is that to be a USDA-approved pressure canner, the pot must accommodate at least four quart jars vertically with the canner lid closed, have a way to vent steam for the allotted amount of time before pressurizing, and a calibrated dial gauge or weight to verify that the canner is at the proper pressure for the entire processing time.
There are lots of brands and styles of pressure canners that meet those criteria, but an Instant Pot unfortunately isn’t one of them. You can buy electric pressure canners that are safe to use though, and many people swear by them for their set-it-and-forget-it convenience. Although they are also still not USDA-approved (there are tests ongoing prior to approval), they are at least designed specifically for that purpose!
Recommended Safe-Canning Resource Guides
National Center for Home Food Preservation
This free online resource of USDA guidelines (hosted by the University of Georgia) is the best place to check for safe, tested canning instructions and recipes. Everything here is USDA-tested and approved.
If you want to find out if the cool canning idea you found on Pinterest or TikTok is a recommended practice or some wild Cowboy Canning that might kill your family (or not), this website is a good place to start.
Until you really know what you are doing, stick to tested recipes from here and the sources below. Given that the people posting unsafe recipes seem to think they know what they are doing just because no on has died yet (that they know of).
It’s best to stick to tested recipes while you read and learn what safe tweaks you can make to make these recipes your own! There is a LOT of bad canning advice on the internet, and it’s just not worth risking your health (or life).
I don’t want to scare you away from canning… if you’re following good practices it’s very safe! But before we had the standardized practices we have now, it wasn’t. Let’s not go back there, yeah?
Ball Blue Book of Canning
If you buy just one canning book, this is a great one, and was the first book I used when starting out many years ago. The Amazon link is to the newest version of the Blue Book, from 2020.
I have a copy of the previous edition (from 2013) and it’s important that you stick to recent ones, as knowledge about safe practices (as well as tastes in recipes) have changed over time. You shouldn’t use an older edition than these two without checking it against current recommendations for safe canning practices.
I love looking over my vintage cookbook collection (including an early edition Joy of Cooking that has a canning section) but do not trust these recipes for canning unless they are cross-referenced with a modern source.
When I do pick up a copy of this newest edition of the Blue Book, I’ll update with a review of any changes. It looks like there are more flexible options given for safely personalizing some of the recipes in the newest edition, which is great.
The All-New Ball Book of Canning and Preserving
I added this one to my canning library fairly recently. It has some great recipes, adapted for more modern palates and adventurous tastes. I wouldn’t recommend this as your first or only canning book, as there is a lot of basic information about processing various foods that is better covered in the Blue Book.
However, it’s a great addition to your canning and cookbook library. It is beautifully photographed and has useful charts and guides.
Best of all, it has a lot of new raw-pack meal-in-a-jar pressure canning recipes and tasty preserves and sauces with interesting and contemporary flavor profiles. It definitely gets a prominent spot on my cookbook shelf and there are a lot of recipes in here that I have flagged to test out… chocolate cherry jam, anyone? Yes, please!
Read More about Canning Basics & Guides!