BREW: Homemade Dandelion Wine
- Dandelion Wine Ingredients
- Kitchen Equipment Needed
- How to Make Dandelion Wine
- Storage & Serving Ideas
- Homemade Dandelion Wine
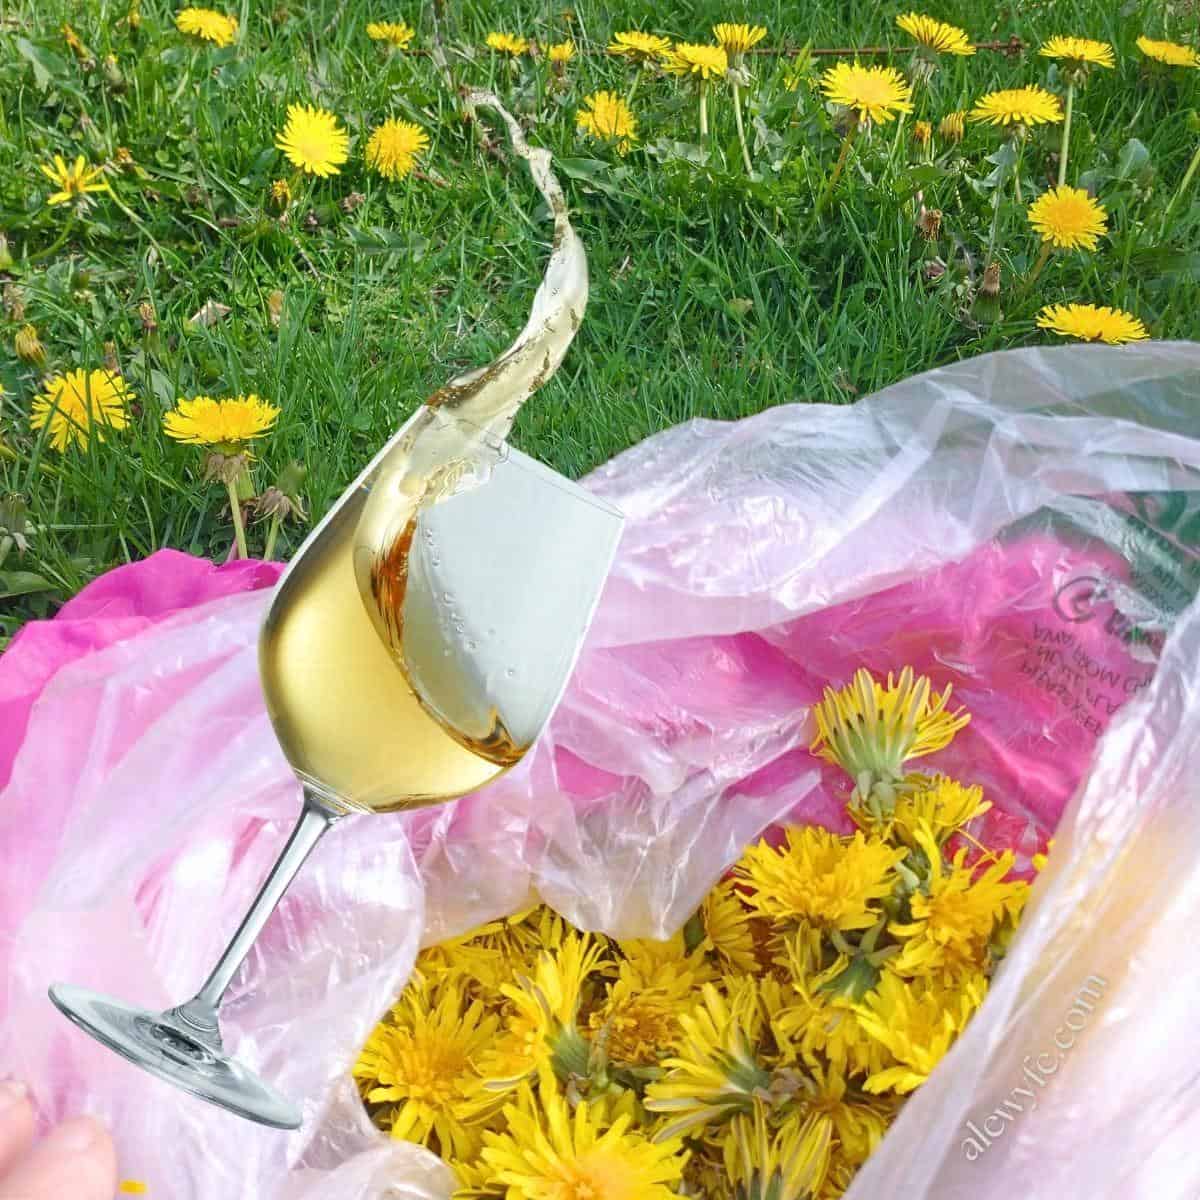
Homemade dandelion wine is an unseasonably warm spring day bottled up, a taste of early summer sunshine in a glass. It’s a rustic but refined country wine when made well, with freshly picked dandelion flower petals, sugar, lemon, and a few other simple ingredients.
The hardest part of making this dandelion wine is plucking enough of the freshly opened brilliant golden flowers, but it’s an enjoyable task, and a great way to shake off a winter’s worth of cabin fever. After that, you pluck or snip the petals from the bitter green stem and calyx, and steep them in hot sugar water before adding the yeast.
After that, the next hardest part begins… the waiting! But your patience will be rewarded, and once you bottle your dandelion wine, you’ll have a little sip of golden light tucked away for a rainy day. Pop a cork and pour yourself a pale yellow glass, and you’ll see why this beverage inspired such distilled sweet nostalgia as Bradbury’s musings on idyllic boyhood summers in his novel, “Dandelion Wine”.
Dandelion Wine Ingredients
Sugar:
Plain granulated sugar is best here. You could also use a light turbinado sugar, I suppose, but I like to let the subtle floral flavor shine through. You could also use honey and make a nice dandelion metheglin (a metheglin is a spiced or herbal infused mead) but that warrants another post altogether!
Dandelions:
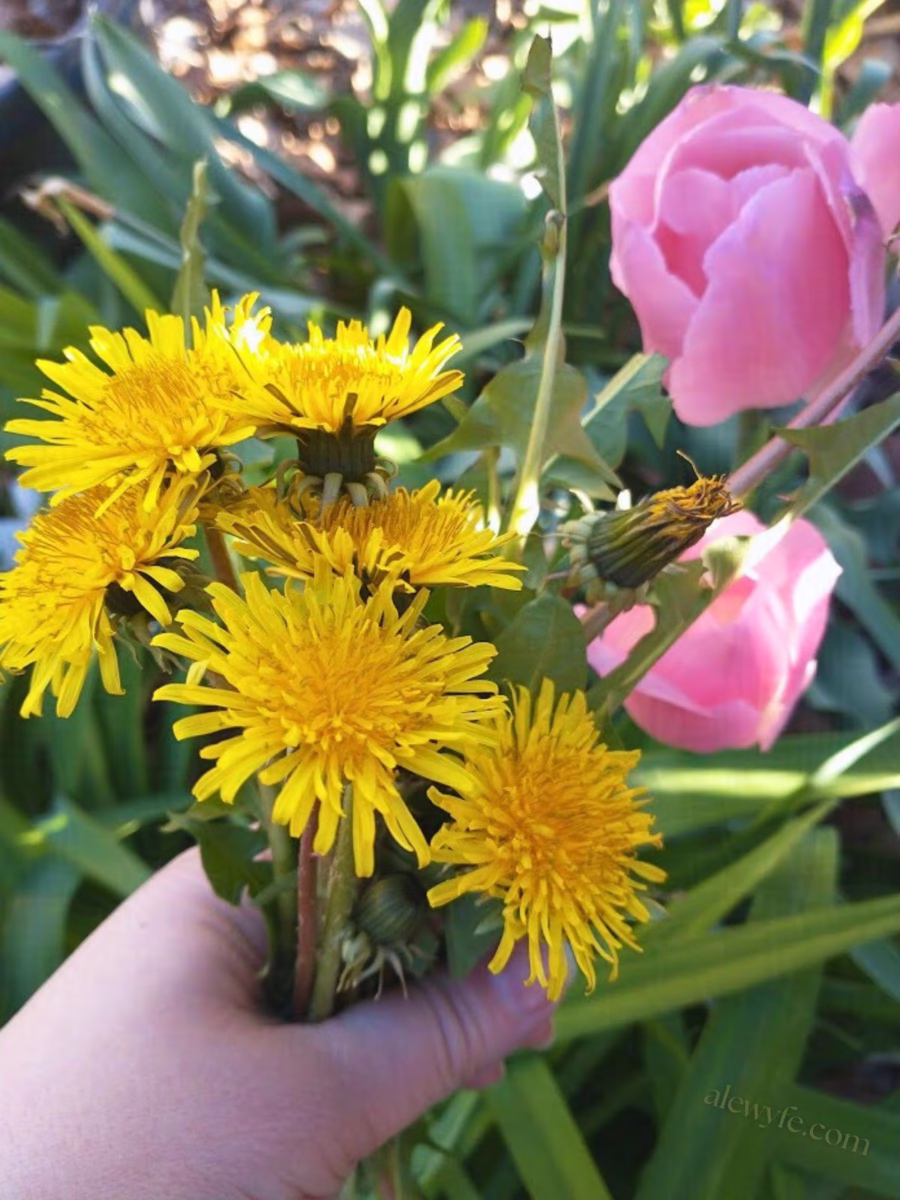
Gather your dandelion flowers in the spring when they are in abundance. It’s best to pick them in the morning, after the dew has dried and the flowers have fully opened. I like to pluck or snip off just the flower heads, bagging them loosely and then trimming them further at home.
Make sure you forage them somewhere that hasn’t been sprayed with herbicides or pesticides, and ideally far from heavily trafficked roadways.
Once you get them home, you can lightly rinse the flowers if you are concerned they are dusty or harboring ants, or use them as is as long as you gathered them somewhere clean.
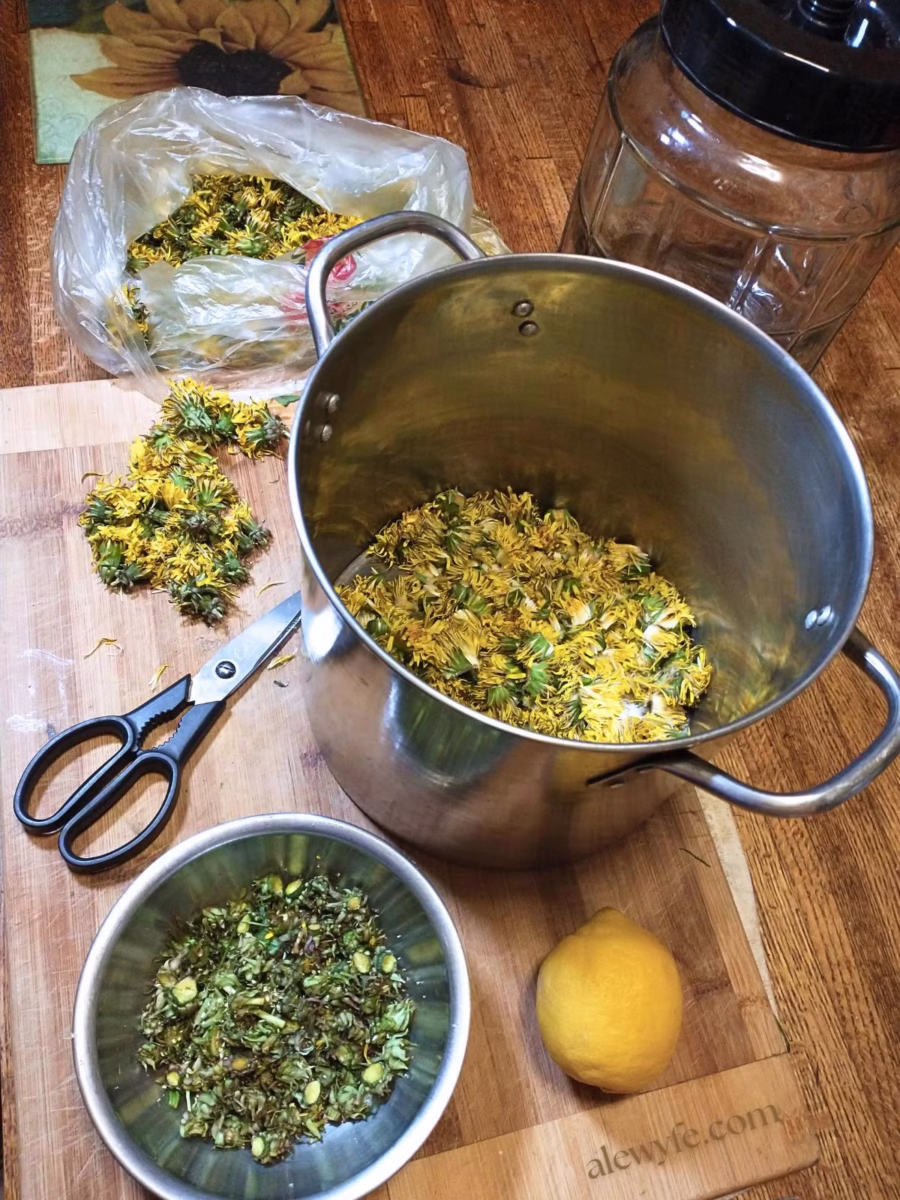
Using sharp kitchen or pruning scissors, snip off the green parts at the base of the flower, discarding them, and collect the yellow and white petals in a bowl. It’s okay if a bit of green calyx ends up in the bowl, but too much will make a bitter or vegetal wine that will overpower the delicate floral notes of the dandelion flowers.
Lemons:
You’ll use the zest and juice of one lemon, which add flavor, balance, and nutrients for the yeast. Because you’re using the outer peel, it’s best to use organic lemons if you can get them.
Otherwise, wash the lemon well before using a vegetable peeler or zester to remove the outer yellow layer, leaving the white pith behind. Then, cut the lemon in half and squeeze out as much juice as possible.
Acid blend:
This is a blend of winemaking acids, usually tartaric acid, citric acid, and malic acids, extracted from fruit or created by fermentation. It’s used to balance the acidity in wines, both to improve the flavor and to help create a happy pH for the yeast to work in.
You could substitute food-grade citric acid if you don’t have acid blend, but either are inexpensive and last basically forever if you keep them dry, so it’s worth having both in your brewing kit. The acid blend has a more balanced and less, well, citrusy flavor than plain citric acid, and I recommend using that if you can get it.
This half pound bag of acid blend isn’t a lifetime supply but will last you for many years unless you’re brewing everyday? You can also buy smaller quantities if you don’t brew often or have limited storage space.
Yeast nutrient:
Floral wines and flower mead do not benefit from the additional nutrients that are naturally available in grape and fruit wine musts. It’s best then to supplement your dandelion wine with a commercial yeast nutrient to ensure that your fermentation doesn’t stall and stick, and that your wine yeast has everything it needs for a healthy, vigorous and complete fermentation.
There are several different formulations of this available, the simplest and cheapest of which is either straight DAP (diammonium phosphate crystals) or DAP and urea, which supply easily accessed nitrogen for your hungry yeast to digest.
I’ll use this in beer (which doesn’t usually need much in the way of supplements), or for wine in a pinch, but for my wines and meads I prefer to use either Fermax or Wyyeast Wine Yeast “Vintner’s Choice” yeast nutrient. These are formulated specifically for wine yeast strains and have additional ingredients to support the health of the yeast in the more difficult fermentation environments of higher gravity wines and meads.
Tannin:
I use a bit of powdered wine tannin to add balance, astringency, and structure, and improve the aging potential of homemade country wine. You can get this at a homebrewing shop or online. Many older country wine recipes will use black tea to add tannin. I prefer the more predictable (and non-caffeinated) commercial wine tannin.
You can use regular powdered wine tannin, or a colorless oak gall tannin designed for use in white wines, to preserve the delicate color of your dandelion wine. It’s a small enough amount that you can use what you have on hand if you don’t have the white wine tannin.
Campden Tablet:
A crushed campden tablet, added to the dandelion wine mixture after heating and well before adding the yeast, gives a measured dose of sulphites that will kill off any contaminants like wild yeasts and bacteria that made it through your quick boiling water sanitation of the floral infusion and other ingredients. This ensures a better chance of getting a lovely wine at the end and not a funky herbal vinegar or wild brew.
Wild fermentations can be fun things to play with, but can also be total failures. Start playing around with them after your cellar is full of bright, clean tasting homebrews, and after you’re an expert in telling mold from a pellicle and good healthy fermentations from funky ones that will give you a headache at best, yeah?
The campden tablets you want for this recipe are KMS, or potassium metabisulfate, not the SMS, or sodium metabisulfate tablets.
SMS powder and tablets, which are usually cheaper and also stronger, are fine for sanitizing equipment but can give an off-flavor if added directly to your finished wines. Since SMS tablets deliver a more potent dose of sulphite, some people are more sensitive to this. Use SMS for cleaning and KMS for adding directly to your actual wine must. Store either of these in a sealed glass or plastic jar away from moisture, or they’ll lose potency.
Wine yeast:
Use a dried or liquid wine-specific yeast for your dandelion wine. Don’t use bread yeast (as recommended by some very old or rustic recipes) or you’ll have an unpleasantly bread-y, yeast-flavored wine that tastes of over-proofed dough. I recommend a strain optimized for white wine or fruit & flower wines, or a champagne yeast for a very dry dandelion wine that ferments and finishes quickly.
I used a Cote de Blanc yeast for my most recent batch, which makes lovely white wines and ciders with a soft, delicate flavor and floral aromas, but takes a very long time to clarify. Have patience and give this yeast extra time to flocculate (settle out of suspension), or be prepared to use a clarifying agent like bentonite, gelatin finings or filtration if you want a very clear wine.
Kitchen Equipment Needed
- 1 gallon jar or wide mouth fermenter for primary fermentation
- 1 lid with airlock for gallon jar, or butter muslin & twine to cover
- 1 gallon jug or demijohn for secondary fermentation & clearing
- 1 lid or stopper with airlock for jug or demijohn
- 1 fine mesh drawstring nylon brewing bag
- Makes racking & removing flower pieces & sediment easier without clogging your racking cane. You can also cover the tip of your racking cane with nylon mesh, though this can clog and is slower than bagging the flowers during primary fermentation.
- 1 stainless or plastic long-handled spoon
- hydrometer & test jar or refractometer
- These are used to measure specific gravity (density) and to monitor fermentation progress (OG & SG readings)
- siphon tubing & racking cane or autosiphon
- A racking cane & autosiphon are very helpful but not necessary for a one gallon batch… you can also use a large funnel and strainer, or a strainer funnel.
- no-rinse brewery cleaner & sanitizer
- sanitized wine bottles & new corks with a bottle corker, or swing-top bottles
- I highly recommend using a floor corker if you are going to be making a lot of wine, or borrowing or renting one from your local homebrew friends, club, or shop.
- I used a basic hand capper for beer bottles for years and thought people were overreacting about how difficult a hand-corker was to use, but after trying to cork my first batch of wine with a hand-corker, I immediately upgraded to a floor corker and never looked back.
- You can use beer bottles and bottle caps for short-term storage, or the grolsch-type swing top bottles if you don’t want to fuss with corks.
How to Make Dandelion Wine
pick fresh dandelion flowers:
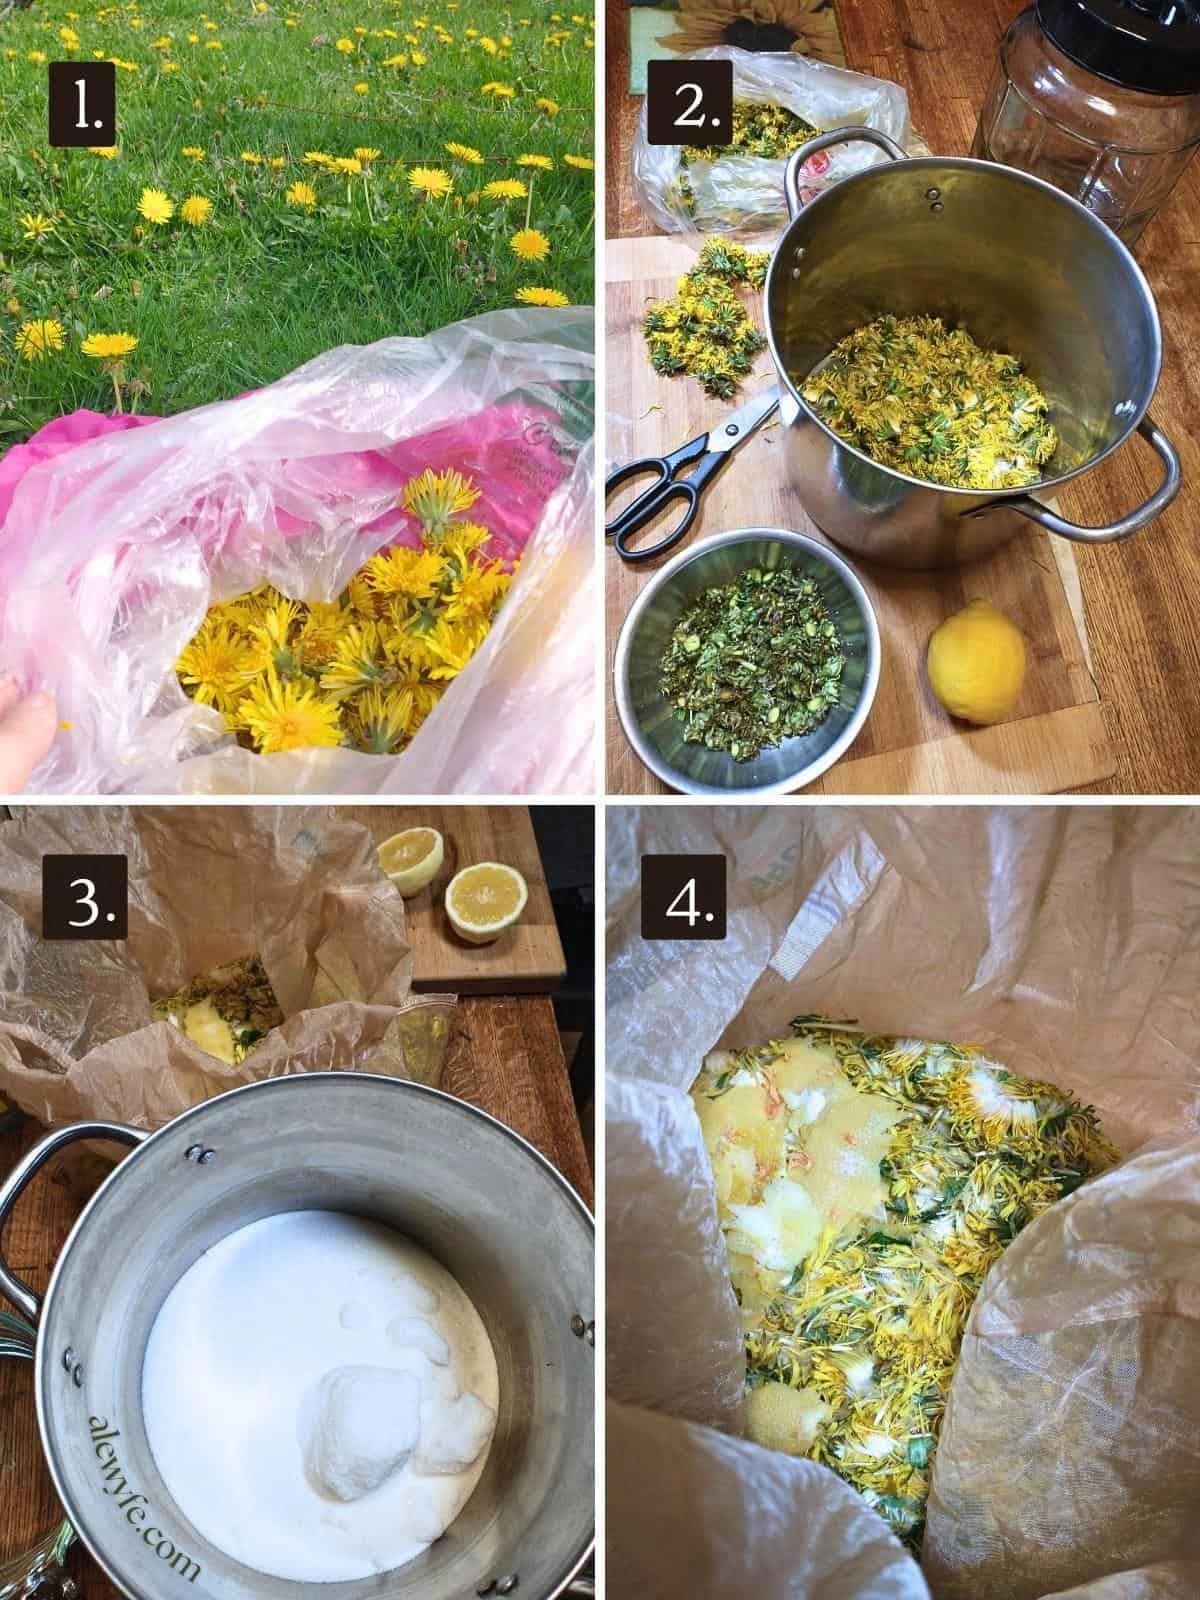
- Choose a spring day when your schedule is clear. You will want to pick the flowers and make your wine immediately after so your flowers don’t close up, spoil, or lose their delicate flavor.
- Have patience and pick a lot of flowers… especially once you trim them, this will take awhile. It’s better to have a bit too much than not enough.
- I weighed mine, but you should start with at least six to eight cups of flowers (I used a standard plastic produce bag mostly full of flowers), to end up with at least 12 oz of trimmed petals.
prep ingredients & equipment:
- Snip the flower petals free from the bitter green bases of the flowers. Weigh or measure them again to make sure you picked enough.
- Wash the lemon, and use a sharp vegetable peeler or paring knife to peel the yellow zest, and add this to your flower petals.
- Squeeze and strain the lemon juice to remove any seeds, and set aside.
- Weigh or measure out the sugar, and get out your other ingredients.
- Wash and sanitize your fermenter & airlock, a large stainless or heat-resistant plastic spoon, a mesh brewing bag, and a large stainless pot.
heat water & sugar:
- Add the sugar and water together to the stainless pot, and stir to dissolve.
- Bring the mixture up just to a boil over medium-high heat, stirring occasionally.
steep flowers & add other ingredients:
- Place the dandelion flowers and lemon zest into the mesh brewing bag, and tie it closed.
- Drop this large dandelion tea bag into the boiling hot sugar mixture, dunk it under using a spoon until it is fully submerged, and add the lemon juice.
- Immediately turn the heat off under the pot. Remove the pot from the heat, cover it, and let this mixture cool until lukewarm.
- Stir in the wine tannin, yeast nutrient, and acid blend.
add campden tab & check OG:
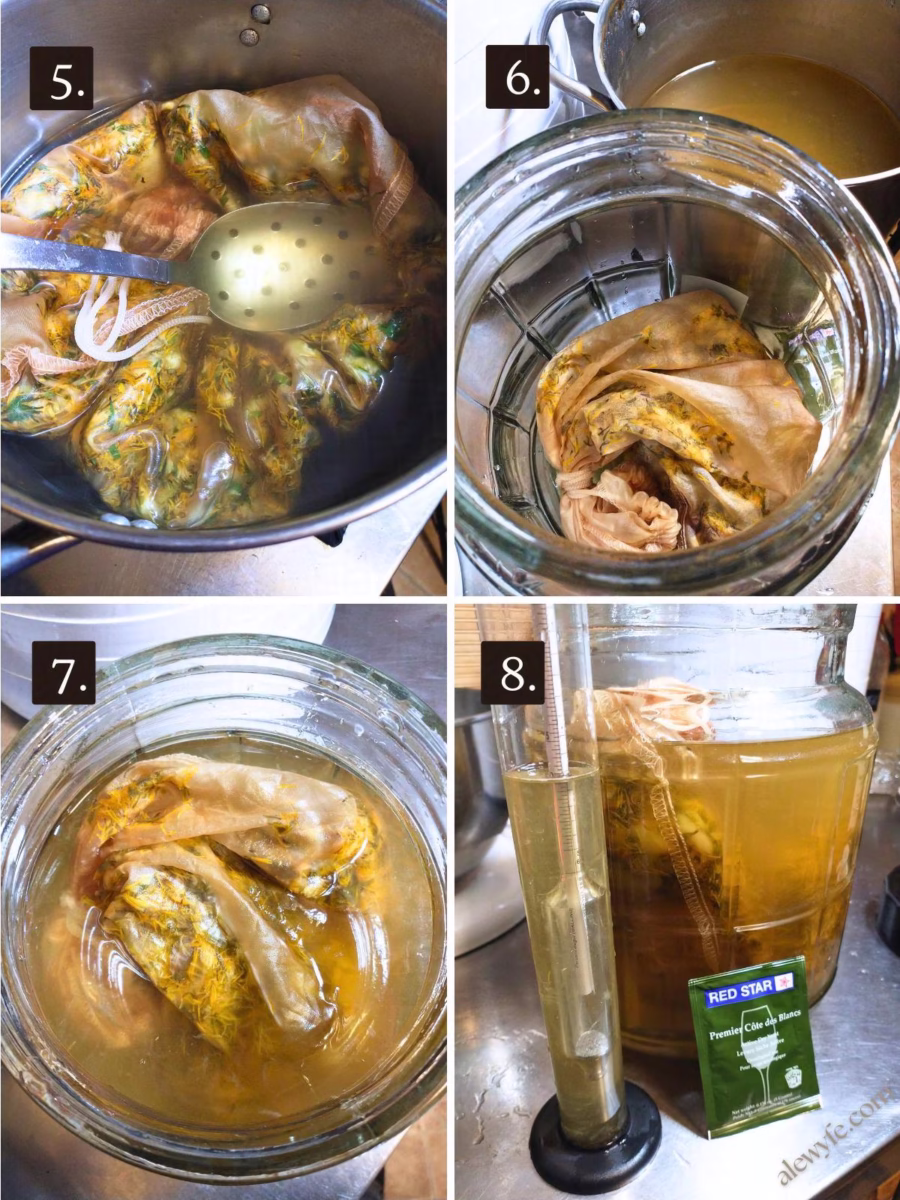
- Transfer the brewing bag carefully to a wide-mouthed fermenter (glass or food-grade plastic) and pour the dandelion wine must (the sugar tea) over it.
- Crumble a campden tablet over the mixture and stir it in using a sanitized spoon.
- Check the original specific gravity (OG) and make a note of it in your brewing book, or make a label and attach it to your fermenter (I use painter’s tape and a sharpie to mark my carboys and jugs, as well as a paper notebook).
- Cover the fermenter and fit it with an airlock to keep out fruit flies and other contaminants.
pitch yeast:
- Wait 24 hours after adding the campden tablet for the sulphite levels in your must to drop, and then add your wine yeast.
- If you choose not to use the sulphites, you should pitch your yeast as soon as the wine must temperature drops to a safe range.
- You can sprinkle the dry yeast directly on the surface of your wine must, or make a yeast starter if you prefer, or use a liquid yeast packet.
- Replace the lid and airlock on your fermentation vessel.
primary fermentation:
- Place your fermenter somewhere warm and out of direct sun. Different yeast strains have preferred temperature ranges- check the directions for yours, or try to keep it between 60-70 F if you aren’t sure.
- Higher fermentation temperatures can finish faster, but if your wine gets too warm it can develop off-flavors. Cooler fermentations have a cleaner flavor, but if it gets too cold, it can stunt the yeast and you are more likely to have a stuck fermentation.
- Watch for healthy and continuous streams of bubbles through the airlock. The wine may take up to a day to really get going to a vigorous fermentation, and then will gradually taper off after a few days to two weeks.
- If the wine doesn’t ferment within 24-48 hours, you may need to re-pitch it with a new packet of yeast, or put it somewhere warmer.
rack & clear:
- When the bubbles have slowed or stopped, or about two weeks have passed (generally 10-20 days), you should rack your dandelion wine off of the petals and zest and into another container to finish fermenting and clearing.
- Make sure your hands and any equipment you use is clean and sanitized.
- Use a mini-racking cane and siphon tubing if you have them to transfer your dandelion wine from the wide-mouthed primary fermenter into a one gallon jug or carboy, or several growlers.
- Let the flower petal bag drain into the wine, but do not squeeze it. You can remove it before or after siphoning (before is easier, but may stir up more sediment so that your wine will take longer to clarify).
- You can also use a clean large funnel and carefully pour if you don’t have siphon tubing and a racking cane.
- Top your jug with a rubber stopper and airlock, label it, and check the specific gravity again, making a note of it as before.
- Place the jug somewhere dark and relatively cool to settle and age before bottling.
bottle dandelion wine:
- Your dandelion wine is ready to bottle when it is perfectly clear with no sediment, and fully fermented. This will take at minimum about 4 weeks, but you can safely age it longer before bottling and rack once or twice off the lees (yeast sediment) to get it really clear.
- Some yeast strains may take longer to clear and finish fermenting.
- If you aren’t sure, wait a week or two between sampling and measuring the specific gravity. When it has not dropped in several weeks and has fermented to dryness (0.998-995) you can bottle it.
- Wash and sanitize your bottles, using a bottle brush to get an sediment, and rinse with a one-step cleaner, or use brewing cleaner and then a no-rinse sanitizer like Star-san or sulphite solution to rinse the bottles. I use a spray bottle for the sanitizer, spraying several squirts into the clean bottles, then letting them drain in a bottle drying rack.
- Transfer to a bottling bucket with a spigot and bottling wand, or carefully pour the wine without disturbing any sediment so you don’t end up with a cloudy wine after all your hard work and waiting.
- Fill your bottles, and immediately cork or cap them.
Storage & Serving Ideas
Bottles with natural corks need to sit upright for a day or two before being turned on their sides for storage to make sure they don’t leak. Corks need time to fully expand after being compressed in the corker, then the corks should be in contact with the wine so they don’t dry out.
If you used synthetic corks, you can store your bottles either upright or on their sides. Swing-top bottles should be stored upright.
Label & cellar-age your bottled dandelion wine for at least one month somewhere cool and dark. Ideal cellar temperatures are between 45℉ to 65℉ (7℃ to 18℃) and 60%-80% humidity. If you don’t have a basement, wine fridge, or other temperature-controlled spot, try to find a closet or other place out of direct light, and that has minimal temperature swings.
It is safe to drink immediately but like most wine, it tastes much better with a bit of time in the bottle to mellow. Sample some periodically and take notes to find what you prefer!

Homemade Dandelion Wine
Equipment
- 1 gallon jar or wide mouth fermenter
- 1 lid with airlock for gallon jar, or butter muslin & twine
- 1 gallon jug or demijohn
- 1 lid or stopper with airlock for jug
- 1 fine mesh drawstring nylon brewing bag (optional, but makes racking & removing fruit sediment easier)
- 1 stainless or plastic spoon
- hydrometer & test jar or refractometer
- siphon tubing & racking cane or autosiphon
- no-rinse brewery cleaner & sanitizer
Ingredients
- 20 oz fresh dandelion flowers (about 12 oz of petals after trimming)
- 7½ pints water (120 fluid oz: US pints)
- 3 lbs sugar
- 1 large lemon (zest and juice only, preferably organic)
- 2 tbsp acid blend or citric acid
- 1 tsp yeast nutrient (Wyeast wine yeast nutrient or similar)
- ¼ tsp wine tannin (use colorless oak gall tannin if possible to preserve delicate color)
- 1 each KMS Campden tablet
- 1 packet wine or champagne yeast
Instructions
pick fresh dandelion flowers:
- Choose a spring day when your schedule is clear. You will want to pick the flowers and make your wine immediately after so your flowers don’t close up, spoil, or lose their delicate flavor.
- Have patience and pick a lot of flowers… especially once you trim them, this will take awhile. It's better to have a bit too much than not enough. I weighed mine, but you should start with about six to eight cups of dandelion flowers (I used a standard plastic produce bag mostly full of flowers).
prep ingredients & equipment:
- Snip the flower petals free from the bitter green bases of the flowers.
- Wash the lemon, and use a sharp vegetable peeler or paring knife to peel the yellow zest, and add this to your flower petals.
- Squeeze and strain the lemon juice to remove any seeds, and set aside.
- Weigh or measure out the sugar, and get out your other ingredients.
- Wash and sanitize your fermenter & airlock, a large stainless or heat-resistant plastic spoon, a mesh brewing bag, and a large stainless pot.
heat water & sugar:
- Add the sugar and water together to the stainless pot, and stir to dissolve.
- Bring the mixture up just to a boil over medium-high heat, stirring occasionally.
steep flowers & add other ingredients:
- Place the dandelion flowers and lemon zest into the mesh brewing bag, and tie it closed.
- Drop this large dandelion tea bag into the boiling hot sugar mixture, dunk it under using a spoon until it is fully submerged, and add the lemon juice.
- Immediately turn the heat off under the pot. Remove the pot from the heat, cover it, and let this mixture cool until lukewarm.
- Stir in the wine tannin, yeast nutrient, and acid blend.
add campden tab & check OG:
- Transfer the brewing bag carefully to a wide-mouthed fermenter (glass or food-grade plastic) and pour the dandelion wine must (the sugar tea) over it.
- Crumble a campden tablet over the mixture and stir it in using a sanitized spoon.
- Check the original specific gravity (OG) and make a note of it in your brewing book, or make a label and attach it to your fermenter (I use painter’s tape and a sharpie to mark my carboys and jugs, as well as a paper notebook).
- Cover the fermenter and fit it with an airlock to keep out fruit flies and other contaminants.
pitch yeast:
- Wait 24 hours after adding the campden tablet for the sulphite levels in your must to drop, and then add your wine yeast.
- If you choose not to use the sulphites, you should pitch your yeast as soon as the wine must temperature drops to a safe range.
- You can sprinkle the dry yeast directly on the surface of your wine must, or make a yeast starter if you prefer, or use a liquid yeast packet.
- Replace the lid and airlock on your fermentation vessel.
primary fermentation:
- Place your fermenter somewhere warm and out of direct sun. Different yeast strains have preferred temperature ranges- check the directions for yours, or try to keep it between 60-70 F if you aren’t sure.
- Higher fermentation temperatures can finish faster, but if your wine gets too warm it can develop off-flavors. Cooler fermentations have a cleaner flavor, but if it gets too cold, it can stunt the yeast and you are more likely to have a stuck fermentation.
- Watch for healthy and continuous streams of bubbles through the airlock. The wine may take up to a day to really get going to a vigorous fermentation, and then will gradually taper off after a few days to two weeks.
- If the wine doesn’t ferment within 24-48 hours, you may need to re-pitch it with a new packet of yeast, or put it somewhere warmer.
rack & clear:
- When the bubbles have slowed or stopped, or about two weeks have passed (generally 10-20 days), you should rack your dandelion wine off of the petals and zest and into another container to finish fermenting and clearing.
- As always, make sure your hands and any equipment you use is clean and sanitized.
- Use a mini-racking cane and siphon tubing if you have them to transfer your dandelion wine from the wide-mouthed primary fermenter into a one gallon jug or carboy, or several growlers.
- Let the flower petal bag drain into the wine, but do not squeeze it. You can remove it before or after siphoning (before is easier, but may stir up more sediment so that your wine will take longer to clarify).
- You can also use a clean large funnel and carefully pour if you don’t have siphon tubing and a racking cane.
- Top your jug with a rubber stopper and airlock, label it, and check the specific gravity again, making a note of it as before.
- Place the jug somewhere dark and relatively cool to settle and age before bottling.
bottle dandelion wine:
- Your dandelion wine is ready to bottle when it is perfectly clear with no sediment, and fully fermented. This will take at minimum about 4 weeks, but you can safely age it longer before bottling and rack once or twice off the lees (yeast sediment) to get it really clear.
- Some yeast strains may take longer to clear and finish fermenting.
- If you aren’t sure, wait a week or two between sampling and measuring the specific gravity. When it has not dropped in several weeks and has fermented to dryness (0.998 or so) you can bottle it.
- Wash and sanitize your bottles, using a bottle brush to get an sediment, and rinse with a one-step cleaner, or use brewing cleaner and then a no-rinse sanitizer like Star-san or sulphite solution to rinse the bottles. I use a spray bottle for the sanitizer, spraying several squirts into the clean bottles, then letting them drain in a bottle drying rack.
- Transfer to a bottling bucket with a spigot and bottling wand, or carefully pour the wine without disturbing any sediment so you don’t end up with a cloudy wine after all your hard work and waiting.
- Fill your bottles, and immediately cork or cap them.
cellar & age
- Bottles with natural corks need to sit upright for a day or two before being turned on their sides for storage to make sure they don’t leak. Corks need time to fully expand after being compressed in the corker, then the corks should be in contact with the wine so they don't dry out. If you used synthetic corks, you can store your bottles either upright or on their sides. Bottles with swing-caps or metal beer caps should be stored upright.
- Label & cellar-age your dandelion wine for at least one month somewhere cool and dark. It is safe to drink immediately but tastes much better with time (sample some periodically and take notes to find what you prefer)!
Notes
Liked this? Try these wine & mead recipes!
