CANNING: Horseradish Beet Relish
- Horseradish Beet Relish Ingredients
- Kitchen Equipment Needed
- How to Can Horseradish Beet Relish
- Pantry Storage Tips
- Horseradish Beet Relish
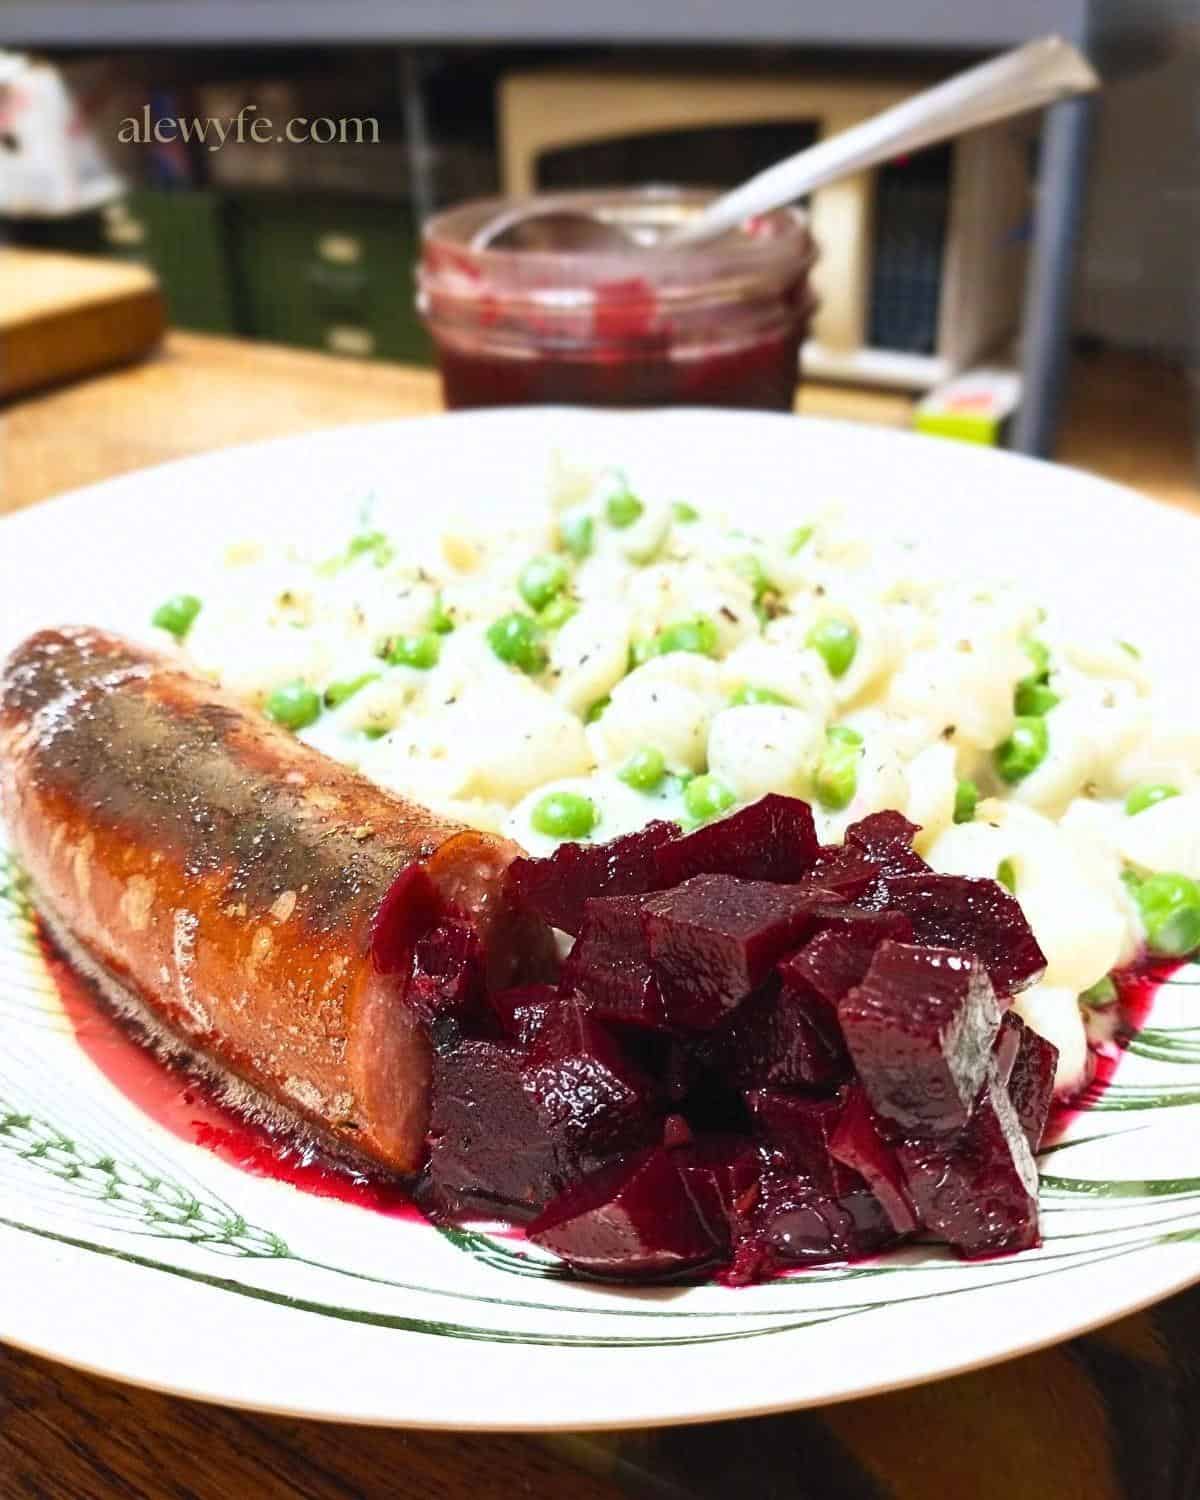
This brightly-colored horseradish beet relish is sweet, earthy, and has a little kick. It has a bold flavor that complements tons of foods, and is so simple to make. This homemade relish is an easy water-bath canning recipe, and perfect for beginners.
It’s great on grilled kielbasa or polish sausages, hot dogs, or served with pierogi, pork chops, smoked or roasted meat, potato dumplings or fried potato cakes.
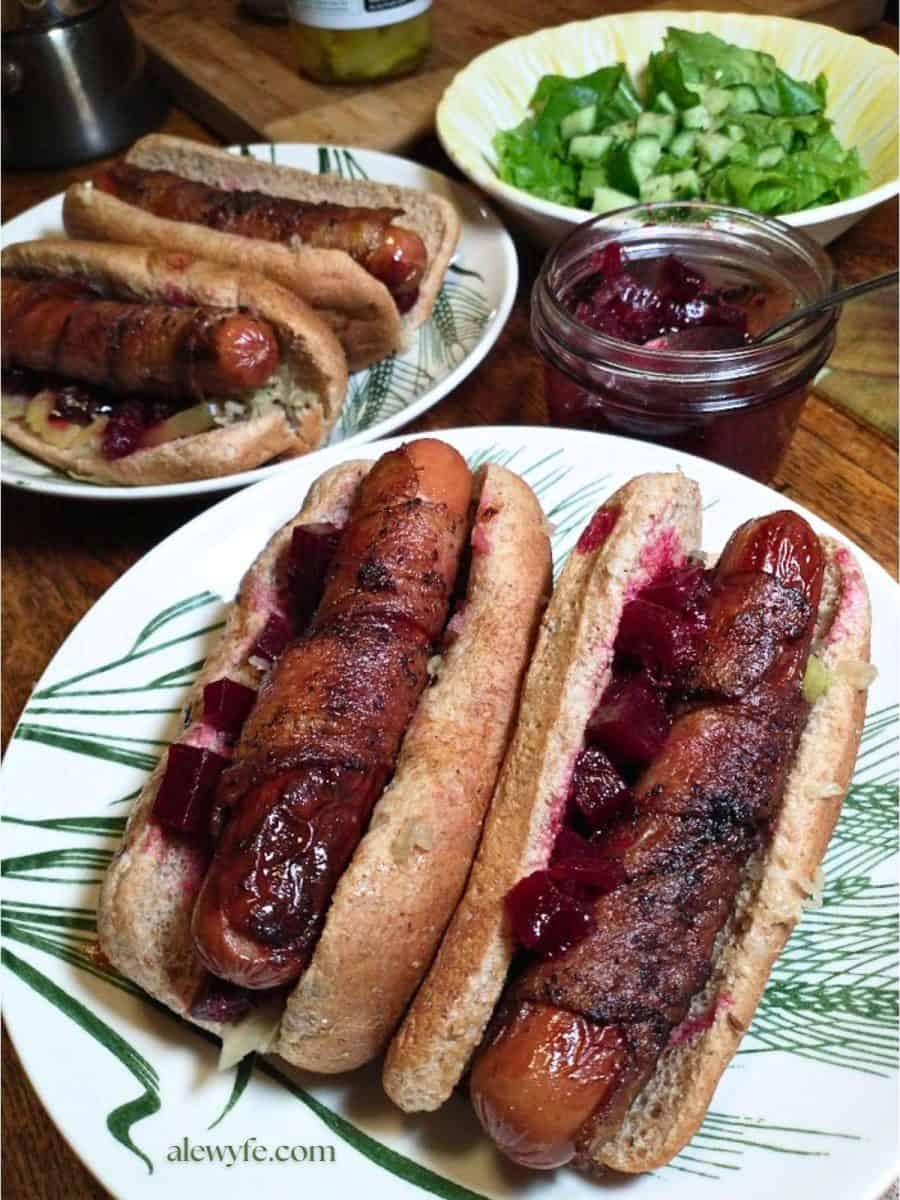
For a flavor-bomb, pair this beet relish with bacon-wrapped hot dogs topped with mustard, caraway-apple kraut, and pickled banana peppers on your favorite hot dog buns. I use whole wheat, but a sturdy poppy seed bun is also great. So good!
You can also add it to fresh salads of mixed greens, especially if you make it with the larger diced beets instead of very fine relish. It’s a festive addition to a holiday table or will add a pop of color and flavor to an everyday one!
Horseradish Beet Relish Ingredients
beets:
You’ll need three pounds of fresh, whole beets. I use regular, red beets in this recipe, but you could use golden beets, chioggia, or rainbow beets if you’d like a colorful relish (the colors will blend together in processing though).
Scrub the beets well, trim the root and stem ends, and place in a large pot. Cover with water, and bring up to a simmer. Cook until fork-tender, then cool, peel, and dice as directed in the recipe.
onion:
You can use white, yellow, or red onion here. I use standard yellow Spanish onions in my horseradish beet relish. You’ll need two cups of diced onion, about one large or two medium onions.
Peel and dice the onion, measure out two cups, and save any remaining onion for another recipe (or throw it in your homemade stock trimmings bag in the freezer if you have one).
vinegar:
The original Ball recipe calls for apple cider vinegar (5%). You can also substitute red or white wine vinegar, or even plain distilled vinegar in a pinch, as long as they also are 5% acidity (check the label, and don’t use homemade vinegar for canning).
sugar:
You’ll need one and a quarter cups of white granulated sugar. You could substitute raw sugar (the color of the relish won’t be as bright and the flavor will change a bit). Do not use brown sugar.
horseradish:
This recipe uses 2/3rds of a cup of prepared horseradish. “Prepared horseradish” in this case means finely grated horseradish preserved with vinegar and salt, NOT the creamy horseradish spread, which is not safe for canning.
Check the ingredient label on your prepared horseradish, as some brands use this for a spread that contains added oil or egg… this will not work and isn’t safe to can! If you have fresh horseradish root, you can use that too (see below).
Again, do not use horseradish spread with added mayo or dairy in this relish. If you want a creamy horseradish beet relish, you can add either mayo, sour cream, or both to the relish after canning and just before serving, and refrigerate the leftovers.
You can use commercially available prepared horseradish (usually in a jar in the refrigerated section) or prepare your own by peeling and finely grating or blending fresh horseradish root. Mix with equal parts distilled or apple cider vinegar and a bit of salt to make a thick but spreadable paste.
The longer the freshly grated horseradish sits before you add the vinegar, the stronger it will get (up to a point). This fresh horseradish is very pungent! Do this in a well-ventilated area, especially if the horseradish is very fresh, as the vapors are very potent.
seasonings:
This relish has a simple seasoning blend, letting the earthy flavor of the beets and tangy horseradish shine through. The original recipe just calls for salt, black pepper, and red pepper. I add ground coriander seed to mine as well, but this is optional and not in the original Ball recipe.
I used Kashmiri red chili powder (bright red ground hot pepper), but you could use cayenne or red chili flakes. Use paprika for a mild relish, though there’s just a bit of spice to this one.

Kitchen Equipment Needed
medium-large saucepan:
You’ll need a pot big enough to simmer all of the beets, and to make the beet relish. You can use the same pot if you want to save dishes, or only have one. Cook the beets first, and then while they are cooling, add the rest of the ingredients to the pot while you wait to peel the beets.
canning jars and new lids:
You’ll need four pint jars, eight half-pint jars, or some combination of small canning jars. You’ll also need canning rings and new lids for each jar.
You can also use the small four-oz jelly jars, but do not can this recipe in quart jars. The processing time was tested for pint jars or smaller (the processing time is the same even if you use a smaller jar or are canning a mixed batch).
jar funnel and jar tongs:
It’s easiest to fill the jars with a jar funnel, which helps keep the rims of the jars clean and prevents messy spills. Jar tongs or a jar rack with handles make transferring hot jars in and out of the canner safe and easy.
canning pot and rack:
You’ll need a large pot with a lid for the water bath. Ideally your pot has a rack to lift the jars out, or at least an insert to raise the jars off of the bottom of the pot. This lets the heat circulate & protects your jars from scorching or breaking. You can also use a heat-resistant silicone trivet in a pinch.
Make sure there is room in the pot to cover all of your jars by at least an inch or two with boiling water, and for a vigorous boil.
How to Can Horseradish Beet Relish
prep and measure ingredients:
- Assemble all of your ingredients and equipment.
- Scrub the beets well, and trim the tops and root ends.
- If you are using fresh horseradish instead of prepared pickled horseradish, wash, peel, and finely grate the root. Mix with equal parts of vinegar by volume and a pinch of salt. (Skip this step if you have jarred prepared horseradish in the fridge.)
- Peel, wash, and finely dice the onion. Measure out two cups of onion, and set aside any extra for another recipe.
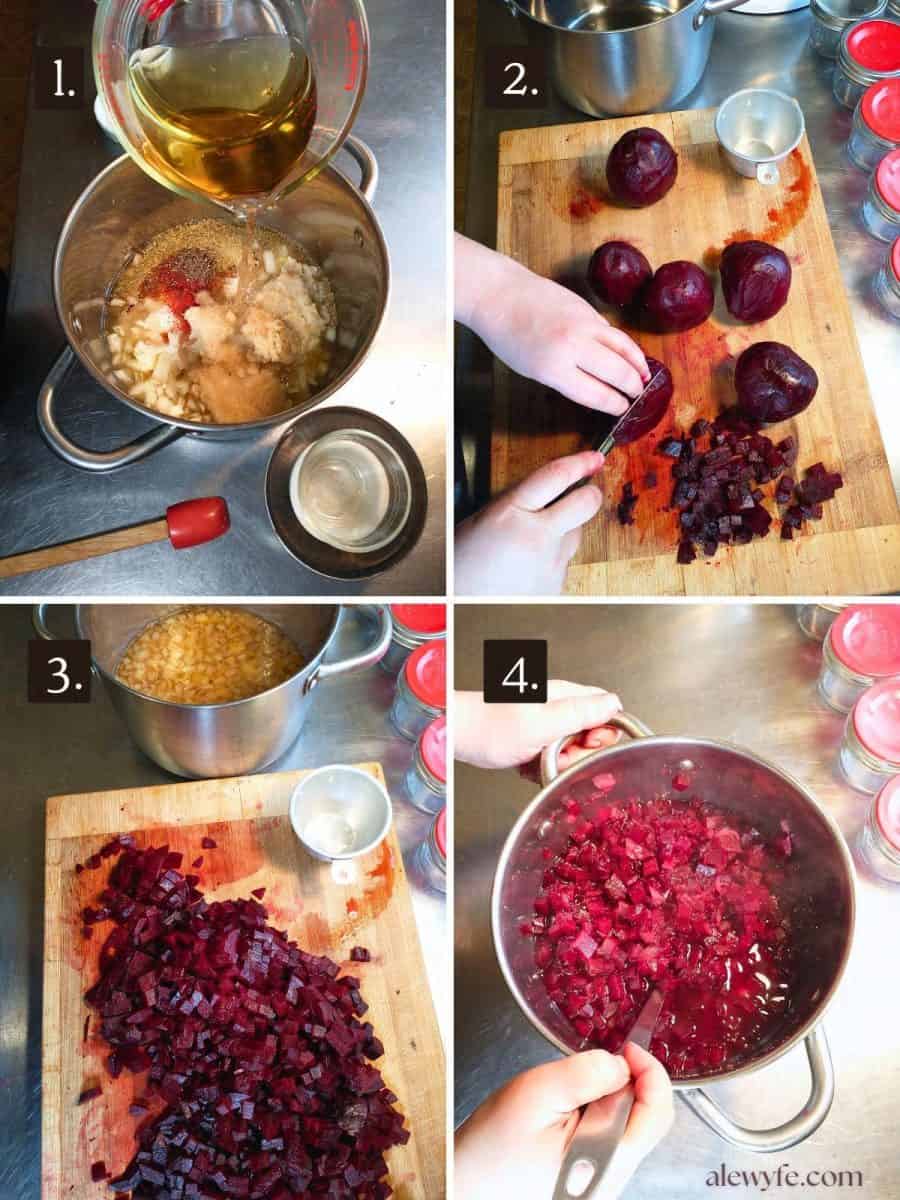
- In a large pot (big enough to hold all of the brine and cooked beets), combine the diced onion with the vinegar, sugar, horseradish, and seasonings (all of the ingredients except for the beets). Stir to combine and dissolve the sugar.
prep canning jars and water-bath:
- Wash your canning jars with hot, soapy water, and rinse well.
- Fill your canning pot with enough water to cover the jars by at least 1″-2″.
- Place the jars in the pot to keep them warm, and bring the pot up to a simmer while the beets are cooking.
cook beets:
- Place the beets in a pot and add enough water to cover them.
- Bring the pot to a simmer over medium heat.
- Cover pot, and check occasionally to make sure all beets are covered by the water (stir them around a few times to make sure they cook evenly).
- Cook for about 25-35 minutes, or until the beets are still somewhat firm, but can be pierced with a fork. Large beets will take longer to cook through, and small ones will be done more quickly, so adjust cooking time as needed.
- Drain the beets and let them cool.
make the pickling brine & prepare beets:
- Bring the pot with the onion, vinegar, and horseradish mixture to a simmer over low heat while you peel and dice the beets.
- If you have good knife skills and can dice them quickly, start the pot of brine before prepping the beets, but if you are slow, wait until you are mostly done with the beet prep so you don’t over-reduce or boil away your brine!
- When the beets are cool enough to handle, slip off the peels. The peels should rub or slip off easily if the beets are cooked enough, though you can use a peeler or paring knife for the tricky bits.
- Cut the beets into 1/4″-1/2″ slices (smaller for a fine relish, larger for a chunky one).
- Cut those slices into baton/stick shapes, and then cut those again into small 1/4″-1/2″ dice.
- They don’t have to be perfectly diced, but will make a prettier relish if they’re relatively uniform.
- Measure out 8 cups of the diced beets. If you have more, set them aside and enjoy them fresh in a salad so that you do not dilute the pickling brine.
cook the relish:
- Add the diced cooked beets to the hot brine mixture and gently stir until well-combined.
- Return the pot to the stove, and bring up to a low simmer over medium-low heat.
- Stir gently and simmer at a low boil for 12 minutes, stirring regularly so that it does not scorch.
pack into jars:
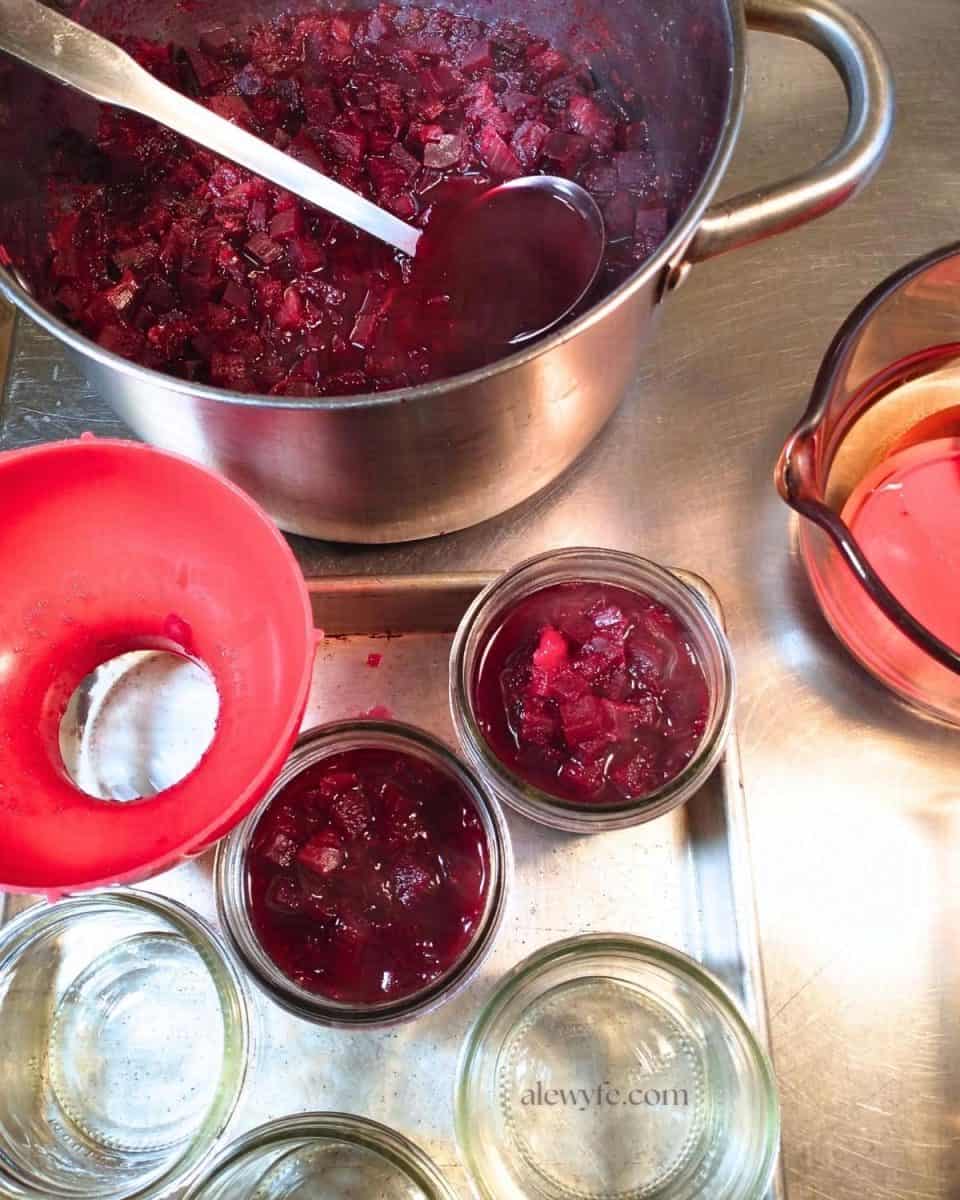
- Pack the hot beet relish into pint, half pint or 4 oz canning jars.
- Leave 1/4″ headspace at the top of the jars. Remove any air-bubbles with a butter-knife, chopstick, or de-bubbling tool.
- Wipe the rims of the jars, and cover them with new canning lids.
- Screw down the rings finger-tip tight.
can the jars:
- Using jar tongs, place the jars into the hot water-bath in your canning pot.
- Cover the pot and bring the water-bath up to a rolling boil.
- Once the pot is boiling, start the processing timer.
- Process the jars for 15 minutes (adjust for altitudes above 1000 ft). Turn off heat and let jars rest in the canner for 5 minutes before transferring to a wire rack or towel-lined countertop to cool.
- Remove the jars of beet relish from the canner, and set on a folded towel or wire rack to cool. If the room is very cold or drafty, cover the hot jars with a kitchen towel so they cool evenly.
- Leave the jars undisturbed overnight (or until completely cooled).
Pantry Storage Tips
- After jars have cooled completely (8-24 hours) remove the bands and check for seals. Make sure that the button on the lid is depressed and the jars have a good vacuum seal.
- Refrigerate any jars of beet relish that did not seal and use them promptly. Or, you can reheat and reprocess them in a water bath with new lids within 24 hours.
- Gently wash jars or wipe with a damp cloth, label, and store in a cool, dark pantry.
- For best quality, enjoy home-canned goods like this beet relish within 12-18 months.


Horseradish Beet Relish
Equipment
- canning jars (pint or smaller jars)
- jar lifter or non-slip tongs (or jar rack with handles)
Ingredients
- 3 lbs beets
- 2 ½ cups apple cider vinegar (5% acidity) can substitute wine vinegar or distilled white vinegar (5% acidity)
- 2 cups onion finely chopped
- 1 ¼ cups sugar
- ⅔ cup prepared horseradish (plain horseradish grated in vinegar, not creamy horseradish spread… do not use horseradish with mayo or dairy added in this recipe!)
- 2 tsp fine pickling salt (or uniodized salt) (substitute 1 tbsp flaky kosher salt)
- 1 ½ tsp finely ground black pepper (freshly ground preferred)
- 1 tsp ground coriander (optional, not in Ball recipe)
- 1 tsp ground red pepper or cayenne (reduce or substitute paprika for mild relish)
Instructions
prep and measure ingredients:
- Assemble all of your ingredients and equipment.
- Scrub the beets well, and trim the tops and root ends.
- If you are using fresh horseradish instead of prepared pickled horseradish, wash, peel, and finely grate the root. Mix with equal parts of vinegar by volume and a pinch of salt. (Skip this step if you have jarred prepared horseradish in the fridge.)
- Peel, wash, and finely dice the onion. Measure out two cups of onion, and set aside any extra for another recipe.
- In a large pot (big enough to hold all of the brine and cooked beets), combine the diced onion with the vinegar, sugar, horseradish, and seasonings (all of the ingredients except for the beets). Stir to combine and dissolve the sugar.
prep canning jars and water-bath:
- Wash your canning jars with hot, soapy water, and rinse well.
- Fill your canning pot with enough water to cover the jars by at least 1″-2″.
- Place the jars in the pot to keep them warm, and bring the pot up to a simmer while the beets are cooking.
cook beets:
- Place the beets in a pot and add enough water to cover them.
- Bring the pot to a simmer over medium heat.
- Cover pot, and check occasionally to make sure all beets are covered by the water (stir them around a few times to make sure they cook evenly).
- Cook for about 25-35 minutes, or until the beets are still somewhat firm, but can be pierced with a fork. Large beets will take longer to cook through, and small ones will be done more quickly, so adjust cooking time as needed.
- Drain the beets and let them cool.
make the pickling brine & prepare beets:
- Bring the pot with the onion, vinegar, and horseradish mixture to a simmer over low heat while you peel and dice the beets.
- If you have good knife skills and can dice them quickly, start the pot of brine before prepping the beets, but if you are slow, wait until you are mostly done with the beet prep so you don’t over-reduce or boil away your brine!
- When the beets are cool enough to handle, slip off the peels. The peels should rub or slip off easily if the beets are cooked enough, though you can use a peeler or paring knife for the tricky bits.
- Cut the beets into 1/4″-1/2″ slices (smaller for a fine relish, larger for a chunky one).
- Cut those slices into baton/stick shapes, and then cut those again into small 1/4″-1/2″ dice.
- They don’t have to be perfectly diced, but will make a prettier relish if they’re relatively uniform.
- Measure out 8 cups of the diced beets. If you have more, set them aside and enjoy them fresh in a salad so that you do not dilute the pickling brine.
cook the relish:
- Add the diced cooked beets to the hot brine mixture and gently stir until well-combined.
- Return the pot to the stove, and bring up to a low simmer over medium-low heat.
- Stir gently and simmer at a low boil for 12 minutes, stirring regularly so that it does not scorch.
pack into jars:
- Pack the hot beet relish into pint, half pint or 4 oz canning jars.
- Leave 1/4″ headspace at the top of the jars. Remove any air-bubbles with a butter-knife, chopstick, or debubbling tool.
- Wipe the rims of the jars, and cover them with new canning lids.
- Screw down the rings finger-tip tight.
can the jars:
- Using jar tongs, place the jars into the hot water-bath in your canning pot.
- Cover the pot and bring the water-bath up to a rolling boil.
- Once the pot is boiling, start the processing timer.
- Process the jars for 15 minutes (adjust for altitudes above 1000 ft). Turn off heat and let jars rest in the canner for 5 minutes before transferring to a wire rack or towel-lined countertop to cool.
- Remove the jars of beet relish from the canner, and set on a folded towel or wire rack to cool. If the room is very cold or drafty, cover the hot jars with a kitchen towel so they cool evenly.
- Leave the jars undisturbed overnight (or until completely cooled, at least 6-8 hours).
- Check the lids for seals, remove bands, and wash the jars if they are sticky. Any jars that didn’t seal can be reprocessed with new lids within 24 hours of processing, or put in the fridge or freezer to be used first.
Notes
- 0-1,000 ft – use recipe time
- 1,001-3,000 ft – increase 5 minutes
- 3,001-6,000 ft – increase 10 minutes
- 6,001-8,000 ft – increase 15 minutes
- 8,001-10,000 ft – increase 20 minutes
Loved this? Try these related recipes!
- Spiced Cranberry Mustard (Water-Bath Canning Recipe)
- Festive Cranberry Jalapeno Salsa (Water-Bath Canning Recipe)
- Fiery Habanero Peach Salsa (Water-Bath Canning Recipe)
- Moroccan Beet Salad (Warm or Chilled Marinated Beets)
- Homemade Spicy Beet Falafel
- Spicy Green Coriander Chutney with Coconut
- Wild Game Charcuterie- How to Make Homemade Venison Wiejeska (Fresh Kielbasa with marjoram)
- How to Make Homemade Sauerkraut
- How to Make Caraway-Apple Sauerkraut