
CANNING: How to Can Bolognese Meat Ragu
- Serving Suggestions and Recipe Ideas
- Beefy Bolognese Ragu Ingredients
- Kitchen Equipment Needed
- How to Can Bolognese Meat Ragu
- Pantry Storage & Safety Tips
- How to Can Bolognese Meat Ragu (large batch recipe)
The best traditional Bolognese ragu sauces are simmered for a long time, but with jars of this home-canned bolognese ragu on your shelf, you can have easy dinners on the table in the time it takes to cook a pot of pasta.
There’s a reason Italian families make big batches of red sauce… it saves labor overall, and all of those flavors combining and simmering together makes a better sauce! This recipe will make a large batch of pasta sauce to make more efficient use of your time in the kitchen.
It’s written to be safe for pressure-canning, but you can also cook up a big batch, portion it, and freeze it. This meaty Bolognese recipe will make a generous 6 quart canner load of finished sauce (or about a dozen pints), or a smaller canning batch plus extra sauce to use immediately, refrigerate, or freeze.
It’s a tested Ball canning recipe, with a few safe tweaks to the seasoning to make a more authentically flavorful sauce. These modifications are noted in the recipe below, in case you want to omit them and can it strictly by the book.
This pressure-canned pasta sauce recipe uses canned bulk tomatoes for convenience. The original Ball recipe called for 1 ½ quarts of tomatoes and only yields 3 quarts of sauce, but I have doubled the quantities in their recipe to maximize your meals for the time it takes to cook and can. It’s the same tested recipe, but now you can make a big batch using those Costco (or your favorite bulk foods store) #10 cans of whole or diced tomatoes, or three quarts of your own canned tomatoes.
Serving Suggestions and Recipe Ideas
This Bolognese sauce makes a fantastic spaghetti sauce, or toss it with wider hand-cut tagliatelli. Use this meaty ragu as a shortcut for amazing homemade lasagna, for topping ricotta cheese stuffed shells or manicotti, or in baked ziti and other pasta casseroles.
Serve it over frozen or homemade ravioli, meat tortellini, or your favorite long or short dried pastas or with fresh egg noodles, or pair it with creamy or fried polenta.

Beefy Bolognese Ragu Ingredients
Ground beef or venison:
You can use ground beef or venison, or a blend of ground venison and beef or pork for your ragu. If you have 70/30 ground beef, you may want to drain off some of the excess fat after browning for a lower-fat sauce, but do not completely drain it. The fat adds flavor and mouthfeel, and your ragu will be thin without it!
Do not increase the amount of meat in the recipe without scaling up the other ingredients proportionally, though you can safely decrease it if you’d like, since this would reduce the density of the sauce.
Mirepoix:
This ragu recipe uses three parts diced onion to one part each of carrot and celery. Peel the carrots and onion before dicing, and wash the celery thoroughly to remove any dirt or grit. Cut the vegetables into 1/4″-1/2″ dice.
Tomato:
You’ll need both tomato paste and canned whole or diced tomatoes for this sauce. You can use home-canned roasted tomato paste or commercially canned stuff.
A double batch of the original Ball Beefy Bolognese recipe needs 3 quarts of diced tomatoes with their juices, which is just about exactly a large #10 can of tomatoes, which is how I have scaled this batch below.
I use whole canned tomatoes, and hand crush or roughly chop them before adding them to the sauce along with the liquid they’re packed in, but you can use diced tomatoes if you prefer for less mess. You can of course use three quart jars of your home-canned tomatoes if you have them!
And while this tested recipe specifies that you can use homemade roasted tomato paste (prepared according to their directions), you can also use commercial tomato paste, either one 12 oz can or two small 6 oz cans is perfect (this substitution is approved in the published recipe).
If you would like to use fresh Roma tomatoes (or other plum-type paste tomatoes) instead of canned ones, you’ll need to first blanch and peel them, core and chop them, and bring them to a simmer before measuring them out along with their juices.
Red wine & balsamic:
Use a nice, dry red table wine that you’d be okay with drinking for this ragu recipe (especially since you’ll be left with the rest of the bottle to pair with a bowl of pasta bolognese!). Decent quality boxed wine is totally fine, but don’t use salted “cooking wine” (blech!).
No need to break out an expensive bottle of Barolo… you can uncork (or unscrew, or uh, unbox?) any quaff-able weeknight tipple and it will do here. You can use an Italian wine like a Sangiovese or Chianti, or another bold red like a Cabernet, Shiraz, or Malbec. Just avoid sweet or salted wine, and you’ll be fine!
You’ll also need a few spoonfuls of balsamic vinegar. Use a cooking quality balsamic vinegar, not the really fancy and precious stuff. If it’s good enough for making salad dressing, it will work for your sauce. Make sure it’s regular 6% acidity vinegar, and not the syrupy balsamic glaze reduction.
Seasonings:
The Ball recipe uses only dried oregano, dried basil, and fresh garlic, along with the wine and balsamic for acidity.
We’re adding salt, pepper, and some spices. You can also add a bit of red pepper flakes for a zestier red sauce, or a spoonful or two of sugar to sweeten and round out the flavors.
These changes are optional, but the sauce tastes flat without them, in my opinion. These are safe modifications to the recipe that will not affect the processing time, and I have noted in the recipe card which are not in the original recipe if you’d prefer to go strictly by the book.

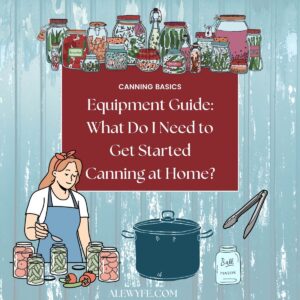
Kitchen Equipment Needed
Pressure Canner:
You absolutely must use a pressure canner to safely can this ragu recipe. If you don’t have a pressure canner, you can still make the recipe, simmering it until you are happy with the flavor and consistency, and then freeze it.
You can’t safely can this in an Instant Pot or a water-bath. They do not reliably build up enough heat or pressure to safely can foods, especially low-acid foods like beans, meat, mushrooms, and veggies that require consistent pressure and long processing times.
Botulism isn’t worth the risk… always pressure can low-acid foods like meats and vegetables in a suitable pressure canner.
I love my big All-American pressure canner, but any pressure canner that is large enough to hold at least four quart jars and that has a pressure weight and/or a tested pressure gauge will work (although you may need to adjust the batch size for your canner, or can the sauce in several batches).
For more information about canning basics and equipment, check out our introductory article with recommendations:
large heavy-bottomed stock pot or 8 qt Instant Pot:
You’ll need a non-reactive (enameled or stainless steel) pot that can hold at least 8 quarts (to the brim) so that you have room to stir and simmer your ragu without overflowing.
You can use a regular stockpot (as long as it’s not so thin that your sauce will scorch on the bottom) or a large enameled dutch oven, rondeau, or sauce pot, and cook your ragu on the stove top. I use my 8 quart Instant Pot, or you could probably use an electric roasting pan of similar volume.
pint or quart mason jars & new lids:
You’ll need 6 quart mason jars and new canning lids with bands, 12 pint jars, or an equivalent combination of smaller jars.
jar funnel, tongs, and other canning accessories:
These tools are optional but make the job of filling your jars, and getting them into and out of the hot water bath a lot easier and safer!
You can read more about these and our recommendations in our guide to canning equipment if you don’t already have these or are new to canning.
How to Can Bolognese Meat Ragu

one: prep ingredients
- Trim and peel the onion, and cut into medium dice (1/2″).
- Wash and peel the carrots, and cut into small to medium dice (1/4″-1/2″).
- Wash the celery well to remove any grit, then chop into medium dice or thin slices (cut larger stalks horizontally before dicing, and small once crosswise).
- Peel and thinly slice or chop the fresh garlic.
- Measure out your spices and other ingredients, or have them ready.
two: brown beef & vegetables
- Heat an 8 qt Instant Pot on the saute setting, or place an 8-12 qt enameled dutch oven or stock pot over a medium high heat.
- Crumble and brown the ground beef into the pan, working in batches if necessary.
- Stir and cook until the beef is beginning to brown and no pink remains.
- Drain any excess fat, and saute the onions with the salt and pepper until they are translucent. You may want to remove the beef to a bowl and keep it warm while you saute the vegetables before returning it to the pan, unless you are using a very large pot.
- Once the onions are beginning to color, add the carrots and celery and saute for another few minutes, stirring often, then add the garlic.
three: deglaze and add tomatoes
- Add the tomato paste to the pot, and stir, continuing to cook just until the tomato paste just begins to brown.
- De-glaze the pan with the wine and balsamic vinegar, stirring to scrape the bottom of the pot.
- Add the browned beef back to the pot (if you removed it) along with the dried herbs, spices, and sugar, and stir all together to combine.
- Add the diced tomatoes and their liquid, or crush whole canned tomatoes by hand before adding them into the sauce. Stir again carefully to mix.
four: simmer sauce
- Reduce heat to medium and bring the Bolognese ragu mixture just up to a boil, stirring frequently.
- Lower the heat again to keep the pot from scorching, and simmer until the sauce is beginning to thicken and come together.
- Ball suggests 15 minutes, but I recommend cooking it quite a bit longer. Stir the mixture often and adjust heat if necessary to prevent scorching.
- If you are not pressure canning your sauce, you’ll want to slow cook it for at least an hour, preferably several, before portioning and freezing your ragu.
five: prep canner
- Fill your pressure canner with several inches of water (follow the manufacturer’s directions) and heat it to around 180F.
- Wash your canning jars, rings, and lids in hot soapy water. Place the jars into the canner to pre-heat, and set your rings and lids aside.
- Do not boil your lids if you are using standard modern canning lids (follow manufacturer instructions for reusable lids like Tattler or Weck lids).
six: fill jars
- Using canning jar tongs or a jar rack, carefully remove the pre-heated jars from your pressure canner.
- Place the jars on a kitchen towel or wire rack. Do not put hot jars directly on a cold countertop, or they may crack or shatter.
- Using a canning funnel and ladle, fill the pint jars with the hot Bolognese sauce. If you used a bay leaf, remove it before filling the jars (or fish it out when you find it).
- Divide the ragu mixture evenly among the jars. Leave a 1″ headspace at the tops of the jars. De-bubble the jars, using a de-bubbling tool or chopstick, and top up if needed.
- Wipe the jar rims with a clean cloth or paper towel (dip the cloth in hot water or vinegar to cut any fat or residue for better seals).
- Top the jars with canning lids and rings, and tighten the rings down fingertip tight (quite snug but not overly tight).
seven: pressure-can the ragu
- Carefully place the filled jars of sauce into the preheated canner.
- Check that the canner vent isn’t clogged and close & seal the lid. Bring the canner up to pressure over medium heat with the vent open, and once the canner is venting a steady stream of steam, set a timer for 10 minutes.
- When the canner has vented for 10 minutes, regulate the heat if necessary and drop the weight over the vent (or close the petcock if you have an older unweighted dial-gauge canner).
- Can pint or smaller jars of hearty chicken stew for 1 hr (60 minutes) at 11 PSI dial gauge/10 PSI weighted gauge up to 1000 ft (adjust to 15 at higher altitudes with a weighted canner). Process quart jars or mixed batches of pints and quarts for 1 hour and 15 minutes (75 minutes).
- Start your processing timer only once the appropriate PSI has been reached, or when the weight is jiggling to indicate that the proper pressure has been reached. Watch or listen carefully, adjust heat as needed, and reset the timer to zero and restart processing time if you lose pressure below the correct processing pressure at any point.
eight: remove jars and cool
- After the processing time is complete, turn the heat off. Let the pressure canner has cool and slowly return to neutral pressure (the dial will drop to zero, and no steam escapes from the weight or petcock if jiggled).
- Wait another 5 minutes after the dial on your canner reads zero before opening. Follow your canner instructions for opening, being careful of any remaining steam (open away from your face).
- Gently remove the jars from the canner using jar tongs or the jar rack.
- Place the jars on a folded dish towel, cooling rack, or wooden surface. Protect hot jars from cold surfaces like granite, stainless, or concrete countertops until they have cooled.
- Let the hot jars cool in a draft-free place where they can rest overnight or for up to 24 hours.
Pantry Storage & Safety Tips
Remove the jar rings, check for seals, and wash the cooled jars of Bolognese ragu. Use warm, soapy water to remove any residue from the outside of the jars.
Refrigerate any jars of ragu that did not seal and use those jars promptly. You could reprocess them with new lids within 24 hours of the first processing.
However, since the canning time is so long, the reprocessed jars will lose quality, and the flavor and texture will suffer. I prefer to refrigerate any unsealed jars of ragu and use them within a few days rather than reprocess. You can also transfer the pasta sauce to freezer-safe containers and freeze.
Label the jars and store in a cool, dark place. For best quality, enjoy most home-canned goods within 12-18 months, although they will be safe to eat while the seals are intact. Nutritional value and flavor declines slightly with longer storage (or improper storage conditions).
Discard the contents of any jars of sauce that lose seals in storage, smell off, are bubbling, or hiss when opened, and sterilize the jar before using it again.

How to Can Bolognese Meat Ragu (large batch recipe)
Equipment
- 8 quart Instant Pot or 8-12 quart non-reactive dutch oven or sauce pot
- glass canning jars, rings, and new lids
- jar lifters or tongs or jar rack with handles
Ingredients
- 5 lbs lean ground beef or venison (2.5 kg)
- 1 tbsp kosher salt (or to taste, not in Ball recipe)
- 3 cup onion peeled & diced (750 mL)
- 1 cup carrot peeled & diced (250 mL)
- 1 cup celery washed, trimmed, & diced (250 mL)
- 12 large garlic cloves peeled & thinly sliced or chopped
- 1½ cup tomato paste (350 mL or a 12 oz can)
- 1 cup dry red wine (250 mL)
- 4 tbsp balsamic vinegar 6% acidity (60 mL)
- 4 tsp dried oregano (20 mL)
- 4 tsp dried basil (20 mL)
- 2 tsp sugar (optional, not in Ball recipe)
- 1 large bay leaf (optional, not in Ball recipe)
- ⅛ tsp ground cloves and/or nutmeg (optional, not in Ball recipe)
- 3 quarts canned diced tomatoes, undrained (#10 can) (substitute stewed or canned whole peeled tomatoes, crushed or chopped roughly)
Instructions
one: prep ingredients
- Trim and peel the onion, and cut into medium dice (1/2″).
- Wash and peel the carrots, and cut into small to medium dice (1/4″-1/2″).
- Wash the celery well to remove any grit, then chop into medium dice or thin slices (cut larger stalks horizontally before dicing, and small once crosswise).
- Peel and thinly slice or chop the fresh garlic.
- Measure out your spices and other ingredients, or have them ready.
two: brown beef & vegetables
- Heat an 8 qt Instant Pot on the saute setting, or place an 8-12 qt enameled dutch oven or stock pot over a medium high heat.
- Crumble and brown the ground beef into the pan, working in batches if necessary.
- Stir and cook until the beef is beginning to brown and no pink remains.
- Drain any excess fat, and saute the onions with the salt and pepper until they are translucent. You may want to remove the beef to a bowl and keep it warm while you saute the vegetables before returning it to the pan, unless you are using a very large pot.
- Once the onions are beginning to color, add the carrots and celery and saute for another few minutes, stirring often, then add the garlic.
three: deglaze and add tomatoes
- Add the tomato paste to the pot, and stir, continuing to cook just until the tomato paste just begins to brown.
- De-glaze the pan with the wine and balsamic vinegar, stirring to scrape the bottom of the pot.
- Add the browned beef back to the pot (if you removed it) along with the dried herbs, spices, and sugar, and stir all together to combine.
- Add the diced tomatoes and their liquid, or crush whole canned tomatoes by hand before adding them into the sauce. Stir again carefully to mix.
four: simmer sauce
- Reduce heat to medium and bring the Bolognese ragu mixture just up to a boil, stirring frequently.
- Lower the heat again to keep the pot from scorching, and simmer until the sauce is beginning to thicken and come together.
- Ball suggests 15 minutes, but I recommend cooking it quite a bit longer. Stir the mixture often and adjust heat if necessary to prevent scorching.
- If you are not pressure canning your sauce, you’ll want to slow cook it for at least an hour, preferably several, before portioning and freezing your ragu.
five: prep canner
- Fill your pressure canner with several inches of water (follow the manufacturer’s directions) and heat it to around 180F.
- Wash your canning jars, rings, and lids in hot soapy water. Place the jars into the canner to pre-heat, and set your rings and lids aside.
- Do not boil your lids if you are using standard modern canning lids (follow manufacturer instructions for reusable lids like Tattler or Weck lids).
six: fill jars
- Using canning jar tongs or a jar rack, carefully remove the pre-heated jars from your pressure canner.
- Place the jars on a kitchen towel or wire rack. Do not put hot jars directly on a cold countertop, or they may crack or shatter.
- Using a canning funnel and ladle, fill the pint jars with the hot Bolognese sauce. If you used a bay leaf, remove it before filling the jars (or fish it out when you find it).
- Divide the ragu mixture evenly among the jars. Leave a 1″ headspace at the tops of the jars. De-bubble the jars, using a de-bubbling tool or chopstick, and top up if needed.
- Wipe the jar rims with a clean cloth or paper towel (dip the cloth in hot water or vinegar to cut any fat or residue for better seals).
- Top the jars with canning lids and rings, and tighten the rings down fingertip tight (quite snug but not overly tight).
seven: pressure-can the ragu
- Carefully place the filled jars of sauce into the preheated canner.
- Check that the canner vent isn’t clogged and close & seal the lid. Bring the canner up to pressure over medium heat with the vent open, and once the canner is venting a steady stream of steam, set a timer for 10 minutes.
- When the canner has vented for 10 minutes, regulate the heat if necessary and drop the weight over the vent (or close the petcock if you have an older unweighted dial-gauge canner).
- Can pint or smaller jars of hearty chicken stew for 1 hr (60 minutes) at 11 PSI dial gauge/10 PSI weighted gauge up to 1000 ft (adjust to 15 at higher altitudes with a weighted canner). Process quart jars or mixed batches of pints and quarts for 1 hour and 15 minutes (75 minutes).
- Start your processing timer only once the appropriate PSI has been reached, or when the weight is jiggling to indicate that the proper pressure has been reached. Watch or listen carefully, adjust heat as needed, and reset the timer to zero and restart processing time if you lose pressure below the correct processing pressure at any point.
eight: remove jars and cool
- After the processing time is complete, turn the heat off. Let the pressure canner has cool and slowly return to neutral pressure (the dial will drop to zero, and no steam escapes from the weight or petcock if jiggled).
- Wait another 5 minutes after the dial on your canner reads zero before opening. Follow your canner instructions for opening, being careful of any remaining steam (open away from your face).
- Gently remove the jars from the canner using jar tongs or the jar rack.
- Place the jars on a folded dish towel, cooling rack, or wooden surface. Protect hot jars from cold surfaces like granite, stainless, or concrete countertops until they have cooled.
- Let the hot jars cool in a draft-free place where they can rest overnight or for up to 24 hours.
Notes
Nutrition
Liked this? Try these canning recipes!

- Spaghetti Sauce with Meat and Mushrooms (Pressure-Canning or Freezer-meal prep)
- Canning Vodka Sauce Base
- Roasted Eggplant, Pepper, & Tomato Puttanesca Sauce (water-bath canning)
- Zuppa Toscana – Sausage, Potato, Kale and White Bean Tuscan Soup
- French Onion Soup (Pressure-Canning or Freezer Meal-Prep Recipe)
- Hearty Chicken & Mushroom Stew or Pot Pie Filling