CANNING: Bread & Butter Pickles
- Serving Ideas for Homemade Bread & Butter Pickles
- Bread & Butter Pickles Ingredients
- Kitchen Equipment Needed
- How to Can Bread and Butter Pickles
- Storing your Bread and Butter Pickles
- Bread & Butter Pickles
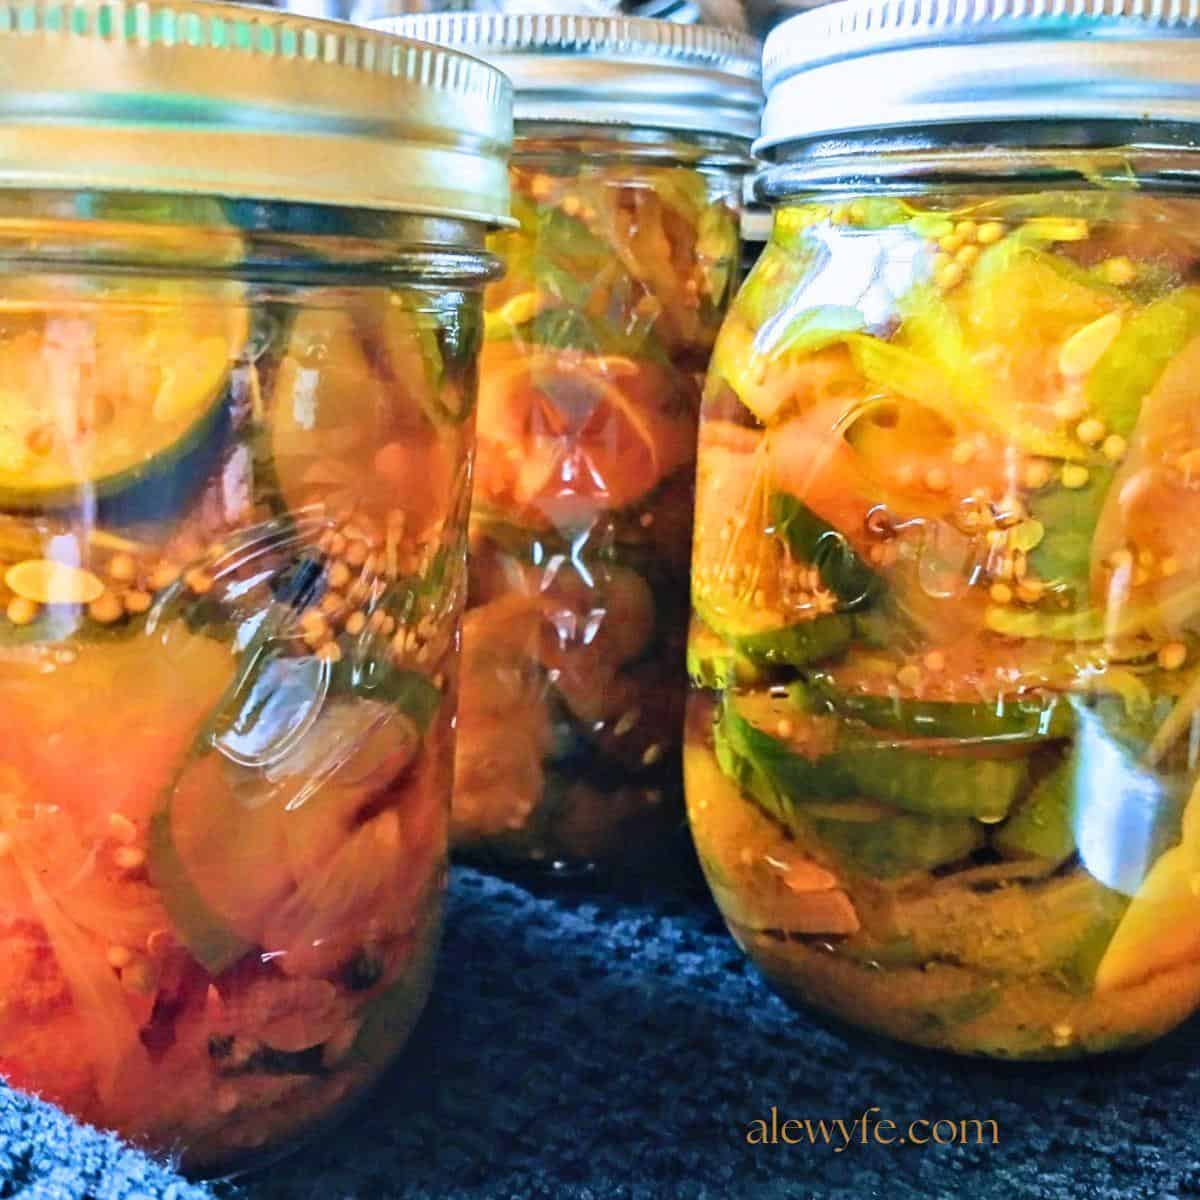
These homemade bread and butter pickles are sweet and tart, with a pop of mustard seeds and warm golden turmeric accenting the pickled cucumbers and onions.
It’s a fresh-pack recipe, which means the pickles are not brined and lacto-fermented before canning them, so it’s much easier than making traditional dill pickles. The cucumbers and onions are briefly salted and iced to remove excess moisture and make them crisp. Then, they’re canned in a sweet and spiced vinegar brine.
Traditional brined dill pickles can take weeks to make. These quick and easy bread and butter pickles are ready in an afternoon, though they’ll have a better flavor if you let them age on the pantry shelf for a few weeks after canning so that all the flavors can come together and infuse into the pickles.
They’re a classic home preserving recipe, and these old-fashioned pickles are one of my favorite ways to put up an excess of cucumbers when the garden runneth over!
Serving Ideas for Homemade Bread & Butter Pickles
These bread and butter pickles are great as a snack, either on their own or on sandwiches or relish trays.
Enjoy them on a thick slice of freshly baked bread slathered in butter (hence the name), or serve them alongside other charcuterie and cheeses with crackers or flatbread for an effortless appetizer or snack.
They’re also great on burgers, in egg salad, tuna, or cold cut sandwiches, with pate or meatloaf, or diced and added to pasta or potato salads and slaws (whole or chopped into relish).
Bread & Butter Pickles Ingredients
Cucumbers:
Use only fresh, firm cucumbers for your pickles. Ideally you should use a small pickling-type cucumber for best results, and pickle them as close to picking as possible (say that three times fast).
Choose young, bright green cucumbers with small undeveloped seeds and firm flesh. Wash them well, and trim and discard the stem and blossom ends before cutting your pickles into 1/4″ slices. Use a crinkle cutter for extra cute pickles with a wavy texture!
Onions:
Red onions are colorful and flavorful in this pickle, though you could substitute white or yellow onions in a pinch.
Vinegar:
Use white distilled vinegar, apple cider vinegar, or a blend, as long as they are 5% acidity or higher. Check the label to make sure before using them for canning.
Salt:
The quantities in the original recipe are for canning & pickling salt, which has a very fine grind and no additives. You can substitute kosher salt if you can’t get pickling salt, but do not use iodized salt. You will want to increase the amount of salt slightly if you use kosher salt, since it is less dense.
Sugar:
These are sweet pickles, so you’ll need a fair bit of granulated sugar- 2 cups for a 7 pint batch. These are quite sweet pickles, but balanced with the vinegar and spices.
Seasonings:
These pickles are not spicy (hot) but they are heavily spiced. We’re using a combination of dried mustard seeds, ground turmeric, celery seed, coriander seeds, ground ginger and peppercorns. Sometimes I add a teaspoon or two of Old Bay, which adds a nice flavor and is a safe modification if you want to try it.
Ground spices will make your pickle brine cloudy. Use whole spices if at all possible, and leave them in the brine. They’ll continue to add flavor after the pickles are canned.
Pickle Crisp (optional):
“Pickle Crisp” is the Ball trade-name for food-grade calcium chloride granules, which help make your pickles crunchy and not soggy. You add about an 1/8 tsp per pint jar when packing the jars.
I buy this in bulk, as it’s shelf-stable and lasts basically forever if you keep it in a moisture-proof container (the link above is what I bought a few years ago and I’ve barely made a dent in it… much more economical than the tiny overpriced jars of the name-brand stuff).
Kitchen Equipment Needed
Water bath canning pot:
Make sure the pot is big enough to fit all the jars of pickles, plus at least 1″-2″ of water to cover and room for them to rapidly boil. You’ll also need a lid that fits, and a jar rack or trivet for the pot.
Large pot:
You’ll need large pot that is big enough to hold your pickling brine mixture along with the cucumbers and onions. This is a hot-pack recipe, so you need to simmer your brine, add the vegetables, and then bring the whole mixture back up to a boil before canning the pickles.
Canning jars and lids:
Use pint or smaller canning jars and new lids to can your bread and butter pickles to ensure that they are safely processed. There is no listed processing time for quart jars for this particular recipe.
How to Can Bread and Butter Pickles
prep and ice-brine vegetables:
- Wash the cucumbers and peel the onions.
- Trim off and discard the stem ends of the cucumbers (they will make your pickles soggy and may taste bitter). Slice the cucumbers into 1/4″ slices (use a crinkle cutter if you have one).
- Thinly slice the onions into 1/4″ slices lengthwise.
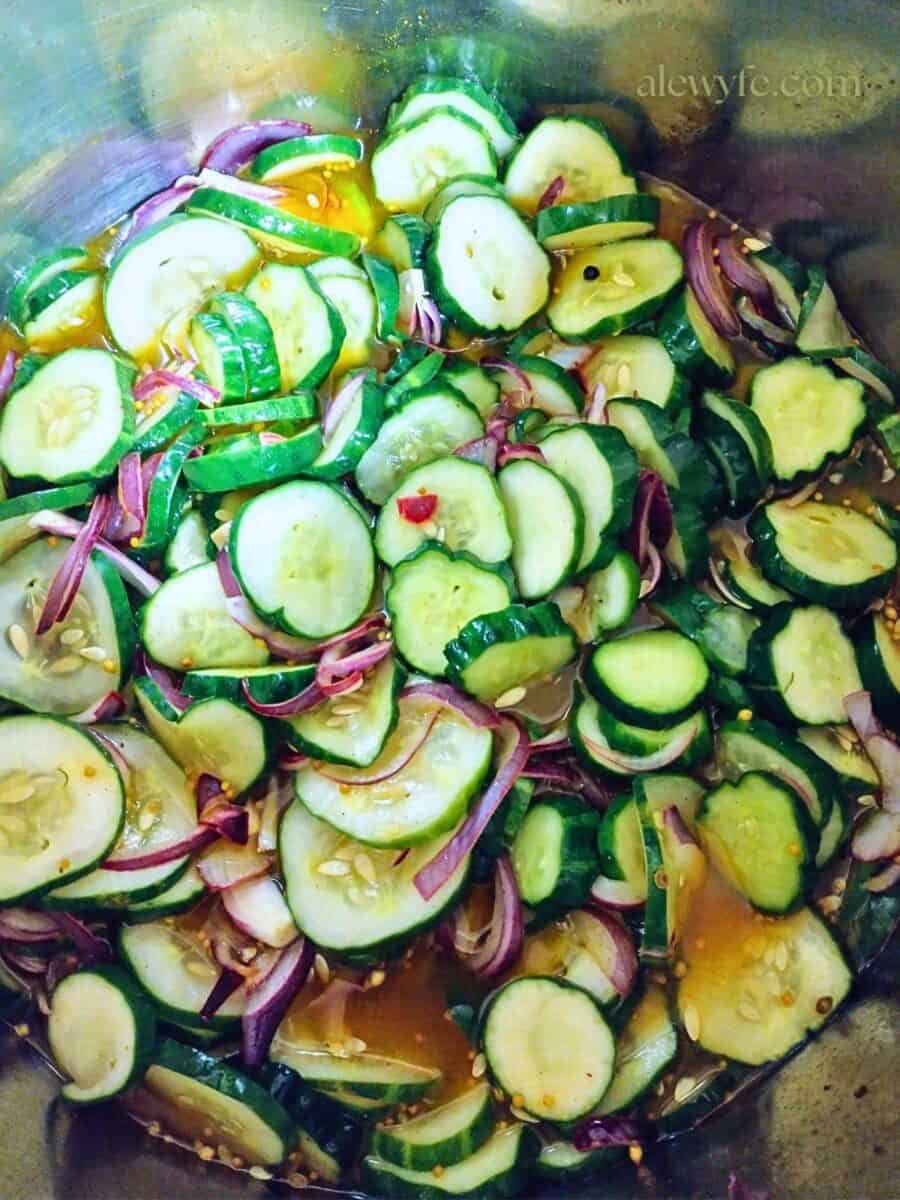
- Combine the cucumbers and onions in a large mixing bowl, layering with the pickling salt.
- Cover the bowl with a layer of ice cubes.
- Let the bowl rest for about an hour and a half to draw moisture from the vegetables.
prep jars and canner:
- Wash the canning jars with hot, soapy water and rinse well. Place them in your canning pot.
- Fill the canning pot with enough water to cover the jars, and begin to bring it up to a boil.
- Do not boil standard canning lids (this is outdated advice for modern lid-sealing compounds, unless you are using reusable lids, then follow manufacturer instructions).
make brine and pickles:
- In another pot, prepare the pickling marinade: combine the vinegar, sugar, and spices (do not add the Pickle Crisp if you are using it). Bring it up to a boil.
- While the brine mixture is heating, rinse the salt and ice from the cucumbers and onions.
- Drain the vegetables, then rinse and drain them again.
- Add the rinsed cucumbers and onions to the brine pot, and bring it up to a boil again.
fill the jars:
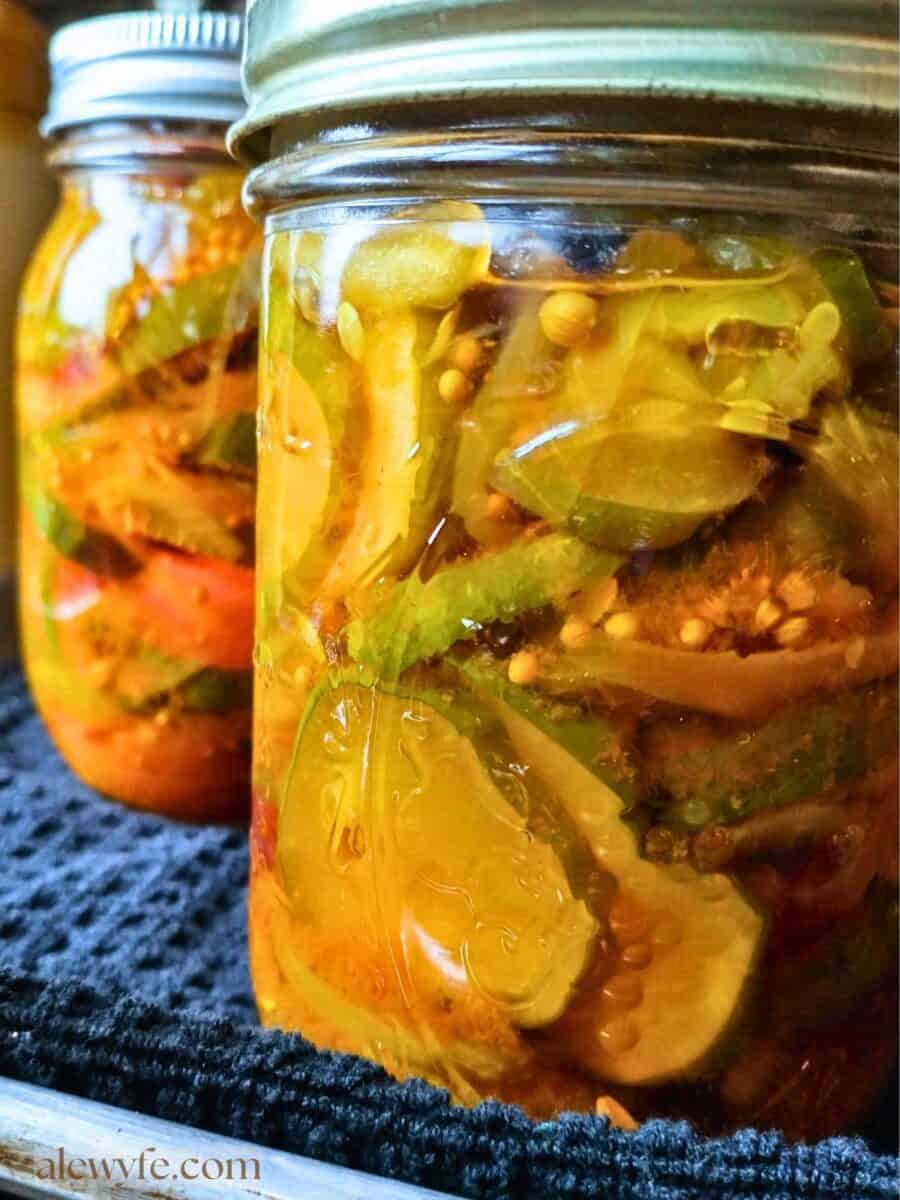
- Divide the hot spiced cucumber and onion mixture among the jars.
- Top up with the hot pickling marinade, dividing the mixture evenly among the jars.
- Leave a 1/2″ headspace at the top of the jars.
- Remove the trapped air bubbles, and top up with brine if necessary. You should have plenty of pickling liquid to fill the jars, but if you need to, you can top the jars up with more plain vinegar.
- If you are using Pickle Crisp, add 1/8 tsp to each jar.
prep jars for canning:
- Wipe jar rims with a clean cloth or paper towel dampened with hot water or distilled vinegar.
- Top the jars with new canning lids and tighten the bands.
- Place the jars in the hot water bath canner and cover with the lid.
water-bath processing:
- Bring the water in the canner back up to a boil before starting the processing timer.
- Process the jars for 10 minutes, then turn off the heat.
- When the time is up, leave the jars undisturbed in the canner for up to 5 minutes (this helps prevent siphoning of the liquid from the jars as they cool). Do not leave them longer than this.
cool jars & let seal:
- After 5 minutes, carefully use tongs or the jar rack to remove the jars from the water bath.
- Place the jars upright on a heat-resistant surface covered with a kitchen towel or wire rack. Do not tighten the lids (*unless you are using reusable lids, then follow manufacturer instructions).
check seals & store:
- Leave the jars undisturbed for 12-24 hours, then check for seals.
- Any jars that did not seal can be reheated and reprocessed with new lids within 24 hours of the initial processing, or refrigerated and used first. I would not recommend reprocessing, as it will make your pickles soft.
- Carefully wash jars with warm soapy water if they are sticky, then label them and store them with rings off.
Storing your Bread and Butter Pickles
- Store in a cool, dark pantry. Home canned goods are best consumed within 12-18 months, but should be safe much longer as long as the seal is intact and the jars show no signs of spoilage.
- Discard any jars that lose their seals in storage, bubble or hiss when opened, or have an off smell or visible signs of spoilage.
- Once they’re opened, use your bread and butter pickles right away, or keep them refrigerated once open! They’ll last for several weeks in the fridge.

Bread & Butter Pickles
Equipment
- large cooking pot
- canning lids
- canning funnel (helpful but not necessary)
- jar tongs or canning jar rack
Ingredients
- 4 lbs pickling cucumbers (4-6" firm cukes)
- 2 lbs onions, peeled & thinly sliced (about 8 small or 4-6 large onions)
- ⅓ cup canning & pickling salt (or sub a scant ½ cup kosher salt)
Pickling Brine:
- 2 cups granulated sugar
- 2 tbsp mustard seeds
- 1 tbsp coriander seeds (optional but nice)
- 1 tbsp ground turmeric
- 2 tsp celery seed
- 1 tsp ground ginger
- 1 tsp peppercorns
- 1 tsp Old Bay (optional variation)
- 3 cups distilled or apple cider vinegar (5% acidity)
- Pickle Crisp (calcium chloride granules) (add directly to jars, not brine)
Instructions
prep and ice-brine vegetables:
- Wash the cucumbers and peel the onions.
- Trim off and discard the stem ends of the cucumbers (they will make your pickles soggy and may taste bitter). Slice the cucumbers into 1/4″ slices (use a crinkle cutter if you have one).
- Thinly slice the onions into 1/4″ slices lengthwise.
- Combine the cucumbers and onions in a large mixing bowl, layering with the pickling salt.
- Cover the bowl with a layer of ice cubes.
- Let the bowl rest for about an hour and a half to draw moisture from the vegetables.
prep jars and canner:
- Wash the canning jars with hot, soapy water and rinse well. Place them in your canning pot.
- Fill the canning pot with enough water to cover the jars, and begin to bring it up to a boil.
- Do not boil standard canning lids (this is outdated advice for modern lid-sealing compounds, unless you are using reusable lids, then follow manufacturer instructions).
make brine and pickles:
- In another pot, prepare the pickling marinade: combine the vinegar, sugar, and spices (do not add the Pickle Crisp if you are using it). Bring it up to a boil.
- While the brine mixture is heating, rinse the salt and ice from the cucumbers and onions.
- Drain the vegetables, then rinse and drain them again.
- Add the rinsed cucumbers and onions to the brine pot, and bring it up to a boil again.
fill the jars:
- Divide the hot spiced cucumber and onion mixture among the jars.
- Top up with the hot pickling marinade, dividing the mixture evenly among the jars.
- Leave a 1/2″ headspace at the top of the jars. You should have plenty of pickling liquid, but if you need to, you can top the jars up with more vinegar.
- If you are using Pickle Crisp, add 1/8 tsp to each jar.
prep jars for canning:
- Wipe jar rims with a clean cloth or paper towel dampened with hot water or distilled vinegar.
- Top the jars with new canning lids and tighten the bands.
- Place the jars in the hot water bath canner and cover with the lid.
water-bath processing:
- Bring the water in the canner back up to a boil before starting the processing timer.
- Process the jars for 10 minutes at a full boil, then turn off the heat.
- When the time is up, leave the jars undisturbed in the canner for up to 5 minutes (this helps prevent siphoning of the liquid from the jars as they cool). Do not leave them longer than this.
cool jars, check seals, & store:
- After 5 minutes, carefully use tongs or the jar rack to remove the jars from the water bath.
- Place the jars upright on a heat-resistant surface covered with a kitchen towel or wire rack. Do not tighten the lids (*unless you are using reusable lids, then follow manufacturer instructions).
- Leave the jars undisturbed for 12-24 hours, then check for seals.
- Any jars that did not seal can be reheated and reprocessed with new lids within 24 hours of the initial processing, or refrigerated and used first. I would not recommend reprocessing, as it will make your pickles soft.
- Carefully wash jars with warm soapy water if they are sticky, then label them and store them with rings off.
Notes
- 0-1,000 ft – use recipe time
- 1,001-3,000 ft – increase 5 minutes
- 3,001-6,000 ft – increase 10 minutes
- 6,001-8,000 ft – increase 15 minutes
- 8,001-10,000 ft – increase 20 minutes
Liked these pickles? Try these related recipes:
- How to Make Chicago-Style Giardiniera
- Fun Guys – How to Can Marinated Mushrooms
- Spiced Cranberry Mustard
- Spiced Pear Chutney
- Mock Ploy: Sweet Chili-Garlic Sauce (Mae Ploy Copycat Recipe)
- Spiced Golden Pickled Eggs (easy refrigerator pickle recipe)
- Spicy Jalapeno Pickled Eggs (easy refrigerator pickle recipe)