CANNING: “Mock Ploy” Sweet Chili-Garlic Sauce (Mae Ploy Copycat Recipe)
- Mae Ploy Copycat Recipe Ingredients
- The best way to peel a bunch of garlic (so easy!)
- What Do I Need to Can Sweet Chili Sauce?
- How to Make Sweet Garlic Chili Sauce
- Storage and Pantry Tips
- Serving Ideas for Homemade Sweet Chili-Garlic Sauce
- Mae Ploy Sweet Garlic and Chili Sauce (Canning Recipe)
If you’re looking for an easy winter canning project that won’t blow your grocery budget, look no further than this Mae Ploy copycat sweet chili sauce recipe. This “Mock Ploy” is inexpensive to make, a perfect beginner’s canning recipe, and a super-versatile pantry ingredient. You can it in smaller jars, so you don’t have a ton of leftovers cluttering up your fridge when you just need a little bit for a recipe or a fast dipping sauce.
This is a high-acid water-bath canning recipe adapted from a tested recipe from Bernardin. I have added a little bit more spice and umami to the original, and thickened it a bit with pectin (you can also use ClearJel, which is a modified food starch that’s safe to use in home-canning recipes, unlike cornstarch or other thickeners, which should never be added to home canned goods until serving).
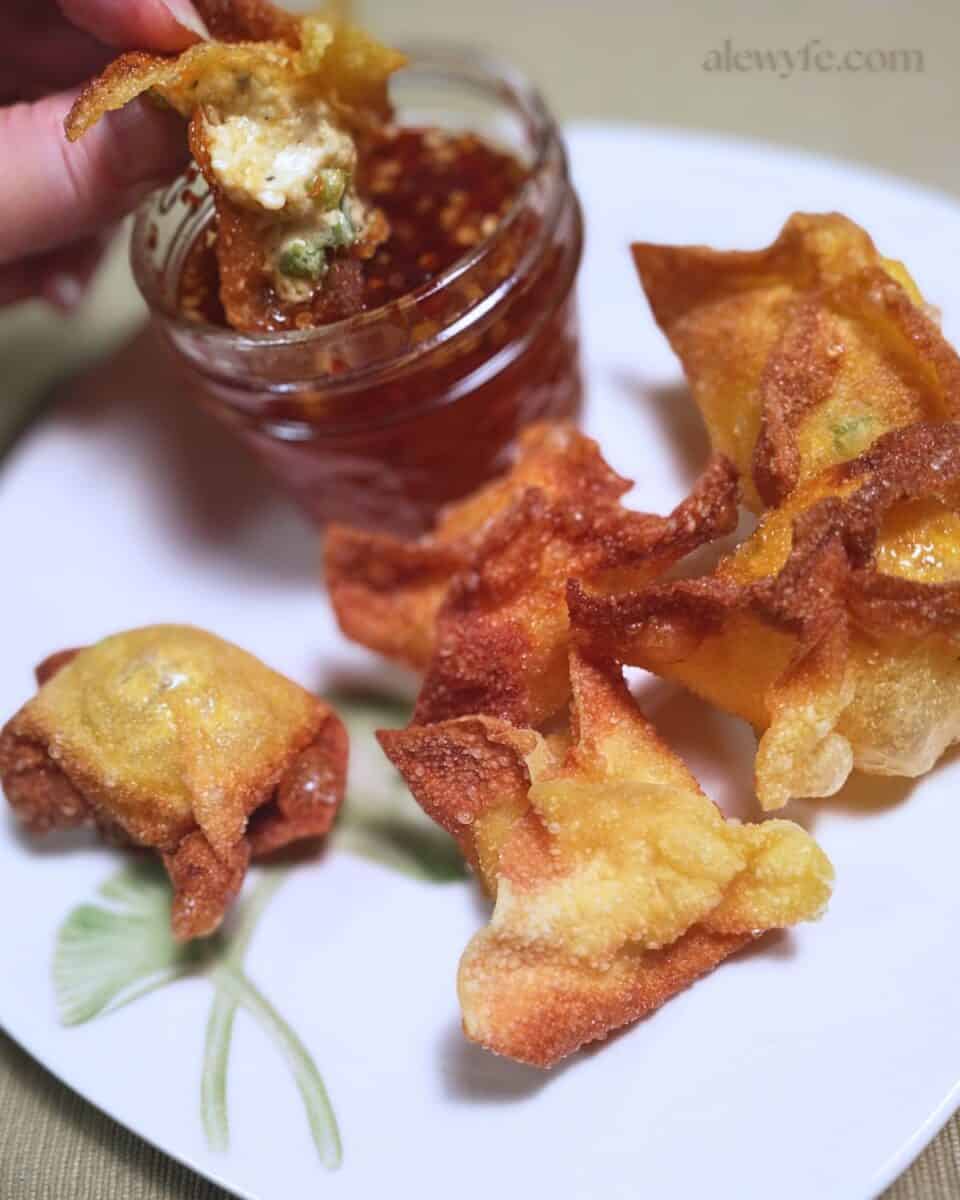
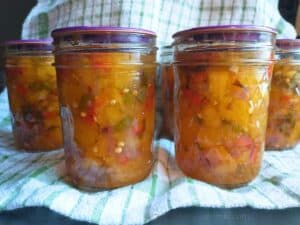
It’s still a very thin sauce, much thinner than the Mae Ploy bottled sauce, but we like this better for dipping. I also didn’t want to mess too much with the density to throw off the tested processing times or risk making garlic-pepper jelly instead of sauce. I do love pepper jelly, but we’ve already got that in our pantry and you can’t dip your egg rolls (or jalapeno popper wontons) in it!
You could also can it as originally written without the added pectin, and thicken it before serving with some cornstarch, but we like to use it right out of the jar and prefer a little closer to a nappé texture- it won’t hold a line when you stir it, but it will coat a spoon, or more importantly, whatever food you’re dipping in it.
(Scroll down to the bottom of the post for a ton of recipe and serving ideas for your homemade sweet chili sauce!)
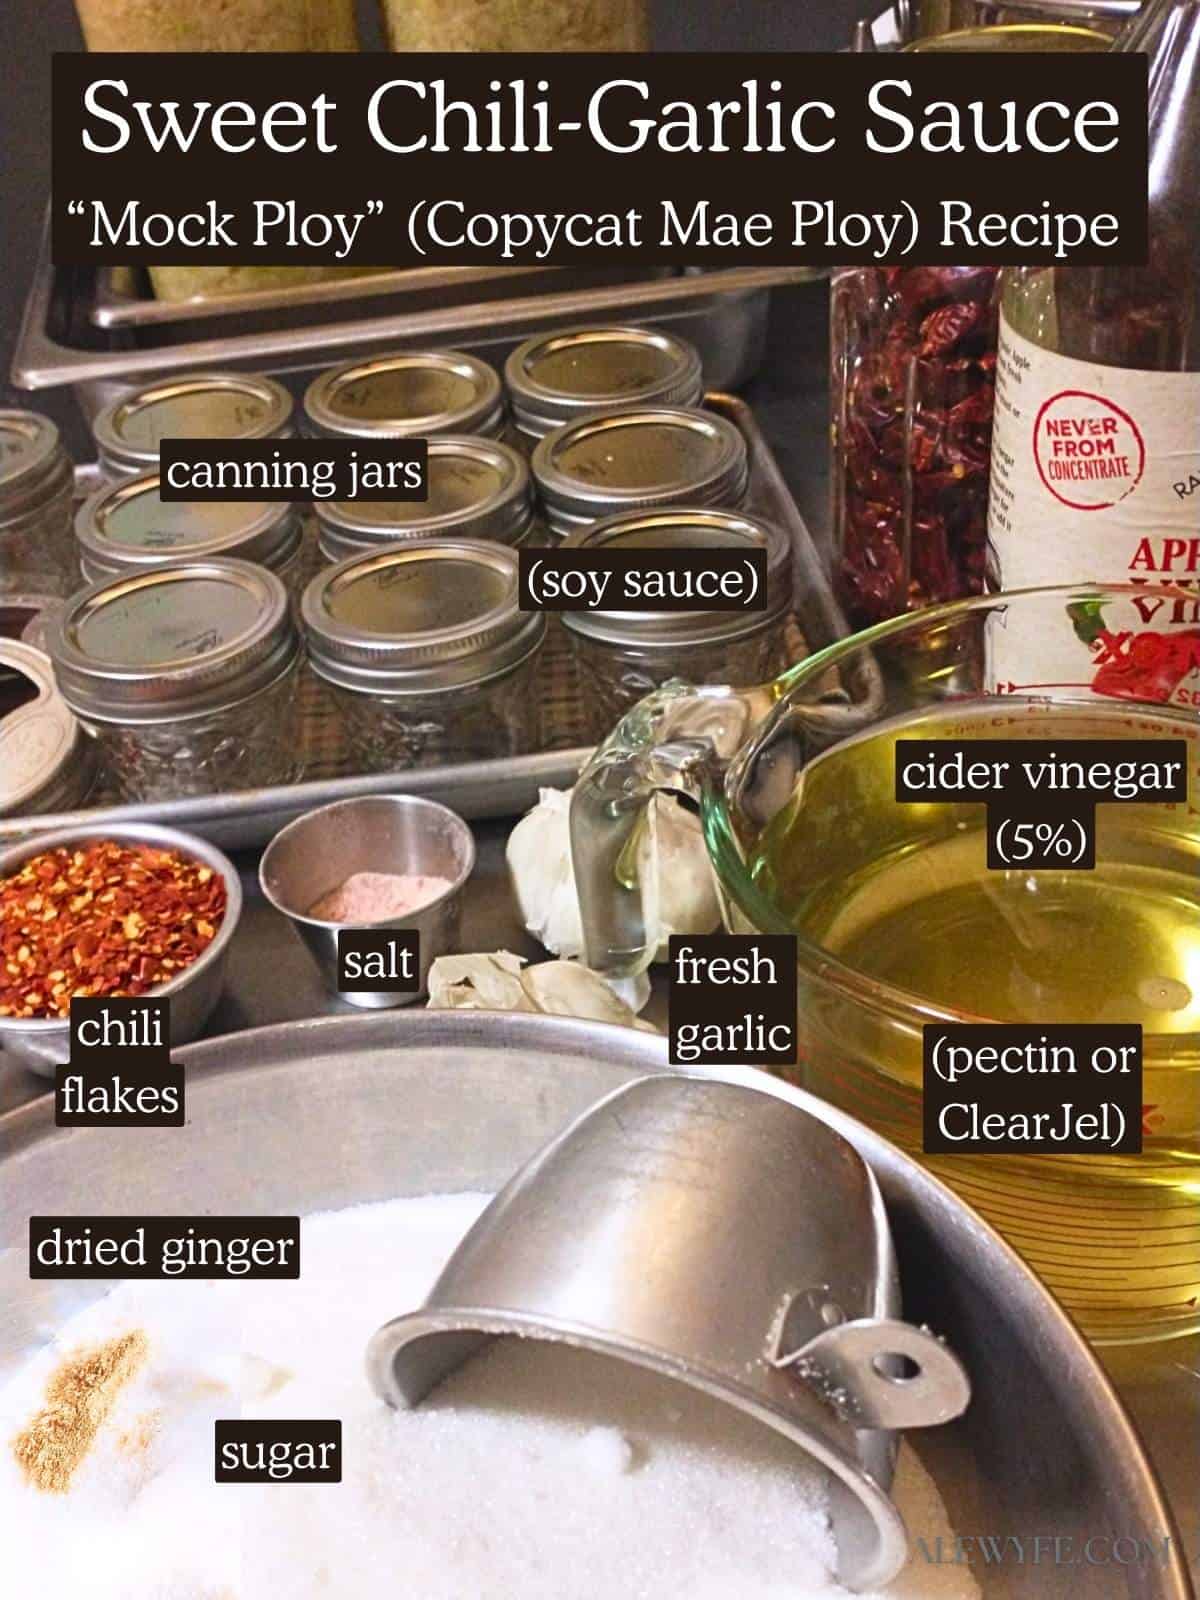
Mae Ploy Copycat Recipe Ingredients
Vinegar:
Apple cider vinegar is what is in the original tested recipe from Bernardin, and will give you both great flavor and a safe sauce. Though in a pinch, you could use distilled vinegar for all or part of the six cups of vinegar you’ll need for a single batch. Rice wine vinegar would also be delicious, or even white wine vinegar would also have a better flavor than distilled if you don’t want to use apple cider vinegar or need to do a substitution.
If you substitute rice wine vinegar for all or part of the vinegar, check the acidity first- some types of rice wine vinegar have less than 5% acidity, and can’t be safely used on their own in this recipe without adding additional acid (citric acid, or full-strength German vinegar could be used to lower the pH without diluting the sauce… but if you aren’t comfortable doing the math conversion to figure out the ratios, it’s best to stick with the commercially bottled stuff that’s already at the correct strength for pickling).
Whichever kind you choose, make sure it is at least 5% acidity and commercially bottled. I love making homemade apple cider vinegar, but I save that for salad dressings and marinades, as you can’t safely calculate the acidity at home (well, you could theoretically titrate and measure that if you have some lab experience but ain’t nobody got time for that, right). Anyway, check the label on your vinegar to make sure it’s safe to use for canning!
Sugar:
This one’s easy- just regular granulated sugar. You’ll need six leveled cups. Don’t worry about lumps- they’ll dissolve just fine in the simmering vinegar.
Dried Chilis:
You can make your own chili flakes with dried thai chilis (birds eye peppers, or chiles de arbol), or save time and use red pepper flakes. Try to use fresh, brightly colored flavored chili flakes with a fruity aroma, as they’ll comprise a lot of the flavor of your sauce.
Shopping tip – if you have an Indian or Latin American grocery store or section, they usually have bagged bulk spices that are good quality and much more inexpensive than the small containers in the spice aisle. I’ve also used the dried pepper flakes from Costco in this, and they work great.
You’ll need a half cup of chili flakes, or stemmed and crushed whole dried chili peppers.
Garlic:
You’ll need a half cup of peeled, chopped garlic cloves. Use fresh garlic and peel it, not the jarred stuff in this recipe. It’s worth the effort!
The best way to peel a bunch of garlic (so easy!)
Here’s a pro-tip for peeling garlic that will save your sanity on recipes like this… Remove the papery outer covering and separate the cloves. Using a sharp chef’s or paring knife, slice off a sliver at the root end and tip of the garlic cloves, and put them in a container with a lid that’s about twice the volume of your garlic (ie: fill it up about half-way).
At the restaurant, we’d put the garlic cloves in metal six or nine pans (square metal containers used for food prep and buffet trays) and nest another one upside down on top, holding them together – which always had the potential for comedy and flying garlic if one of the pans slipped. Never a dull moment in the kitchen, I guess. At home, you could use a mason jar, tupperware, a deli container, any hard-siced container that is the right size and seals well.
Now… SHAKE. Shake it like a cocktail, a mocktail, your moneymaker, or a mason jar full of cream that you’re trying to turn into butter, whatever. Shake it up some more.
Now, open the top, and some of your garlic will be fully peeled. The rest of the skins should pop off relatively easy. The more cloves you are peeling, the better this works, as there’s more friction in the container. It’s a good way to meal prep – peel a head or two of garlic at a time and store the rest in the fridge (in an airtight container) for up to a week.
Seasonings:
The original recipe only adds salt. I wanted a little bit more dimension to the dipping sauce, and make mine with a bit of dried ginger for zip and a dash of soy sauce for umami.
Optional Thickener:
The recipe as originally published is very watery, almost like a Vietnamese sweet chili sauce (without the briny tang of fish sauce and lime).
I add a little bit of powdered pectin, though Clearjel could work too, and I’m going to use that next time I make a batch (I’ll update these notes when I do with any feedback!). This isn’t enough to thicken and set the sauce into a jelly, but just adds a bit more viscosity to the finished sauce which improves the texture and makes it a much better dipping sauce.
If you decide to do this too, add them to the vinegar before you heat it so that it dissolves without clumping. If you prefer liquid pectin, you’d also add that to the liquid ingredients (the vinegar), but that would leave you with a mostly unused packet of pectin… one of the reasons I prefer working with the powdered stuff. It’s easier to store and to adjust quantities for different batch sizes!
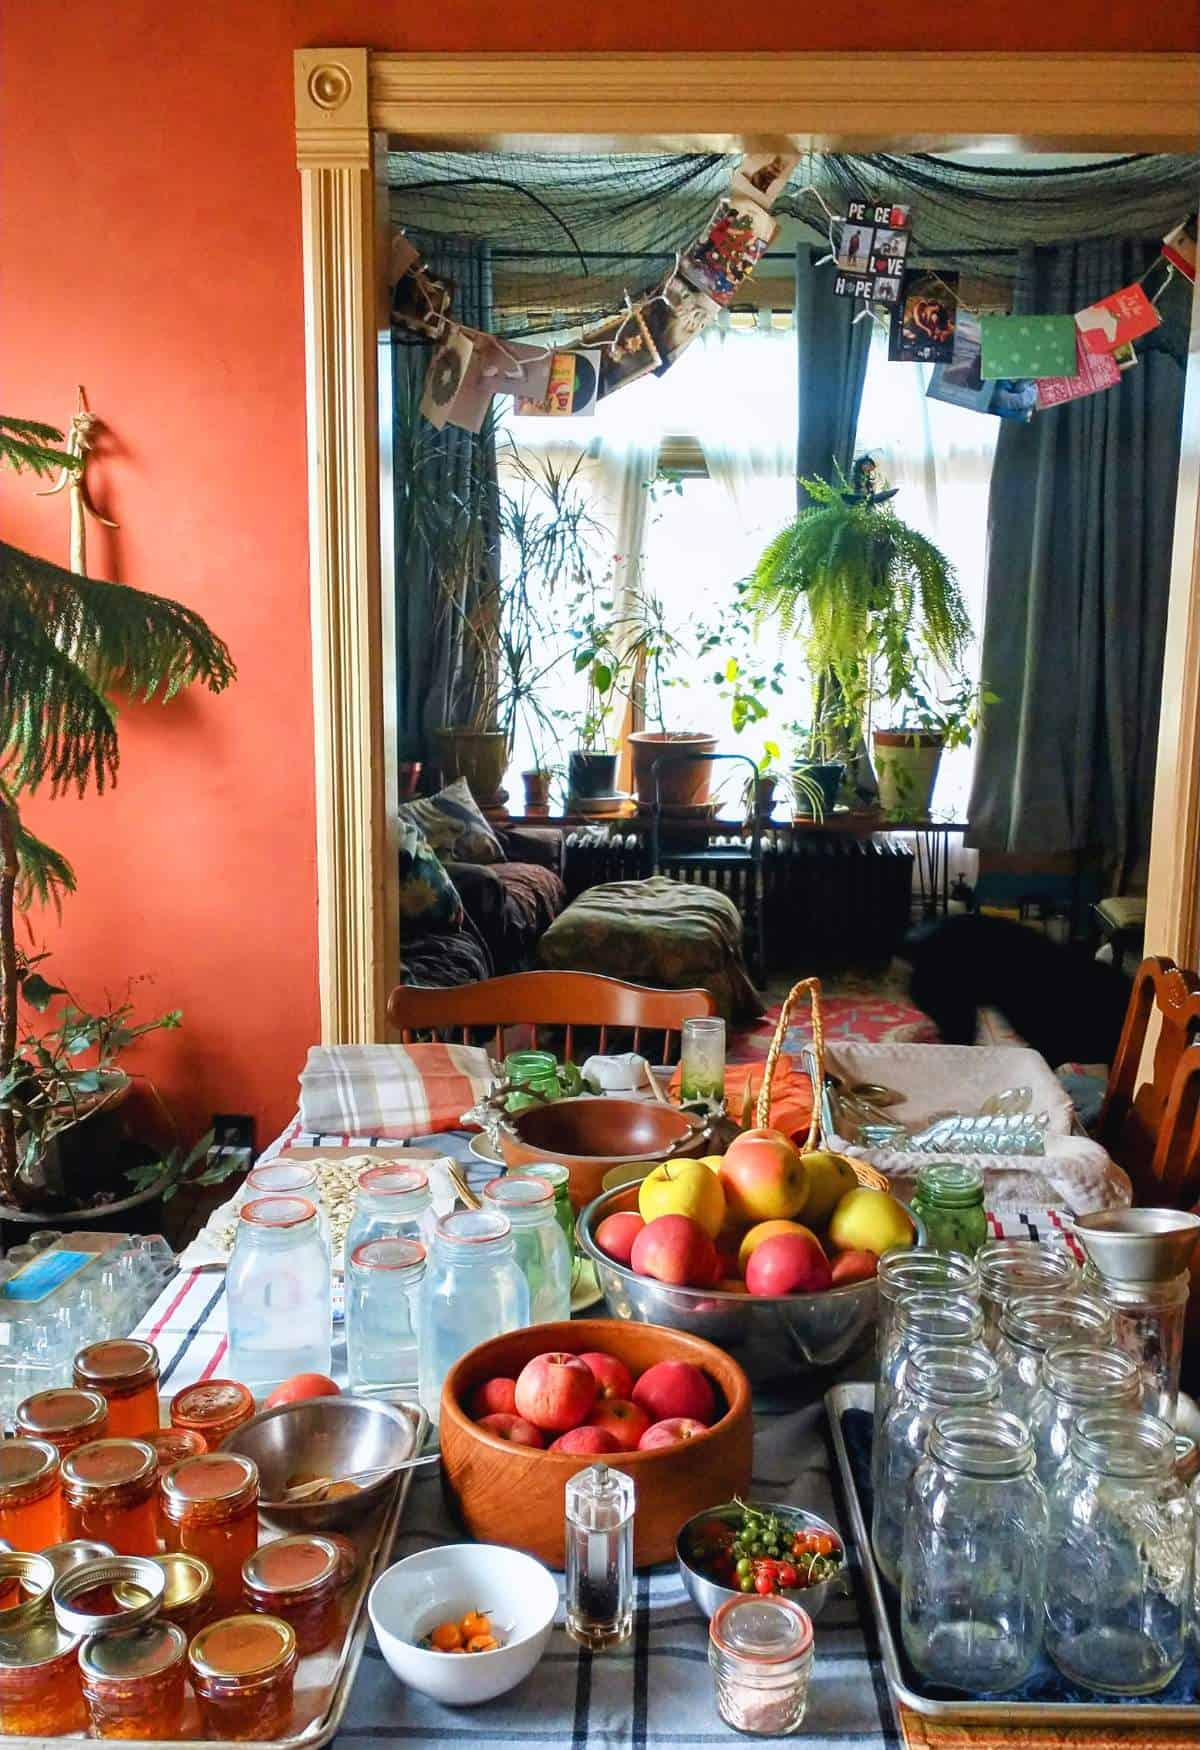
What Do I Need to Can Sweet Chili Sauce?
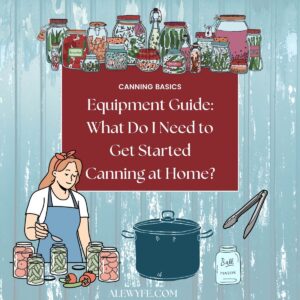
If you aren’t familiar with canning already, take a look at our canning equipment guide which should demystify the process and tools you’ll need. Don’t worry, this is a really easy beginner-friendly recipe, and I’ll walk you through the steps, so you can totally do this!
Large Stockpot or Water-Bath Canner:
This recipe is canned in small jelly jars, so you may not even need a big canner to try making your own Mae Ploy. You just need a pot that will hold all the jars (it’s ok to stack them, though it’s better if there’s a rack or steamer disk between them, or at least a silicone trivet). A canning pot with a jar-lifter rack in it will make it easier, but you can totally use what you have, as long as it’s big enough to cover your jars with at least an inch or two of water, boiling vigorously.
Jar lifter and canning funnel:
These are in the “nice to have but will make your life easier” category. Get some if you don’t have them already… life is hard enough as it is, right?
Mason Jars:
The original tested recipe specifies 250 ml jars (it’s from Bernardin, in Canada, so it’s metric). Those are equivalent to our 8 oz half pint jelly jars, if you’re using Freedom Units (lol, insert “Americans will literally use anything but the metric system” joke here…). You can also use the squat wide-mouth “fish jars” that are also a half-pint and convenient for dipping.
I’ve also used smaller 4 oz Ball mason jars, but out of an abundance of caution and also convenience, I wouldn’t go larger than those 8 oz jars, and if you’re a real stickler for following directions. These little mini-jars are also the perfect size for dipping sauce for a meal or two of dumplings, or for most recipes where you just need a little bit of chili sauce without having a million jars open in your fridge. It’s always safe to reduce the size of jar in a canning recipe, but you shouldn’t increase it.
Canning Jar lids and rings:
Use new canning jar lids and check your canning rings for dents. Discard any with dents or that are too rusted (or use them for crafts). Dented rings can interfere with getting a good seal, especially if they’re dented at the top where the sealing compound meets the jar rim.
If you’re comfortable with reusable canning lids (like Weck jars, or Tattler or Harvest Guard lids, or Le Parfait Super Terrine jars) make sure they’re scrupulously clean and check the rubber seals for cracks or use new ones.
Follow the manufacturer instructions for your particular brand of lids. If you’re a beginner, stick with the standard mason jars and new metal canning lids.
How to Make Sweet Garlic Chili Sauce
one: prep jars and canner
- Fill a large stock pot or boiling water canner with water and begin to preheat the canner.
- Wash your canning jars in hot soapy water. Check your rings for dents and count your lids to make sure you have enough. The original recipe says it makes 9 half-pints, but the yield was slightly higher when I made it, and yes, I measured everything! If you are using the 4 oz quarter-pint jars, you’ll need twice as many, or you can mix and match 4 and 8 oz jars- they process for the same amount of time. Don’t use larger jars.
- Place the jars in your canner pot, on a pan in the oven on low, or in your dishwasher on pre-heat to warm them. You can also rinse them with hot water just before filling them. You don’t need to sterilize the jars as long as they are perfectly clean, but you don’t want to put hot liquid in cold jars.
- Do not preheat your lids as this may damage the sealing compound (unless you are using reusable lids- then follow the manufacturer directions).
two: measure your ingredients
- Peel and chop the garlic cloves.
- In a small bowl or measuring cup, combine with the salt and the soy sauce.
- Measure the sugar into a large bowl, and add the dried ginger (you can also measure the sugar and ginger directly into the pot in step four if you want to save a dish).
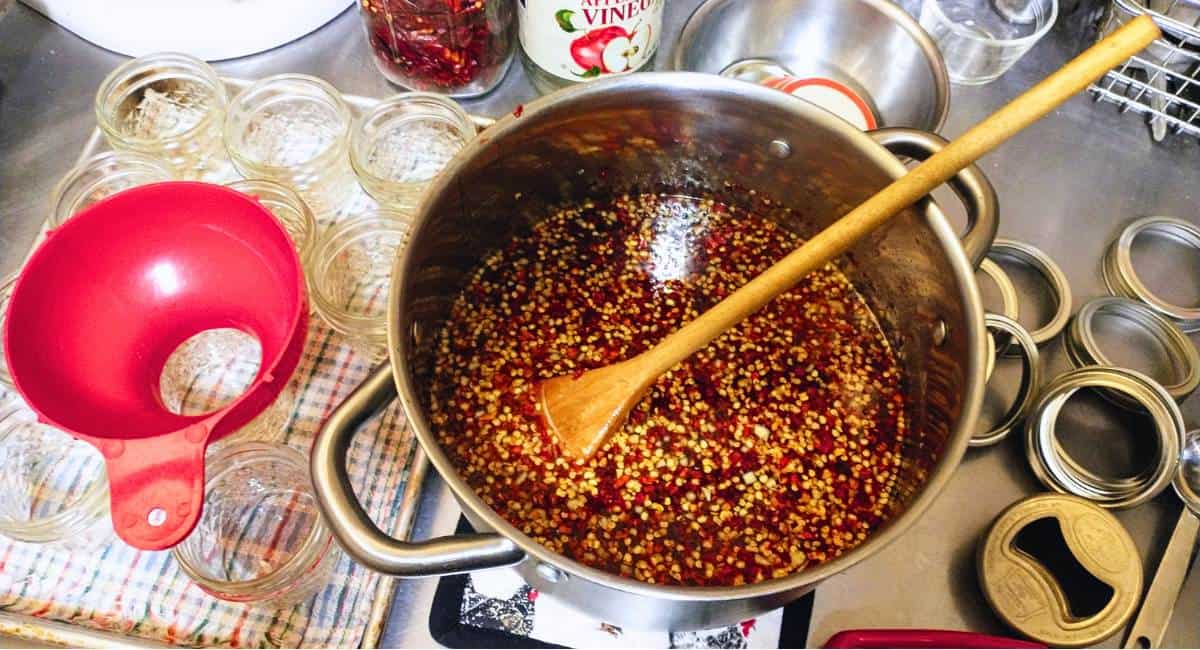
three: heat the vinegar
- Measure the vinegar into a large heavy bottomed pot.
- If you are using powdered pectin, sprinkle that into the pot and whisk well to break up any clumps.
- Bring vinegar to a boil over high heat.
four: add sugar
- Add sugar and ginger and stir until the sugar dissolves.
- Reduce the heat and simmer for five minutes.
five: add chili & garlic
- Add the chili flakes and the garlic mixture to the pot and stir until well combined.
- Turn the heat to low and simmer for three to five minutes.
six: fill your jars
- Remove the pot from the heat and ladle the sauce into your hot canning jars.
- Use a canning funnel if you have one to help keep the chili sauce off the rims of the jars.
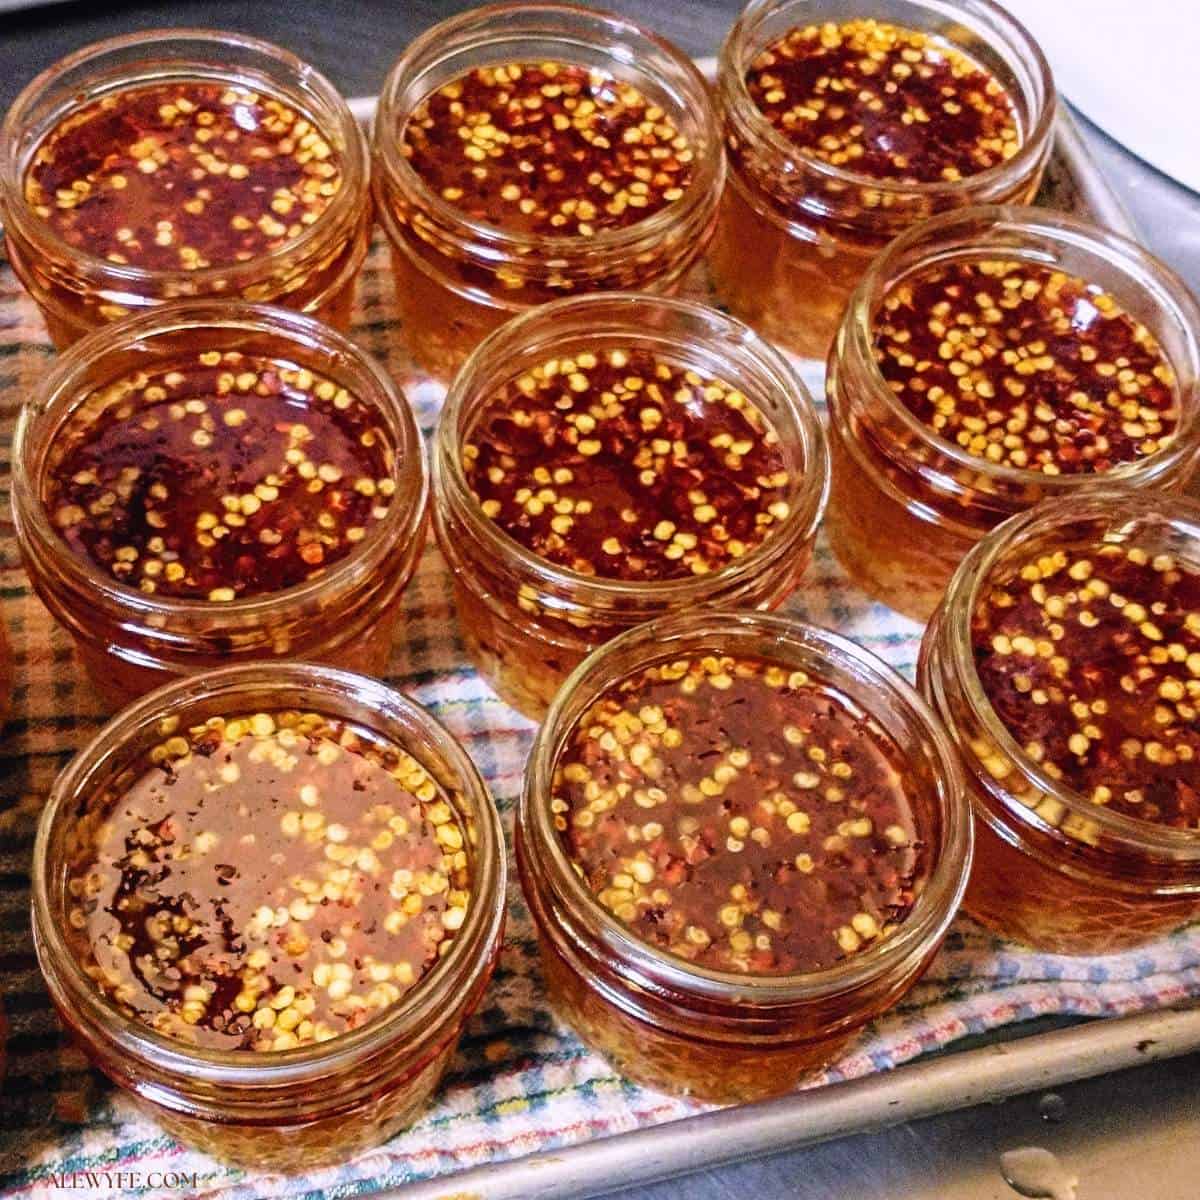
- The chili flakes will float to the top of the pot. Stir the pot as you ladle it out. I also like to ladle it out evenly to all the jars rather than completely filling one at a time. This is a bit more tedious and messy, as you’re moving the funnel, but can help get a more uniform mixture of “chunks” and liquid sauce in each jar.
- Leave 1/4″ of headspace at the top of each jar. If you have extra sauce, refrigerate it rather than overfilling or underfilling the jars.
- Wipe the rims of the jars with a clean, lint free cloth or paper towel dipped in hot water, vinegar, or a mixture of the two. This will remove any sticky residue from the rims of your jars and help make sure you get good seals.
- Top the jars with lids and rings, and place them in your canner using a jar rack or tongs.

seven: process the jars
- Process the jars in the boiling water bath for ten minutes.
- Start the processing timer only after the pot reaches a rolling boil.
- After ten minutes, turn off the heat and set another timer for five minutes.
If you live at a high elevation, consult a processing time conversion chart to increase the processing time accordingly for your altitude.
- Using jar tongs or the jar rack, lift out the jars and place them on a tray, a wire rack, or a folded towel.
- Don’t place hot jars directly onto a cold surface (like a stone, concrete, or stainless counter top surface) as they may crack.
- Leave the jars undisturbed to cool overnight, or from 8-24 hours.
- Remove the rings from the cooled jars and check to make sure your lids are firmly sealed.
- Refrigerate any unsealed jars, or you can reheat the mixture and reprocess with new lids.
- Wash the jars to remove any sugar or sticky residue and hard water marks, label them, and store them in your pantry without the rings on.
Storage and Pantry Tips
Your unopened home canned chili sauce will last a long time, especially if it’s stored somewhere cool, dry and dark. The quality is best if you use it within 18 months to two years, though if it is properly processed, as long as the jar is sealed it should be safe to consume a lot longer than that… if it lasts that long!
Once opened, store your sauce in the refrigerator and try to use it within a week or two of opening, though if you use clean utensils to spoon your sauce out, it may keep longer than that. If you dip directly into the jar of sauce, discard the leftovers, or use them within three days. If you notice any off smells or bubbling, or of course, if there is any mold in the jar, toss it.
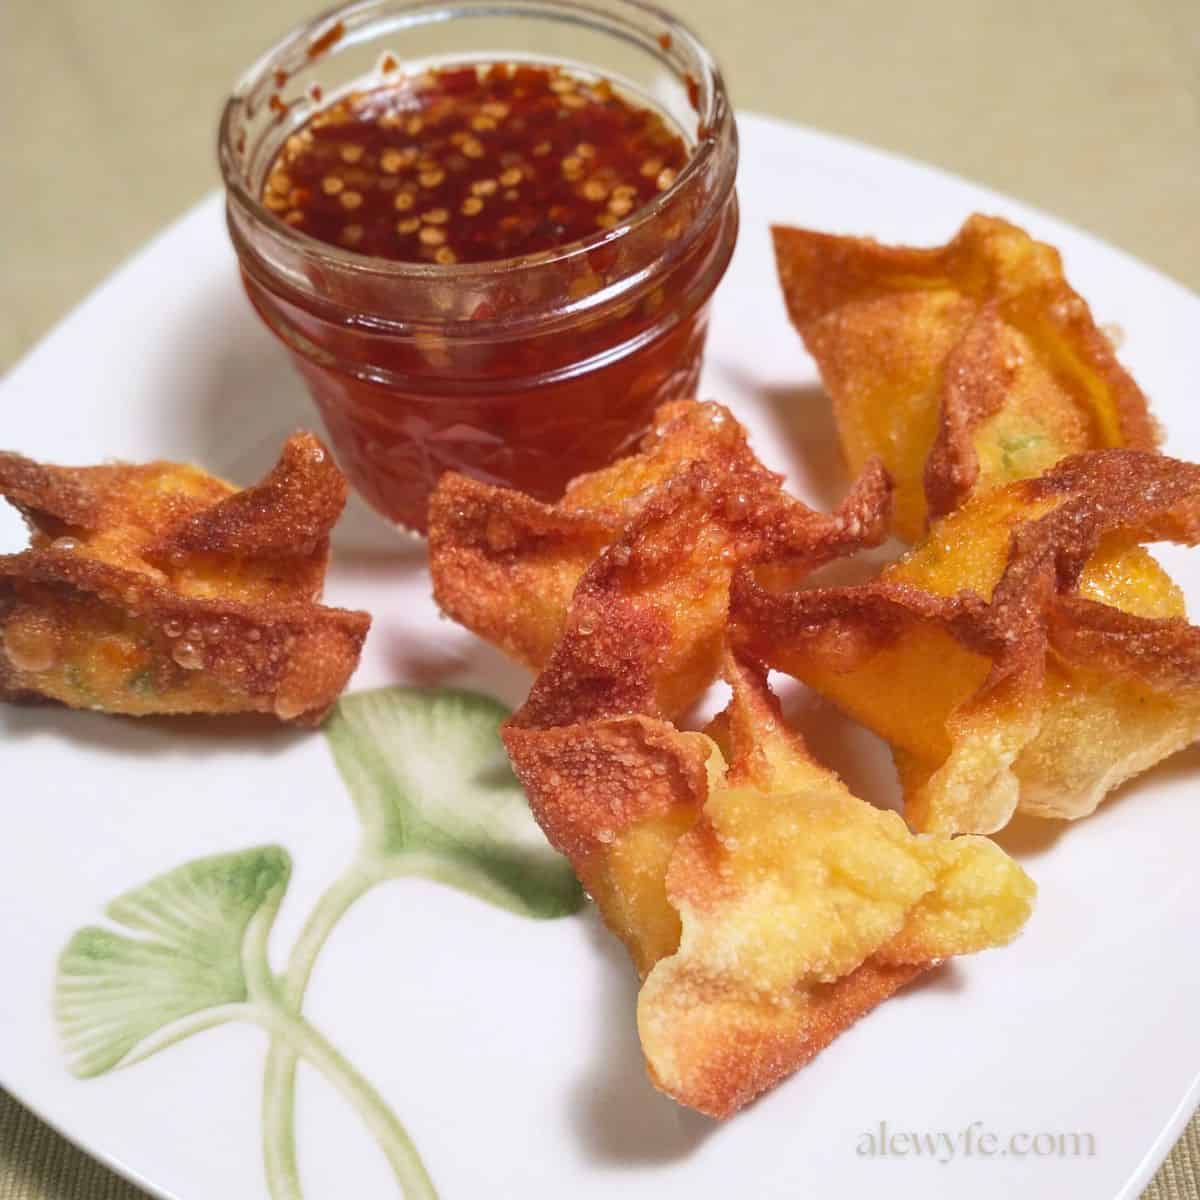
Serving Ideas for Homemade Sweet Chili-Garlic Sauce
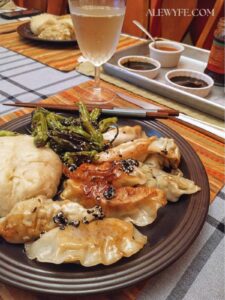
We love to use jars of this Mae Ploy copycat recipe as an instant dipping sauce for frozen or homemade dumplings and potstickers, steamed bao buns, egg rolls and spring rolls, and crispy fried wontons or crab rangoons.
It will also elevate your next takeout or delivery order! Toss those gloopy packets of plum sauce or bland BBQ back in the junk drawer and use your homemade sauce instead… Sweet and spicy nuggies, anyone?
It’s a great sweet and spicy simple BBQ sauce for grilled or broiled chicken, beef, or pork (it’s better basted on towards the end, or used with indirect smoke, since very sugary sauces like this one can burn if they’re over high heat or direct flames too long. Try basting grilled vegetable or vegetable and shrimp skewers with it towards the end of cooking.
It also makes a great sweet and not-too-spicy sauce to toss with wings (whether fried, grilled, baked, or air-fried)… perfect for game night or your next party! We also like it with crispy wok-fried whole fish, shrimp, or crispy tofu.
Brush your sweet chili-garlic sauce on broiled salmon or tuna steaks, and serve with rice and a fresh green salad or roasted veggies for an easy and healthy dinner.
It makes an easy fried rice or rice noodle sauce, or starter base for a homemade sweet and sour sauce. Whisk a small jar of your homemade sweet chili sauce with soy sauce, lime juice, peanut, and toasted sesame oil to make a quick zippy vinaigrette for greens, slaw, or noodle salads, or blend it with peanut butter to make a quick and easy peanut sauce!

Mae Ploy Sweet Garlic and Chili Sauce (Canning Recipe)
Ingredients
- 6 cups apple cider vinegar (5% acidity)
- 6 cups granulated sugar
- ½ cup chili flakes
- ½ cup garlic (peeled and chopped)
- 1 tbsp salt
- 1 tbsp soy sauce
- 1 ½ tsp dried ginger
- 2-3 tbsp dry pectin or ClearJel (cook-type) (optional… you can omit but do NOT use cornstarch, arrowroot, or flour)
Instructions
Sweet Chili-Garlic Sauce and Canning Prep:
- Fill a large stock pot or boiling water canner with water and begin to preheat the canner. Wash your canning jars in hot soapy water. Check your rings for dents and count your lids to make sure you have enough. Boil or keep your jars warm, but do not heat your lids.
- Peel and chop the garlic cloves. In a small bowl or measuring cup, combine with the salt and the soy sauce. Measure the sugar into a large bowl, and add the dried ginger (you can also measure the sugar and ginger directly into the pot in step four if you want to save a dish).
- Measure the vinegar into a large heavy bottomed pot. If you are using powdered pectin, sprinkle that into the pot and whisk well to break up any clumps. Bring vinegar to a boil over high heat.
- Add sugar and ginger and stir until the sugar dissolves. Reduce the heat and simmer for five minutes.
- Add the chili flakes and the garlic mixture to the pot and stir until well combined. Turn the heat to low and simmer for three to five minutes.
Fill the Jars:
- Remove the pot from the heat and ladle the sauce into your hot canning jars. Use a canning funnel if you have one to help keep the chili sauce off the rims of the jars. Stir the sauce as you go so the jars get an even distribution of ingredients (the chili floats and the garlic sinks).
- Leave 1/4″ of headspace at the top of each jar. If you have extra sauce, refrigerate it rather than overfilling or under-filling the jars.
- Wipe the rims of the jars with a clean, lint free cloth or paper towel dipped in hot water, vinegar, or a mixture of the two. This will remove any sticky residue from the rims of your jars and help make sure you get good seals. Top the jars with lids and rings, and place them in your canner using a jar rack or tongs.
Process the Sauce:
- Process the jars in the boiling water bath for ten minutes. Start the processing timer only after the pot reaches a rolling boil. (If you live at high elevation, consult a canning time conversion chart to increase the processing time accordingly for your altitude).
- After the jars have boiled for ten minutes, turn off the heat and set another timer for five minutes, leaving the jars in the covered pot. This will help prevent siphoning (losing liquid from the jars).
- Using jar tongs or the jar rack, lift out the jars and place them on a tray, a wire rack, or a folded towel. Don’t place hot jars directly onto a cold surface (like a stone, concrete, or stainless counter top surface). Leave the jars undisturbed to cool overnight, or from 8-24 hours.
- Remove the rings from the cooled jars and check to make sure your lids are firmly sealed. Refrigerate any unsealed jars, or you can reheat the mixture and reprocess with new lids. Wash the jars to remove any sugar or sticky residue and hard water marks, label them, and store them in your pantry without the rings on.
Notes
Nutrition
Loved this sauce? Try these related recipes:
- Fiery Habanero Peach Salsa
- Roasted Tomatillo Salsa Verde (water-bath canning recipe)
- Festive Cranberry Jalapeno Salsa (water-bath canning recipe)
- Spiced Pear Chutney (water-bath canning recipe)
- Fun Guys – How to Can Marinated Mushrooms
- Spicy Green Coriander Chutney with Coconut
- Jalapeno Popper Wontons
- Yellow Jasmine Rice (easy stove-top recipe)
- Cold Soba Noodles with Shiitake, Tofu, Steamed Eggs, and Sesame-Soy Dressing
Can you use fresh thai peppers or do they have to be dried?
Because it’s a water-bath canning recipe, I wouldn’t recommend substituting fresh peppers for the dried pepper flakes. If you are making a smaller quantity to use fresh, or freezing your sauce, you are free to experiment though! Or, if you have a dehydrator, you can chop and dry your Thai peppers and use them if you prefer that flavor or have your own peppers that you want to use!
What would be the processing time for pint jars?
Hi Trish! There is no tested safe processing time available for pint jars of the recipe this sauce was based off of, unfortunately. Stick to half-pint or smaller jars!