CANNING: How to Can Dried Beans
- What kind of beans can be canned at home?
- What beans should NOT be canned at home?
- Seasonings for canning dried beans
- Why do I need to soak my beans?
- Kitchen equipment needed
- How to Pressure-Can Dried Beans
- Storage and Safety Tips
- How to Can Dried Beans
Canning your own dried beans may sound like a lot of work, but as long as you have a pressure canner, it’s one of the easiest ways to fill your pantry on a budget.
It will take a few hours of work all-in, but it’s so nice to have all these shelf-stable ready to heat-and-eat meals on your pantry shelves, and the actual working time is almost negligible.
Canning dried beans at home saves a lot of time, as you can batch cook them and then they’re ready to eat whenever you want them for a recipe. They’re ready to use right away without defrosting (or without hours of soaking and then simmering to make them from scratch each time).
Stocking your pantry with a bunch of jars of home canned dried beans is such great peace of mind, and batch cooking them like this is a huge time-saver!

What kind of beans can be canned at home?
Dried Beans:
You can jar a single type of dried beans or your own custom soup or chili blend. You can leave your canned beans plain and completely unseasoned so that they are more versatile for different recipes, add salt, or add canning-safe dried seasonings before jarring them.
Add the salt directly to the jars to ensure even distribution. Other seasonings can be added to the jars or to the batch of beans and broth before simmering and jarring them.
Some suggested types of dried beans that can be canned at home are:
- Chickpeas or Garbanzo beans
- Light or Dark Red Kidney beans
- Black beans
- Pinto beans
- Cannelloni or Great Northern beans
- Navy beans
- Dried lima beans
- Cranberry, Borlotti, or Roman beans
- Black-eyed peas, Crowder peas, & field peas
What beans should NOT be canned at home?
- Red lentils
- Black beluga lentils
- Green or brown lentils
- Split peas & dal (other than following a tested split pea soup or Habitant soup recipe like the ones from Ball, Bernardin, and the USDA)
- Refried or mashed beans (For these, can whole beans, then saute and mash or puree them together with your choice of lard, butter, or oil when you are reheating them before serving)
But, why not, you might ask? It’s a matter of density… there are no safe and tested processing times for canning lentils and other small beans at home. Because they are small and very dense, it is difficult to ensure that the heat and pressure will penetrate evenly into the jar to kill all possible botulism spores and other harmful bacteria or molds.
The good news is that all of these cook relatively quickly, even without soaking or a pressure cooker, and they freeze well, so it wouldn’t be a huge time-saver to can them anyway.
Seasonings for canning dried beans
Salt:
Add ½ teaspoon of salt per pint or 1 teaspoon per quart to the jar, if desired. This is just for flavor enhancement and improved texture. You can safely omit the salt if you are on a reduced-sodium diet.
Dried Herbs:
If you want to use these, good choices are oregano or marjoram, savory, thyme, rosemary, Italian seasoning blend (or your own blend of basil, thyme, parsley, & rosemary), Herbs de Provence, bay leaves (one per quart jar).
Epazote or dried avocado leaves (hojas de avocado) are nice in black beans, and are traditional to southern Mexican cuisine for flavor and carminitive properties.
Do not add sage before canning (it becomes bitter in the pressure canner). Add this to your beans when you reheat them if you want to use this herb.
Other canning-safe seasonings:
Dried chipotle or ancho powder, cayenne, chili powder blends, Cajun or Creole seasoning, seasoned salt, curry powder, ground cumin, dried onion or garlic powder, bouillon powder/paste/cubes.
IMPORTANT: Check the labels on commercial seasoning blends and make sure that there is no added cornmeal, flour, cornstarch, or other starch added to your seasoning blend (most taco seasonings, some chili powders, and some other seasoning blends have added starches and should not be used in home canning).
Why do I need to soak my beans?
Soaking and then rinsing removes enzymes and harmful lectins that cause stomach-upset and gas or that may even impede nutrient absorption. It’s also critical to re-hydrate the beans before briefly simmering and packing them into jars for food-safety and quality reasons.
It also ensures that you don’t overfill the jars, as beans swell a LOT while re-hydrating and can easily break your jars if they aren’t well-hydrated before packing. You don’t have to do an overnight soak (though this is the method I prefer)… we’ll walk through both overnight and quick-soak methods below!
Most importantly, soaking the beans first ensures that your canned beans all reach a safe temperature in the center of the jars, sufficient to kill dangerous pathogens that may be in your dried beans.
Heat transmits differently through dry versus wet materials, and hydrating your beans before canning them makes them less dense and easier for the processing heat to penetrate and move through the jars so that they are safe to store and eat.
All of the tested canning recipe times are verified for soaked beans only. Canning beans without pre-soaking them is a gamble with your family’s health (botulism can be fatal). It’s not worth saving a few minutes!
Kitchen equipment needed
Pressure Canner:
You absolutely must use a pressure canner to safely can dried beans. If you don’t have a pressure canner, you can freeze your cooked beans, or use and Instant Pot or crock pot to cook them and keep refrigerated as needed.
Do not try to water-bath can low-acid foods like beans, meat, or most vegetables!
You also can’t safely can this in an Instant Pot- they do not reliably build up enough pressure to safely can foods, especially low-acid foods like beans, meat, mushrooms, and veggies that require consistent pressure and long processing times.
Botulism isn’t worth the risk… always pressure can low-acid foods like meats and vegetables in a suitable pressure canner.
I love my big All-American pressure canner, but any pressure canner that is large enough to hold at least four quart jars and that has a pressure weight and/or a tested pressure gauge will work (although you may need to adjust the batch size for your canner, or can the sauce in several batches).
For more information about canning basics and equipment, check out our introductory article:
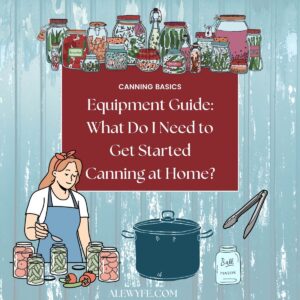
CANNING: Equipment Guide- What Do I Need to Start Canning at Home?
Large Stockpot:
You’ll need a large, heavy bottomed stockpot to pre-soak and simmer your beans before canning.
Canning Jars & New Lids:
You can can your beans in quarts, pints, or smaller jars. Quarts take 90 minutes, and pints and smaller jars process for 75 minutes. If you can a mixed batch of jar sizes, process the whole batch for the longer amount of time (90 minutes for any jars over 16 oz).
How to Pressure-Can Dried Beans
pre-soak your beans:
- Pick through your dried beans, checking for any small stones, twigs, or other foreign matter. Remove this and rinse your dried beans thoroughly. Stir the pot of water and discard any hollow beans that float (these may have pest damage or be empty hulls).
- Drain the rinse water and then refill and soak your pot of beans using one of the following methods:

- Overnight Soak Method: Soak rinsed beans in a large pot of water with plenty of room for the beans to expand (the pot should be no more than 1/2 to 3/5ths full of dried beans before adding water). Cover and let soak in a cool place for 12-18 hours (refrigerate if your kitchen is hot).
- Quick Soak Method: Proceed as for the overnight soak, but bring the pot of beans and water to a boil on medium-high heat. Boil for two minutes, remove from heat, cover, and let soak for at least an hour.
No-Soak Method:Just kidding! Rebel canners might tell you this is fine, but PLEASE do not do this. It isn’t safe to can unsoaked dry beans or peas, and even if it were, it gives unpredictable and poor results with unevenly rehydrated beans, and can even break your canning jars. If you don’t have time to soak overnight, do the quick soak method or can them tomorrow (after soaking them today)!
simmer the beans:
- After your beans have soaked overnight (or heated and quick-soaked), drain and rinse them gently.
- Refill the pot with clean water to cover the beans by at least 2″.
- Bring to a low boil over medium heat, gently stirring periodically so they don’t scorch on the bottom of the pan.
- Simmer the beans for thirty minutes before hot-packing them into your canning jars.

prep pressure canner & jars:
- Wash your canning jars and new canning lids in hot soapy water and rinse well.
- If you are using reusable lids (like Tattler or Harvest Guard, or Weck jars), follow manufacturer directions to prepare lids and rings.
- Fill your pressure canner with the recommended amount of water (check your canner manual, but at least several inches for this long processing time) and preheat it.
- Preheat the jars in the canner on low-medium heat while the beans simmer (see next step), or keep them hot in your oven, dishwasher, or using your preferred method.

pack beans in jars:
- Using a jar funnel, fill your quart or pint jars with the hot beans.
- Add salt (and any other optional canning-safe seasonings) to the jars if you like.
- Divide the hot cooking broth among the jars, leaving 1″ of headspace below the rim at the top of the jar.. If you don’t have enough bean cooking liquid, top the jars up with boiling water or stock.
- Debubble the jars with a small spatula, chopstick, or butter knife. Top up with additional liquid if necessary.
- Wipe the jar rims with a clean, damp cloth or paper towel.
- Top with new canning lids (or properly prepared reusable lids). Tighten the rings finger-tight (or according to manufacturer directions).
pressure-can the beans:
- Place the hot jars in the preheated pressure canner and seal the lid. Heat on medium heat. Vent the canner for 10 minutes once it starts steaming, then add the weight and bring the canner up to pressure over medium low heat.
- Process at 10 lbs of pressure (weighted canner) or 11 lbs (dial gauge). Adjust pressure as needed for your altitude over 1000 sf (15 lbs with weighted canner, consult altitude chart for dial gauge).
- Reset processing timer to zero if canner pressure drops below minimum at any point during processing.
- Process for a full 75 minutes for pints, or 90 minutes for quarts or mixed batches of pints and quarts.
- Turn off the heat after the processing time is up. Let the canner rest undisturbed until the pressure returns to zero- do not remove the weight early to vent the steam faster.
- As soon as the pressure releases completely, carefully remove the canner lid.
- Wait another couple minutes, then remove the jars with jar tongs or hot pads, and place them on a towel or cooling rack.
- Cover jars with a towel if there are cold drafts.
- Leave undisturbed overnight or for at least 8-12 hours when the jars are fully cooled.

Storage and Safety Tips
Remove the jar rings, check for seals, and wash the jars of canned beans with warm, soapy water. Refrigerate any jars of beans that did not seal and use those jars promptly. You could reprocess them with new lids within 24 hours of the first processing.
However, since the canning time is so long, the reprocessed jars will lose quality, and the flavor will suffer. I prefer to refrigerate any unsealed jars of beans and use them within a few days rather than reprocess. You can also transfer the beans to freezer-safe containers and freeze.
Label the jars and store in a cool, dark place. For best quality, enjoy most home-canned goods within 12-18 months, although they will be safe to eat while the seals are intact. Nutritional value and flavor declines slightly with longer storage (or improper storage conditions).
Discard the contents of any jars that lose seals in storage, smell off, are bubbling, or hiss when opened, and sterilize the jar before using them again.


How to Can Dried Beans
Equipment
- large pot
- glass canning jars, rings, and new lids
- canning funnel (optional but helpful)
Ingredients
- 5 lbs dried beans (approx) (for 7 quarts or 14 pints, approx 12 oz dried beans per quart jar)
- water to soak
- water or broth to simmer
- salt (optional, 1 tsp per quart or ½ tsp per pint)
Instructions
clean & pre-soak your beans:
- Pick through your dried beans, checking for any small stones, twigs, or other foreign matter. Remove these if present and rinse your dried beans thoroughly. Stir the pot of water and discard any hollow beans that float (these may have pest damage or be empty hulls).
- Drain the rinse water and then refill and soak your pot of beans using one of the following methods:
- Overnight Soak Method: Soak rinsed beans in a large pot of water with plenty of room for the beans to expand (the pot should be no more than 1/2 to 3/5ths full of dried beans before adding water). Cover and let soak in a cool place for 12-18 hours (refrigerate if your kitchen is hot).
- Quick Soak Method: Proceed as for the overnight soak, but bring the pot of beans and water to a boil on medium-high heat. Boil for two minutes, remove from heat, cover, and let soak for at least an hour.
simmer the soaked beans:
- After your beans have soaked overnight (or heated and quick-soaked), drain and rinse them gently.
- Refill the pot with clean water to cover the beans by at least 2″.
- Bring to a low boil over medium heat, gently stirring periodically so they don’t scorch on the bottom of the pan.
- Simmer the beans for thirty minutes before hot-packing them into your canning jars.
prep pressure canner & jars:
- Wash your canning jars and new canning lids in hot soapy water and rinse well.
- If you are using reusable lids (like Tattler or Harvest Guard, or Weck jars), follow manufacturer directions to prepare lids and rings.
- Fill your pressure canner with the recommended amount of water (check your canner manual, but at least several inches for this long processing time) and preheat it.
- Preheat the jars in the canner on low-medium heat while the beans simmer (see next step), or keep them hot in your oven, dishwasher, or using your preferred method.
pack beans in jars:
- Using a jar funnel and ladle or slotted spoon, fill your quart or pint jars with the hot beans.
- Add salt (and any other optional canning-safe seasonings) to the jars if you like. Add one teaspoon of salt per quart jar, or ½ teaspoon per pint.
- Divide the hot cooking broth among the jars, leaving 1″ of headspace below the rim at the top of the jar.. If you don’t have enough bean cooking liquid, top the jars up with boiling water or stock.
- Debubble the jars with a small spatula, chopstick, or butter knife. Top up with additional liquid if necessary to maintain proper 1" headspace.
- Wipe the jar rims with a clean, damp cloth or paper towel.
- Top with new canning lids (or properly prepared reusable lids). Tighten the rings finger-tight (or according to manufacturer directions).
pressure-can the beans:
- Place the hot jars in the preheated pressure canner and seal the lid. Heat on medium heat. Vent the canner for 10 minutes once it starts steaming, then add the weight and bring the canner up to pressure over medium low heat.
- Process at 10 lbs of pressure (weighted canner) or 11 lbs (dial gauge). Adjust pressure as needed for your altitude over 1000 sf (15 lbs with weighted canner, consult altitude chart for dial gauge).
- Reset processing timer to zero if canner pressure drops below minimum at any point during processing.
- Process for a full 75 minutes for pints, or 90 minutes for quarts or mixed batches of pints and quarts.
- Turn off the heat after the processing time is up. Let the canner rest undisturbed until the pressure returns to zero- do not remove the weight early to vent the steam faster.
- As soon as the pressure releases completely, carefully remove the canner lid.
Cool, check seals, and store:
- Wait another couple minutes, then remove the jars with jar tongs or hot pads, and place them on a towel or cooling rack. Cover jars with a towel if there are cold drafts.
- Leave undisturbed overnight or for at least 8-12 hours when the jars are fully cooled.
- Remove the rings, check for seals, and wash the jars with warm, soapy water.
- Refrigerate any jars of canned beans that did not seal and use those jars promptly. You could reprocess them with new lids within 24 hours of the first processing. You can also transfer to freezer-safe containers and freeze.
Notes
Loved this? Try these canning recipes!

- Cajun Red Beans and Sausage (Pressure Canning Recipe)
- Five Alarm Beef or Venison Chili (Pressure Canning or Freezer Meal-prep recipe)
- French Onion Soup (Pressure Canning or Freezer Meal-Prep recipe)
- Chipotle Barbacoa Beef or Venison (Pressure Canning recipe)
- Zuppa Toscana – Sausage, Potato, Kale and White Bean Tuscan Soup
- Navy Beans with Molasses & Ham
- Enchilada Roja Sauce (Pressure-Canner or Freezer Recipe)
Recipe & Pairing Ideas for your Canned Beans
