CANNING: How to Make Chicago-Style Giardiniera
- How do you use giardiniera?
- Do I have to can this recipe?
- How to can your giardiniera
- Pantry storage tips
- Chicago-Style Hot Giardiniera
This giardiniera canning recipe makes a big batch of the pickled pepper and vegetable condiment that is a beloved staple of Chicagoans. Maybe you already know and love this ingredient, or maybe you just watched The Bear and want to know what the heck all the fuss is about? Heard, chefs.
Or maybe, you’re a displaced Chicagoan homesick for the taste of this classic condiment that we like to put on just about everything, looking for a giardiniera canning recipe to recreate that Taste of Chicago (you probably don’t go there, that’s for tourists, but we love you too, visitors).
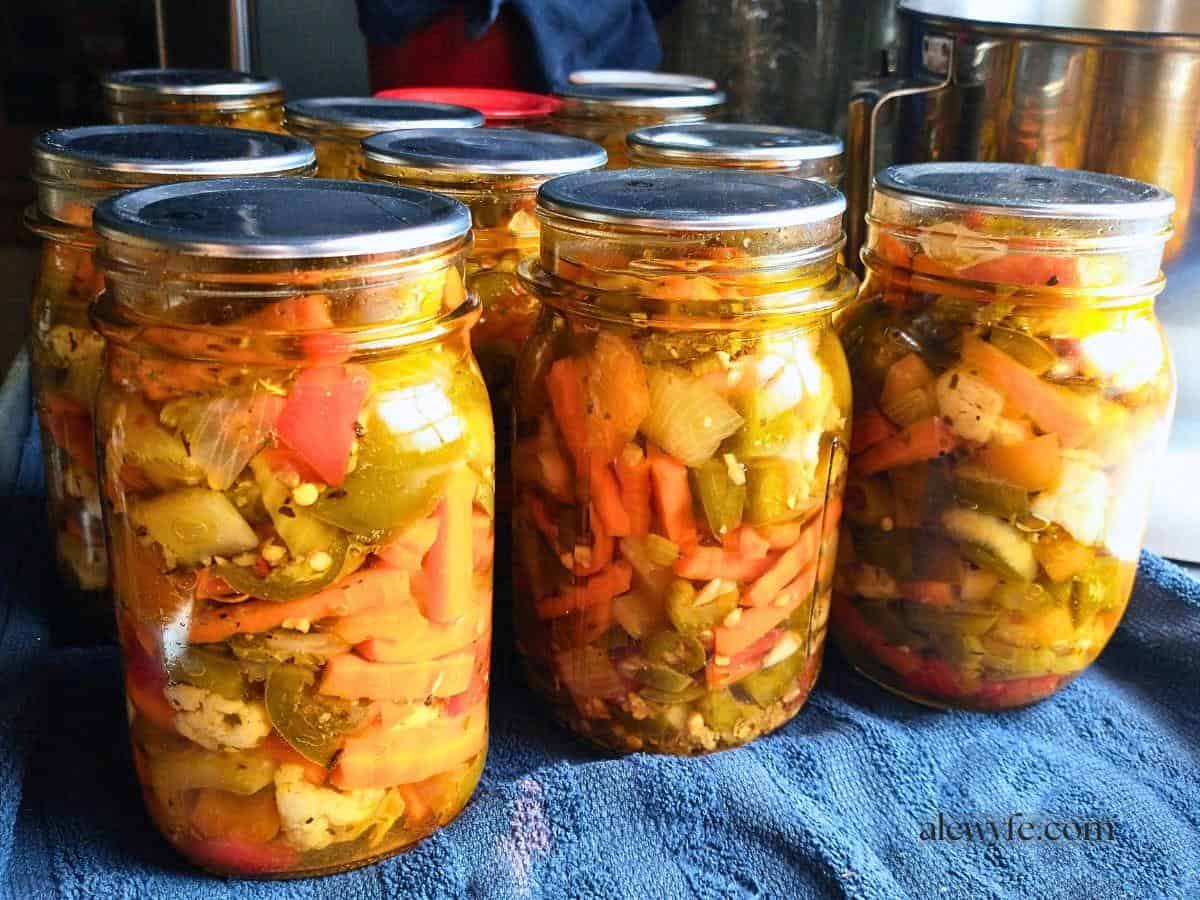
I found myself in this boat when I lived in California for awhile. The Bay Area has amazing grocery stores and specialty markets and local shops with every imaginable thing under the sun… except for the one thing I craved. Oh, the horror!
No need to 86’s this from your menu even if you live where you can’t walk into any grocery store and choose from six or eight different kinds on the shelf.
You can make your own Chicago-style giardiniera wherever you are!

This one is medium-hot. You can vary the proportion of sweet and hot peppers to make it mild to extremely spicy, just as you like it!
How do you use giardiniera?
- Enjoy generous scoops of this spicy pickle on an Italian beef sandwich or sausage, of course. I also like it on hot dogs or a Polish sometimes, instead of (or in addition to) mustard, onions, & kraut.
- This condiment naturally adds a zesty crunch to other sandwiches too. It’s great on a classic pepper and egg sandwich along with sauteed sweet peppers on a crusty Italian bread roll, or layered with thinly sliced Italian deli meats or marinated eggplant, sliced tomato, and provolone or fresh mozzarella cheese.
- Like pepper & egg sandwiches? Try this flavor combo but in quiche form!
- I put giardiniera on pizza, in pasta and potato salads, on scrambled eggs or omelettes, or on a bowl of cottage cheese with cracked black pepper for a snack.
- Blend it with shredded and cream cheeses, and you can make a spicy pizza spread for bagels or crackers, or thin this spread with sour cream to make a spicy veggie dip.
- If you have extra giardiniera brine leftover from canning, or when you finish a jar, it makes a great starter base for a spicy Italian vinaigrette dressing for green salads or pasta salads! Or use it for a steak marinade, or add it to a crock pot when doing a roast.
- Or sometimes, I just eat it with a spoon out of the jar. We won’t judge… just use a clean spoon and no double dipping, ok?

Do I have to can this recipe?
Not necessarily! You can also store the giardiniera as a fresh refrigerator pickle, without canning, in boiled or sterilized jars for a short period of time.
This will give you the crunchiest pickle, since it isn’t heat-treated, but a much shorter shelf-life. Discard any jars that show signs of mold or spoilage, and make sure you keep the jars in the fridge to extend their shelf-life and help prevent mold or botulism growth. I would not recommend freezing this pickle.
If you go this route, you may want to make a smaller batch unless you have a large family, a small restaurant, or are giving these as fresh homemade gifts… or if you eat a LOT of giardiniera.
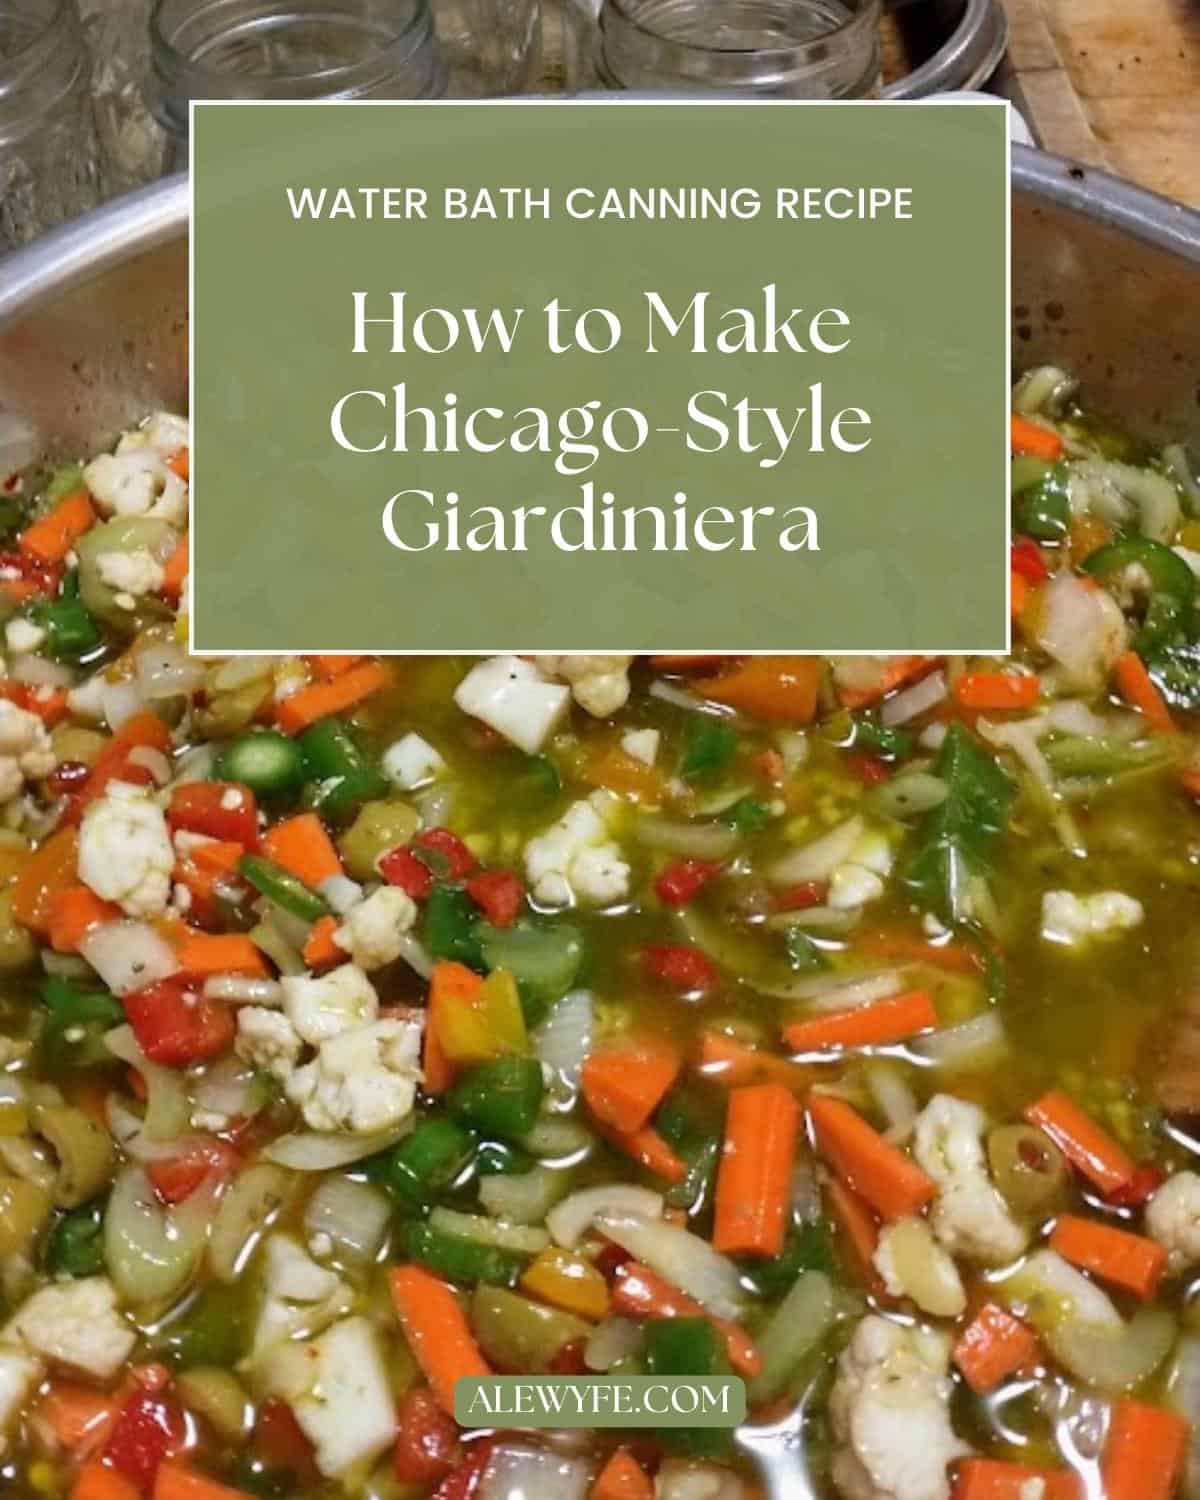
How to can your giardiniera
A full batch of this giardiniera canning recipe should yield about 12 pints. You can also use half-pint or smaller jars but I don’t recommend canning it in quarts or anything larger. If you would like to reduce the recipe volume, do it proportionally and reduce every ingredient by the same factor.
It’s ok to use larger jars if you’re storing this in the fridge as a fresh pickle instead of water-bath canning it, but smaller jars will get used up faster after opening and can reduce the chance of cross-contamination and spoilage in either case.
If you are canning your giardiniera, follow the recipe proportions and directions exactly for vinegar and spices for food safety, but also note that this is not a USDA-tested recipe… Do not decrease processing times or quantities of vinegar, lemon, & salt. Make sure the pickled vegetables are hot when you pack the jars, and can at your own risk!
You can pressure can this pickle instead if you prefer, though the texture of the finished product will be softer and less desirable, so I don’t recommend this.
chop vegetables & salt them:
- Wash and chop the peppers, onion, celery, carrots, and cauliflower and combine in a large stainless or plastic bowl or food-safe 2-3 gallon bucket.
- Add the salt and mix well to distribute. Cover and refrigerate overnight or for at least 8 hours. The salt will draw moisture out of the veggies and is essential for crispness and safety (so the pickling brine is not diluted when the vegetables release their excess moisture).
rinse veggies:
- Drain and lightly rinse the excess salt off the veggies. Taste them- they should still be very salty (more like a caper than a dill pickle) but not unpalatable. Remember that the acid in the pickling brine you make next will balance the salt.
- Return the drained and rinsed veggies to the mixing bowl and add the olives, garlic, and seasonings. Mix well to combine.
prep canner & jars
- Prepare your water-bath canner and jars. Fill canner or stockpot with water and bring to a boil, and place a jar rack, false bottom, or heat-proof trivet in the bottom of the pot.
- Clean and sanitize your jars. Wash well with hot soapy water, rinse, and boil. It is not absolutely necessary to boil the jars before canning them but it can’t hurt, so I always do, especially for a mixed pickle like this. Cleanliness is key in safe canning!
- Count out your new canning jar lids and wash them in hot, soapy water (do not boil modern canning lids!). If you are using reusable canning lids, follow manufacturer directions. Check over your lid rings to make sure they are sound (dents in the rings can cause seal failure).
Make brine & heat veggies:
- In another pot large enough to hold your entire batch of giardiniera, heat the vinegar, olive brine, and lemon juice. Bring the brine just up to a low simmer.
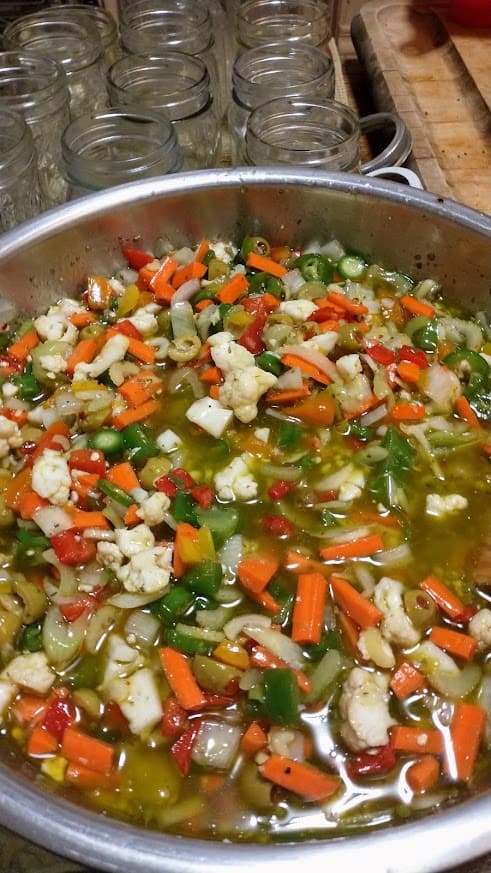
- Add the oil to the hot brine, then add the bowl of salted and rinsed veggie mix. Stir and bring the whole mixture almost back up to a simmer.
- When the giardiniera is hot all the way through (at least 190-212F), it’s ready to jar. This may take some time if you are doing a big batch. Stir it often and be patient!
fill jars with hot giardiniera mixture:
- Using tongs, carefully remove the preheated canning jars from the water bath and place them on a sheet pan or countertop lined with a kitchen towel.
- Using a slotted spoon and canning funnel if possible, evenly distribute the hot vegetable mixture among the jars, leaving an inch of head space at the top of the jars.
- Divide the remaining liquid evenly between the jars, and use a small spatula or the handle of a wooden spoon to press down and remove any trapped air bubbles from the jars. If needed, top up with more vinegar (you can mix vinegar and hot water 1:1) to cover the vegetables with brine. Do not add more oil than indicated in the recipe.
- If you are using Pickle Crisp, add an 1/8 tsp to each pint jar now (or half that for smaller jars).
- Using a clean washcloth or paper towel, wipe the rim of the jar with distilled vinegar or vinegar and hot water to remove any oil or residue that would interfere with the jar seal.
- Put the lids and rings on, screw down fingertip-tight, and carefully put the jars in the preheated canner.
can the giardiniera:
- Process in a hot water bath for 20 minutes (start the timer only after all jars are in the canner and the water returns to a rolling boil). I like to let my jars rest in the canner for an additional 5 minutes after turning off the heat. This can help prevent siphoning.
- If you need to do process your jars in batches, keep the other jars hot while the first batch is processing.
- Remove jars from the canner using canning tongs and place on a kitchen towel or wire rack to cool.
cool and check jars:
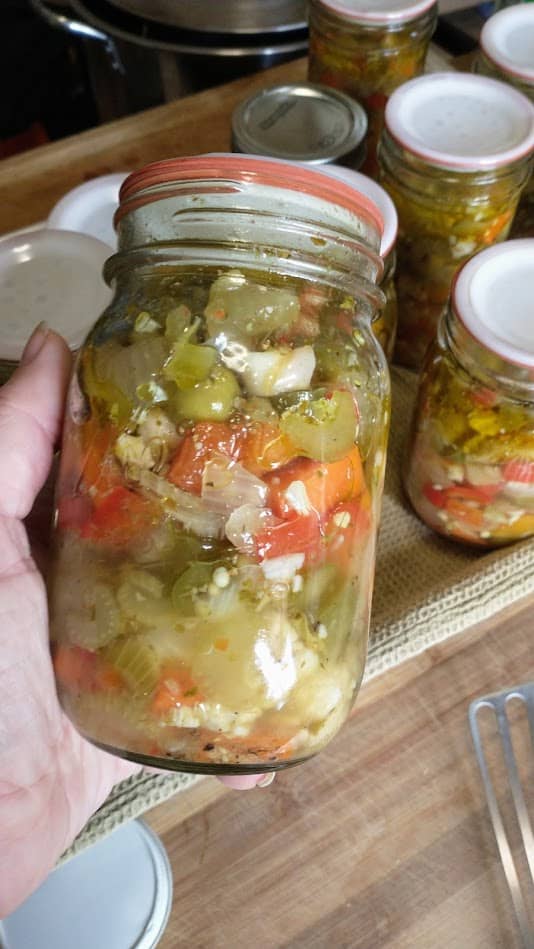
- Check your jars for seals after they have completely cooled (I like to let them sit overnight, but wait at least 8 hours before removing the rings).
- Metal canning lids will have the safety button fully indented and a strong seal with the jar. Other styles of lids will hold without the use of clips or jar rings and have a strong vacuum seal to the jar.
- Refrigerate any jars that didn’t seal, and use those first.
- You can also reheat and reprocess these jars with new lids within 24 hours, but this will make the giardiniera even softer, so I recommend just refrigerating it unless you have a lot of seal failures or a bad batch of lids.
Pantry storage tips
Wash and label your jars clearly, and make sure that you remove the canning rings for storage. If any of the jars lose their seals in the pantry, you should throw out the contents of that jar (without tasting them) and sterilize that jar before reusing it again. Toss any preserves that show signs of mold, bubbling, off flavors or smells, or that make a hissing sound when you open the jar as if they are under pressure.
Store the rest of your jars in a cool & dark pantry or cupboard. Once canned, like most home-preserved items, your giardiniera will have the best flavor if used within 12-18 months. They should be safe to eat for longer than that as long as they were properly canned and stored, the jar seals are intact, and the lids are not rusted on the inside, but fresher is better, even with pickles and preserves!
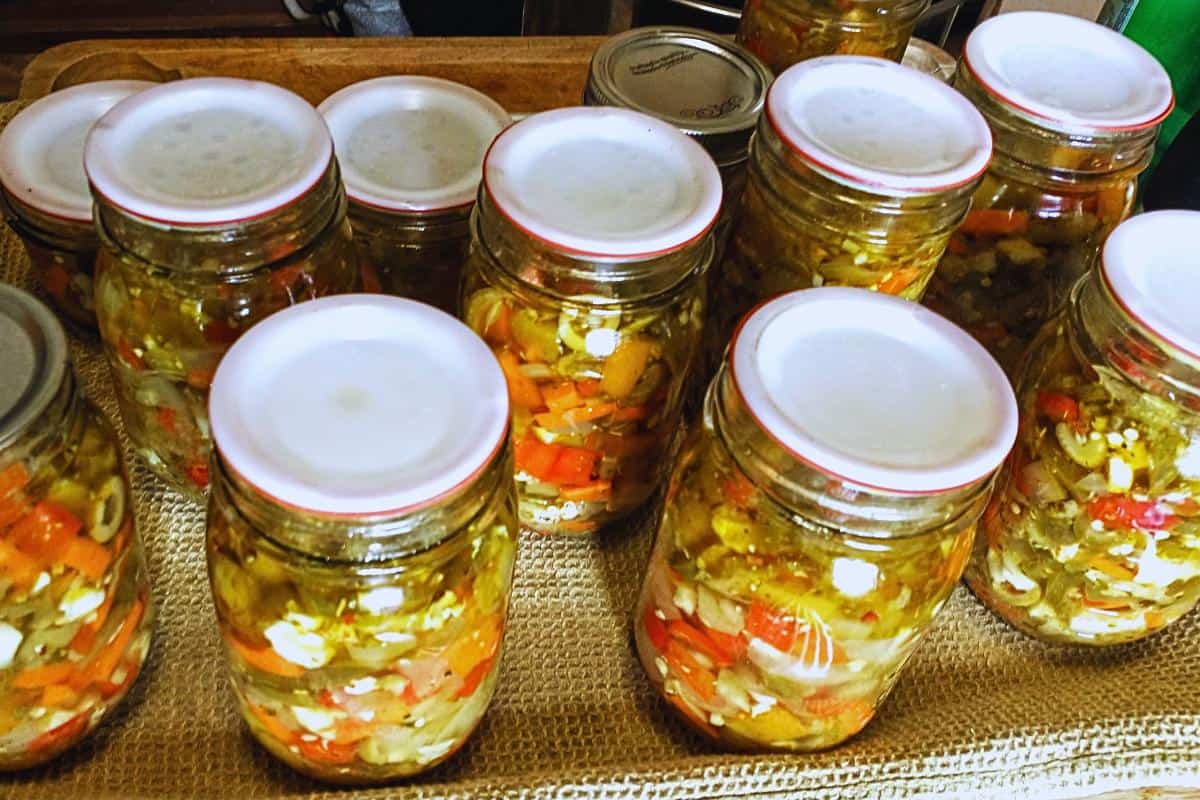
Chicago-Style Hot Giardiniera
Equipment
- 1 Water Bath canner or large stockpot tall enough to cover the pint jars with at least an inch of water and room to boil
- 12-24 canning jars and new lids (pint or half-pint) I use reusable Tattler lids for most of my canning but use metal if you will be giving these as gifts
- a jar rack that fits in your stockpot or canner is also helpful
Ingredients
vegetable mix:
- 4-8 oz serrano peppers, sliced with seeds you can vary the amount and proportion of serrano and jalapeno peppers within these ranges
- 2-6 oz jalapeno peppers, sliced with seeds
- 4-5 large bell peppers, seeded and diced I used a mix of colors- red, green, yellow, and orange
- 1 lb celery hearts, sliced on bias or diced
- 1 lb carrots, diced or small baton cut
- 1 head cauliflower, chopped in small florets
- 1 jumbo yellow onion, large dice
- 1 cup kosher salt (you can use canning salt but reduce volume by about half)
add after rinsing:
- 1 12 oz jar green olives with pimento whole or sliced, reserve/add brine
- 3 tbsp chopped fresh garlic
- 2 tsp fresh cracked coarse black pepper
- 2 tsp red pepper flakes
- 3 tbsp dried oregano
- ½ tsp garlic powder
giardiniera pickling brine:
- ½ cup lemon juice
- 1 cup reserved brine from olives top up with lemon juice or vinegar if not a full cup
- 3 cups red or white wine vinegar 5% acidity
- 2 cups distilled white vinegar 5% acidity (check the label, some discount stores are selling 4% and they're not interchangeable)
add with vegetables after brine simmers:
- 2 cups olive oil or a blend of olive oil and light neutral oil
add to each pint canning jar (optional):
- ⅛ tsp Pickle Crisp (calcium chloride granules) optional but adds quality. 1/8 tsp per pint jar.
Instructions
chop vegetables & salt them:
- Wash and chop the peppers, onion, celery, carrots, and cauliflower and combine in a large stainless or plastic bowl or food-safe 2-3 gallon bucket.
- Add the salt and mix well to distribute. Cover and refrigerate overnight or for at least 8 hours. The salt will draw moisture out of the veggies and is essential for crispness and safety (so the pickling brine is not diluted when the vegetables release their excess moisture).
rinse veggies:
- Drain and lightly rinse the excess salt off the veggies. Taste them- they should still be very salty (more like a caper than a dill pickle) but not unpalatable. Remember that the acid in the pickling brine you make next will balance the salt.
- Return the drained and rinsed veggies to the mixing bowl and add the olives, garlic, and seasonings. Mix well to combine.
prep canner & jars
- Prepare your canner and jars. Fill canner or stockpot with water and bring to a boil, and place a jar rack, false bottom, or heat-proof trivet in the bottom of the pot.
- Clean and sanitize your jars. Wash well with hot soapy water, rinse, and boil. It is not absolutely necessary to boil the jars before canning them but it can't hurt, so I always do, especially for a mixed pickle like this. Cleanliness is key in safe canning!
- Count out your new canning jar lids and wash them in hot, soapy water (do not boil modern canning lids!). If you are using reusable canning lids, follow manufacturer directions. Check over your lid rings to make sure they are sound (dents in the rings can cause seal failure).
Make brine & heat veggies:
- In another pot large enough to hold your entire batch of giardiniera, heat the vinegar, olive brine, and lemon juice.
- Bring the brine just up to a low simmer. Add the oil, then add the bowl of salted and rinsed veggie mix. Stir and bring the whole mixture almost back up to a simmer.
- When the giardiniera is hot all the way through (at least 190-212F), it's ready to jar. This may take some time if you are doing a big batch. Stir it often and be patient!
Fill jars and can the giardiniera.
- Using tongs, carefully remove the preheated canning jars from the water bath and place them on a sheet pan or countertop lined with a kitchen towel.
- Using a slotted spoon and canning funnel if possible, evenly distribute the hot vegetable mixture among the jars, leaving an inch of head space at the top of the jars.
- Divide the remaining liquid evenly between the jars, and use a small spatula or the handle of a wooden spoon to press down and remove any trapped air bubbles from the jars. If needed, top up with more vinegar (you can mix vinegar and hot water 1:1) to cover the vegetables with brine. Do not add more oil than indicated in the recipe.
- If you are using Pickle Crisp, add an 1/8 tsp to each pint jar now (or half that for smaller jars).
- Using a clean washcloth or paper towel, wipe the rim of the jar with distilled vinegar or vinegar and hot water to remove any oil or residue that would interfere with the jar seal.
- Put the lids and rings on, screw down fingertip-tight, and carefully put the jars in the preheated canner.
- Process in a hot water bath for 20 minutes (start the timer only after all jars are in the canner and the water returns to a rolling boil). I like to let my jars rest in the canner for an additional 5 minutes after turning off the heat. This can help prevent siphoning.
- If you need to do process your jars in batches, keep the other jars hot while the first batch is processing.
- Remove jars from the canner using canning tongs and place on a kitchen towel or wire rack to cool.
- Once jars have cooled completely (at least overnight), check seals and refrigerate any unsealed jars to use within a few weeks. Wash and label jars and store without rings in a cool, dark pantry.
Loved this? Try these related recipes!
- Triple Pickled Pepper Pasta Salad with Pepperoni and Chicken (or Chickpeas)
- Spicy Pizza Spread with Giardiniera
- Taqueria-Style Pickled Jalapenos & Carrots (Jalapenos y Zanhorias Encurtidas)
- Spicy Jalapeno Pickled Eggs (easy refrigerator pickle recipe)
- Fun Guys: How to Can Marinated Mushrooms
- Quick Pizza Dough (for deep dish, pan, or thin crust pizza)
- Wheat Pappardelle Pasta with Pork, Mushroom, and Black Olive Ragu and Sauteed Swiss Chard
- Italian Sausage, Mushroom, and Parmesan Ravioli with Spicy Tomato Ragu

Do you think you can can with vinegar and then drain and add oil as you use it?
I suppose you could try it, and it shouldn’t hurt if you’re nervous about canning it with the oil? There are lots of traditional giardiniera recipes that don’t use oil at all, but just brine (both Italian giardiniera and French jardinière, with various assortments of pickled veggies)… pickled with lots of peppers and then oil-packed is the Chicago-style, though! Storing any low-acid food in oil increases the risk of botulism (since it’s a low-oxygen environment) so make sure you keep it in the fridge after you drain the brine and replace it with oil, and don’t skip the vinegar brine step!
Hi Alewyfe,
I have changed the quantity to 4 pints and in the ingredients section you have listed 1.33-1.67 large green peppers but no known measurement, e.g. ounce/pounds. The same goes for the cauliflower and onion. I will be hot bathing these and I know it is often critical to follow the recipe exactly. Can you advise what you would consider these quantities would be?
Thanks,
Hi Christian,
Since you’re dividing the yield by three, just divide the listed quantities (I know, they’re inexact, err on the side of “less is more” for the low-acid vegetable ingredients)… I would probably use 2 small-medium bell peppers (a green one, and a red, yellow, or orange one, ideally), a third of a small to average-sized cauliflower head, and one small-medium yellow onion.
I’m a bit confused. Due to the whole canning thing and love this recipe. After putting the vegetables in almost simmering vinegar, lemon juice and olive brine I then put them in the jars. Do I then top the jars off with just the olive oil?
Hi Dennis… thanks for your question! I actually just went back and added sub-headings to the instructions that should help clarify the steps, so this should hopefully clear up any confusion for you or anyone else! You salt the chopped veggies overnight, then rinse off the excess salt. You add the oil to the simmering vinegar, lemon, and olive brine, then add the seasoned veggies and heat everything back up together until it’s very hot (a low simmer) before packing it into jars.
I use a slotted spoon & wide-mouth funnel to divide the hot veggies among the jars, then ladle in a bit of the remaining liquid at a time to each jar (so that they get an even amount of acid and oil- stir often and try to keep an even mix as you fill the jars).
If you don’t have enough liquid to cover the vegetables completely, you’d use more vinegar or lemon juice, not more olive oil to top up the jars. This is a bit different than commercial giardiniera, because they have different canning equipment and processes that makes it safe for them to can it in just oil (after pickling the veggies), but not something we can safely do at home without risking botulism!
You can also leave out the oil and replace it with more vinegar/lemon brine if you’re concerned, though that will change the flavor. A bit of oil like this is ok in an acidic pickle but too much can interfere with jar sealing or the safety of the recipe… less is more with the oil!
Let me know if you have other questions, and happy canning!
Made this with some late summer garden veggies and it is absolutely DELICIOUS! Perfect balance of spice and acidity. A friend from the Midwest tried it and said it was as good if not better than what he got near Chicago as a kid. Thank you for the recipe and your time sharing it with the internet! Will definitely be making it annually!
Comments like this are why I do what I do… thank you so much Courtney, and happy canning!
I took a little extra time and chopped the vegetables so I had more of a relish consistency. This was my first attempt at making my own giardiniera. I grew up in the northwest suburbs of Chicago and I use a lot of giardiniera. This recipe is perhaps the best I’ve had! Thanks for taking the time to share it!
Hi Russ… thanks, I’m so glad you liked it!