CANNING: Seasoned Chipotle Potatoes (easy raw-pack recipe)
- Recipe & Serving Ideas for Canned Chipotle Potatoes
- Chipotle Canned Potato Ingredients
- Equipment Needed to Can Raw-Pack Potatoes
- Step-by-Step Guide for Pressure Canning Chipotle Potatoes
- Storing Canned Chipotle Potatoes
- Seasoned Chipotle Potatoes (Raw-Pack Pressure-Canning Recipe)
These canned seasoned chipotle potatoes are simple to pressure-can, and so delicious! Most traditional instructions for pressure canning potatoes are hot-pack recipes. These recipes are tried and true, but partially cooking the potatoes before filling the jars is an extra step that takes more time. With our busy lives these days, safe shortcuts for meal prep are always welcome, right?
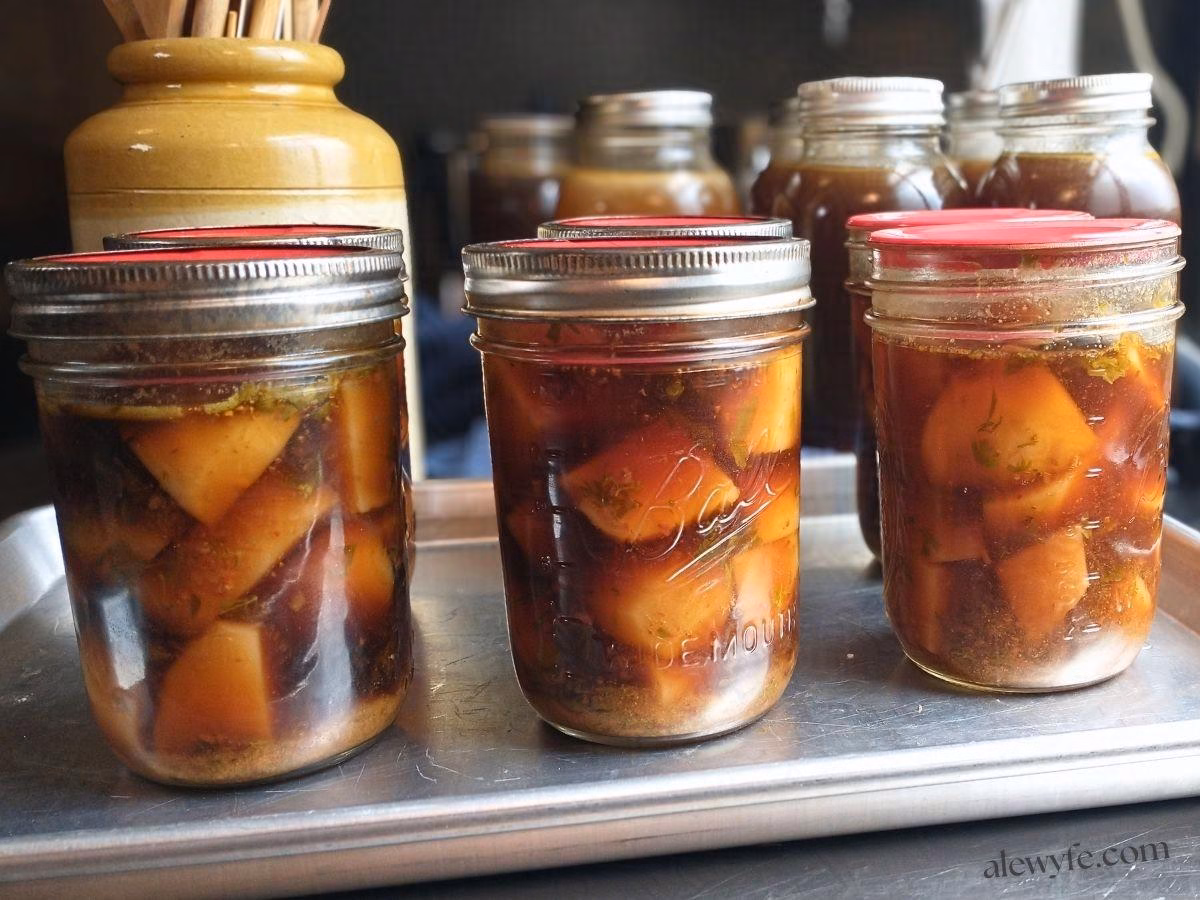
These pantry-ready potatoes are canned in a rich, flavorful broth and seasoned with smoky dried chipotle peppers and bright green cilantro. This method is from a modern, tested Ball raw-pack canning recipe (with only a safe tweak to the seasoning blend) and couldn’t be easier.
They’re a shortcut to effortless meals that you’ll love having in your pantry! You can use vegetable broth or bouillon to make these vegan, or use chicken or beef broth for an even richer flavor.
The chipotle potatoes perfect as a simple side dish just heated up right out of the jar, or seared in a hot skillet with a little butter or oil. Or use them as a shortcut for making quick and easy potato and chorizo filling for tacos or burritos, a fast potato and egg frittata, or heat and top with roasted tomato and guajillo salsa for quick and easy potato tapas!
Recipe & Serving Ideas for Canned Chipotle Potatoes
Canning the potatoes in meat or vegetable stock, flavored with smoky dried chipotle peppers and garlic with fresh green cilantro, makes these extra delicious, whether you’re going to reheat them as a side dish, or use them to make quick tacos, burritos, or enchilada filling.
I find the waxy potatoes in this recipe make very “gluey” mashed potatoes, so I prefer to serve these seasoned potatoes reheated right out of the jar, or you can dice or slice them into smaller pieces for tacos or burritos.
Pair them with chorizo and eggs, or seasoned chicken or steak. You can heat and serve the chipotle potatoes as is, or dress them up a little if you like.
- You can strain off the stock (save this) and roast or sear the potatoes in a skillet with a bit of olive oil or butter, and they’ll brown up nicely for quick roasted potatoes or home-fries.
- Add a squeeze of fresh lime juice for bright tasting Southwestern potatoes.
- Serve these chipotle potatoes with roasted or rotisserie chicken or grilled meat, fish, or sausages.
- Thicken the strained canning broth with a tablespoon or two of roux or cornstarch slurry to make a quick gravy (don’t pour it out, it’s full of flavor and nutrition).
- These jars of chile and garlic infused potatoes are also a shortcut to making quick hearty spicy soups and stews.
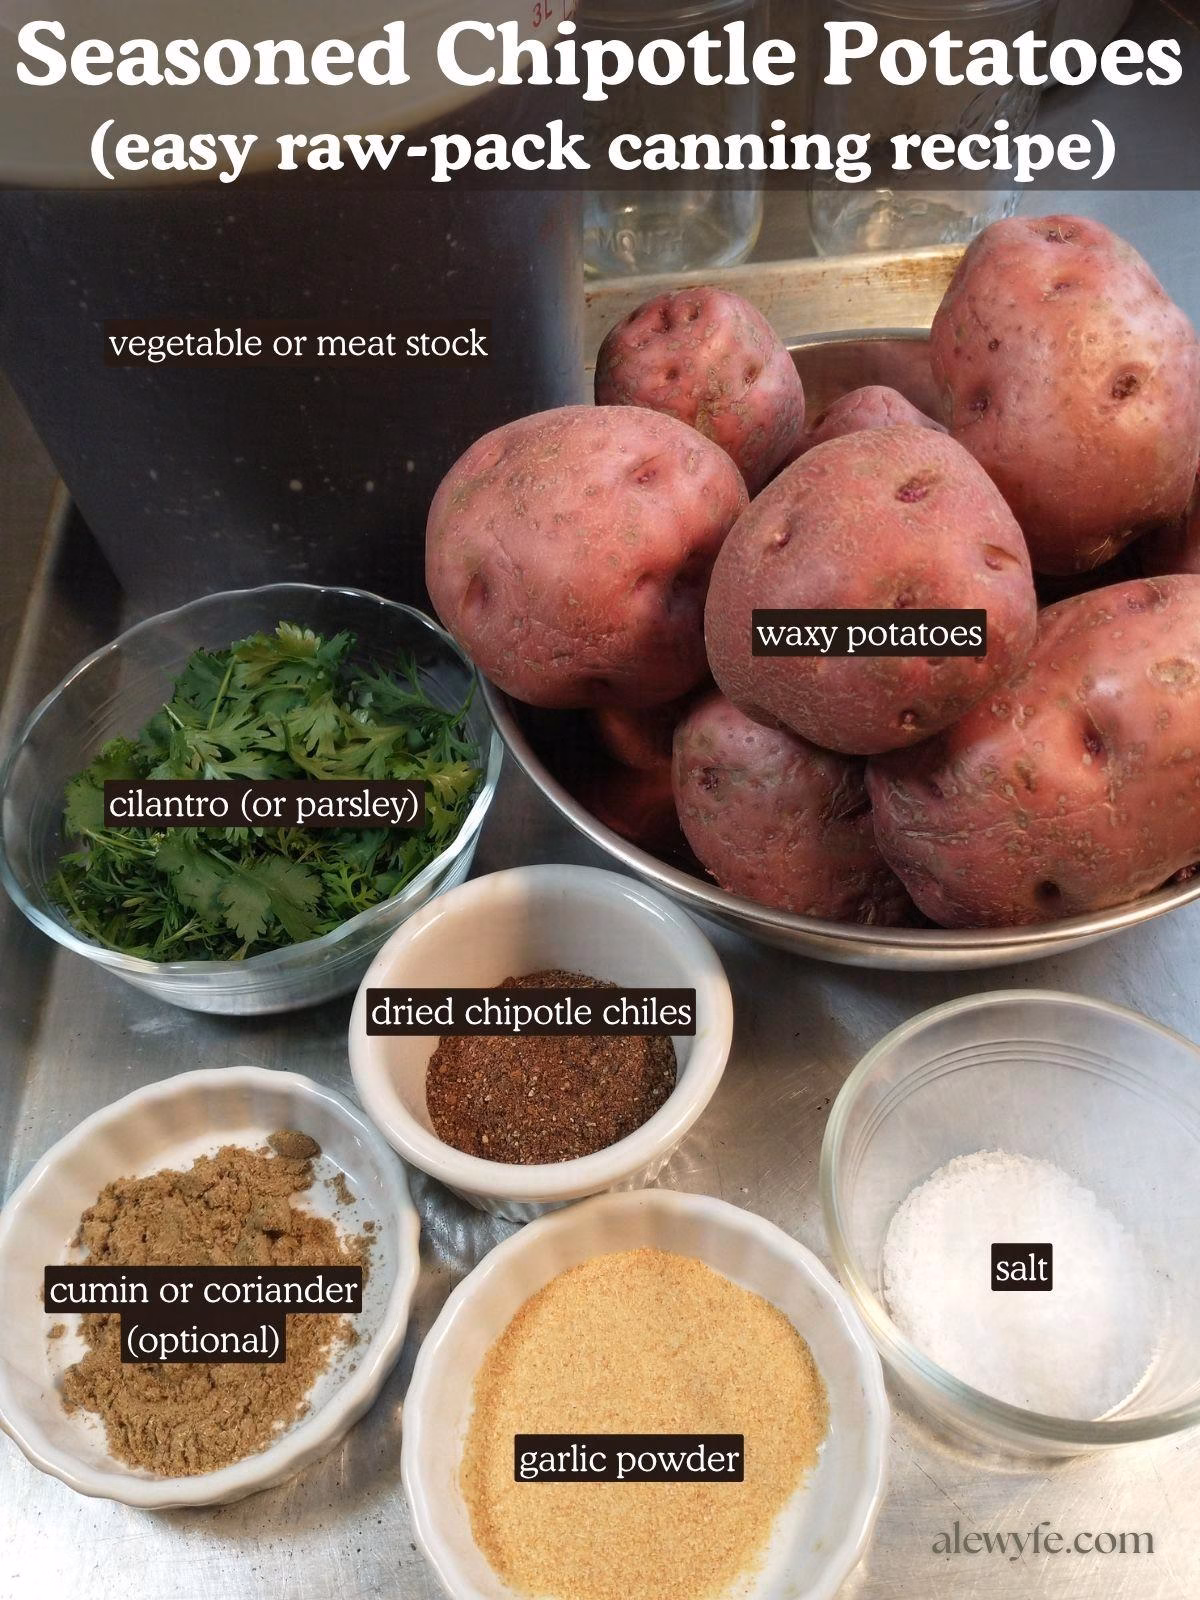
Chipotle Canned Potato Ingredients
Potatoes:
You want to use waxy potatoes for this recipe. Yukon Gold and most red-skinned potatoes are fine, or blue potatoes if you are fancy. Don’t I don’t recommend using russet or other mealy potatoes, as they may turn to mush in the jar.
You need 20 oz per quart, so about 8 3/4 lbs (140 oz) if you are doing a full pressure canner load of seven quarts (or adjust for your canner or batch size).
The hardest part of pressure canning potatoes is peeling them. I often like to serve my potatoes skin-on, but if I’m canning them, the peels go in the compost (or I steam the peels and give them to the chickens).
Some people will tell you that you don’t need to, but it’s really best to peel all root vegetables before canning, from a food-safety perspective. The biggest danger with canned goods is botulism, which is a naturally occurring bacteria that lives in soil (and that is odorless, tasteless, and thrives in low-acid anaerobic environments, like inside a sealed jar).
Anything that grows directly in soil has a higher risk of being contaminated with this bacteria. If you properly pressure-can your potatoes, it should kill or neutralize all harmful bacteria (and fungi or other spoilage organisms), but it’s always better to avoid adding to the risk and stacking the deck in your favor, right?
So, wash and weigh your potatoes, peel them, and then rinse them off again. Safety first, don’t eat dirt (unless you’re playing baseball or something, even then, slide feet first, my friends… Dirt in the skirt!).
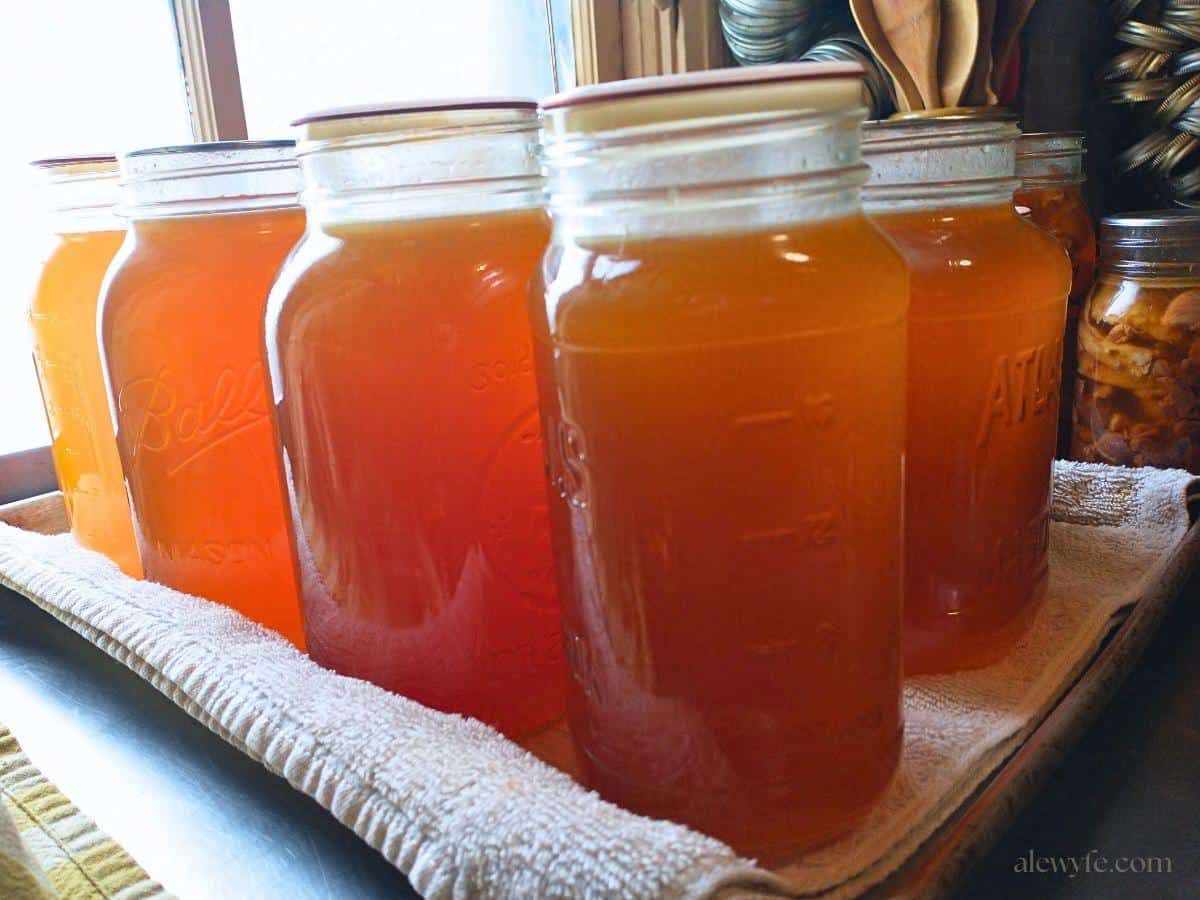
Broth:
You could can your chipotle potatoes in water, but doing them in broth makes them much more flavorful and nice. Do not listen to the people who tell you to “dry can” your potatoes- this is not safe! Liquid is a better conductor of heat than air, and ensures that the heat penetrates to the center of the jar during processing.
Dry canning recipes have not been tested and it’s not an approved or safe canning method, for both safety and quality reasons. Make sure the broth completely covers the raw-packed potatoes in the jars (leaving an inch of head-space at the top).
It’s okay if the liquid level is lower than this after processing- it could be because of siphoning (changes in pressure forcing liquid out of the jar) or just that your potatoes absorbed the broth. If this happens, try to use the jars with the lowest liquid level first.
I use homemade chicken or turkey stock in mine, but you could also use vegetable stock to keep them vegetarian/vegan, or even water (though they’ll be less flavorful). You can use bouillon powder or “base” concentrated broth if you don’t have homemade or store-bought stock in your pantry. You could also use a darker stock, but I think the color and flavor is much nicer with a paler, more neutral stock.
Seasonings:
You’ll need ground dried chipotle peppers. You can buy pre-ground chipotle chili powder, or grind your own with a blender, spice grinder, or mortar and pestle (remove the stems first… you can leave or remove the seeds, depending on hyow spicy you want your potatoes).
Use one quarter cup of washed and chopped fresh cilantro for each quart jar (or two pints) of seasoned potatoes. If you are cursed with the gene that makes cilantro taste like soap, you could safely substitute fresh parsley for the cilantro.
The original Ball recipe uses 2 tsp of dried garlic powder (not garlic salt) per quart (half that for pints). I like to substitute equal parts ground cumin or coriander for half of the garlic, but this is an optional variation!
Equipment Needed to Can Raw-Pack Potatoes
Pressure Canner:
You absolutely must use a pressure canner to can this recipe safely. Do not try to water-bath can low-acid foods! You also can’t safely can this in an Instant Pot- they do not reliably build up enough pressure to safely can foods, especially low-acid foods like meat and veggies that require consistent pressure and long processing times.
Botulism isn’t worth the risk… always pressure can low-acid foods like meats and vegetables.
I love my All-American pressure canner, but any pressure canner that is large enough to hold at least four quart jars at a time and that has a pressure weight and/or a tested pressure gauge will work for pressure canning potatoes.
You need to process at least two quart jars (or four pint jars) at a time to ensure proper processing. I prefer doing a full load of seven quarts (or 14-16 pint jars) to save time and energy!
Mason jars and new canning lids:
Clean mason jars (quart or pint jars) & new canning lids. Wide-mouth jars are easier to pack, but small-mouth jars will work (and the lids are less expensive). It’s up to you, or use what you have!
Kitchen Scale:
For any raw-pack potato canning recipe, it’s important to not over pack the jars so that they process fully. The best way to do this is to weigh the potatoes. According to the recipe testers at Ball, you need 20 oz of potatoes per quart jar (or 10 oz per pint). You can put less in each jar, but not more, and make sure you top them up to the proper head-space with broth either way.
Use your kitchen scale to weigh your total potatoes, and as a check when you’re filling your jars if you want to be very precise. I use my trusty spring-balance scale for most basic cooking tasks that don’t require absolute precision, but if you have a digital one, you can tare it to remove the jar weight. Very handy!
Canning Equipment:
Canning funnel, ladle, and jar lifter tongs. Not essential but you’ll wish you had these if you don’t! If you own a pressure canner, you probably already have these.
Blender or Spice grinder (optional):
You can buy pre-ground dried chipotle peppers, but if you are using whole dried chipotles, you’ll need a blender or spice grinder. You can also toast and grind cumin and coriander seeds for an even fresher flavor.
Step-by-Step Guide for Pressure Canning Chipotle Potatoes
Prep the potatoes
- Wash and scrub the potatoes, discarding any that have mold or rot. Weigh out the potatoes.
- You’ll need one and a quarter pounds (20 oz) per quart jar (or 10 oz per pint).
- You need to process a minimum of two quart jars or four pint jars (or a combination) at a time to ensure your pressure canner reaches safe canning temperatures.
- Peel the potatoes and place them in a pot of cold water to prevent them from browning.
- Once you have them all peeled, drain and rinse the potatoes. Slice the potatoes into large 2-3″ sections (halved or quartered). Small potatoes (less than 2″ diameter) may be left whole.

Prep the pressure canner & jars
- Wash and preheat your jars, and get your lids and rings ready. Check lids and rings for dents and make sure they’re clean.
- Fill your pressure canner with the recommended amount of water (check your canner manual, but at least several inches) and preheat it.
- Check the canner lid vent to make sure it isn’t blocked (I hold it up to a light source and make sure it’s clear).
Prep the canning broth & seasonings
- If you are working with whole chipotle peppers:
- Remove the stems and seeds & discard.
- Tear the peppers into small pieces, and then grind the peppers into a powder using a blender or spice grinder.
- You can skip this step if you bought chipotle pepper powder.

- Heat vegetable, meat, or chicken stock to a boil.
- You can also use bouillon powder or concentrate, or even water.
- You’ll need about a cup of stock or broth per quart jar.
- The exact amount will depend on the shape and size of your potatoes, but I find that about 8-10 liquid ounces of stock per quart is enough (just over a cup), and roughly half that amount for a pint jar.
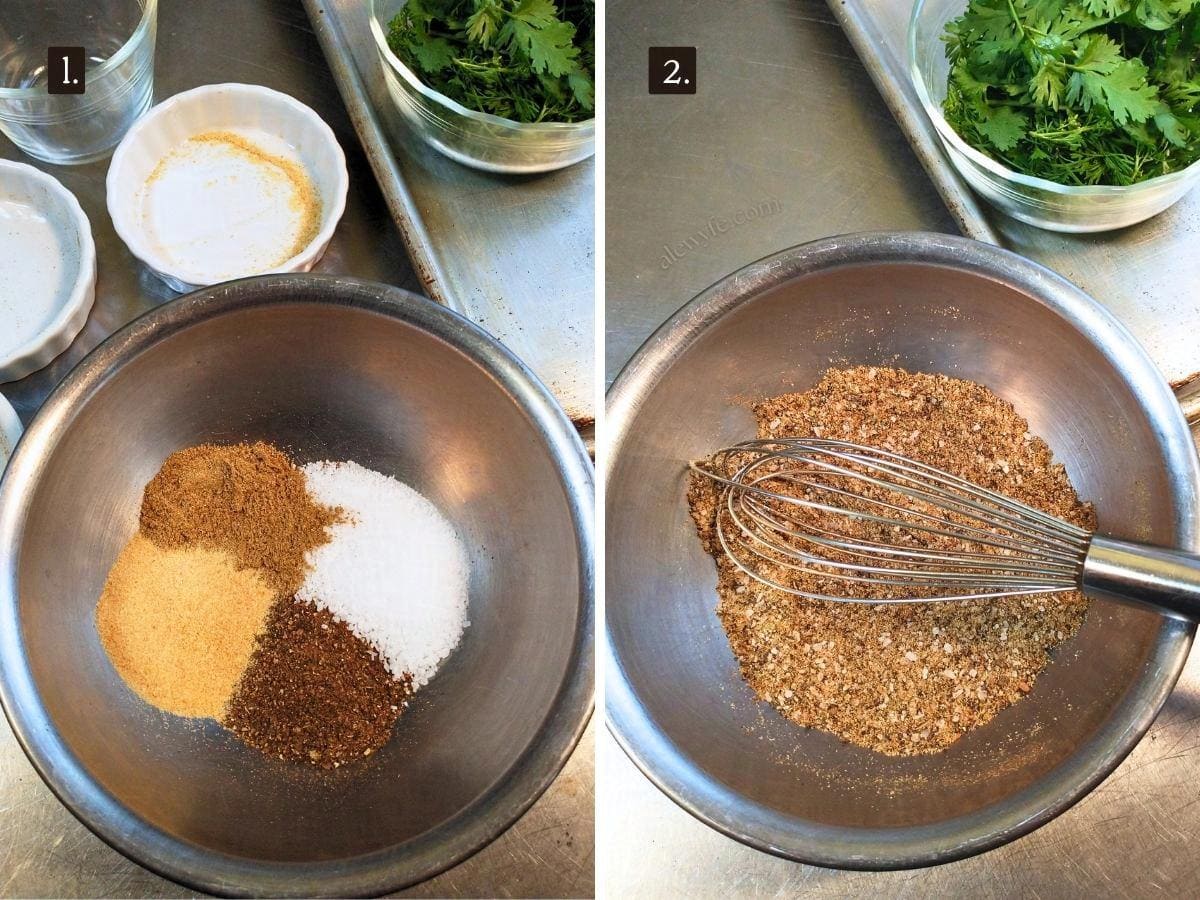
- Multiply the dry seasoning quantities by the number of jars you’ll be processing (refer to the total weight in the recipe below).
- Measure out the ground chipotle pepper, along with the kosher salt and dried garlic (or blend of dried garlic and cumin or coriander) into a small bowl or jar.
- Mix or shake the dry seasonings well to combine.
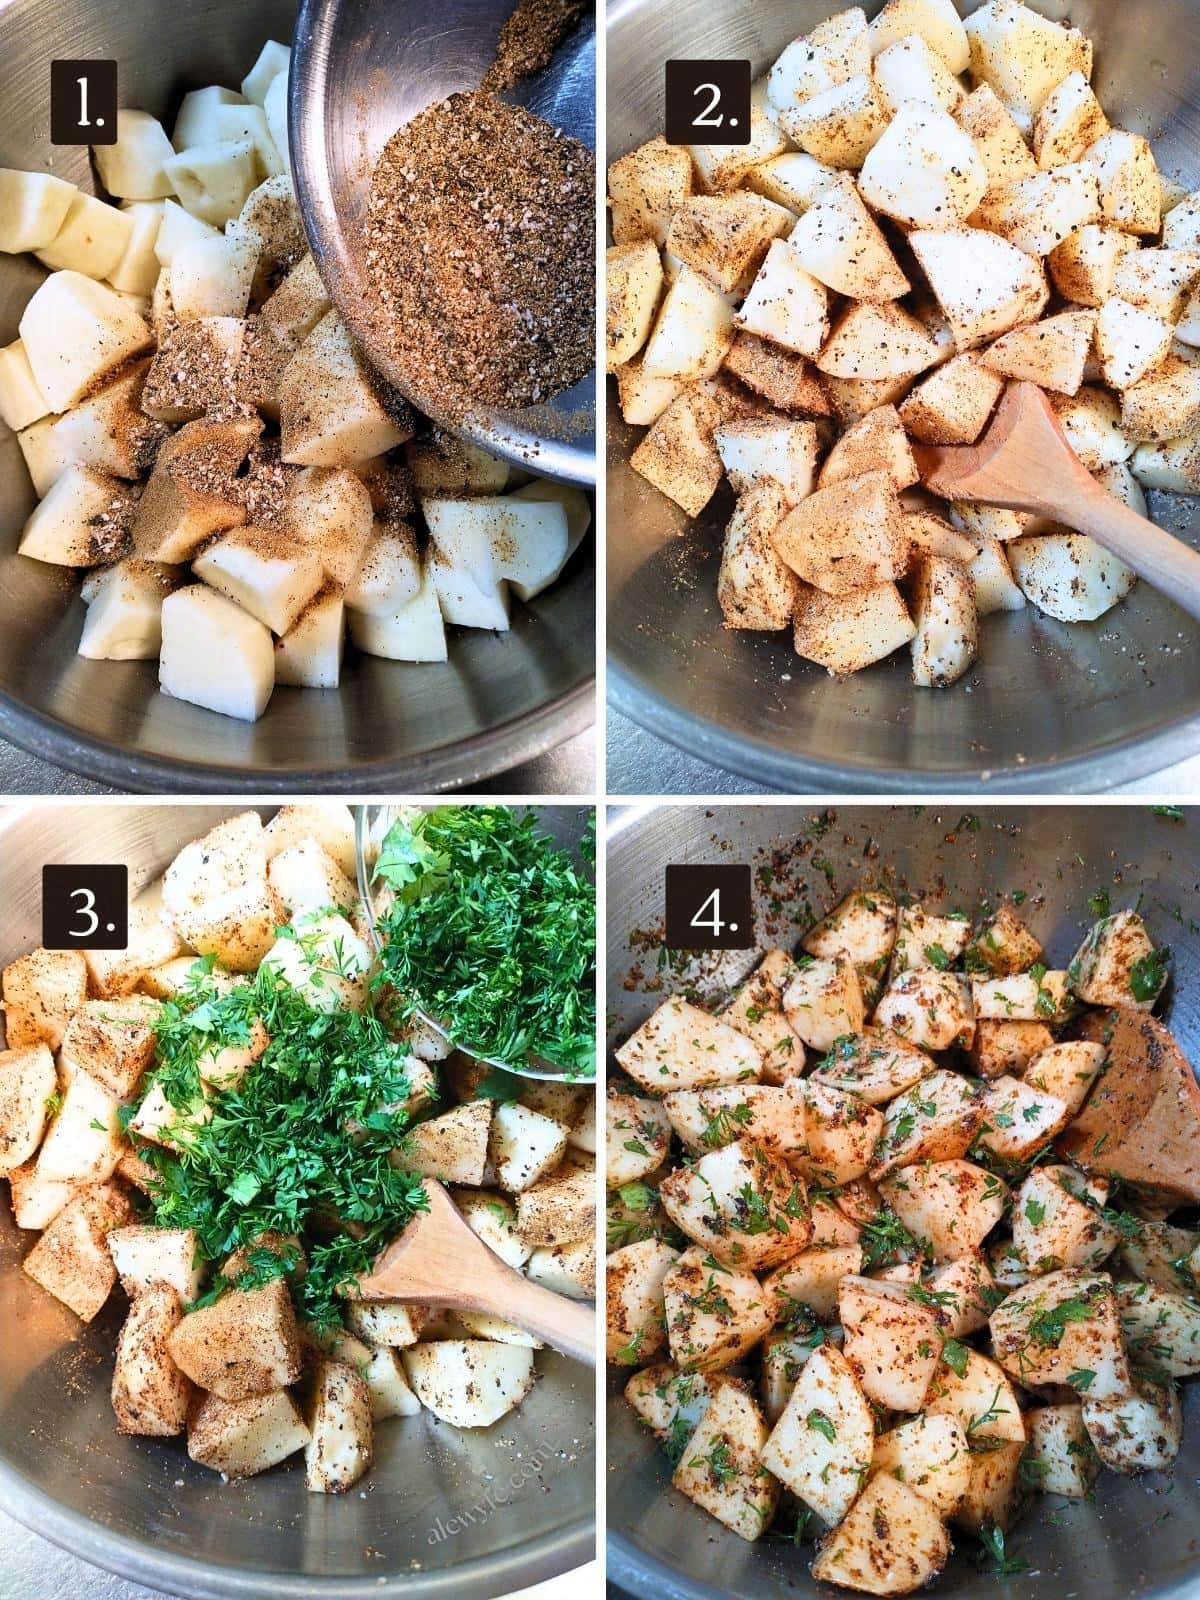
Mix the potatoes with the seasoning
- Drain the peeled, sectioned potatoes and place them in a large mixing bowl.
- Sprinkle the potatoes with the chopped cilantro and the dried seasonings.
- Toss or stir the mixture until the seasoning is evenly distributed on the diced potatoes.
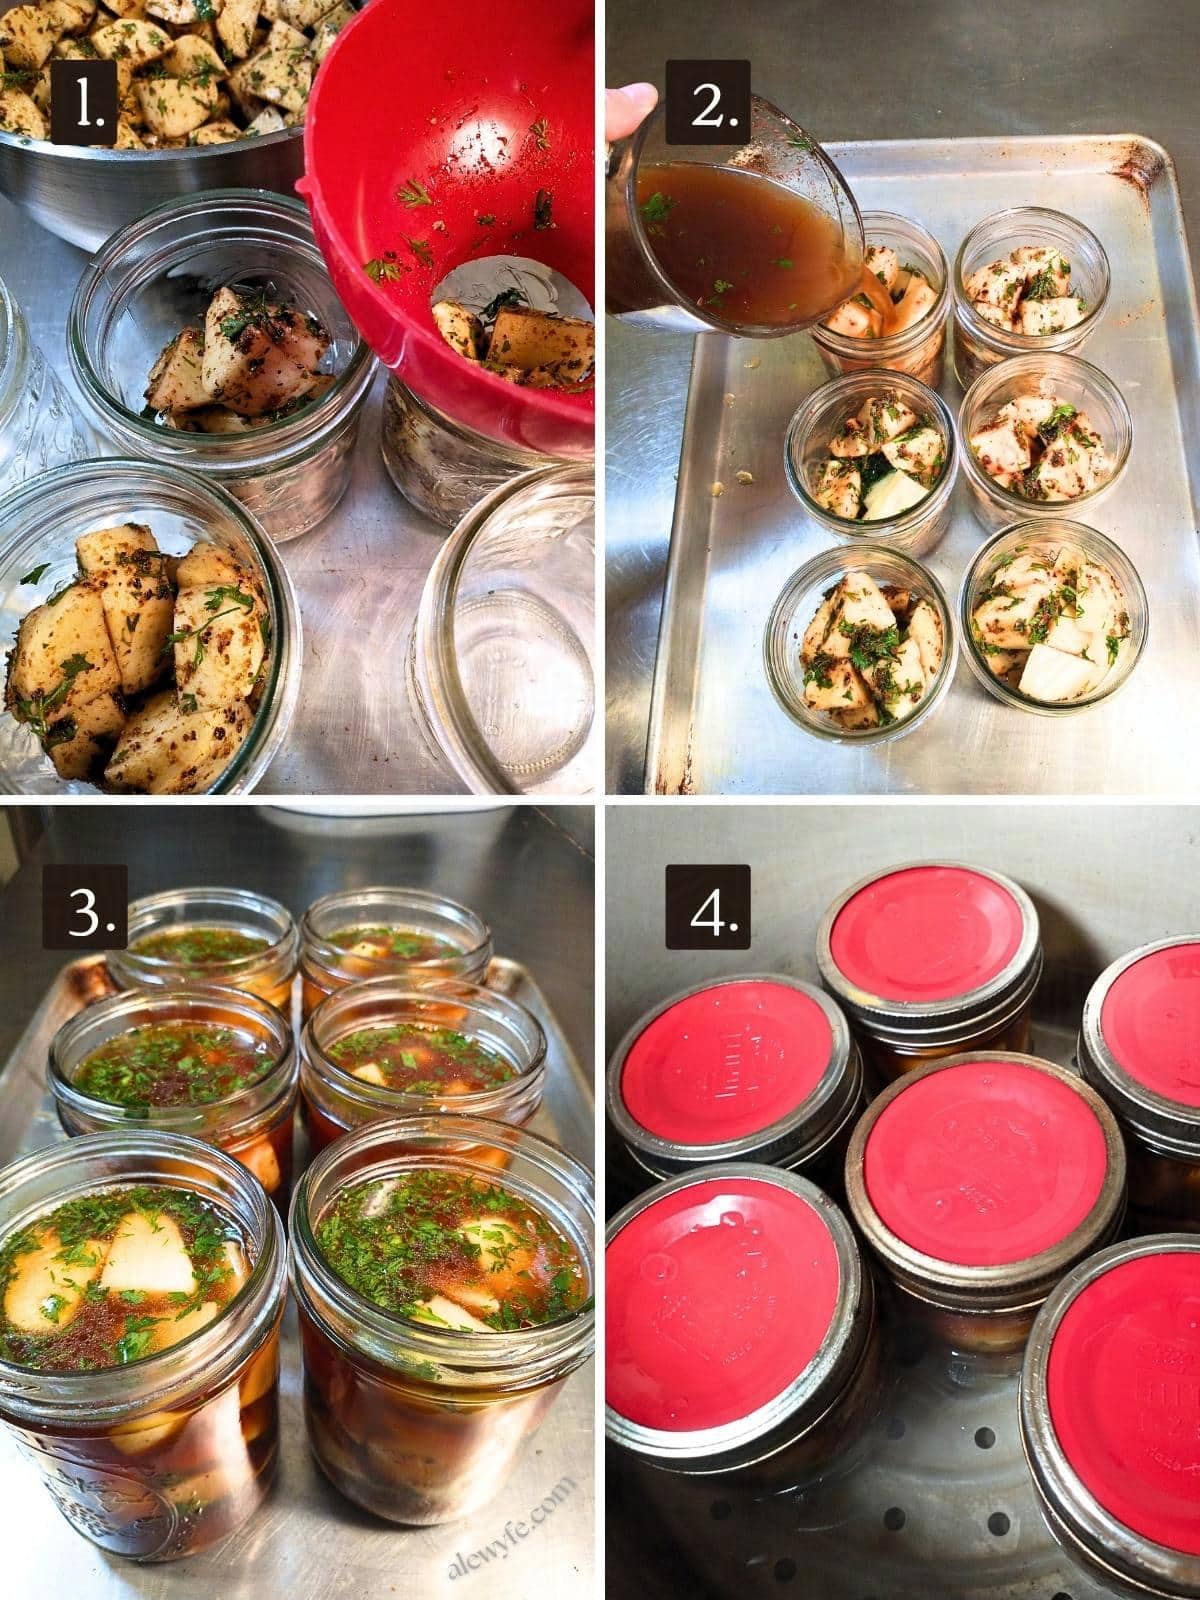
Fill the jars
- Working quickly, fill your jars (dividing the potatoes evenly between the number of jars indicated by the initial weight).
- Do not pack more potatoes into the jars than indicated.
- Leave room for an inch of head space at the top.
- Check the weight of the jars as you work (20 oz of potatoes in a quart, 10 oz in a pint). Less is okay, more is not.
- Top up the jars with the hot broth, dividing it evenly between the jars.
- If you run out, you can heat more broth or bouillon, or top up the jars with plain boiling water, leaving one inch headspace.
- Don’t leave the jars partially filled, or any potatoes above the liquid may discolor, and more importantly, the heat will not penetrate the jars evenly. This is why those “dry canning” rebel canning recipes you see on Pinterest are not safe! Liquid is a much better conductor of heat than air.
- Wipe the rims of the jars (a bit of vinegar on a soft cloth or paper towel works great for this) and top with new canning lids.
- Tighten the rings finger-tight (or follow manufacturer directions for reusable lids).
Fill and vent the canner
- Place the filled jars in the canner and close the lid.
- Leave the weight off or pressure relief valve open, and heat the canner over medium-high heat until the canner is steadily venting steam.
- Set a timer to vent steam for ten minutes.
Process the jars
- Place a 10 lb weight on the canner vent (or close the valve). Process at 10 lbs of pressure on a weighted canner, or 11 lbs for a dial gauge (adjust for altitude).
| Altitude Feet | Weighted Gauge | Dial Gauge |
|---|---|---|
| 0- 1,000 | 10 | 11 |
| 1,001- 2,000 | 15 | 11 |
| 2,001- 4,000 | 15 | 12 |
| 4,001- 6,000 | 15 | 13 |
| 6,001-8,000 | 15 | 14 |
| 8,001-10,000 | 15 | 15 |
- Start the processing timer only after the canner weight is jiggling or the dial reads the appropriate pressure.
- Process quart jars for 40 minutes, or pint jars for 35 minutes. If you have both pints and quarts in your canner, process the whole batch for 40 minutes.
- If the canner depressurizes or drops below the target at any time during processing, reset the timer to zero and process for the full amount of time again.
Cool and depressurize the canner
- Turn off the heat after the processing time is up. Let the canner rest undisturbed until the pressure returns to zero. Do not remove the weight early to vent the steam faster.
- Once the pressure releases, wait another five minutes. Carefully open the lid of the canner (away from you, to direct the steam away from your face).
- Don’t leave the jars in the hot canner overnight or for an extended period of time.
- This can lead to a problem called “flat sour”, caused by an overgrowth of a thermophilic (heat-tolerant) bacteria.
- It isn’t dangerous, but makes the food taste terrible.
- It’s most common in corn and peas, but can affect any low-acid vegetable. I’ve never had this problem, but better safe than… sour?
Cool jars, check seals
- Using jar tongs or a jar lifter rack, remove the jars of chipotle potatoes and place them on a towel or cooling rack.
- Don’t place hot jars directly on a cold surface or they may crack.
- Cover with a towel if it is winter and there are cold drafts.
- Leave undisturbed overnight or for at least 8-12 hours when the jars are fully cooled before checking for seals.
- Any jars that didn’t properly seal can be refrigerated and used within a week, or reprocessed with new lids within 24 hours of canning.
- Remove rings, wash jars with warm soapy water and store.
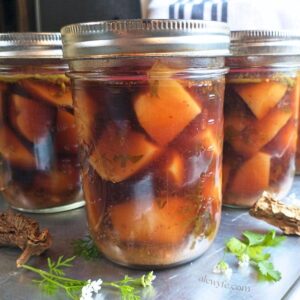
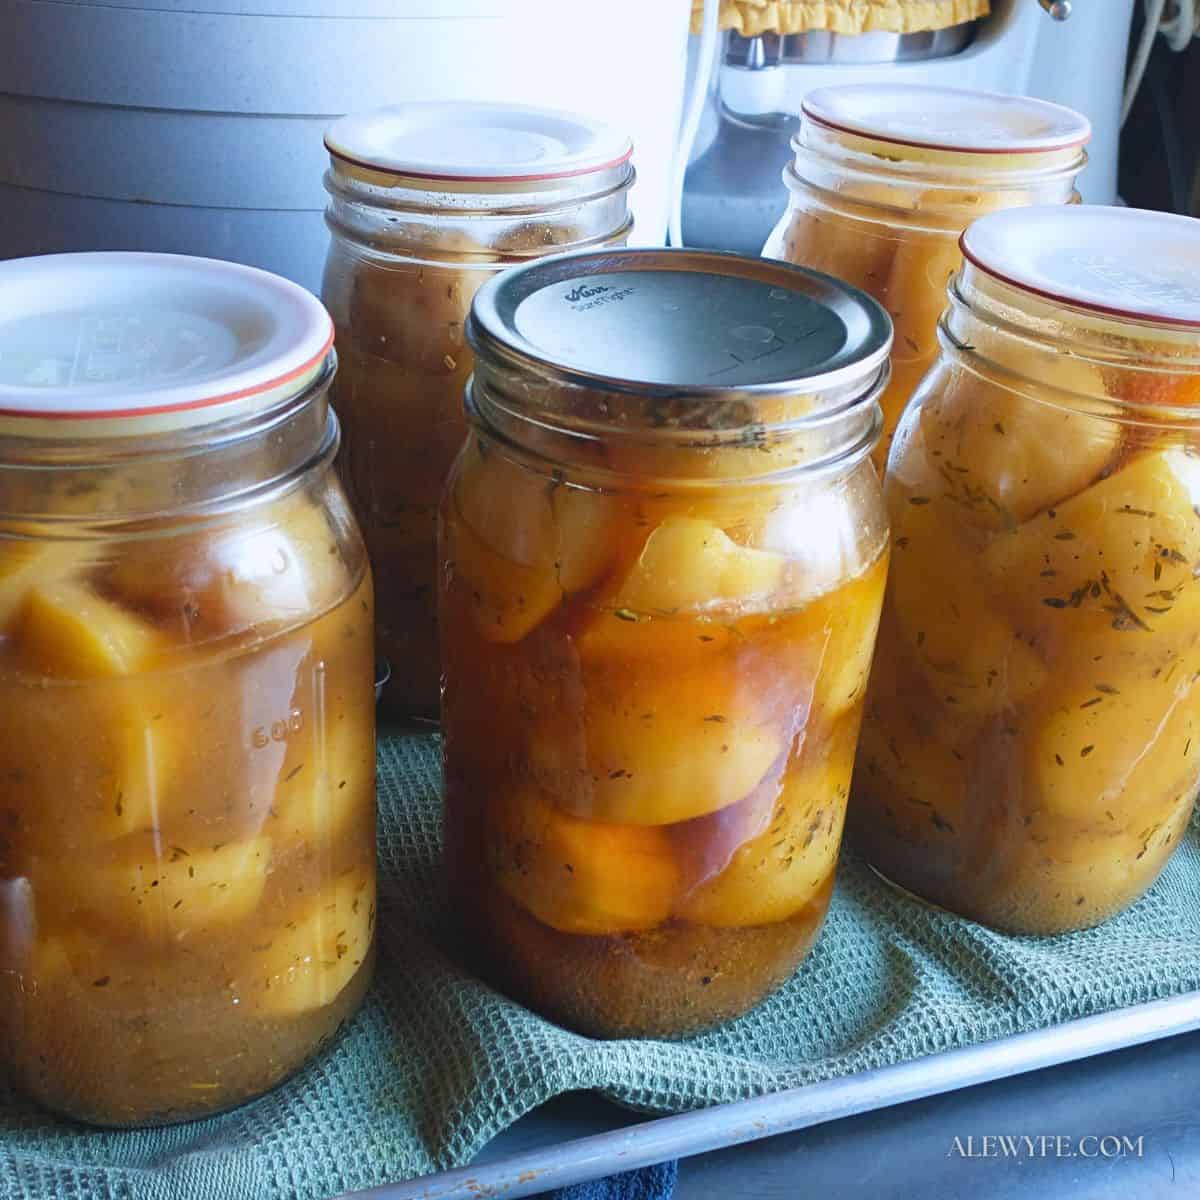
Storing Canned Chipotle Potatoes
Label the canning jars or lids (with the recipe name or ingredients, and the processing date). Store in a cool, dark place with the rings off.
For best quality, flavor, and nutritional value, enjoy your home-canned goods within 12-18 months, although they will be safe to eat for much longer if the lid jar seals are intact.
Discard any jars that lose their seals in storage, smell off, are bubbling, or hiss when opened. Use older jars first, or any that have less liquid in the jars. Potatoes above the liquid line may darken slightly but should still be safe to eat.
Seasoned Chipotle Potatoes (Raw-Pack Pressure-Canning Recipe)
Equipment
- canning jars, rings, and new lids
- Jar tongs & canning funnel
Ingredients
Ingredients Per Quart or Two Pint Jar(s):
- 1 ¼ lb Yukon gold, red-skinned, or other waxy potatoes 20 oz per quart jar, 10 oz per pint
- 1 cup chicken, meat, or vegetable broth (or water & bouillon) 8-10 oz (you can use plain water but broth is better)
- 1 tsp kosher, canning, or sea salt
- 1 tsp ground dried chipotle pepper
- 1 tsp dried garlic powder (Ball recipe has 2 tsp of garlic and no cumin or coriander)
- 1 tsp ground cumin or coriander (optional, not in Ball recipe, substitute more garlic powder instead for original recipe)
- ¼ cup fresh cilantro (washed & chopped)
Instructions
Prep the potatoes:
- Wash and scrub the potatoes, discarding any that have mold or rot. Weigh out the potatoes. You'll need one and a quarter pounds of waxy potatoes (20 oz) per quart jar (or 10 oz per pint). You need to process a minimum of two quart jars (or four pint jars) at a time to ensure your pressure canner reaches safe canning temperatures.
- Peel the potatoes and place them in a pot of cold water to prevent them from browning and wash off the excess starch. I like to start the later steps now (prepping the canner, broth, and seasoning) so that they're ready when the potatoes are drained.
- Once you have them all peeled, drain and rinse the potatoes. Slice the potatoes into large 2-3" sections (halved or quartered). Small potatoes (less than 2" diameter) may be left whole.
Prep the pressure canner & jars
- Wash and preheat your jars, and get your lids and rings ready. Check for dents and make sure they're clean.
- Fill your pressure canner with the recommended amount of water (check your canner manual, but at least several inches) and preheat it.
Prep the broth and seasonings:
- Heat vegetable or chicken stock to a boil. You can also use bouillon powder or concentrate, or even water. You'll need about a cup of stock or broth per quart jar… the exact amount will depend on the shape and size of your potatoes, but I find that about 8-10 liquid ounces of stock per quart is enough (just over a cup), and roughly half that amount for a pint jar.
- If you are working with whole chipotle peppers, remove the stems and seeds, tear the peppers into small pieces, and then grind the peppers into a powder in a blender or spice grinder. You can skip this step if you bought chipotle pepper powder.
- Multiply the dry seasoning quantities by the number of jars you'll be processing (refer to the total weight). Measure out the dried chipotle and spices, along with the kosher or canning salt into a small bowl. Mix the dry seasonings well to combine.
- Drain the peeled, sectioned potatoes, place in a large mixing bowl. Sprinkle with the dried seasonings and the chopped cilantro and toss or stir until they're evenly distributed.
Prep the jars:
- Working quickly, fill your jars (dividing the potatoes evenly between the number of jars indicated by the initial weight). Do not pack more potatoes into the jars than indicated, and leave room for an inch of head space at the top.
- Check the weight of the jars as you work (20 oz of potatoes in a quart, 10 oz in a pint). Less is okay, more is not.
- Top up the jars with the hot broth, dividing it evenly between the jars. If you run out, you can heat more broth or bouillon, or top up the jars with boiling water, leaving one inch headspace. Don't leave the jars partially filled, or any potatoes above the liquid may discolor, and the heat will not penetrate the jars evenly.
- Wipe the rims of the jars (a bit of vinegar on a soft cloth or paper towel works great for this) and top with new canning lids. Tighten the rings finger-tight (or follow manufacturer directions for reusable lids).
Pressure-can the potatoes:
- Place the filled jars in the canner and close the lid. Leave the weight off or pressure relief valve open, and heat the canner over medium-high heat until the canner is steadily venting steam. Set a timer to vent steam for ten minutes.
- Place a 10 lb weight on the canner vent (or close the valve). Process at 10 lbs of pressure on a weighted canner, or 11 lbs for a dial gauge (adjust for altitude).
- Start the processing timer only after the canner weight is jiggling or the dial reads the appropriate pressure. If the canner drops below the indicated pressure at any time during processing, reset the timer to zero.
- Process quart jars for 40 minutes, or pint jars for 35 minutes. If you have both pints and quarts in your canner, process the whole batch for 40 minutes.
- Turn off the heat after the processing time is up. Let the canner rest undisturbed until the pressure returns to zero- do not remove the weight early to vent the steam faster. This can cause siphoning and seal failure in your jars!
- Once the pressure releases, wait another five minutes. Carefully open the lid of the canner (away from you, to direct the steam away from your face).
- Using jar tongs or a jar lifter rack, remove the jars and place them on a towel or cooling rack. Don't place hot jars directly on a cold surface or they may crack.
- Leave undisturbed overnight or for at least 8-12 hours when the jars are fully cooled before checking for seals. Any jars that didn't properly seal can be refrigerated and used within a week, or reprocessed with new lids within 24 hours of canning.
- Remove rings, wash jars with warm soapy water, label, and store.
Notes
- Label the jars (with the recipe name or ingredients, and the processing date) and store in a cool, dark place with the rings off.
- For best quality, flavor, and nutritional value, enjoy home-canned goods like these seasoned chipotle potatoes within 12-18 months, although they will be safe to eat for longer than that as long as the seals are intact.
- Discard any jars that lose their seals in storage, smell off, are bubbling, or hiss when opened. Use older jars first, or any that have less liquid in the jars. Potatoes above the liquid line may darken slightly but should still be safe to eat.
Loved this? Try these related recipes!
Po-TAY-toes (More of our favorite potato recipes)
- Garlic and Herb Potatoes (Easy Raw-Pack Recipe)
- Zuppa Toscana – Sausage, Potato, Kale and White Bean Tuscan Soup
- Cajun Crispy Potato Wedges (Easy Oven Fries)
- Lemon-Herb Roasted New Potatoes
- Dill-Yogurt Nordic Potato Salad
- Classic Southern Potato Salad Recipe
More pressure canning favorites:
- Canning Chipotle Barbacoa Beef or Venison
- Chipotle Steak & Bean Chili (Beef or Venison)
- Canning Five-Alarm Venison (or Beef) Chili
- Hearty Chicken & Mushroom Stew or Pot Pie Filling
- Canning Fresh Bluegill, Perch, and Other Small Panfish
- How to Can a Whole Turkey (or three)
- Canning Meat, Chicken or Turkey Stock