
CANNING: Bourbon Brown Sugar Peach Jam
- Bourbon Brown Sugar Peach Jam Ingredients
- Kitchen Equipment Needed
- How to Can Bourbon Brown Sugar Peach Jam
- Pantry Storage Tips
- Bourbon Brown Sugar Peach Jam
This homemade peach jam has a kick… it’s packed with fresh fruit flavor, but layered with caramel brown sugar notes, whiskey, vanilla, and a hint of sea salt and spice. You can use just a pinch of salt in this jam for balance, or add more if you enjoy salted caramel dessert flavors. Either way, it’s a delicious way to put up and preserve the flavor of sun-ripened summer peaches!
I love to use this richly-flavored jam to bake layered jam bars and shortbread sandwich cookies. It’s also fantastic on a slice of buttered toast, pancakes, waffles, french toast, or a piping hot butter-swim biscuit.
You can make this jam with fresh peaches, or with frozen peach slices if you can’t get good ripe peaches where you are. The weight given in the recipe is for fresh, unpeeled peaches before they’re trimmed, pitted, and sliced. If you’re using frozen ones, use the cup (volume) measurements instead.

Bourbon Brown Sugar Peach Jam Ingredients
Peaches:
You can use clingstone or freestone yellow peaches for this jam recipe. Freestone types are easier to process, but either will work! They need to be standard yellow peaches.
Do not use white peaches if you are canning your jam. White peaches are not acidic enough to safely can (and the flavor balance for the recipe will also not be as nice, since the tartness of regular peaches balances out the sweetness of the jam). If you must use white peaches, refrigerate or freeze any jam that you won’t be using right away.
To easily peel the peaches, blanch them briefly (30-60 seconds) in a pot of boiling water, then dunk them into an ice bath or bowl of cold water to stop the cooking and cool them enough to handle. The skins should slip right off with very little help from your paring knife. If not, return them to the hot water briefly again.
Brown sugar:
I like to use light brown sugar for this jam, as it lets more of the peach flavor and bright color shine through. If you want a more caramel-flavored, darker colored jam, you can use dark brown sugar, or a mix of light and dark.
Lemon juice:
Use bottled lemon juice, not fresh, for this jam recipe. Bottled lemon juice has a standardized acidity level, which ensures your jam will be the correct pH for water-bath canning.
Whiskey:
You can use your favorite whiskey in your jam. Save the top-shelf stuff for cocktails, but don’t use terrible quality booze here either. Bourbon is a natural choice, and has a sweet, caramel flavor that harmonizes with the peaches perfectly. I have also made this jam with rye whiskey when I was out of bourbon… it adds a spicy, complex note that is quite nice if you enjoy rye whiskey.
Pectin:
You can use bulk powdered pectin or a packet of pectin. If you are using bulk pectin, measure out 6 tablespoons for a relatively soft-set jam (that can also be used as a thick dessert sauce). This is roughly equivalent to a packet of classic pectin (1.75 oz packet). If you want a thicker jam, add an additional tablespoon or two of pectin.
You can can the jam without the added pectin, but it will be very runny and soft. Peaches are relatively low in pectin, and benefit from added pectin. This preserves more of their fresh peach flavor. Otherwise you will have to cook the jam down for a very long time to get a good set.
Spices:
You can mix these up to suit your tastes, but I like to go with a teaspoon each of freshly ground coriander seed and nutmeg. You can use pre-ground spices in a pinch if they are relatively fresh, but once you try freshly grated nutmeg you’ll never want to go back to the musty stuff in a jar from the store. Add the vanilla extract with the whiskey, near the end of cooking down the jam to preserve the flavor.
I like to use either finely-ground sea salt or Himalayan pink salt in this recipe. Start with about a half teaspoon, and add more to taste.
I like a fairly salty-sweet balance, and use two teaspoons of salt in this jam, which goes well with the brown sugar sweetness and spirited whiskey flavors. Add it a bit at a time to taste to make sure you don’t over-salt it to your liking! If you are using flaky kosher salt, you may need to add a bit more, since it’s less dense than the finer sea salt or pink salt.

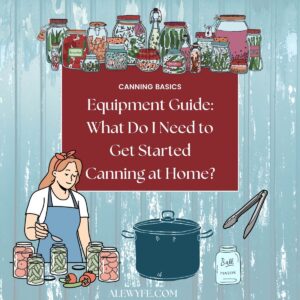
Kitchen Equipment Needed
one gallon saucepan:
You’ll need a large, heavy bottomed stockpot large enough to hold all of the recipe ingredients. The peaches, powdered pectin, and lemon juice are simmered together until they are soft, then blended with the sugar and spices, then simmered again.
food processor or immersion blender:
After simmering, the peaches are all pureed into a soft paste. This is easiest with an immersion blender, but you can also use a food processor or a regular blender, working in batches if necessary.
half-pint or smaller canning jars and new lids:
Can this recipe only in pint, 12 oz, half-pint jelly jars or smaller 4 oz jars with new canning lids. Do not can quarts of this jam recipe. Processing time is the same for pints or smaller jars.
You can also portion and freeze this recipe if you prefer, in any freezer safe airtight container.
large canning pot:
You need a large canning pot with a lid that will hold all of your pint jars with room for at least an inch of rapidly boiling water to cover the lids. You can use any pot with a lid that will hold all of your jars, plus enough boiling water to cover by an inch or two and room at the top for a vigorous boil.
It’s ok to stack the jars if your pot is tall enough, but it’s best to use a jar rack or a perforated steamer insert separating between the layers so that the jars don’t jostle and break.
Canning funnel, ladle, jar tongs, and rack:
These tools are optional but make the job of filling your jars with hot jam, and getting them into and out of the hot water bath a lot easier and safer!
It’s best to use a canning pot with a false bottom or fitted with a jar rack to keep your jam jars from scorching or breaking on the bottom. You can use a silicone trivet if you don’t have a jar rack.
You can read more about these and our recommendations in our guide to canning equipment if you don’t already have these or are new to canning.
How to Can Bourbon Brown Sugar Peach Jam

combine prepared peaches and pectin:
- Combine the peeled, pitted, sliced peaches, powdered pectin, and the lemon juice in a large heavy bottomed jam pot or saucepan.
- Stir the peaches until the pectin dissolves and is evenly distributed.
cook peaches & pectin:
- Bring to a simmer over med-high heat, stirring frequently, then reduce heat to low, and stir often to prevent scorching.
- Simmer until the peaches are soft and translucent (this will vary depending on the ripeness of your fruit and how small you cut the pieces, but can take up to 30-40 minutes).
blend peaches:
- Remove from heat. Carefully puree the peach mixture with an immersion blender, or in batches in a blender or food processor.
- You can leave a few small fruit pieces if you like a chunky jam, or puree it until completely smooth.
- Return the fruit puree to cooking pot (if you didn’t use an immersion blender).
add sugar & spices:
- Add the brown sugar, a small amount of the salt, and spices- and return to medium-low heat.
- Return to a simmer and stir often so that it doesn’t scorch. Let the peach jam simmer uncovered until it is quite thick, glossy, and caramel colored- this may take several hours.
- As the mixture reduces, lower the heat and stir more often to prevent scorching. Remember that the pectin will not fully set for awhile after the jam has cooled.

add whiskey and vanilla:
- After the jam has thickened enough to coat a spoon and is beginning to show traces when you stir, you can add the whiskey and the vanilla.
- Taste the mixture and add additional salt (up to about 2 teaspoons of fine salt or a tablespoon of kosher salt).
plate test (optional):
- Place a small saucer or ramekin in the freezer if you want to do a plate test.
- Drizzle a teaspoon of jam onto the cold plate, and let it sit for a few seconds to cool.
- Run your finger or a spoon through the jam. If the line you traced runs back together, the jam isn’t done. If the line remains, you can stop cooking it.
freeze or can your jam:
- You can cool and freeze in appropriate containers for 6-12 months, refrigerate in clean jars for up to a few weeks, or can the peach jam for longer shelf life (recommended).
Water-Bath Canning Instructions:
- Fill your water bath canner with water to a height that will cover your jars by several inches with room to boil vigorously.
- Wash your jars and lids with hot soapy water, rinse, and place the jars (but not the lids) in the canner as you bring the water up to a simmer (do this while the jam is almost finished).
- Protect your work surface- I like to use a baking sheet pan lined with an old kitchen towel. Remove your canning jars from the canner (carefully, with tongs or jar lifters, tilting them out of the hot water) just before filling and place them on the sheet pan or counter lined with a towel. This helps protect them from temperature shocks and also makes for easier clean-up!
- Using a jar funnel if you have one, ladle the hot peach jam into the hot jars. Leave between ¼-½” of headspace at the top of the jars (slightly more headspace if you are using reusable-style lids with gaskets like Weck or Tattler, less if you are using standard metal lids).
- Debubble the jars with a thin spatula, spoon, or debubbling tool, stirring gently to dislodge any trapped air.
- Wipe the tops of the jars with a clean paper towel or lint-free cloth that has been dipped in hot water or vinegar.
- Place the canning lids on the clean jar tops and screw down the rings- don’t overtighten, just snug. Using your jar lifter, tongs, or the canning jar rack, carefully place the hot filled jars in the hot canner.
- Make sure you have adequate water covering the jars (at least 2″ over the tops of the jars). Top up with water from a hot kettle if needed. Cover the pot with a lid.
- Start the timer for your water bath only after the water is at a rolling boil and all jars are in the canner. Process for 15 minutes (adjust processing time for altitude if you live at an elevation over 1000 ft) and then turn off the heat under the pot. Set a second timer for 5 minutes.
- Remove jars from the canner after 5 minutes, and place back on the towel-covered sheet pan or counter (put down a fresh towel if you spilled while filling the jars).
- Leave jars to cool slowly in a draft-free place. If you are using reusable lids, follow manufacturer directions to tighten rings, otherwise do not touch the jar rings until the jars are completely cool and sealed. Do not stack the jars.
Pantry Storage Tips
- After jars have cooled completely (8-24 hours) remove the bands and check for seals. Make sure that the button on the lid is depressed and the jars have a good strong vacuum seal.
- Refrigerate any jars of peach jam that did not seal and use them first. Or, you can reheat and reprocess them in a boiling water bath with new lids within 24 hours.
- Gently wash jars or wipe with a damp cloth to remove any sugary residue or hard water deposits from the canning bath.
- Clearly label your jars with the name and date of your product, and store them in a cool, dark pantry.
- For best quality, enjoy home-canned goods like this bourbon brown sugar peach jam within 12-18 months.
- The jam will still be safe to consume after that as long as it was properly processed and stored, and the jars are still sealed. However, older jam may discolor and darken, and the flavor and nutritional value will decline over time.


Bourbon Brown Sugar Peach Jam
Equipment
- 1 large heavy-bottomed jam or sauce pot (At least 3 quarts in volume)
- 1 immersion blender, blender, or food processor
- water bath canner or large stockpot with rack
- glass canning jars, rings, and new lids (pint or smaller jars)
- jar lifters or tongs or jar rack with handles
- canning jar funnel (optional but helpful for filling the jars)
- silicone or other heat-resistant spatula (optional but helpful)
Ingredients
- 5 pounds peaches, washed, peeled, cored, and roughly chopped (pre-processing weight. Should yield about 8½-9 cups of processed, sliced peaches)
- ¾ cup lemon juice (bottled for standardized acidity)
- 6 tbsp powdered pectin (one 1.75 oz packet of classic pectin)
- 2 lbs light brown sugar
- 1 tsp ground nutmeg
- 1 tsp ground coriander
- 2 tsp Himalayan pink salt or sea salt (use just ½ tsp, or to taste, if you don't want a strong salted caramel jam flavor)
- ½ cup bourbon or rye whiskey
- 1 tbsp vanilla extract
Instructions
Bourbon Brown Sugar Peach Jam:
- Combine the peeled, pitted, sliced peaches, powdered pectin, and the lemon juice in a large heavy bottomed jam pot or saucepan.
- Stir until the pectin dissolves and is evenly distributed.
cook peaches & pectin:
- Bring to a simmer over med-high heat, stirring frequently, then reduce heat to low, and stir often to prevent scorching.
- Simmer until the peaches are soft and translucent (this will vary depending on the ripeness of your fruit and how small you cut the pieces, but can take up to 30-40 minutes).
blend peaches:
- Remove from heat. Carefully puree the peach mixture with an immersion blender, or in batches in a blender or food processor.
- You can leave a few small fruit pieces if you like a chunky jam, or puree it until completely smooth.
- Return the fruit puree to cooking pot (if you didn’t use an immersion blender).
add sugar & spices:
- Add the brown sugar, a small amount of salt, and spices- and return to medium-low heat.
- Return to a simmer and stir often so that it doesn't scorch. Let the peach jam simmer uncovered until it is quite thick, glossy, and caramel colored- this may take several hours.
- As the mixture reduces, lower the heat and stir more often to prevent scorching. Remember that the pectin will not fully set for awhile after the jam has cooled.
add whiskey and vanilla:
- After the jam has thickened enough to coat a spoon and is beginning to show traces when you stir, you can add the whiskey and the vanilla.
- Taste the mixture and add additional salt (up to about 2 teaspoons of fine salt or a tablespoon of kosher salt).
plate test (optional):
- Place a small saucer or ramekin in the freezer if you want to do a plate test.
- Drizzle a teaspoon of jam onto the cold plate, and let it sit for a few seconds to cool.
- Run your finger or a spoon through the jam. If the line you traced runs back together, the jam isn’t done. If the line remains, you can stop cooking it.
freeze or can your jam:
- You can cool and freeze in appropriate containers for 6-12 months, refrigerate in clean jars for up to a few weeks, or can the peach jam for longer shelf life (recommended).
Water-Bath Canning Instructions:
- Fill your water bath canner with water to a height that will cover your jars by several inches with room to boil vigorously. Wash your jars and lids with hot soapy water, rinse, and place the jars (but not the lids) in the canner as you bring the water up to a simmer (do this while the jam is almost finished).
- Protect your work surface- I like to use a baking sheet pan lined with an old kitchen towel. Remove your canning jars from the canner (carefully, with tongs or jar lifters, tilting them out of the hot water) just before filling and place them on the sheet pan or counter lined with a towel- this helps protect them from temperature shocks and also makes for easier clean-up!
- Using a jar funnel if you have one, ladle the hot peach jam into the hot jars. Leave between ¼-½” of headspace at the top of the jars (slightly more headspace if you are using reusable-style lids with gaskets like Weck or Tattler, less if you are using standard metal lids).
- Debubble the jars with a thin spatula, spoon, or debubbling tool, and wipe the tops of the jars with a clean paper towel or lint-free cloth that has been dipped in hot water or vinegar.
- Place the canning lids on the clean jar tops and screw down the rings- don’t overtighten, just snug. Using your jar lifter, tongs, or the canning jar rack, carefully place the hot filled jars in the hot canner.
- Make sure you have adequate water covering the jars (at least 2″ over the tops of the jars). Top up with water from a hot kettle if needed. Cover the pot with a lid.
- Start the timer for your water bath only after the water is at a rolling boil and all jars are in the canner. Process for 15 minutes (adjust processing time for altitude if you live at an elevation over 1000 ft) and then turn off the heat under the pot. Set a second timer for 5 minutes.
- Remove jars from the canner after 5 minutes, and place back on the towel-covered sheet pan or counter (put down a fresh towel if you spilled while filling the jars).
- Leave jars to cool slowly in a draft-free place. If you are using reusable lids, follow manufacturer directions to tighten rings, otherwise do not touch the jar rings until the jars are completely cool and sealed. Do not stack the jars.
- After jars are cooled and seals are set (I leave them at least overnight but no more than 24 hours), check that all jars are sealed, carefully wash jars, label them, and remove rings before storing.
- Sealed jars with metal lids will not flex when the seal is pressed, and the lid has a firm vacuum seal with the jar. Any jars that did not seal can be reprocessed the same day with new lids (check the jar tops again for chips and the ring for dents), or immediately refrigerated and used first.
Notes
- 0-1,000 ft – use recipe time
- 1,001-3,000 ft – increase 5 minutes
- 3,001-6,000 ft – increase 10 minutes
- 6,001-8,000 ft – increase 15 minutes
- 8,001-10,000 ft – increase 20 minutes
Related Recipes:
- Whiskey Peach Brown Sugar Compote (Water-bath canning)
- Salted Caramel & Coriander Spiced Pear Butter (Water-bath canning)
- Cinnamon or Spiced Summer Peaches (Easy Raw-pack Water-bath Recipe)
- Spicy Peach BBQ Sauce Canning Recipe
- Vanilla Bean Marmalade Compound Butter
- Southern Fried Cornmeal-Crusted Catfish Salad with Peaches & Pecans