BAKE: Rustic Heirloom Tomato Gallette
- Serving Ideas & Suggestions
- Heirloom Tomato Gallette Ingredients
- Make-Ahead Tips for this Tomato Tart
- Rustic Heirloom Tomato and Herb Gallete
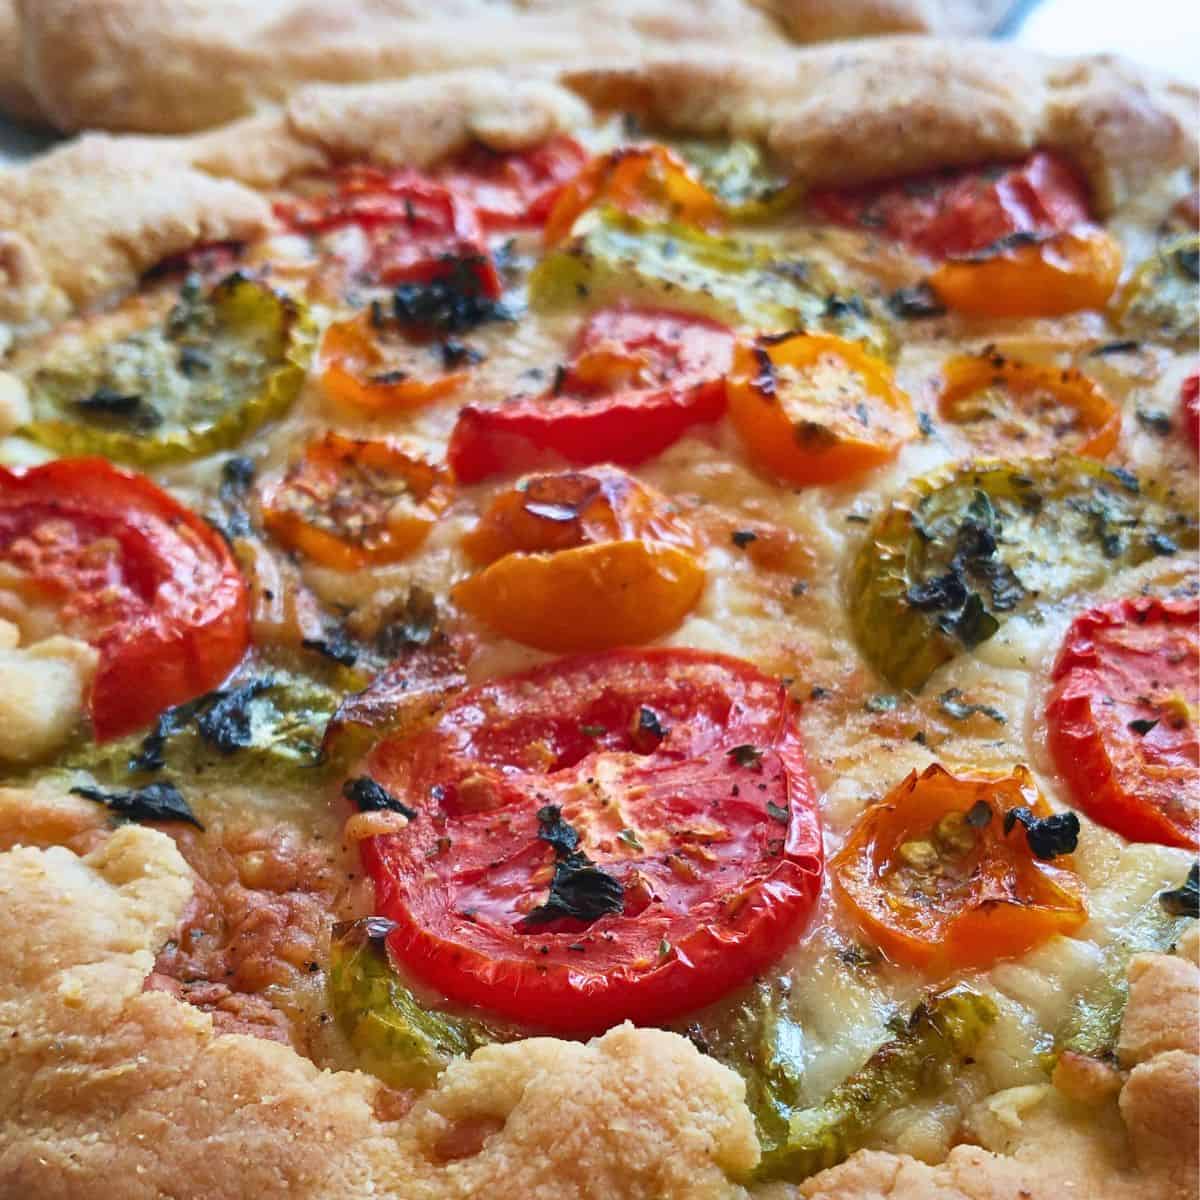
These heirloom tomato and herb gallettes are free-form baked savory summer tomato tarts. They have a crunchy cornmeal crust and are at their best when showcasing the vibrant flavors of colorful heirloom tomatoes, though any ripe tomatoes can be used.

Serving Ideas & Suggestions
This is a fantastic dish to share at a summer picnic or BBQ. Cut in slender pieces as an appetizer, or generous wedges to serve as a meatless main dish, along with a crisp side salad of seasonal greens and veggies. You can wrap it in parchment and it will travel quite well for a picnic, or a cold luncheon dish the next day.
Heirloom Tomato Gallette Ingredients
Tomatoes:
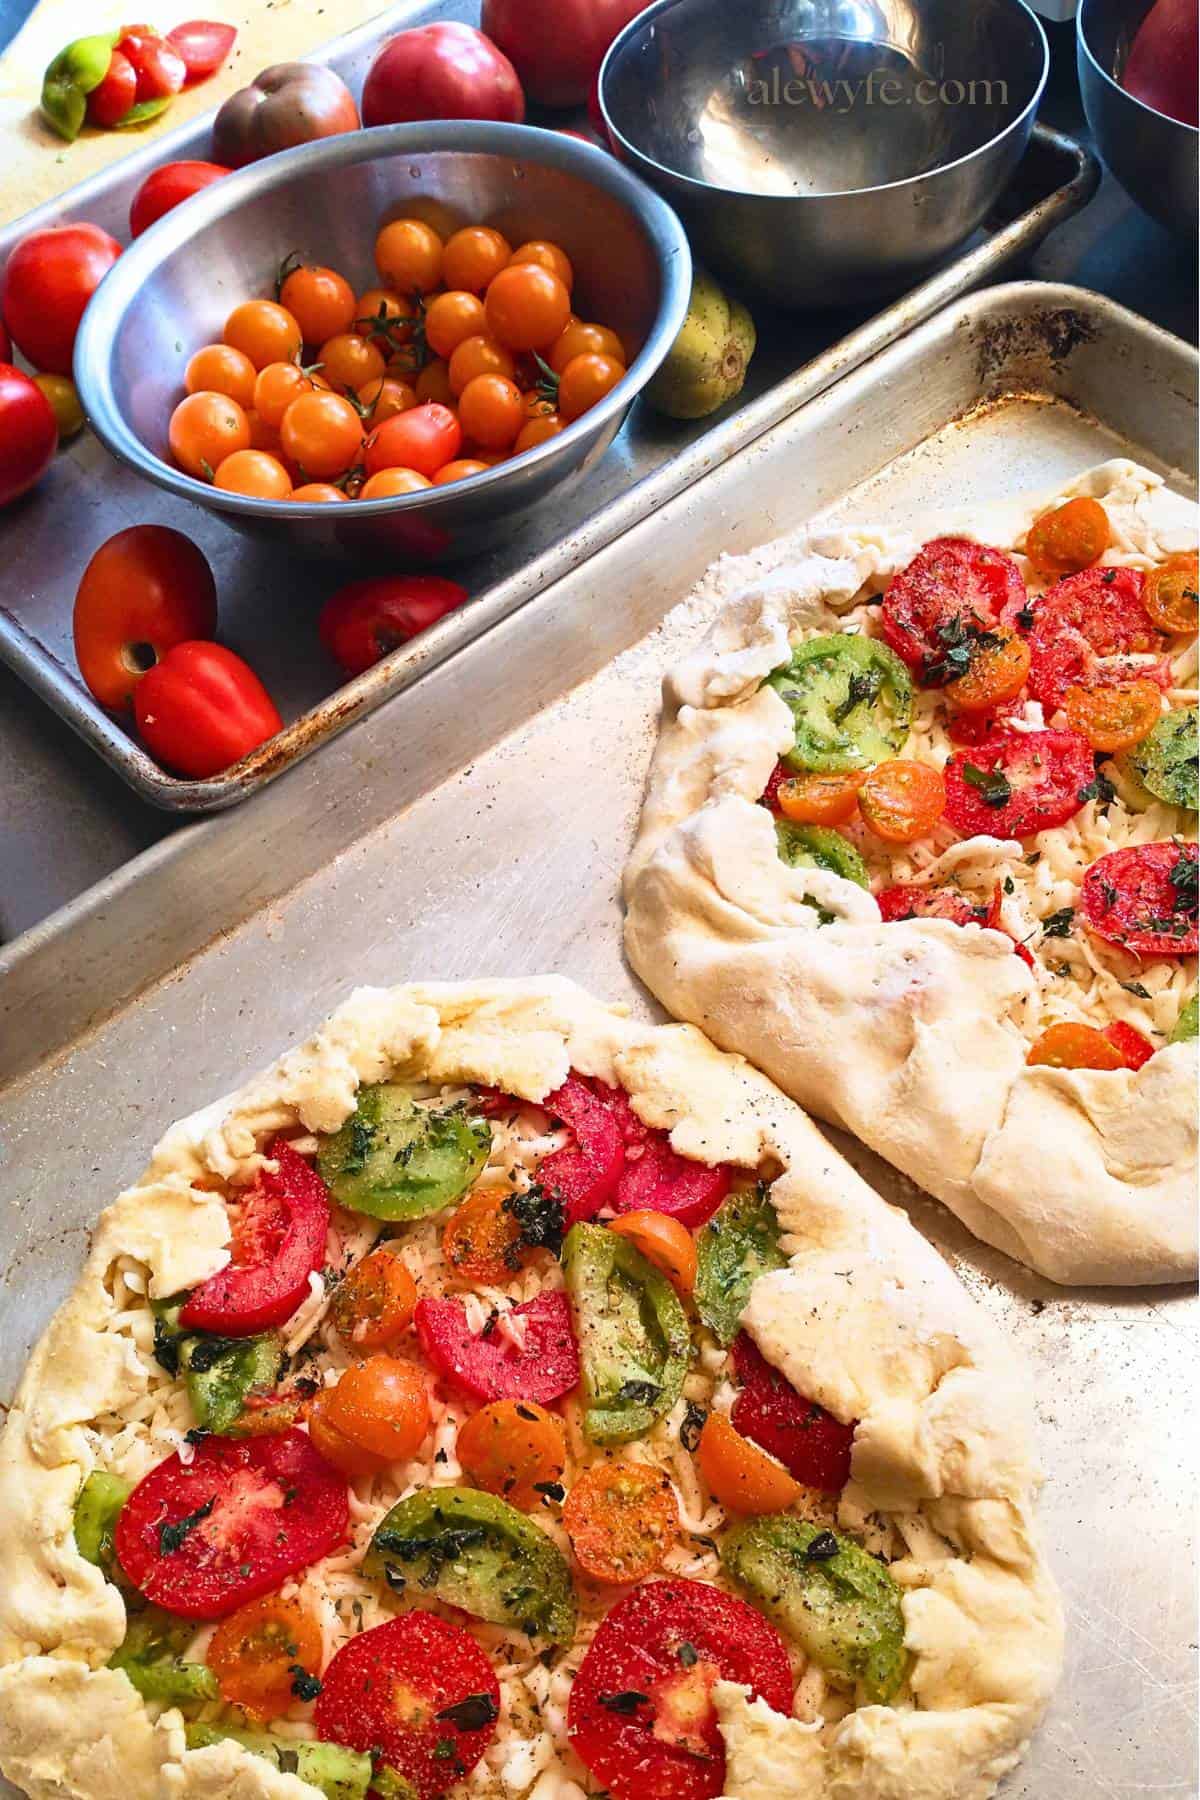
You can make this savory tart with regular tomatoes, but if you can, use a variety of regular and cherry tomatoes in every color of the rainbow. I love a mix of Green Zebra, Sungold or other sweet cherry tomatoes, Black Krim, and San Marzano tomatoes, but use whatever you have in your garden or can source near you.
Cheese:
I usually use grated mozzarella, or sliced fresh mozzarella, but you can also use Fontina, Monterey Jack, or other mild-flavored melting cheese.
Fresh Herbs:
I use a generous amount of fresh basil when I make this tart, with a bit of either thyme, oregano, marjoram, chives, baby arugula, or rosemary, or a blend of a few of these. If you can’t get fresh basil, you can spread a few spoonfuls of basil pesto on the crust before adding the other toppings.
Gallette crust:
This is a versatile dough, that combines all purpose flour with a bit of cornmeal for texture. Cold butter adds tenderness, as does cultured yogurt or sour cream. This crust has a pleasant tang that harmonizes with the bright tomato flavors or fresh fruit. It’s so good!
This easy going gallette dough is sure to be a favorite with all sorts of fillings. It’s got a bit of cornmeal for crunch and texture, which helps it stand up to this juicy filling.
The dough comes together in minutes in a food processor, or you can mix it by hand without much fuss. It also makes great open-form fruit tarts with fresh or frozen berries or sliced stone fruits! Experiment with this recipe and make it your own… I think you’ll love it.
Make-Ahead Tips for this Tomato Tart
The gallette dough can be made ahead and wrapped tightly in the fridge for a day or two. You can also freeze it in well-wrapped discs, or even pre-rolled out on parchment, stacked, and wrapped for easy weeknight dinners.
Let it thaw in the fridge before using, and press together any cracks in the pre-rolled crusts before filling. This is also a great way to prep these tarts in advance for a party, filling and baking them on the day of the event.
The tart is most delicious still slightly warm from the oven, but it also makes a fantastic cold brunch or lunch snack the next day. You can store leftovers in the refrigerator for up to 4 days, though the gallette crust is best on the first day.

Rustic Heirloom Tomato and Herb Gallete
Ingredients
Gallette Dough
- 1 cup pastry flour can substitute all-purpose
- ⅓ cup cornmeal
- ¾ tsp salt
- ¾ tsp sugar
- 1 stick butter 4 oz, cold, cut into 1" pieces
- 3 tbsp yogurt can sub. sour cream or kefir
- ⅓ cup ice water
Tomato and Herb Tart Filling
- 2 cups heirloom or other ripe tomatoes sliced
- 2 cups grated mozzarella cheese can sub. sliced fresh mozzarella
- ⅓ cup fresh basil chiffonade
- 2 tbsp fresh thyme leaves can sub. 2 tsp dried thyme
- fresh cracked black pepper to taste
Instructions
Gallette Dough
- Combine all dry ingredients in a large bowl or food processor, whisk or pulse to mix well.
- Cut the butter into the dry ingredients with a pastry blender, or pulse gently in the food processor until butter pieces are pea-sized and dough is lightly crumbly in texture. Do not over mix.
- Combine yogurt with ice water and sprinkle a spoonful at a time over the dough, tossing and folding lightly to incorporate, or pour into food processor in a steady stream while pulsing, just until dough begins to come togther.
- Divide the dough into two to four pieces, press into discs, wrap tightly, and rest in the fridge until thoroughly chilled (about two hours).
- Dough can be made in advance and held tightly wrapped in the fridge for one to three days, or frozen for several months, either wrapped in a disc or pre-rolled on parchment and well-wrapped (pre-rolled dough should not be kept for longer than a month, as it may dry out).
Tomato and Herb Tarts
- Preheat oven to 400℉. Take one round of dough at a time from the fridge to roll, fill, and shape.
- Roll the dough into rough circles on a lightly floured surface, dusted with cornmeal if the dough is sticking, to between ⅛-¼" thick, lifting the dough with a bench scraper and dusting with additional flour or cornmeal as needed.
- If you have silicone baking sheet liners, you can roll the dough out on these directly and bake, or parchment. Otherwise, work quickly while the dough is still very cold to help prevent sticking, and fold the dough circle into quarters or roll loosely onto your rolling pin to transfer to your baking sheets. Press together any small tears or holes in the dough. It's ok if the edges are a bit ragged.
- Divide the cheese and spread it out, stopping a few inches short of the edge (this will be folded over the filling). Sprinkle with the herbs (you can reserve a few spoonfuls of basil to garnish after baking if you like).
- Arrange the half the tomatoes over each tart. Grate fresh pepper over and sprinkle lightly with salt. Fold the edges of the dough over the filling to form a folded rim of crust.
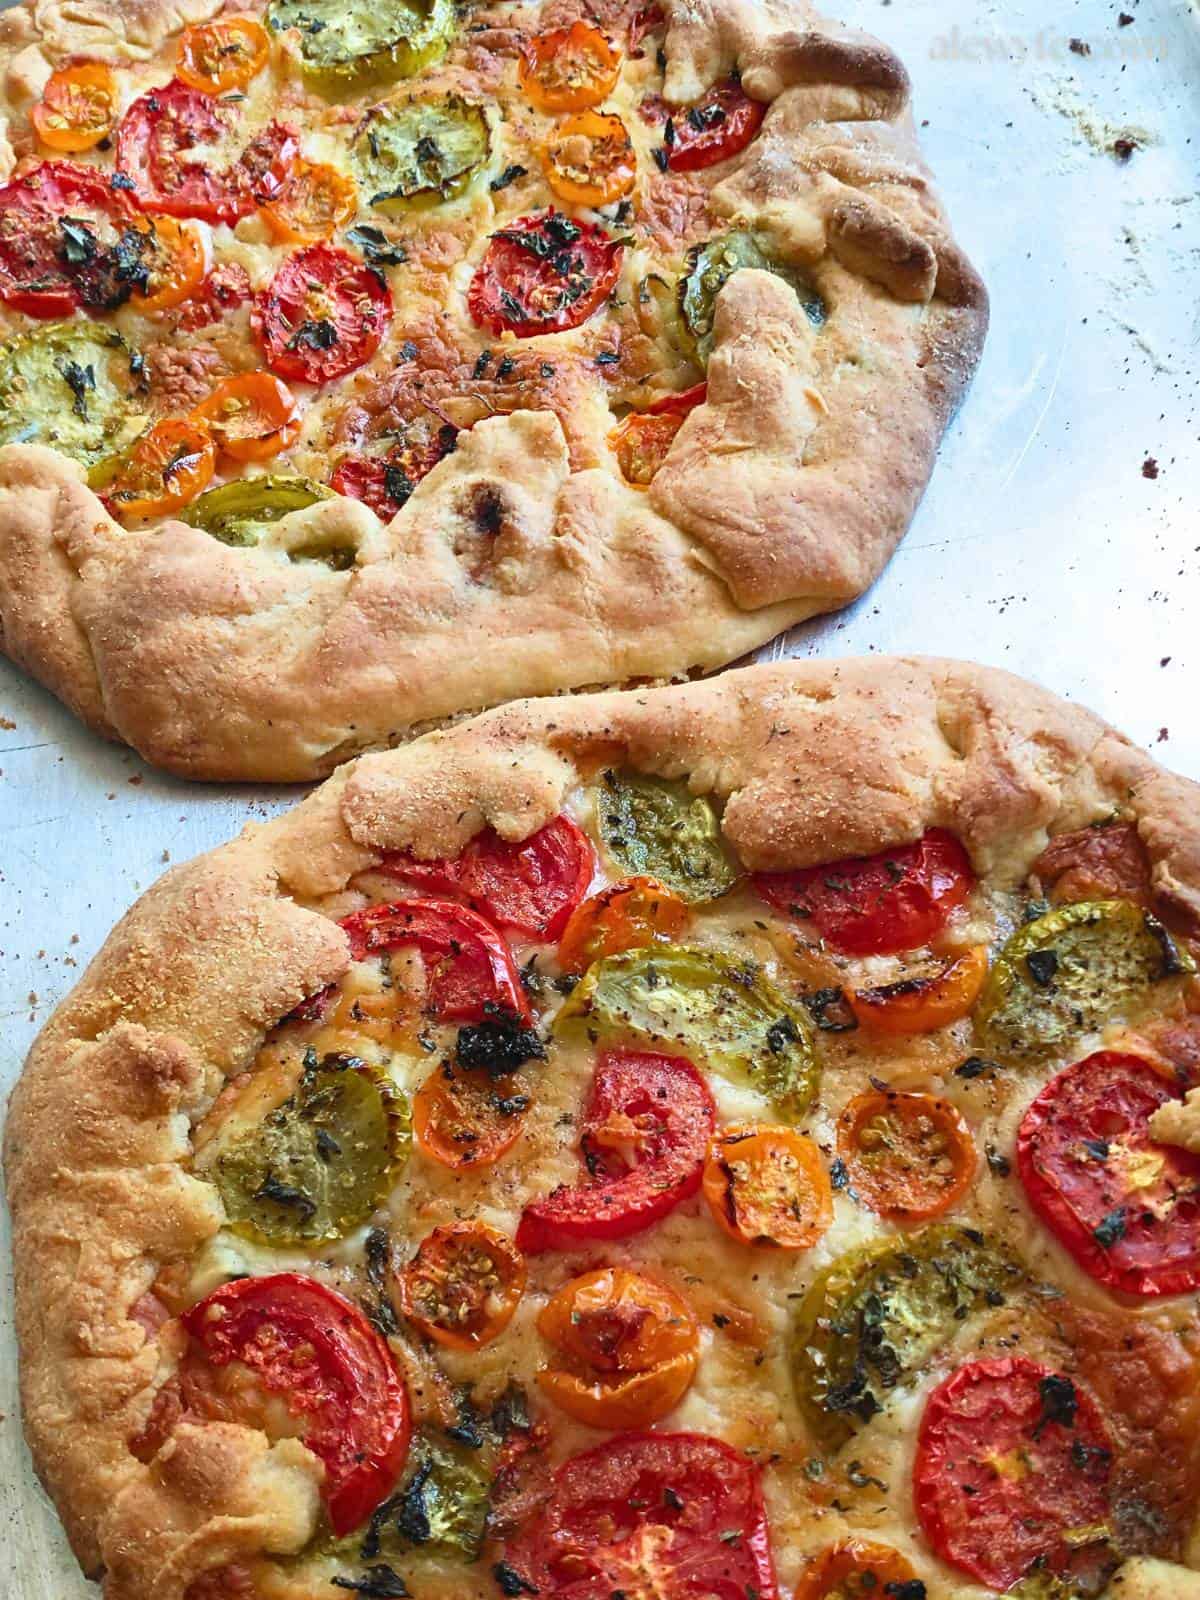
- Bake in the lower third of your hot oven for 35 to 45 minutes, until the cheese is bubbly, the tomatoes are roasted, and the crust is crisp and golden.
- Let rest in the pan for a few minutes before sliding onto a cooling rack- use a pizza peel or thin metal spatula if the dough is stuck to the pan (more likely if you didn't bake on parchment or silicone sheets). Rest 10 minutes total, or until tart can be sliced without crumbling.
- Best served warm, while the cheese is melty and the crust is still crisp, but also tasty as a cold brunch or lunch dish the next day- store in the fridge and serve at room temperature or lightly warmed.
Loved this tomato gallette? Try these related recipes!
Heirloom Tomato Burrata Caprese Salad
Simple Spinach Lasagna
Perfect All-Butter Flaky Pastry Crust
Butternut Squash, Goat Cheese and Caramelized Onion Quiche