
BAKE: Perfect All-Butter Flaky Pastry Crust
- Ingredients for All-Butter Flaky Pie Crust
- Equipment & Method for Pastry Dough
- Making the Pastry Dough with a Stand Mixer:
- Making the Pie Dough By Hand:
- Make-Ahead Tips for Perfect Flaky Pastry Crust
- Perfect All-Butter Flaky Pastry Crust
Every baker and home cook should have at least one homemade pie crust recipe in their repertoire. This basic flaky butter pastry crust is one of my absolute favorites, with a tender crumb and lots of flaky layers in the dough.
This pie crust dough has a rich buttery flavor, and has no shortening or other fats added… just butter, flour, salt, and water (plus an optional tenderizing secret ingredient).
Best of all, one batch of this pie crust recipe makes four full-sized pie crusts. It’s enough for two covered fruit pies or four open topped pies or quiches, or a whole lot of small tartlets or hand pies.
This is THE pastry crust recipe you’ll find yourself reaching for again and again for holiday pies or for other festive occasions. And in between, to freeze and have on hand for quick and easy pies, pastries, and quiches on a whim (without covering your kitchen in flour each time).

You can use this all-butter crust recipe to make any classic sweet or savory pie that wants a top or bottom crust. You can make plain rolled top crusts, or use this pastry dough to make woven crusts and other fancy lattice top or cut-outs.
Try making your own homemade pop-tarts (filled with your favorite jam or a cinnamon and brown sugar filling). It’s also great for individual hand pies and turnovers filled with fruit or savory fillings. Use this pie dough to make deep-dish or regular quiches, flaky tarts and mini tartlets, pie-crust cookies, pot pies, and more.
Ingredients for All-Butter Flaky Pie Crust
Flour:
You can use all-purpose flour, pastry flour, or a 50/50 blend of whole wheat and all-purpose flour to make your pie crusts. All-purpose flour will make the most versatile pastry crust that is tender and flaky, but with a good structure and sturdy enough to use for hand pies and woven lattice toppings.
For a less flaky but delicate and fork-tender crumb, substitute pastry flour for all or part of the mix. You can also use whole wheat pastry flour or up to 50% whole wheat flour for a heartier and healthy crust option.
Butter:
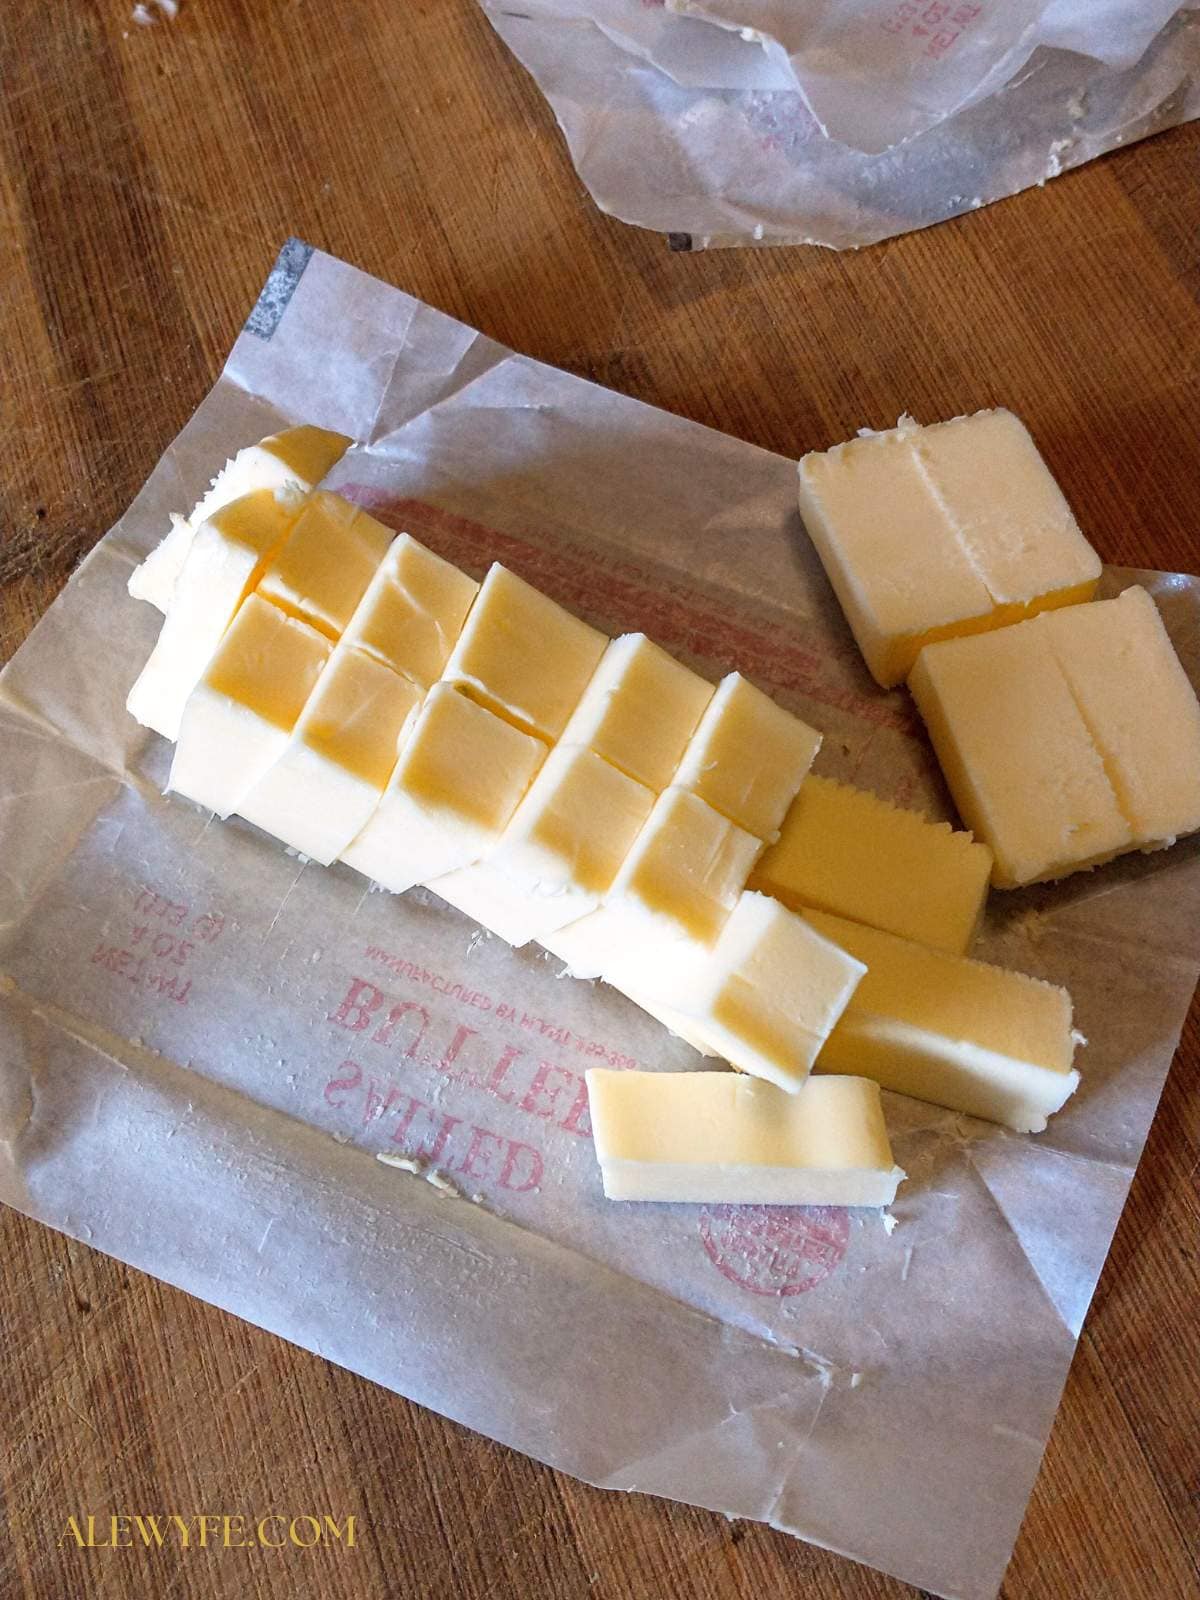
You can use sweet or cultured unsalted butter. If you substitute salted butter, reduce or eliminate the salt in the recipe. Butter should be as cold as possible without being frozen. Cut the butter into cubes, about an inch to inch and a half in size. You will add the butter in two additions.
Salt:
Measurements are for flaky kosher salt. You can substitute regular fine table salt, sea salt, or Himalayan pink salt, but reduce the quantity slightly (2-2.5 tsp).
Water:
Ice cold water will keep the butter from melting into the dough and keep the dough light and flaky.
Vodka or Distilled Vinegar:
Either of these will not affect the flavor of the dough. Both work to help prevent the development of gluten strands in the dough as it is worked, which will help keep the dough and your pie crusts from being tough.
Equipment & Method for Pastry Dough
You can make this flaky pie crust dough by hand or with a stand mixer fitted with a paddle attachment.
You can also use a food processor, but most home-sized food processors are on the small size for a full batch of this recipe. If your food processor can hold the volume of this four-crust recipe, you can carefully pulse the dough, following the stand mixer instructions, or divide all quantities and make a half batch. If your food processor has a plastic dough blade, use that instead of the metal one.
It’s best to use a large stand mixer that can handle the volume and stiff doughs… I have a 5 quart bowl-lift Professional KitchenAid model and still have to mix carefully so that it doesn’t overflow.
To mix the dough by hand, you’ll need a large mixing bowl, pastry blender, whisk, or butter knives, bowl scraper or spatula.
Making the Pastry Dough with a Stand Mixer:
This is the easiest method to make this all-butter pie dough if you have a large 5-6 quart stand mixer and paddle attachment.
Cut in the first addition of butter:
- Add the flour and salt to the bowl of the mixer, and stir on low to combine.
- Next, add the first addition of 12 oz of cubed butter (three sticks).
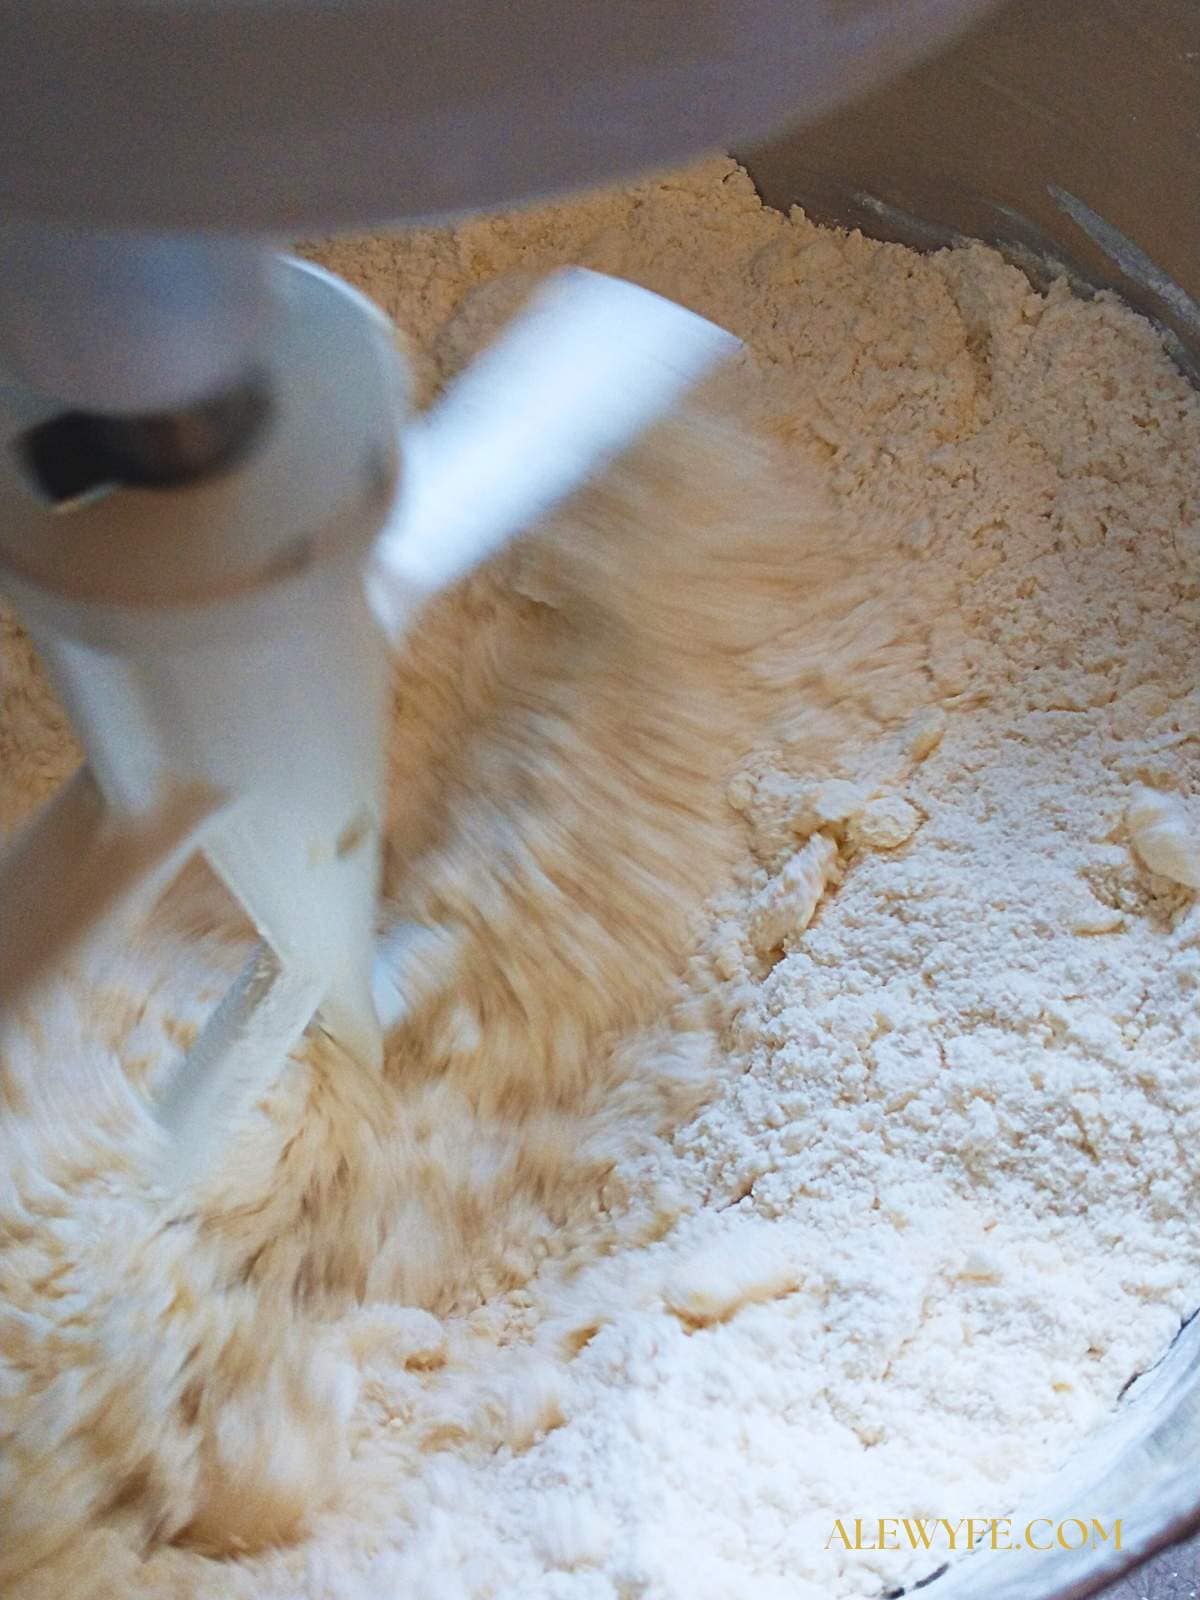
- Mix on low speed, stopping to scrape the bowl and pulse the mixer, until the butter is well cut-in.
- The flour and butter mixture should begin to look crumbly, with a texture ranging from coarse meal to small peas.
- This butter addition is the “shortening” for the dough, coating the flour and preventing long gluten strands from forming when you add the liquid, which will give the dough a tender crumb.
add the second addition of butter:
- Next, add the remaining 9 oz of cubed butter (one stick plus two tablespoons) and mix just enough to break it into small irregular pea-sized pieces.
- Do not overmix. These larger pieces of butter will flatten out and give your dough the lovely flaky laminated layers when baked, similar to a quick puff pastry.
add the liquid:
- Combine the ice water and vinegar or vodka in a measuring cup and drizzle this over the surface of the flour and butter mixture.
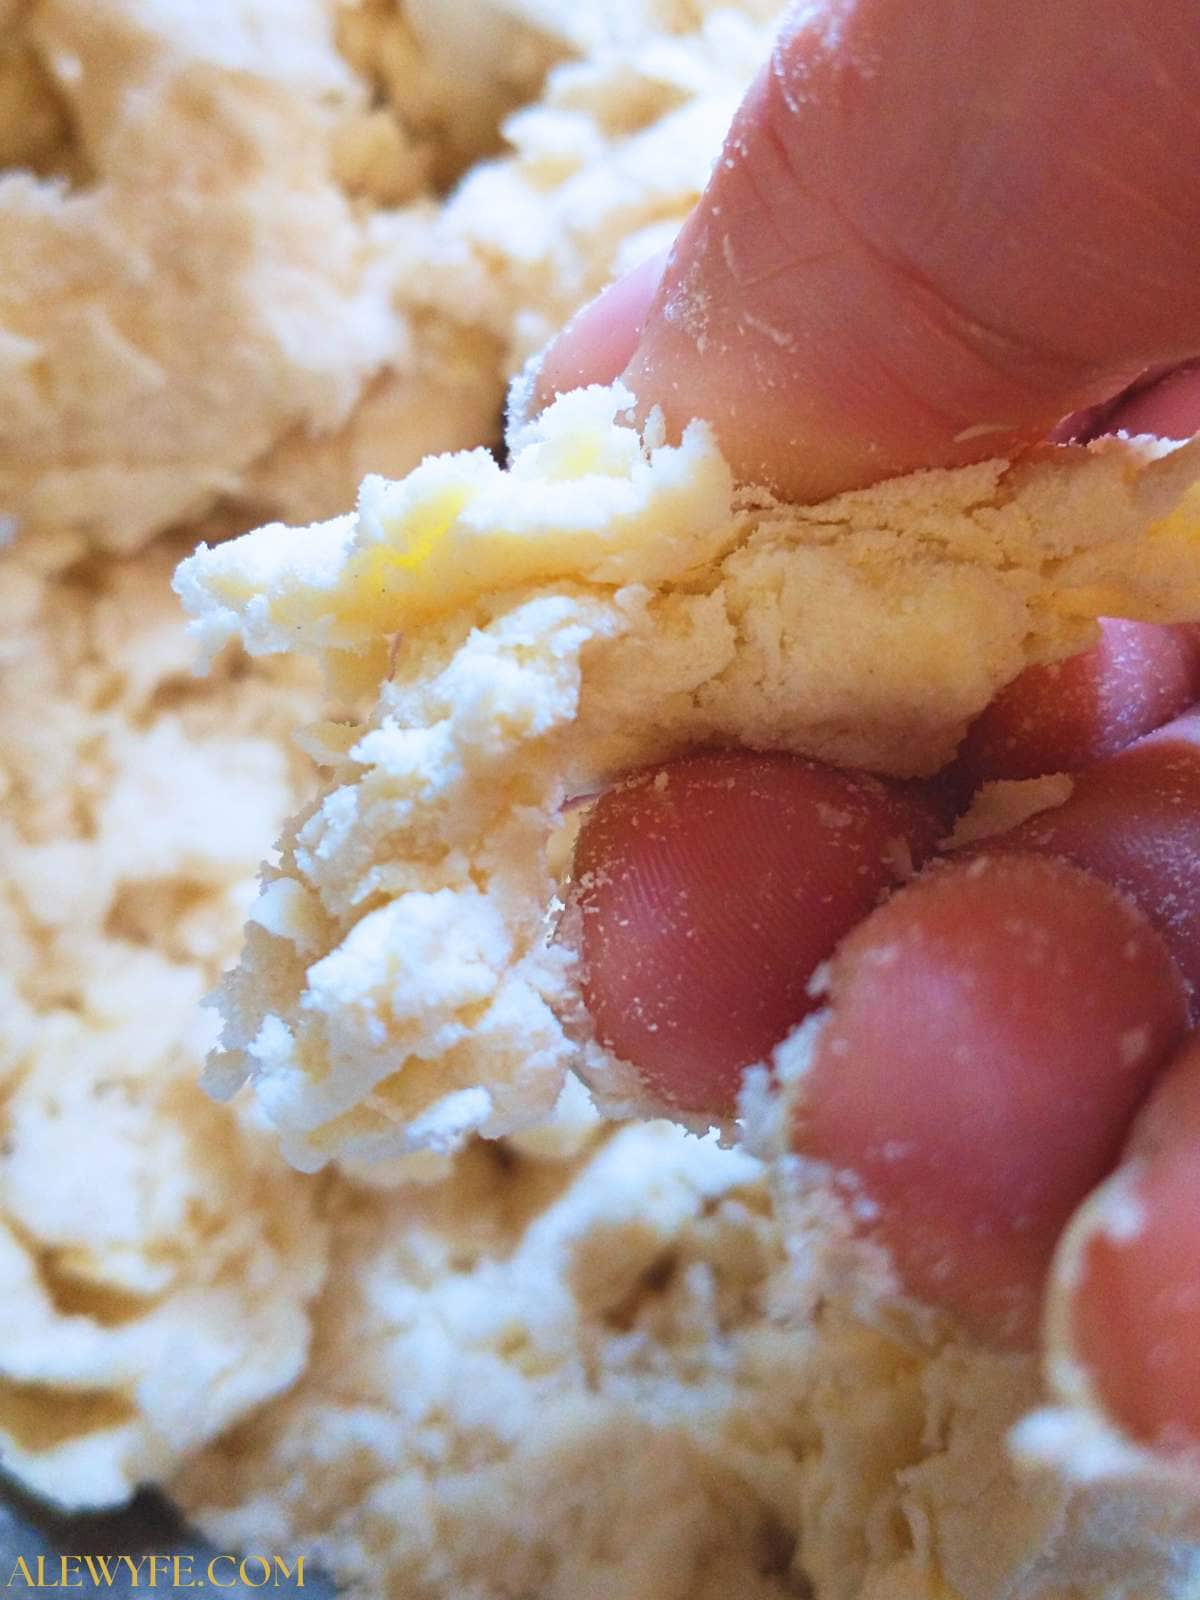
- Pulse the mixer on the lowest setting just until the dough starts to combine. It will look dry and crumbly – this is ok. The dough will become more cohesive as it rests, but should just hold together when pressed.
- If it’s still too dry, add additional ice water by the teaspoon.
wrap and chill the dough:
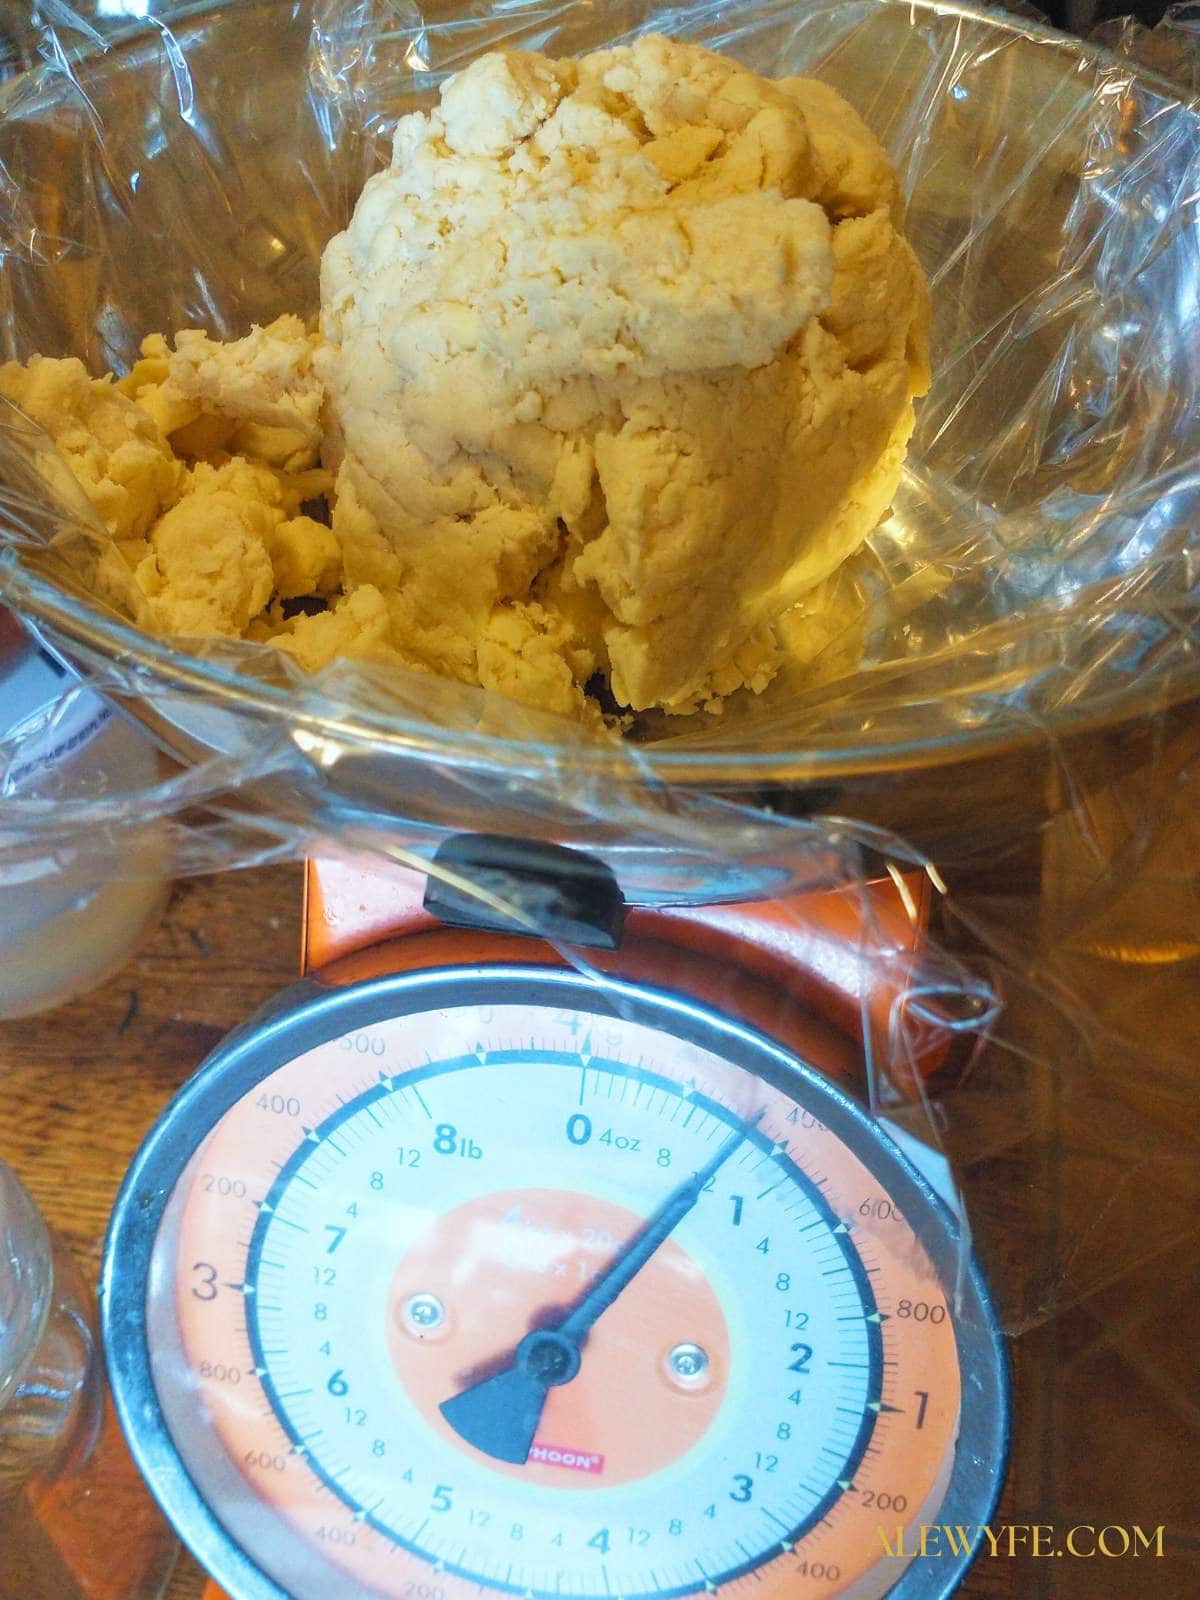
- Divide the pastry dough into four balls (roughly 12 oz each).
- This is easiest if you turn the dough out onto a lightly floured work surface or a silicone baking mat and press the dough together.
- Wrap each portion of the flaky pie dough with a square of plastic wrap or reusable food wrap, pressing them together into cohesive circles that are each about 6″ in diameter and 1″-2″ thick.
- Place these wrapped circles of dough in the fridge or a cold place for at least 30 minutes to rest before rolling out your pie crusts or freezing the dough for later use.
This chilling and resting time will allow the gluten in the dough to relax and the flour to fully absorb the liquid and hydrate the starch in the flour. This will make the pastry dough easier to work without tearing or shrinking.
Making the Pie Dough By Hand:
- To mix the pie crusts by hand, follow the same steps listed above for using a mixer, but instead of using the paddle attachment to cut in the butter, you’ll do it by hand.
- You can use a pastry blender, a sturdy whisk, two crossed butter knives, or even your clean fingertips (using a pinching motion, keeping the butter from melting with the heat of your hands as much as possible) to cut in and incorporate the butter into the dry ingredients, in two additions as described above (first cutting in completely until the flour/butter mixture is crumbly, and leaving pea-sized chunks of the second addition of butter).
- Follow the rest of the steps listed above, but use a spatula, bowl scraper, or wooden spoon to incorporate the ice water mixture into the dough, folding it in with a gentle motion.
This method works just as well, it just takes a little longer (and a little more elbow grease) than using a mixer. But, if you don’t have a stand mixer, or yours isn’t big enough, this is the way, and it’s not hard!
It’s how I did it for years before I had a mixer. It’s a great way to learn how to make this dough, and you’re less likely to overmix your dough when you’re learning with this method.
Make-Ahead Tips for Perfect Flaky Pastry Crust
You want to make your dough at least half an hour before you need to use it, but you can also make it ahead of time.
You can keep the dough chilled and well-wrapped for several days in the refrigerator, or for several months in the freezer. I like to make mine well in advance of the holidays and pull them out of the freezer a day or two before I’m planning to bake.
Thaw your pastry dough in the fridge, and keep it cold until you are ready to work with it. Don’t let the dough dry out- wrap each portion well with air-tight plastic wrap or reusable beewax-coated wraps, and then store these in either a zip lock bag or air-tight plastic or glass container, especially when freezing dough.
This will protect your dough from drying out or freezer burn, but also from picking up any off flavors or odors from other items in your fridge or freezer.


Perfect All-Butter Flaky Pastry Crust
Equipment
- 5-6 quart mixer fitted with paddle attachment.
- or, large mixing bowl to make by hand
- pastry blender, sturdy whisk, or butter knives to make by hand
- liquid measuring cup
- measuring spoons
- bowl scraper or spatula (optional)
Ingredients
- 5¼ cups all-purpose flour (sub pastry flour or 50/50 blend for an extra tender crust, or up to 50% whole wheat flour for a heartier crust)
- 17 oz cold unsalted butter, divided
- 1 tbsp kosher salt (sub 2 tsp fine sea or regular salt)
- 1 cup ice water
- 1 tbsp distilled vinegar or vodka (or additional ice water if you prefer)
Instructions
mix dry ingredients:
- Add the flour and salt to the bowl of the mixer, and stir on low to combine with the paddle attachment.
cut in first addition of butter:
- Add the first addition of 12 oz of cubed butter (three sticks). Mix on low speed, stopping to scrape the bowl and pulse the mixer, until the butter is well cut-in. The flour and butter mixture should begin to look crumbly, with a texture ranging from fine to coarse cornmeal.
- This butter is the "shortening" for the dough, coating the flour and preventing long gluten strands from forming when you add the liquid, which will give the dough a tender crumb.
add the second addition of butter:
- Next, add the remaining 9 oz of cubed butter (one stick plus two tablespoons) and mix just enough to break it into small irregular pea-sized pieces. Do not overmix. These larger pieces of butter will give your dough the lovely flaky layers when rolled out and baked.
add the liquid:
- Combine the ice water and vinegar or vodka and drizzle this over the surface of the mixture.
- Pulse the mixer on the lowest setting just until the dough starts to combine. It will look rough, shaggy, and almost dry and crumbly- this is ok.
- The dough will become more cohesive as it rests, but at this point it should be only just damp enough hold together when pressed. If it's still too dry, add additional ice water by the teaspoon.
wrap and chill the dough:
- Divide the dough into four balls (roughly 12 oz each) and wrap each with a square of plastic wrap or reusable food wrap, pressing them together into a cohesive circle about 6" in diameter and 1"-2" thick.
- Place these in the fridge or a cold place for at least 30 minutes to rest and come together before rolling out or freezing the dough for later use.
- This chilling and resting time will allow the gluten in the dough to relax and the flour to fully absorb the liquid and hydrate the starch in the flour. This will make the pastry dough easier to work without tearing or shrinking.
Notes
Mixing Pastry Dough By Hand:
- To make the flaky pie crusts by hand, follow the same steps listed above for using a mixer, but instead of using the paddle attachment to cut in the butter, you’ll do it by hand.
- This takes a bit longer, but is a great way for beginners to learn how this dough should behave with less risk of over-mixing.
- You can use a pastry blender, a sturdy whisk, two crossed butter knives, or even your clean fingertips (using a pinching motion, keeping the butter from melting with the heat of your hands as much as possible) to cut in and incorporate the butter into the dry ingredients, in two additions as described above (first cutting in completely until the flour/butter mixture is crumbly, and leaving pea-sized chunks of the second addition of butter).
- Follow the rest of the steps listed above, but use a spatula, bowl scraper, or wooden spoon to incorporate the ice water mixture into the dough, folding it in with a gentle motion.
Nutritional Info:
Quantities listed are per whole 12 oz pie crust, calculated with unsalted butter, all purpose flour, and distilled white vinegar. Divide by number of servings to estimate nutritional information per serving. These values are an estimate for informational purposes only.Nutrition
Liked this pie crust recipe? Try these tarts & quiches!
- How to Make a Classic Southern Pecan Pie
- Homemade Peach Pie Filling (with Clear Jel)
- Cranberry Apple Crumble Pie for The Crumbles
- Apple Almond Frangipane Tartlets
- Smoked Trout Quiche
- Butternut Squash, Goat Cheese and Caramelized Onion Quiche
- Chicago-Style Pepper & Egg Quiche
- Hearty Chicken & Mushroom Stew or Pot Pie Filling
- Yooper (ish) Pasties with Venison & Roasted Root Vegetables and Spent Grain Hot Water Butter Crust
- Rustic Heirloom Tomato Gallette
Love the butter pie recipe, can’t wait to try it! Coming back to read Easy EggnogPound Cake tomorrow. Eggnog is a favorite of mine. Can’t wait to get caught up.😋