
CANNING: How to Can Smoked Trout
- Why Should you Smoke and Can Fresh Trout (or other Fish)?
- How do I smoke and can trout?
- Preparing your Trout for the Smoker
- A Note on Pressure Canners for Smoked Fish
- Smoking the Trout for Canning
- Checking the Smoked Fish by Weight
- How to Can Smoked Rainbow Trout
So you or someone you know was just blessed with a bounty of trout. Now what?
You can freeze them, grill them, pan-sear them, poach them, bake them… sure, but one of the best things to do is to brine, smoke, and then put them up in pint and half-pint jars with your pressure canner. Making & preserving your own smoked trout is not the easiest canning project, but it’s one of the most rewarding!
Not gonna lie, I was pretty intimidated by this process until I did it, but as long as you have access to a pressure canner and a smoker, you can totally do this too, I promise! I’ll walk you through it and you’ll have your own stash of canned smoked trout to enjoy when we’re done.

Why Should you Smoke and Can Fresh Trout (or other Fish)?
Once you’ve followed this recipe and you’ve learned how to smoke and can your trout fillets or other fresh fish, you have freed up precious freezer space. Now you can go catch more fish, get ready for deer season, or expand your ice cream collection, perhaps? Also, no more worrying about your freezer dying while you’re out of town and losing all your fish!
But more importantly, after you can your smoked trout, you’ll have jars filled with a heavenly shelf-stable gourmet snack stashed away right in your pantry. It also makes a fantastic gift (only for people you really like though, because this is so good you may not want to share).
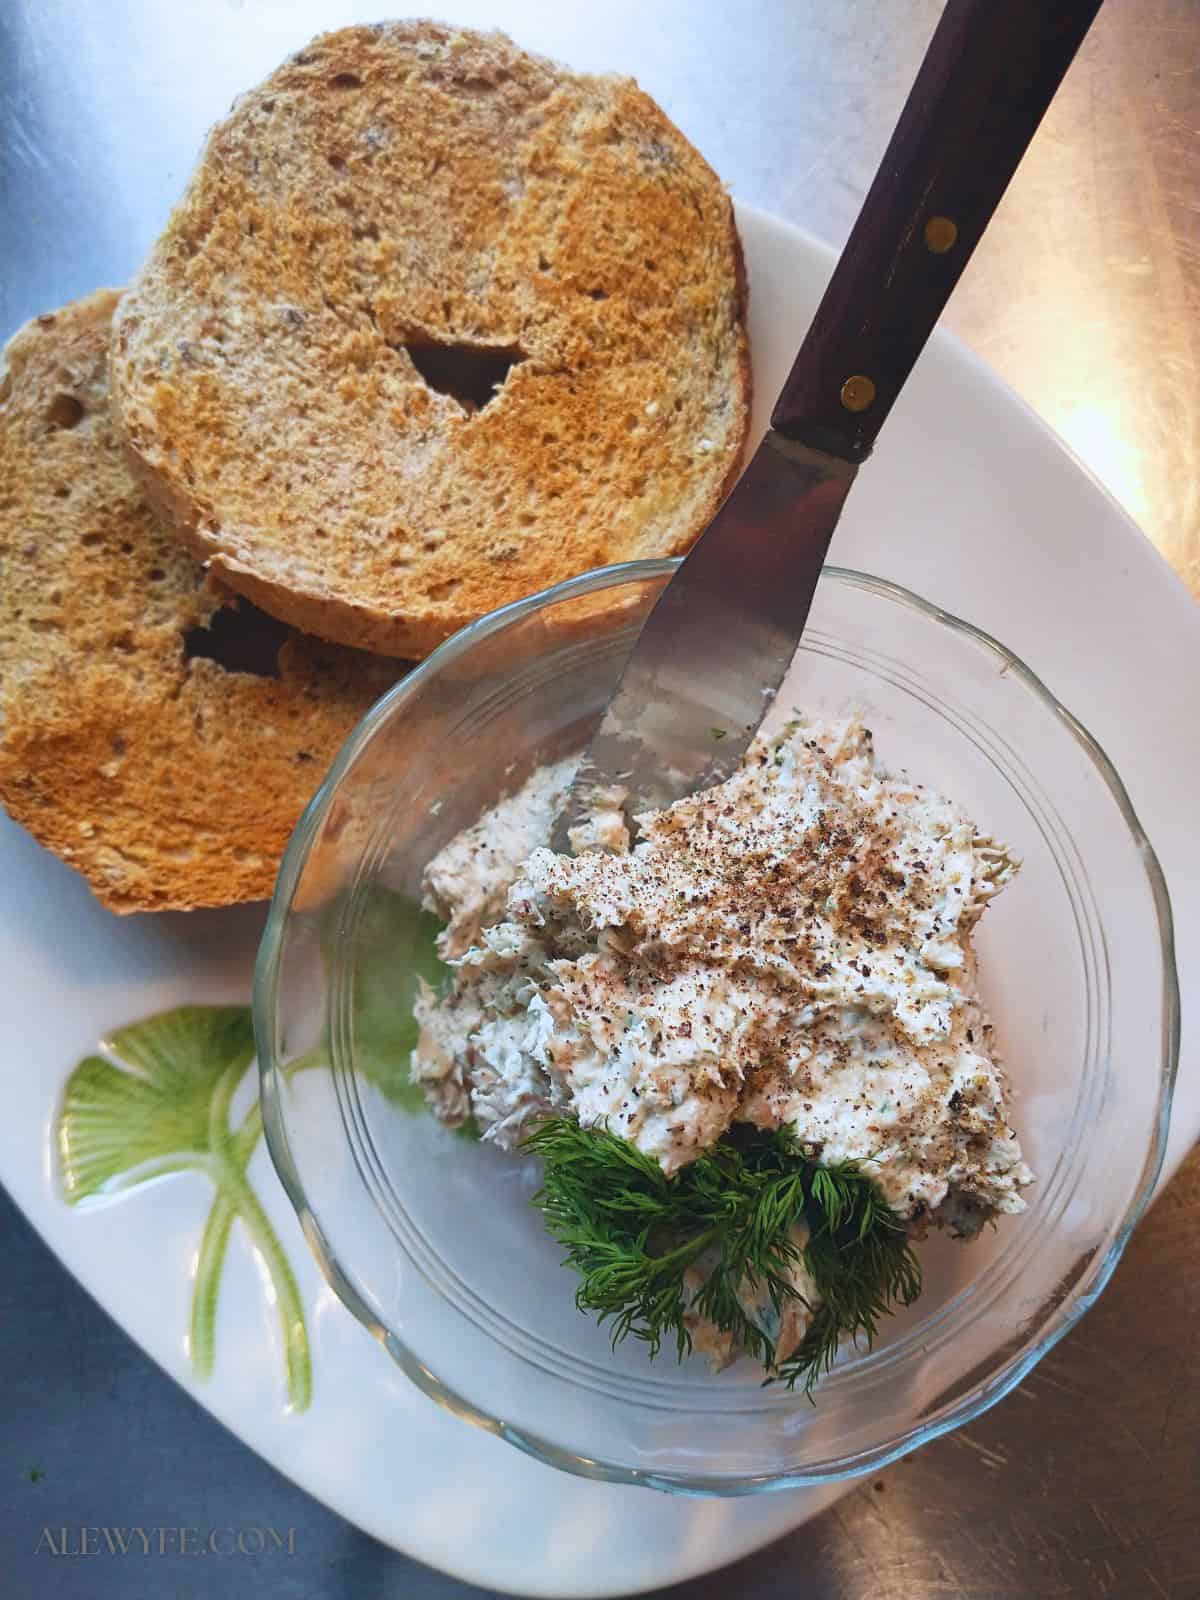
Your homemade canned smoked trout is fully cooked and ready for snacking, making trout dip or spread, deluxe bagel breakfasts, smørrebrød & trout toasts, smoked trout quiche, or garnishing gourmet salads. You can use it in recipes, or just pop open a jar and dig in!
How do I smoke and can trout?
- Clean and filet the fish.
- Brine the filets.
- Remove from brine and let air-dry in the fridge (to build a good pellicle so the smoke sticks).
- Lightly smoke the fish.
- Pack in canning jars.
- Process the jars in your pressure canner.
- Cool, check seals, wash jars, label and store your smoked fish.
It’s not a quick process, but it’s not terribly difficult either. As long as you have room in the fridge to keep everything very cold while you work, you can spread the processing out over a few days, from the cleaning, to the brining, the smoking, and finally the canning.

Preparing your Trout for the Smoker
Just like commercially canned salmon, you don’t have to worry about the pin-bones or making perfectly boneless fillets when making canned smoked trout. The long canning processing time under pressure leaves those bones soft and almost imperceptible in the finished product, so you get all the calcium and nutrition that’s in the fish!
It also saves a ton of time when you’re cleaning and dressing your fish. I remove the heads, tails & fins, and the larger spine bones (though you can certainly leave the bigger bones in if you like for smaller fish like trout).
I save those to make fish stock for soups and sauces. You can even lightly smoke the bones while you’re smoking the fish and make a smoked fish stock for your next batch of chowder or other hearty fish soup!
Store fresh fish stock in the freezer or refrigerate for use within three days. There’s no safe tested processing time for canning fish stock, and those who have say the quality of fresh or frozen fish stock is much better than canned.
A Note on Pressure Canners for Smoked Fish
You’ll need a large pressure canner (not a pressure cooker or Instant Pot) to safely can smoked trout or other fish.
While you can use a smaller pressure canner to can many things safely and effectively, to reach safe and consistent processing temperatures for this recipe or canning any other smoked fish product, your canner needs to hold at least 16 quarts (volume, not jars).
Note, this refers to the canner total volume, not the number of jars it holds. For example, my All-American 921 Canner holds 7 quart jars or up to 19 pint jars, but the actual canner volume is 21.5 liquid quarts, so it’s safe to use for canning smoked fish. Check your pressure canner manual or with the manufacturer if you aren’t sure!
Why do I need a larger canner for smoked fish?
Because the brined and smoked fish flesh is denser than raw-pack fish, you need the extra margin of safety here that a larger volume canner gives you.
Smaller pressure canners are prone to more temperature fluctuations, but more importantly, the extended processing time means you need to add a larger volume of water to your canner.
This additional water displaces the area available for the steam that actually creates the pressure that allows you to make sure you have killed any botulism spores or other food spoilage organisms that may be present.
A smaller canner does not have enough volume for both the headspace required in the canner to fully pressurize, and the amount of water needed for the long processing time.
What if I only have a smaller pressure canner?
If you don’t have a canner that’s up to the task, since the fish is lightly smoked and not fully cooked until processed, you could follow these instructions using your smaller canner to fully cook the fish and soften the bones. Do not use a pressure cooker, you need a canner that will process at least 4 quart sized jars at a time or there will not be enough room for the added liquid.
If you try this, you must freeze your fish for long-term storage instead of storing at room temperature! The jars will not be shelf-stable or safe to store in your pantry. You could probably reuse canning lids for this, since you’re not relying on the jar seal and will be using cold-storage instead for food-safety.
Make sure that you clearly label that the under-processed jars must be kept frozen, especially if you give any as gifts. Better yet, repackage them in vacuum-sealed bags (or double-wrap portions in plastic wrap and then freezer paper) for longer freezer storage without risk of breakage and to free up your jars for more canning projects!
Smoking the Trout for Canning
We used a mixture of fruit woods for this batch of canned smoked trout, mostly dried apple and peach tree prunings from our garden, along with some purchased pecan chips, oak chunks, and hardwood charcoal to get the smoker going.
Lighter flavored woods are best so that you do not overpower the delicate flavor of the fish. Save the mesquite for your next batch of ribs, not your fish! Chunks of wood are easier to work with than chips if you can get them and they work in your smoker.
What type of smoker can you use?
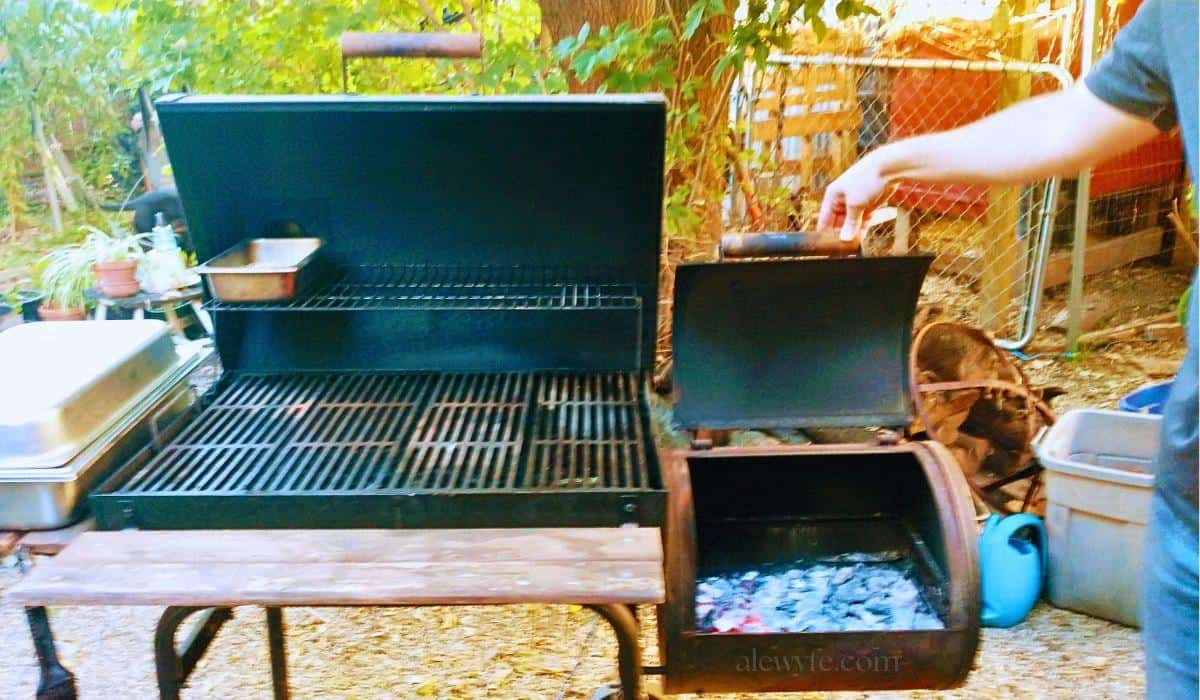
We have an offset wood-fired smoker (basically this grill with the side-mounted firebox option), which isn’t ideal for this kind of low-heat smoking, but better than the direct-heat type of barrel-smoker for imparting the smoke flavor without drying and cooking the fish.
Most offset smokers also have a larger surface area for smoking a big batch of fish at once, and easy access to the coals and water pan. The downside is that they tend to be less fuel-efficient and require more attention to temperature control.
A pellet smoker (Traegers and the like) will give you more precise control with less babysitting if you have access to one of those. I would recommend still using an external thermometer to check on the temperature.
Do I need a water pan in my smoker?
You definitely want to use a water pan in your smoker if it has one, or improvise one if it doesn’t. This will help the fish smoke longer without drying it out.
If your smoker doesn’t have a water pan, use a disposable aluminum foil pan (you can reuse these until they leak). Or, pick up a stainless hotel pan insert at a restaurant supply store for a water pan that will last for years (or can also be used for food prep, albeit with a lot of scrubbing). A four-inch deep 1/3 hotel pan is a good size for most grills, though you can use a half pan if you have space in your grill… you won’t have to refill it as often, but will lose surface area if it’s on the grates.
In an offset smoker like ours, you want to place the water pan on the grill surface between the firebox and the grates where you put your fish. This is the hottest spot on this type of grill, and putting the pan here will even out the temperatures and keep your fish from drying out too much as it smokes.
If you want to get really fidgety and have metalworking skills, there are plenty of folks who add a metal baffle here so that you can place a water pan under the grates (or pre-cut kits to add tuner plates and whatnot to adjust the smoke flow). Work with what you’ve got though!
How long should you smoke the fish?
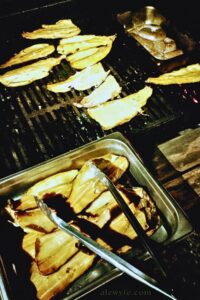
For canning, you want to lightly smoke the fish only. We are not fully cooking the fish, just imparting the rich flavor from the smoke and a firmer texture. Ideally, you want your smoker temperature between 140-160℉, and to smoke the fish for no more than two hours.
If you fully smoke the fish (160℉ for 30 minutes or more) the canned product will be dry, dark, and unpleasantly smoky. Since the smoking in this recipe is mostly just for flavor, err on the side of less time in the smoker if you aren’t sure.
The best way to know if the fish is done is to weigh it before and after smoking, but you can also go by feel and appearance once you know what you are doing. Because the fish is not fully cooked at this point, don’t taste-test it!
Checking the Smoked Fish by Weight
To check for moisture loss by weight, weigh a small portion of the fish before smoking (and keep track of where you put it on the smoker). Write that down, then check it again during the smoking process. Subtract the new weight from the initial weight, and multiply that number by 100 to get the percentage of moisture weight lost in the smoker.
You are aiming for about 10%, but anything up to 15% is going to be ok (regular fully-smoked fish is usually between 20-30%; you definitely want to be well below that). More than 14-15% and your finished canned smoked trout or other fish will be too dry, and the flavor will suffer.

How to Can Smoked Rainbow Trout
Equipment
- 1 Pressure canner 16 Quart liquid capacity or larger
- pint or half-pint canning jars wide-mouth is best. Do not use jars larger than one pint (500 ml for metric jars)
- Smoker pellet or cold-smoker with temperature control is best but you can use others if you can keep the smoke and temperature consistent
Ingredients
Trout Brine (double for large quantities of fish)
- 3 cups water
- ⅓ cup brown sugar can substitute honey
- 1 cup kosher salt
- 3 tbsp coriander seeds whole
- 2 large bay leaves
- 1 tbsp black peppercorns whole
- 1 sprig fresh thyme sub. 1 tsp dry thyme leaves
- 4 cups ice water
Trout
- fresh or freshly thawed trout 1½ -2½ lbs of fresh trout per half-pint or pint jar, approximately
Instructions
Clean and Brine the Fish
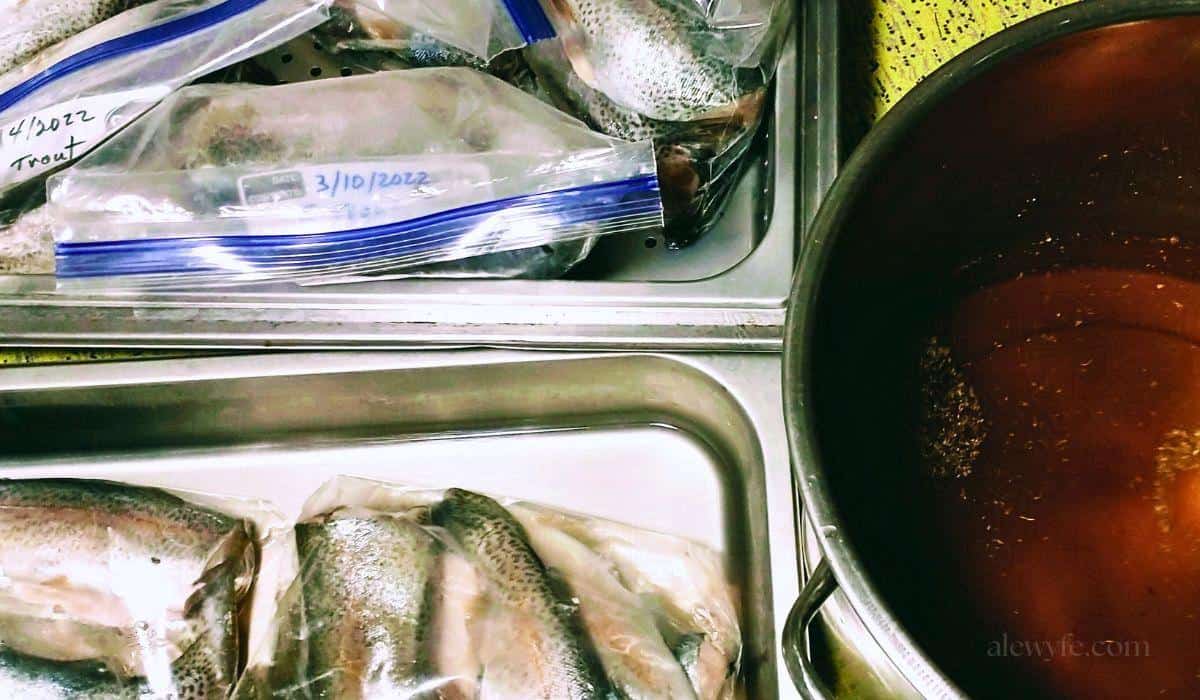
- Follow safe handling practices with fresh fish, cleaning your catch and getting it on ice within two hours (see above). Rinse fish inside and out with potable water to remove blood and to avoid introducing bacteria. If you are using previously frozen fish, thaw fish in the refrigerator before brining and smoking.
- Prepare your brine – mix all the ingredients except ice water in a large stockpot and bring up to a boil and stir to dissolve salt (add some of the ice water if necessary). You can strain the brine if you like before adding the fish if you didn't wrap the spices and herbs in cheesecloth, or pick the pieces off the fish as you remove them from the brine. Add the ice water and chill the brine completely before adding the fish. Keep the fish in the brine in the fridge for 20-45 minutes (less time for smaller pieces or for a less salty finished product, longer for thicker pieces of fish or a stronger seasoned smoked fish).
- Remove the fish from the brine and lay on racks or sheet pans in the fridge overnight or for at least several hours. You want the surface of the fish to dry (form a pellicle) so that the smoke will adhere and the color and consistency will be even.
- While the fish is drying in the fridge or other cold place, ready your smoker with your choice of wood. Aim for a cold smoke around 140℉ but up to 160℉.
- Lightly smoke the fish at 140-160℉ for up to 2 hours, or until a specific weighed portion has lost 10-14% of its initial weight in the smoker (weigh a portion of the fish before smoking, check the weight periodically during smoking, and divide the weight lost by the initial weight, then multiply this number by 100 to get the percentage of weight lost).
- Remove the fish from the smoker and quickly chill the fillets if you are doing this over two days, or you can immediately pack the fish in hot jars to go into the canner for processing. If you can't pack and can the fish either immediately or the next day, wrap and freeze the fish well, and thaw completely in the fridge before canning.
Canning the Smoked Fish
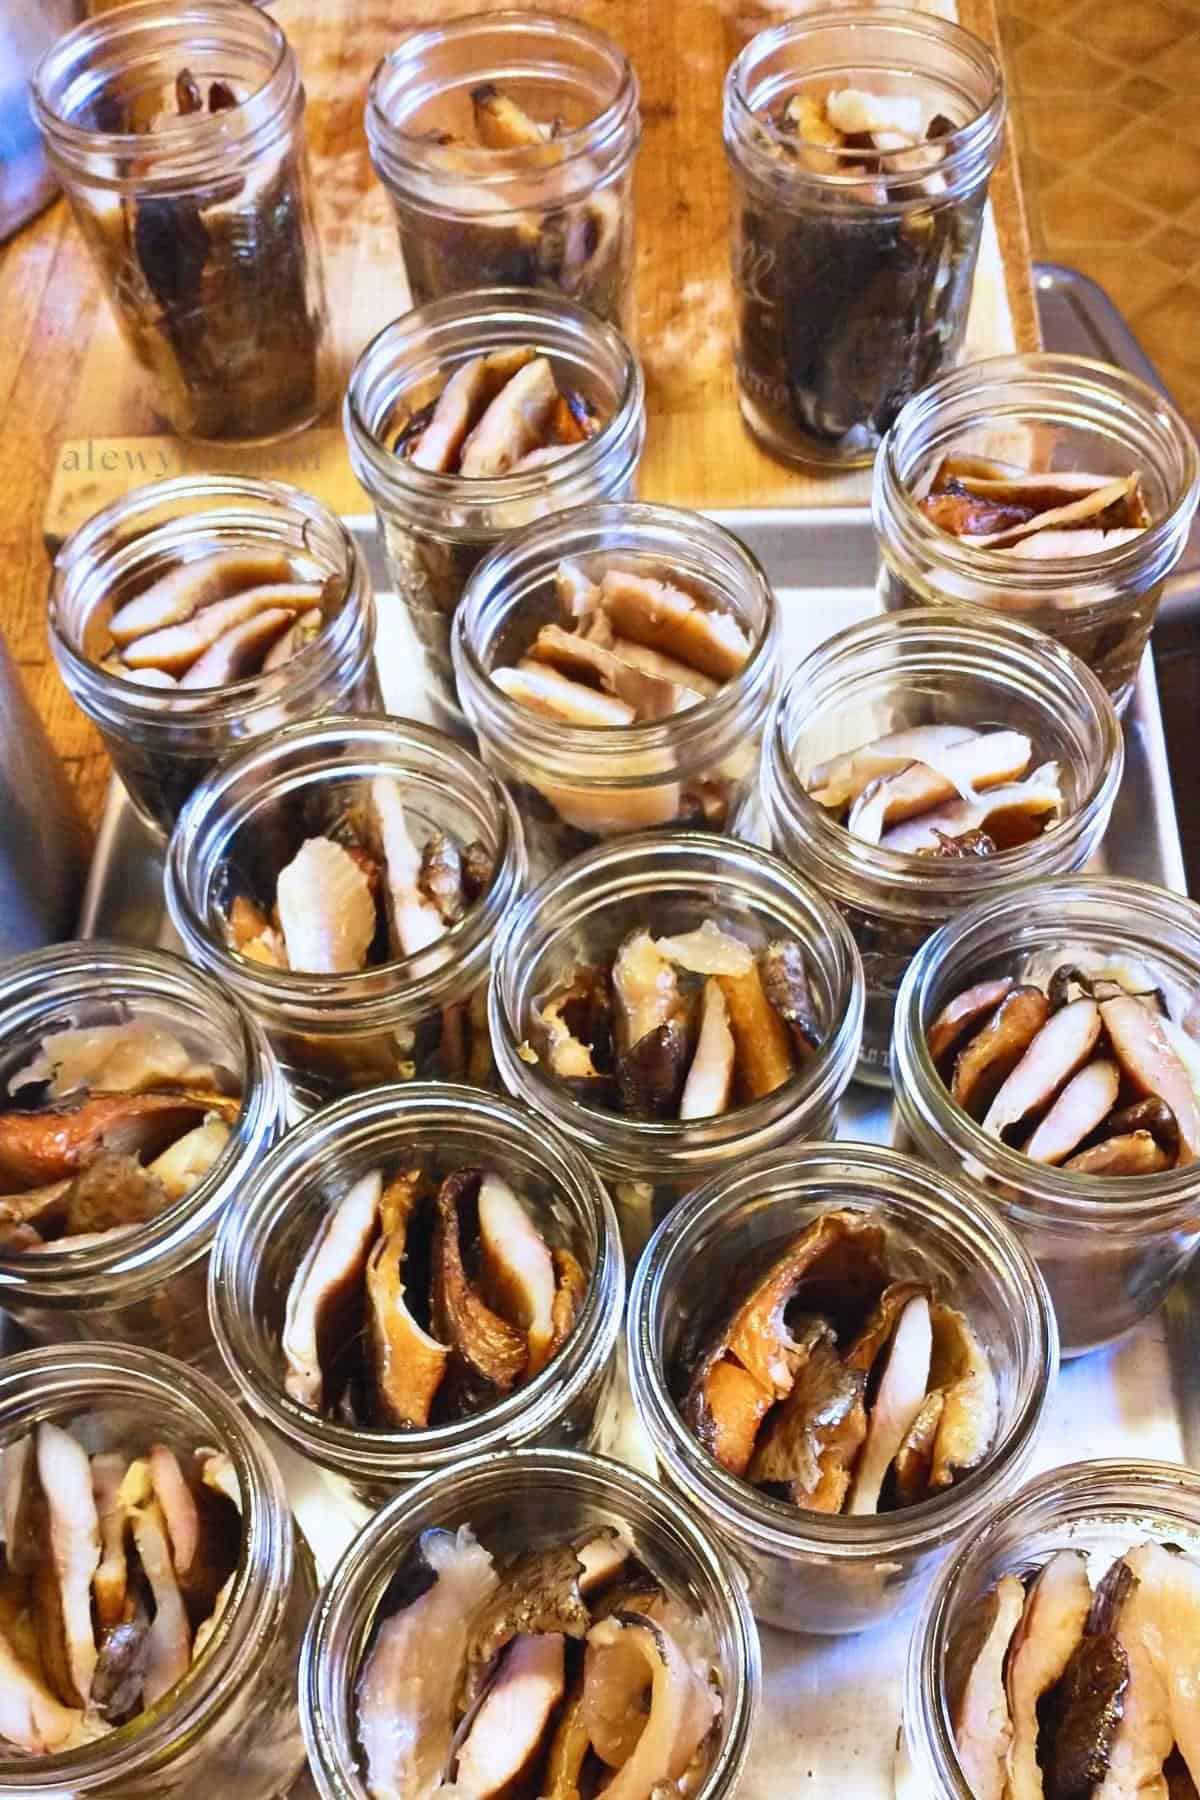
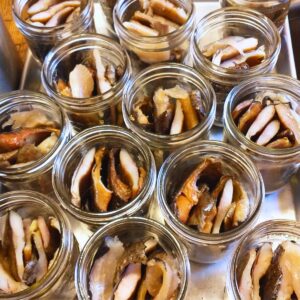
- Trim the fillets if needed and pack them into wide-mouth pint or half-pint jars. Leave 1" of headspace at the top of the jars. Do not use larger jars! You can use regular mouth jars, but they'll be harder to serve from and to get clean later.
- Wipe the rims of the jars with a clean, lint free cloth or paper-towel soaked in vinegar to ensure the rims are clean and free of oil or debris that would interfere with the seal.
- Put clean, new metal lids (or reusable Tattler or Weck style lids if you are comfortable using those) on each jar, and tighten the rings finger-tight. I recommend using only new, quality metal lids here (see note below before using reusable lids for smoked fish).
- Place the jars in the rack of your pressure canner and add 4 quarts of cool water to the canner. Note: this is necessary because of the extended processing time, and probably a lot more water than you usually use and the jars may float a little. This is ok.
- Check that the canner vent isn't clogged and close & seal the lid. Bring the canner up to pressure over medium heat with the vent open, and once the canner is venting a steady stream of steam, set a timer for 10 minutes.
- When the canner has vented for 10 minutes, regulate the heat if necessary and drop the weight over the vent (or close the petcock if you have an unweighted dial-gauge canner).
- Can at 10 lb up to 1000 ft, or adjust to 15 at higher altitudes with a weighted canner. Start your processing timer for 110 minutes only once the appropriate PSI has been reached (11 PSI on a dial-gauge canner for up to 2000 ft, see notes for altitude adjustments), or when the weight is jiggling to indicate that the proper pressure has been reached. Watch or listen carefully, adjust heat as needed, and reset the timer to zero and restart processing time if you lose pressure below the correct processing pressure at any point.
- After the processing time is complete, turn the heat off. Once the pressure canner has cooled and returned to neutral pressure (the dial will drop to zero, and no steam escapes from the weight or petcock if jiggled) you should open the canner and remove the jars (follow your canner instructions for opening).
- Let the jars cool in a draft-free place where they can rest overnight or for up to 24 hours. Don't touch the rings until the jars have cooled and the seals are set (disregard for reusable lids and follow manufacturer instructions to tighten rings).
- Remove the rings and check the seals on the jars after they have rested at least overnight. Promptly freeze or refrigerate any jars that did not seal and use within a few days- reprocessing these jars will cause a loss in quality and might not be safe. Gently wash all sealed jars with soapy water, label clearly, and store in a cool, dark place. Protect jars from freezing and safely discard the contents of any jars that lose their seals in storage and sterilize jars before reuse.
Notes
Want to learn more about canning fish or using your smoked fish? Check out these posts!
- How to Can Fresh Bluegill, Perch, and Other Small Panfish
- Equipment Guide-What Do I Need to Start Canning at Home?
- Organizing & Managing Your Mason Jar Inventory
- CANNING: Tips and Troubleshooting for Perfect Seals Every Time!
- Smoked Trout & Herb Cream Cheese Spread
- Smoked Trout Toasts
- Smoked Trout Quiche
I am surprised that there is no liquid added to the jars of fish before canning.
I know, it’s unusual, but is actually the safe USDA-recommended method for packing raw or smoked fish!
I have a question: Did you add any liquid to the packed jar to bring it to 1 inch headspace? The recipe doesn’t mention it.??
Nope, no liquid added to the jar for smoked fish! Just make sure to leave about a 1″ gap at the top of the jar when you’re packing the fish fillets or slices. Trim your pieces if necessary… you can use the trimmings to fill in gaps or uneven spots in other jars so they’re not wasted.
Going to try this, but I did notice that your math is wrong on figuring out the loss of moisture. Once you subtract the smoked weight (80g) by the original weight (90g), you need to divide that number (10g) by the original weight. IE:
90g – 80g = 10g
10g / 90g = 0.11g
0.11g x 100 = 11% moisture lost.
Hey, you’re right… Thanks for catching that and letting me know! I’ve been meaning to update this post and will fix that section asap when I do.