CANNING: Organizing & Managing Your Mason Jar Inventory
- Planning for Canning Projects and Tracking Jar Inventory
- Crates and Containers for Storing Mason Jars
- Protecting Jars from Damage
- Shelving Options for Organizing Canning Jars
- Making Space (Where There Isn’t Any)
- Want more canning ideas and inspiration?
We’re talking about canning jar storage, management, and rotation today. It definitely gets easier to have enough jars on hand for canning projects the longer that you’ve been collecting them (though you never have enough jars, no matter how many you have, right?). It still can be tricky to match your current canning projects to the right jar sizes so you don’t have to run out and buy more at the last minute.
A lot of my canning jars have been collected over a decade or more, bought new, thrifted, or gifted from friends. My mom watches estate sales at farms near her for them and brings me some when she visits. Suffice to say, I’ve acquired quite a collection, which is excellent but it can be a challenge to keep all of my mason jars organized!
Here are some tips for how I keep the chaos at a minimum that you can use when organizing your mason jars in your canning pantry and keeping your home canned goodies safe until you’re ready to use them!
Planning for Canning Projects and Tracking Jar Inventory
I try to go through my pantry and canned good storage at least a few times a year, and to rotate new jars of food to the back whenever I make a fresh batch of something. I’m lucky enough to have a small walk-in pantry convenient to the kitchen and more storage in a basement that has better temperature control. I put most of the canned goods downstairs, with a few jars of each thing upstairs for easy access, and most of the empty jars upstairs too so they’re close at hand when I’m ready to use them.
I’ve been meaning to do an actual jar inventory and start a spreadsheet of at least how many of what kind I have (if not what’s currently in them, but that would be nice?). It would be nice to know how many of each size and also whether they’re wide mouth or regular. If I were *really* organized I’d know if and when I have enough reusable Tattler lids of each size to cover every jar in inventory, though that’s going to have to be a gradual investment. That’s probably a good thing to do now before you have a lot of jars and update as you acquire more, though if you gift a lot, would require updating or at least an audit periodically, which sounds a lot like work. Sigh. I’ll probably make a spreadsheet or a printable for this at some point, but for now, let’s talk about strategies to keep your jar inventory under control.
If I know I have a canning project coming up that will take a certain kind of jar I try to meal plan from the pantry around it. For example, we were gifted a bunch of frozen trout that we wanted to smoke and can, so I tried to free up as many wide-mouth pints as possible before that so I didn’t have to buy new ones by opening those jars of beans or stew meat or whatever first for a couple months until we finally had enough and smoked the fish.
Or sometimes, I just buy more jars? Those tiny 4 oz jelly jars are expensive for what they hold but so handy! Especially for specialty condiments like dipping sauces, mustards, or flavored jellies, where it might be hard to use up a larger jar before it crystallizes or goes bad, storing small amounts of leftover sauces and dressings, and of course they’re fantastic for making gift basket samplers (it’s one size I have to re-buy more often as I give them away, and so rarely find them secondhand).
Crates and Containers for Storing Mason Jars
Before storage, full or empty jars should be washed thoroughly (yes, even those tricky bits around the rim, and protein or hard water stains- distilled vinegar or hot soapy water is great for getting them clean).
Empty jars should be stored upside down in the original boxes, if still have them, and they’re in good shape. The shallow flats that jars are sold in now aren’t great or terribly durable though. I try to cut the plastic shrink wrap in an x at the top when I remove the jars and leave it on as a dust cover and to protect the cardboard bottom, though it will eventually tear or get too dusty.
Cardboard Boxes:
If you don’t have your original canning jar boxes, or want something sturdier, you can buy sturdy boxes with dividers sized exactly for storing canning jars. However, they’re pretty expensive for what’s basically a cardboard box!
You can often find free boxes at stores like Costco, or liquor stores that go through a lot of cases bottles, and cut your own dividers from other boxes. You could even cover the boxes with contact paper or spray paint and make nice labels if you want a Pinterest-perfect pantry shelf, and to protect the cardboard from spills.
Otherwise, work with what you might have on hand! I have a couple clear plastic drawers that outlasted their original shelving unit and a collection of metal hotel pans (restaurant chafing dish stainless pans).
I line them with a clean dish towel and store jars in those, upside down and covered with another clean towel. This helps keep dust and dog hair off the jars in storage- if you have pets you know what I mean- hair gets everywhere, and while I rewash the jars before using them it’s still nicer if they’re clean to begin with. I use these plastic bins for empty jars in the kitchen and in my office where there is a lot of turnover, and more likelihood of bumps or spills.
Wooden Canning Jar Crates:
You can buy wooden jar crates pre-made or flat-packed from sellers at craft fairs or on Etsy, or download plans to make your own if you are handy using new or reclaimed pallet wood. Eventually I’ll make some wooden crates that stack but that’s pretty far down on my project list unfortunately (and access to a brad nailer would make that project a lot easier)!
The best designs have a lug on the bottom so that the crates lock together when they’re stacked so you can store more in a small space or move with the jars more easily. If you wanted to get really fancy, you could cut some slats from sturdy cardboard or even MDF to make dividers for these, or even thin slats of wood.
The Ikea wooden KNAGGLIG flat-pack crates are nice, though not sized exactly right for the most efficient jar storage.
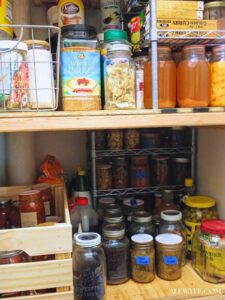
I wouldn’t trust them for moving full jars around a lot, but they can help you organize open shelving and keep jars safe from falling off, like in our pantry here in the photo on the left.
They give a clean and organized look to your pantry and assemble with very basic tools. You really only need a screwdriver, though if you’re putting together more than one your wrists will thank you if you use a power drill. You can leave them unfinished, or paint or stain them to match your shelving or decor.
Jarboxes:
I’d love to try out some plastic Jarboxes but they’re expensive and I try to avoid buying new plastic stuff. They have great reviews though, if you can find them in stock, and look like they’d do a great job of protecting jars from breakage and keep them clean. They’re stackable and sized exactly for quart or pint jars, and snap together to protect the goodies inside.
Canning Jar Totes:
I’d also like to try a couple of these Jarganizer totes, which are sized for quart jars with padded dividers, not to store all my jars (that would get very expensive!) but for bringing canned goods down to the basement cold room. I usually make several trips carrying a few jars at a time down from the kitchen (so I can have a hand free for the stair railing) but these jar totes would make that job a lot easier!
If you’ve used any of these and love them (or otherwise), please share with us in the comments! (looks like these may be sold out or currently unavailable? Bummer!)
China and glassware storage boxes:
Padded glassware and mug storage boxes are not specifically designed for canning jars, but are useful for storing smaller jars like standard mouth pints, half-pints, and specialty jelly and mustard jars.
These fabric boxes vary a lot in quality. I prefer the ones that zip closed, have sturdy padded removable partitions, and have a solid lid so that they’re stackable, with a clear card holder for labels so you know what’s in each one. The ones with zipper closures are vastly preferable to ones with separate flimsy lids, as they seal better to keep out dust and spiders, and also are a lot more secure if you are moving them around.
These mug boxes are similar to the ones I have (also linked above), but a bit less expensive (the lid folds in half on the Homyfort brand rather than being a single solid piece like the Homelux ones, but they’re plenty sturdy for canning jars).
These padded canning jar bins are sized and marketed specifically for quart jars (though they also make smaller matching pint jar sized ones), and look like they’re a similar quality and construction to the ones I have? I wish they came in grey to match, but the mocha brown is a decent neutral (and if you have closed shelves or are putting these in a pantry or closet it doesn’t matter).

Plus, they look really sleek and can sit out on the shelf without looking tacky, and zip closed to keep out dust and spiders. I found a set on sale that I am using for our extra wine glasses, my great grandma’s china, and my photo staging props that get so grungy on the open shelves in our dining room (pictured above). I’m hoping to pick up a couple more of the mug storage boxes for a nicer way to store my unused pint jars or batches of canned goods, but that’s still on my wish list for now.
Plastic or Wire Crates:
I have a bunch of old but very sturdy shallow plastic commercial soda and produce crates that work okay for organizing things on metro/wire shelves. Since they were free, the price was right!
You can fit a little less on a shelf that way but the jars are less likely to fall off and it’s easier to rotate stock of canned goods, as you can pull the whole crate out like a tray and add new jars to the back.
I also use a few of these sturdy welded wire baskets to hold and organize jars on my pantry shelving (and for rolled towels in the linen closet).
Protecting Jars from Damage
If you stack your empty jars, or are concerned about protecting your jars from banging into each other and breakage, you can cut sections from clean tube socks and slide them over the jars to act as bumpers, or cut slats from heavy-duty cardboard or coroplast (the corrugated plastic used for campaign signs, etc) to make dividers.
Tip: If you have an existing divider from an old canning jar box that has seen better days, use that as a template to trace and cut new clean & sturdy ones to fit your boxes!
If you have extra plastic lids, use them on your empty jars to keep dust out and prevent the rims from chipping (sometimes lids from condiments like mayonnaise or pre-grated Parmesan cheese will fit on mason jar threading).
Don’t store your empty jars with metal lids unless you know your storage area is bone-dry, as dampness can cause the metal rings to rust and leave stains on the jar that are difficult to remove, or worse, the rings can get stuck! If you are patient and careful you can use a hacksaw and/or tin-snips to cut off the old ring (I did that once for a specialty jar size I didn’t want to toss out when the hot sauce in there corroded the lid, but it was a pain and you can easily break or chip your jar!).
Shelving Options for Organizing Canning Jars
Wooden Shelving Units: Wall-mounted or Freestanding
While I’d love to have a stack of nesting custom made wooden jar crates, probably the nicest way to store your canning jars is on a sturdy wooden shelf. If you are relatively handy (or have access to the labor of someone who is) and have some basic tools, you can put up custom shelving in your storage area with proper shelf spacing for common canning jar sizes.

This is be relatively easy if your pantry or storage room has conventionally-spaced wooden framing, or even just has level and plumb block or concrete walls. Attach 2×4 or 2×3 shelf supports to the wall studs or use tap-cons and a hammer drill on masonry walls to anchor your shelves, and build your shelving unit out from there.
Ana White has a great tutorial and free plans that could be easily modified to add closer spaced shelves if you don’t already know how to build this style of shelf, or are just looking for some design inspiration! It’s similar to the shelves I built in our upstairs walk-in pantry, though like most projects around here, it’s functional but not finished and pretty yet. It works though!
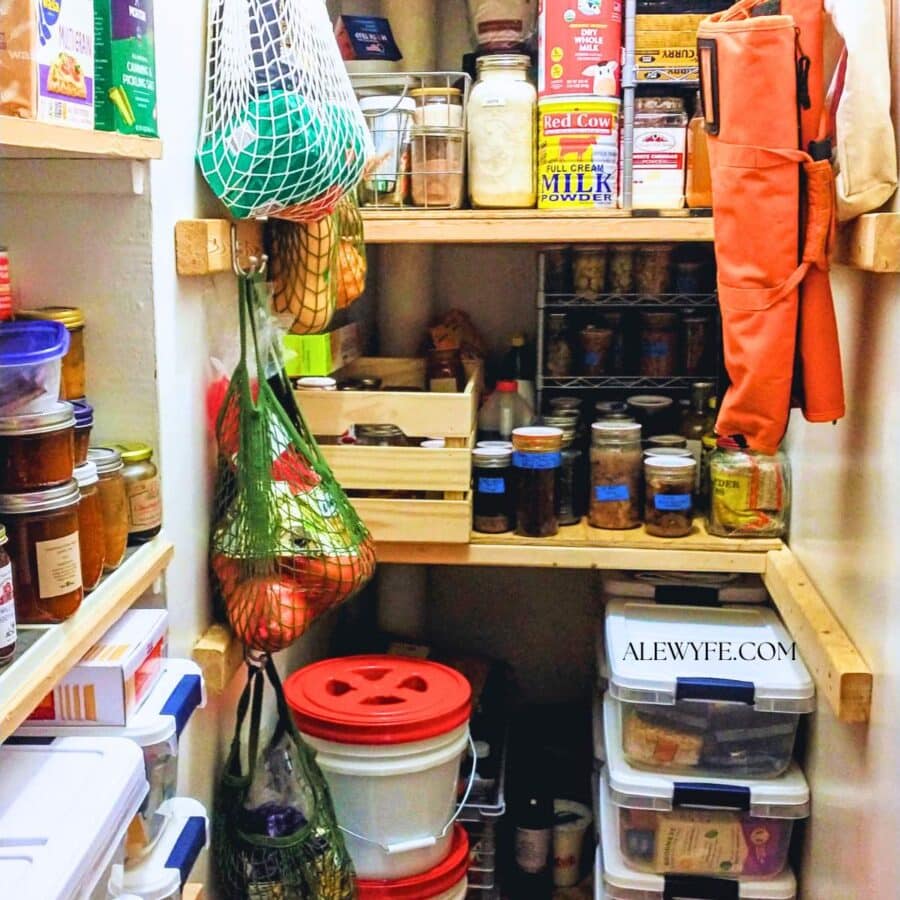
Unfortunately my basement storage room is unfinished and has 100+ year old uneven brick-infill walls, so freestanding shelves are the way to go for now down there. Maybe you’re luckier than me and can slap up some sturdy wall-mounted shelving that can’t tip, or have a helper or professional who can install that for you. This type of storage is ideal and the safest and most secure, and what I built in our upstairs walk-in deep working pantry (pictured above).
Whether freestanding or attached, build your shelves with a lip on the front face if possible, or even better, a 1″x2″ slat board secured to the uprights across the face and open sides of the shelves an inch or so from the shelf. This will make sure your jars can’t slide out the front or sides of the shelves, but unlike a solid lip, the shelves won’t collect as much dust and it’s easier to wipe the shelves down, or clean up any spills if you ever break a jar on the shelf. If you’re feeling really crafty, paint this shelf slat-rail with chalkboard paint and you can label your rows!
Make curtains to cover the front and keep the dust off your jars. These are optional, but nice, and are especially necessary if you don’t have a dark place for your shelving to protect your canned goods from light, which can shorten the shelf life of anything stored in there. You can use tension rods, or mount skinny dowel rods on the face of the shelves (make these removable so you can wash them if they get dusty).
Alternately, fit your shelves with cupboard doors, with latches or child-proof locks, which are especially great if you live in an earthquake prone area (or are anticipating marauding bandits raiding your canned good stash… but that’s a pretty rude thing to call your roommates or toddlers, ok? I won’t tell them you said that, but you’ll have to explain the locks yourself).
Wire Metro Shelving
If you are renting or just otherwise need something more modular, wire metro shelves work fine, preferably the sturdy, NSF-rated heavy duty ones. The light-duty ones from Amazon and big-box hardware stores will sag under the weight of full jars, and while I haven’t had one fail it’s still a little unsettling.
If your shelf has wheels, make sure they’re very heavy duty- the wheels are often rated for less weight than the shelves themselves and you don’t want them to fail when you are moving a shelf loaded up with stuff!
To make this style of wire shelf extra secure, wrap two layers of electrical tape tightly around the plastic clam shell clips that snap onto the metal poles that the shelves rest on, so they are less likely to come apart and slide downwards out of the grooves that hold them in place.
A shelf liner of plastic or hardboard will keep jars from tipping on the wire and let you stack more efficiently on the wire shelves, and helps keep dust from collecting on the lower shelves.
You can use pre-made snap-in metal shelf bumpers for the backs, or secure bungees or lace paracord across the back through the shelf slats to keep jars from falling off. This is especially prudent if you don’t have your canning jars in crates or boxes, and essential if you’re in earthquake country. You should think about securing the shelf to the wall or ceiling to prevent tipping, even if you aren’t near a fault zone and especially if there are or may be children around who’d be tempted to climb the shelving.
Standard Builder-grade Wall-mounted Wire Pantry Shelving
This is your standard-issue wire closet shelving, like these from ClosetMaid, common in new construction and apartments. I don’t recommend these unless you absolutely have to use them.
If they’re what you’ve got and you need to make them work for now, I would add extra shelf supports and a shelf liner, and make sure that at least some of the supports are anchored into a stud and not just into the drywall (you can add additional supports with drywall anchors where there aren’t studs but you need at least two supports for a short shelf in the studs, and preferably attached at every stud if you are storing full jars. If possible, flip the shelves so that the lip faces forwards to help keep jars from sliding off the front of the shelves.
If you’re starting from scratch but still need to use this type of shelving, buy the sturdier shelves with closer spaced wire if you can afford them… they’re less likely to fail and bow, and also support the jars better so they’re not as tippy (though a shelf liner will also help with this, especially if it’s a rigid pressboard one or thick plastic.
Making Space (Where There Isn’t Any)
Ok, whether you have a sprawling, rambling old farmhouse or an efficiency studio apartment, finding space to store everything (without drowning in clutter) is always a challenge, right? Objects have a way of expanding to fill the available space, especially if you have a lot of hobbies.
While it’s always a good idea to start with de-cluttering and giving away or selling things you are not going to use again, sometimes you just have to find more places to stash your stuff. Here is where you get creative! Just remember that mason jars are heavy, especially if they’re full of food… so make sure you’re storing them on sturdy shelving!
A lot of my empty mason jars are stored under the futon in my office near the kitchen, for example (there’s a slipcover on the futon that reaches the floor, so you’d never know, and helps keep the dust off, and by dust, I mean dog hair).
No pantry room? What about under your bed? Behind the books on your bookcase? In a spare dresser? The bottom of a closet? Build some built-in shelves under staircases? Add a recessed pantry in the joists of an inner wall? Do you really need furniture, or will stacks of jar boxes suffice?
What? No, I don’t have a jar problem… (I’m kidding about that last one, I promise, though I do have a lot).
I am terrified to think about packing them all if and when we move (though I’m sure I’ll be gifting quite a lot of the common ones if that happens, and packing them into every available object otherwise).
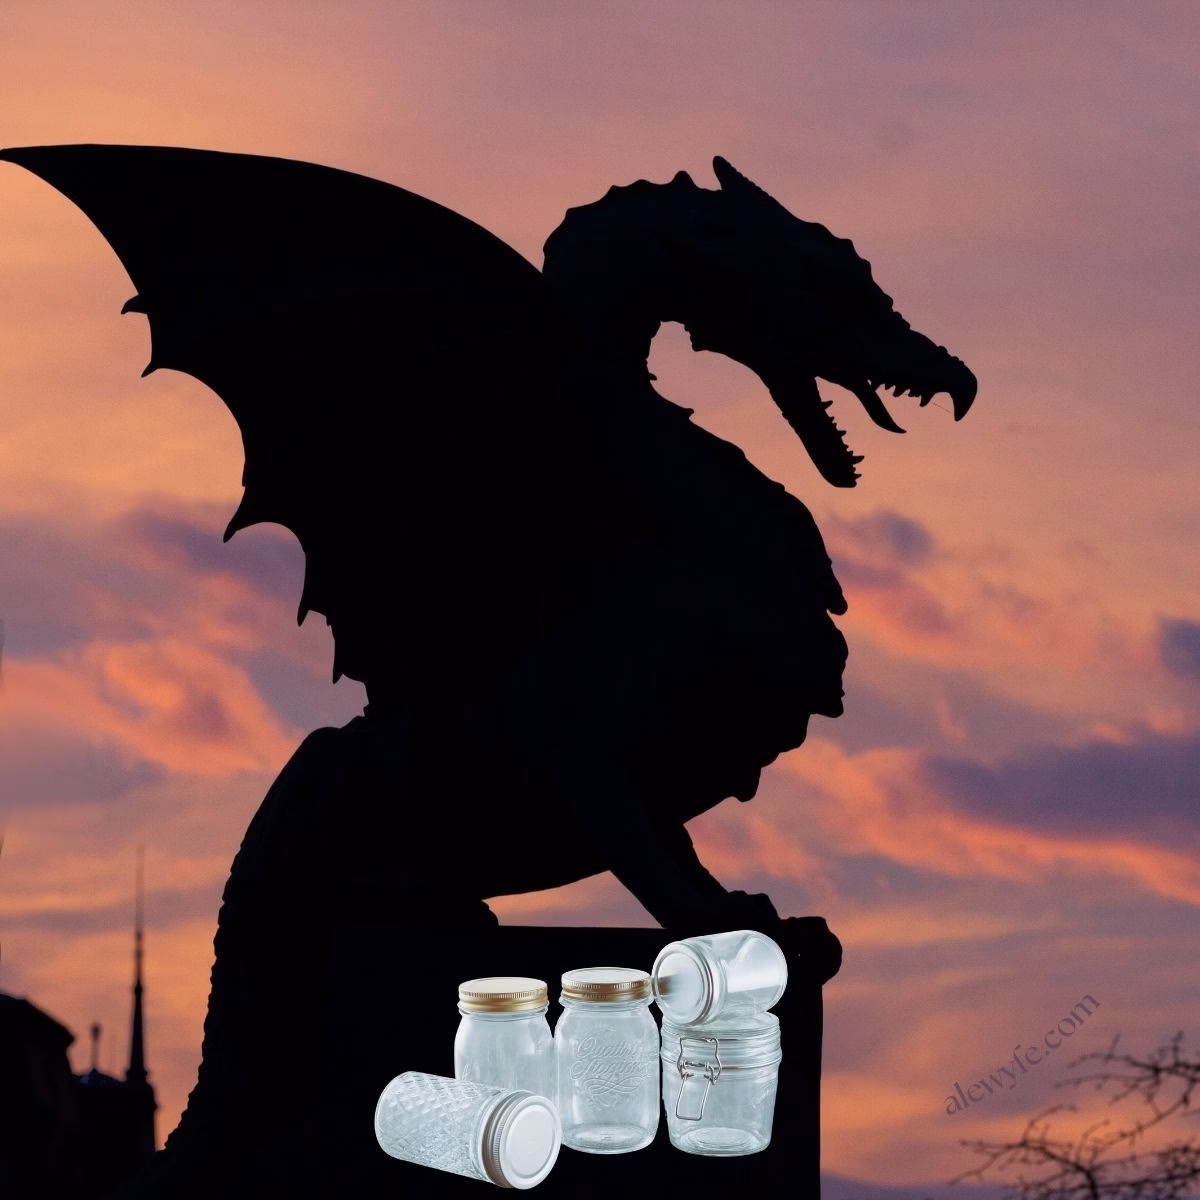
Cue up images of me curled up like a dragon on the pile of jars that won’t fit in the moving truck, hissing… “my precioussssessssss”! One of those problems for future me to figure out though, and I’ll worry about that then. Current me has enough on her plate… like testing and writing up new recipes for y’all here!
Why store upside down?
That is the way I do it but nearly every person I have received a box of used jars from had theirs right side up with lid (often upside down lid) and rings on. They hear the way I store them and say like glasses they shouldn’t be stored that way. Need to protect the edge
I suppose it depends on your storage situation, and whether or how you are stacking your boxes or bins? If I’m putting empty jars in longer term storage anywhere damp or humid, I take the rings off so they don’t rust. If they’re in my kitchen, going to be reused soon, I’ll sometimes leave the rings on, but loosely, to protect the rims, since the kitchen bin for smaller jars gets jostled around or with jars stacked up where they’d need extra protection. Otherwise, I find storing them upside down keeps them cleaner so they’re easier to wash and reuse! I usually line my boxes or trays with an old clean kitchen towel so they have some padding.