
CANNING: Roasted Tomato Guajillo Salsa
- Roasted Tomato Guajillo Salsa Ingredients
- Kitchen Equipment Needed
- How to Make Tomato Guajillo Salsa
- Canning Roasted Tomato Guajillo Salsa
- Pantry Storage Tips
- Roasted Tomato Guajillo Salsa
If you love bold salsa flavors without the screaming heat, this roasted tomato guajillo salsa recipe might be your new favorite. It’s rich, with a deep red hue and complex taste that doesn’t leave you needing to eat the whole bag of chips just to tame the burn… but you might reach for the rest anyway because this salsa is just that good!
This authentic salsa recipe marries sweet and fruity dried guajillo chiles with roasted tomatoes, garlic, and onions and a bit of vinegar for tang (and to make it safe for canning).
It’s an easy water-bath canning recipe, adapted slightly (and safely) from a tested Ball recipe. I’ve increased the batch size and tweaked the seasoning blend, and now this is one of my new favorites. If you’re scared of canning or just don’t want to fuss with it, you can also freeze any salsa that you won’t use up within a week and refrigerate the rest.
You can it in half-pint (8 oz) or smaller jars, so you don’t have to worry about half-eaten jars of salsa taking up your fridge real-estate or going bad… but that shouldn’t be a problem anyway, because you’re going to want to put this simple homemade salsa on everything!

I’ve been spooning it generously on huevos rancheros, sopes, steak, pork, or chicken tacos, home fries, baked potatoes & hash browns, and quesadillas. Of course, it’s delicious with tortilla chips. Add a jar of this roasted tomato guajillo salsa to a chip and dip bar or nacho buffet at your next big game party or birthday gathering!
And if you like this one, be sure to try our other salsa canning recipes for a selection of homemade goodies that will truly wow your friends and family at your next get together!

Roasted Tomato Guajillo Salsa Ingredients
Tomatoes:
Use red, ripe plum or paste-type tomatoes such as Roma or San Marzano for best results in this salsa. Slicing-type tomatoes will make a watery sauce.
If you are using store-bought tomatoes, it’s worth it to let them ripen on the counter for a while… they’re often packed and shipped rock-hard. Let them turn red and soften a bit before you roast them for better flavor. Of course, for the best flavor, you should grow your own or buy them from a local grower who picks them closer to fully ripe!
Avoid refrigerating tomatoes if you can. Cold temperatures make them mealy and do not improve the flavor. Freezing is a different story… you could use frozen tomatoes here in a pinch if you put them up quickly to process later, but they will get very watery and won’t roast well.
Guajillo peppers:
Guajillo chiles are dried mirasol peppers. They’re bright to dark red, flat, and long, and have a sweet fruity aroma and taste. These chiles are more flavorful than spicy, and have a very mild heat (2500-5000 Scoville, similar to a poblano or very mild jalapeno pepper).
You can find these dried chile peppers in a well-stocked grocery store or international market, or you can buy them online if they’re not easily available in your area.
Onion:
You can use yellow, white, or red onions in this recipe. Trim the root end, and wash the onions, removing any loose skin before quartering them through the root end.
You can leave the inner layers of skin on while you roast the onions, and remove the tough outer layer before blending the roasted onion into the salsa, or peel them before roasting (take extra care to not over-roast and dry out the onion if you peel them completely first).
Vinegar:
You can use apple cider vinegar or malt vinegar in this recipe, or a blend of the two of them. You can also substitute other types of vinegar, as long as they are also 5% acidity.
Seasoning:
Fresh garlic cloves, ground cumin, and oregano. Use Mexican oregano if you can get it, which is a more pungent variety that adds an extra aromatic kick to your salsa.
I have increased the amount of cumin and oregano slightly from the original Ball recipe. Do not increase the fresh garlic. If you want more garlic flavor, add dried garlic powder.
The original recipe doesn’t include salt. This salsa tastes a lot better with salt added, but if you are on a sodium-restricted diet, you can safely leave it out.

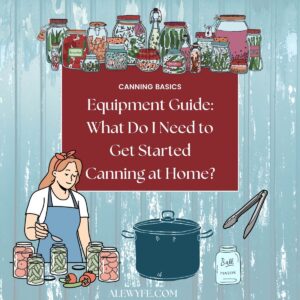
Kitchen Equipment Needed
sheet pan(s):
I used a standard half-sheet pan to roast the tomatoes, onion, and garlic. You can use other baking dishes, just make sure your cookie sheets or pans have a shallow lip to catch the juices from the roasting vegetables, and aren’t so deep that the veggies steam instead of roasting. Don’t crowd the pan… it’s better to use two pans than to overcrowd everything onto one pan.
blender, food processor, or food mill:
You’ll want to puree the soaked chiles into a paste, and then the roasted tomatoes, onions, and garlic. You can do this in batches in a blender, or with a food processor. In a pinch, you can use an immersion blender, though your salsa will probably be chunkier or at least less uniform.
You can even use a food mill, which will make a very smooth salsa without any lumps, seeds, or tough bits of pepper skin, but will be slower and more labor-intensive.
If you want to be very old-school, you can use a large molcajete, but if you have one, you probably don’t need me to teach you how to make salsa (though maybe you’re here for the canning part, since you can’t just can any salsa recipe!).
Anyway, other than altering the ingredient proportions or changing the canning parts, there’s no wrong way to go about this part. Use what you have or what you prefer!
large sauce pan or stockpot:
You’ll need a 4 quart (1 gal) or larger pot or dutch oven to simmer your salsa mixture before canning. Make sure the pot is non-reactive stainless steel or enameled, since the salsa mixture is acidic. Don’t use an un-coated aluminum or cast-iron pot.
water bath canner or large stockpot:
You’ll need one large or two smaller stockpots or water-bath canning pots that can hold 8-9 half-pint jars, or you’ll need to process this in batches. You can also can part of this batch, and refrigerate the rest of your salsa to use right away.
canning jars and lids:
You’ll need 8-9 half-pint mason jars and new canning lids with bands, or an equivalent combination of smaller jars.
Do not water-bath can this roasted tomato guajillo salsa in jars larger than a half-pint (8 oz or 250mL jars). There is no tested processing time listed for pint or quart jars for this salsa.
You can safely use a combination of half-pint or smaller (4 oz) jars to can your batch of salsa. The water-bath processing time is the same (30 minutes, adjusted for altitude if needed).
Canning funnel, ladle, jar tongs, and rack:
These tools are optional but make the job of filling your jars with hot salsa, and getting them into and out of the hot water bath a lot easier and safer!
It’s best to use a canning pot with a false bottom or fitted with a jar rack to keep your canning jars from scorching or breaking on the bottom. You can use a silicone trivet if you don’t have a jar rack.
You can read more about these and our recommendations in our guide to canning equipment if you don’t already have these or are new to canning.
How to Make Tomato Guajillo Salsa

prep ingredients:
- Preheat the oven to 425℉ (220℃ or gas mark 7)
- Wash the tomatoes and remove the core/stem end with a sharp paring knife or tomato corer.
- Trim the root end from the onions, remove any loose papery skin, and cut them into quarters through the root end.
- Peel the garlic cloves and wrap them in a bundle of aluminum foil.
- Put a kettle or small pot on to boil with at least 4 cups of water.
- Get out the vinegar, cumin, oregano, and salt and measuring implements.
roast tomatoes, onions, and garlic:
- Place the cored Roma tomatoes, quartered onions, and bundle of garlic in foil on a half-sheet pan or several smaller baking pans (with a rim to collect the juices).
- Roast the tomatoes and vegetables until they begin to brown, char, and soften.
- Check the garlic after about 15-20 minutes, and remove the packet with tongs once it is soft and roasted (don’t let it burn or it will be bitter).
- Turn the tomatoes and onions over with tongs so that they cook evenly. The original recipe suggests 20 minutes, but I like to roast them a bit longer.
- You can also grill the whole cored tomatoes for a smokier flavor.
- Remove the sheet pan from the oven once the tomatoes are well roasted and the skins are loose. Let them cool until they can be safely handled.
wash & toast chiles:
- While the vegetables are roasting in the oven, rinse the dried chiles with running water to remove any dirt, dust, or other field residue.
- Shake off the excess water, then pat the chiles dry.
- Heat a large cast iron or stainless skillet or griddle over medium to high heat.
- Working in batches, toast and dry the washed chiles in the hot skillet until they are fragrant and puffed. Turn them with tongs to toast all sides. Don’t let them char or burn or they’ll get bitter.
- Let the chiles cool slightly until they aren’t too hot to handle.
soak toasted dried chiles:
- Break off the stem end of the toasted chiles and shake out the dried seeds and loose membrane.
- Tear the de-seeded chiles into a few pieces each, and place them in a large heat-resistant bowl.
- Pour up to 4 cups of boiling water over the guajillo chile pieces (enough to cover).
- Weight them down with a heavy plate or another bowl so the pepper pieces stay submerged, or cover the bowl and stir them so they are evenly covered with the hot water.
- Let the chiles soak until they are soft and re-hydrated, at least 15-20 minutes.

blend salsa components:
- Peel the roasted tomatoes, and remove any tough outer skin layers from the roasted onions (save these for a roasted vegetable or meat stock).
- Strain most of the soaking liquid from the dried chiles, reserving this in case you need to thin the salsa.
- Blend together, working in batches, the re-hydrated chile peppers, tomatoes, onions, garlic, cumin, oregano, salt, and vinegar. You will need to do this in several batches, unless you have a giant commercial blender. Add a splash of chile liquid to each portion to make it easy to blend smoothly.
- Pour the blended salsa into a large non-reactive pot, and use as much of the reserved chile soaking liquid as you need to get a thin, light-bodied salsa.
- Stir everything together and check the consistency- this should be a light and relatively smooth salsa that will coat a spoon, not a thick chunky one.
simmer salsa:
- Place the salsa pot on medium-high heat, stirring frequently.
- Taste the tomato guajillo salsa and adjust the seasoning if needed (with more salt or vinegar, or canning-safe spices).
- Bring the salsa mixture up to a full boil, and turn down or remove from the heat.
- If you aren’t canning your salsa, cool rapidly and portion into refrigerator or freezer-safe containers.
- If you are canning it, keep the salsa hot until you fill the jars (have your jars and pre-heated water bath canner ready when the salsa is done, or keep the salsa hot on a very low heat until they’re ready).
Canning Roasted Tomato Guajillo Salsa
prep jars and canner:
- While you are roasting your vegetables and soaking your dried chiles, fill your water bath canner with water to a height that will cover your jars by several inches with room to boil vigorously.
- Wash your jars and lids with hot soapy water, rinse, and place the jars (but not the lids) in the canner as you bring the water up to a low simmer or at least 180℉.
- Protect your work surface- I like to use a baking sheet pan lined with an old kitchen towel, but you can also use a sturdy wire cooling rack or silicone mat. This helps protect the glass from temperature shocks and also makes for easier clean-up!
- Remove your canning jars from the canner (carefully, with tongs or jar lifters, tilting them out of the hot water) just before filling and place them on the towel or rack.

fill jars:
- Using a jar funnel if you have one, ladle the hot tomato guajillo salsa into the hot jars. Leave ¼” of headspace at the top of the jars (very slightly more if you are using reusable-style lids with gaskets like Weck or Tattler).
- De-bubble the jars with a thin spatula, spoon, or de-bubbling tool, and wipe the tops of the jars with a clean paper towel or lint-free cloth that has been dipped in hot water or vinegar.
- Place the canning lids on the clean jar tops and screw down the rings- don’t over-tighten the rings, just barely snug or “fingertip tight”. Regular canning lids are pretty forgiving but reusable lids need a more exact tension.
water-bath process:
- Using your jar lifter, tongs, or the canning jar rack, carefully place the hot filled jars of salsa in the preheated water-bath canner.
- Make sure you have adequate water covering the jars (at least 2″ over the tops of the jars). Top up with water from a hot kettle if needed.
- Start the timer for your water bath only after the water is at a rolling boil and all jars are in the canner. Process half-pint and smaller jars for 30 minutes (adjust for altitude if applicable, see recipe notes for chart) and then turn off the heat. There are no tested processing times for pint or quart jars of this salsa.
- Leave the jars in the canner, and set another timer for 5 minutes.
- Remove jars from the canner after the total time is up, and place them back on the towel-covered sheet pan or counter (put down a fresh towel if you spilled while filling the jars).
- Leave jars of processed salsa to cool slowly in a draft-free place. Do not touch the lid rings until the jars are completely cool and sealed (if you are using reusable canning lids, follow manufacturer instructions). Do not stack jars while they are cooling (or in storage).
Pantry Storage Tips
- After your jars of tomato guajillo salsa have cooled completely (8-24 hours) remove the bands and check for seals. Make sure that the button on the lid is depressed and the jars have a good strong vacuum seal.
- Refrigerate any jars of salsa that did not seal and use them first. Or, you can reheat and reprocess them in a boiling water bath with new lids within 24 hours.
- Gently wash jars or wipe with a damp cloth to remove any sticky residue or hard water deposits from the canning bath.
- Clearly label your jars with the name and date of your product, and store them in a cool, dark pantry.
- Store jars without canning rings, and do not stack jars (unless they’re in a crate or container that keeps them from resting on the jar rims of the layer below, which can break the seals).
- For best quality, enjoy home-canned goods like this roasted tomato salsa within 12-18 months. The salsa will still be safe to consume after that as long as it was properly processed and stored, and the jars are still sealed.
- However, older jars of salsa may discolor and darken, and the flavor and nutritional value will decline over time, so it’s best to make just what you will use in a year or two at a time.
- Be generous and share the love with your friends… your homemade roasted tomato and guajillo salsa makes a great gift. Or, organize a salsa swap if you have other friends who can!


Roasted Tomato Guajillo Salsa
Equipment
- glass canning jars, rings, and new lids half-pint or smaller jars
- jar lifters or tongs or jar rack with handles
- food processor (or immersion blender, or regular blender)
Ingredients
roast together:
- 4 lbs roma or other paste-type tomatoes washed & cored
- 2 medium white or yellow onions quartered
- 8 large garlic cloves peeled
toast and soak:
- 24 large dried guajillo chile peppers
- 4 cups boiling water
blend together with roasted/soaked veggies:
- ⅓ cup malt or apple cider vinegar (5% acidity) (use more, but not less, to taste)
- 1 tbsp kosher salt (or to taste)
- 1½ tsp ground cumin
- ¾ tsp dried Mexican oregano (substitute regular dried oregano)
Instructions
prep ingredients:
- Preheat the oven to 425℉ (220℃ or gas mark 7)
- Wash the tomatoes and remove the core/stem end with a sharp paring knife or tomato corer.
- Trim the root end from the onions, remove any loose papery skin, and cut them into quarters through the root end.
- Peel the garlic cloves and wrap them in a bundle of aluminum foil.
- Put a kettle or small pot on to boil with at least 4 cups of water.
- Get out the vinegar, cumin, oregano, and salt and measuring implements.
roast tomatoes, onions, and garlic:
- Place the cored Roma tomatoes, quartered onions, and bundle of garlic in foil on a half-sheet pan or several smaller baking pans (with a rim to collect the juices).
- Roast the tomatoes and vegetables until they begin to brown, char, and soften.
- Check the garlic after about 15-20 minutes, and remove the packet with tongs once it is soft and roasted (don’t let it burn or it will be bitter).
- Turn the tomatoes and onions over with tongs so that they cook evenly. The original recipe suggests 20 minutes, but I like to roast them a bit longer.
- You can also grill the whole cored tomatoes for a smokier flavor.
- Remove the sheet pan from the oven once the tomatoes are well roasted and the skins are loose. Let them cool until they can be safely handled.
wash & toast chiles:
- While the vegetables are roasting in the oven, rinse the dried chiles with running water to remove any dirt, dust, or other field residue.
- Shake off the excess water, then pat the chiles dry.
- Heat a large cast iron or stainless skillet or griddle over medium to high heat.
- Working in batches, toast and dry the washed chiles in the hot skillet until they are fragrant and puffed. Turn them with tongs to toast all sides. Don’t let them char or burn or they’ll get bitter.
- Let the chiles cool slightly until they aren’t too hot to handle.
soak toasted dried chiles:
- Break off the stem end of the toasted chiles and shake out the dried seeds and loose membrane.
- Tear the de-seeded chiles into a few pieces each, and place them in a large heat-resistant bowl.
- Pour up to 4 cups of boiling water over the guajillo chile pieces (enough to cover).
- Weight them down with a heavy plate or another bowl so the pepper pieces stay submerged, or cover the bowl and stir them so they are evenly covered with the hot water.
- Let the chiles soak until they are soft and re-hydrated, at least 15-20 minutes.
blend salsa components:
- Peel the roasted tomatoes, and remove any tough outer skin layers from the roasted onions (save these for a roasted vegetable or meat stock).
- Strain most of the soaking liquid from the dried chiles, reserving this in case you need to thin the salsa.
- Blend together, working in batches, the re-hydrated chile peppers, tomatoes, onions, garlic, cumin, oregano, salt, and vinegar. You will need to do this in several batches, unless you have a giant commercial blender. Add a splash of chile liquid to each portion to make it easy to blend smoothly.
- Pour the blended salsa into a large non-reactive pot, and use as much of the reserved chile soaking liquid as you need to get a thin, light-bodied salsa.
- Stir everything together and check the consistency- this should be a light and relatively smooth salsa that will coat a spoon, not a thick chunky one.
simmer salsa:
- Place the salsa pot on medium-high heat, stirring frequently.
- Taste the tomato guajillo salsa and adjust the seasoning if needed (with more salt or vinegar, or canning-safe spices).
- Bring the salsa mixture up to a full boil, and turn down or remove from the heat.
- If you aren’t canning your salsa, cool rapidly and portion into refrigerator or freezer-safe containers.
- If you are canning it, keep the salsa hot until you fill the jars (have your jars and pre-heated water bath canner ready when the salsa is done, or keep the salsa hot on a very low heat until they’re ready).
prep jars and canner:
- While you are roasting your vegetables and soaking your dried chiles, fill your water bath canner with water to a height that will cover your jars by several inches with room to boil vigorously.
- Wash your jars and lids with hot soapy water, rinse, and place the jars (but not the lids) in the canner as you bring the water up to a low simmer or at least 180℉.
- Protect your work surface- I like to use a baking sheet pan lined with an old kitchen towel, but you can also use a sturdy wire cooling rack or silicone mat. This helps protect the glass from temperature shocks and also makes for easier clean-up!
- Remove your canning jars from the canner (carefully, with tongs or jar lifters, tilting them out of the hot water) just before filling and place them on the towel or rack.
fill jars:
- Using a jar funnel if you have one, ladle the hot tomato guajillo salsa into the hot jars. Leave ¼” of headspace at the top of the jars (very slightly more if you are using reusable-style lids with gaskets like Weck or Tattler).
- De-bubble the jars with a thin spatula, spoon, or de-bubbling tool, and wipe the tops of the jars with a clean paper towel or lint-free cloth that has been dipped in hot water or vinegar.
- Place the canning lids on the clean jar tops and screw down the rings- don’t over-tighten the rings, just barely snug or “fingertip tight”. Regular canning lids are pretty forgiving but reusable lids need a more exact tension.
water-bath process:
- Using your jar lifter, tongs, or the canning jar rack, carefully place the hot filled jars of salsa in the preheated water-bath canner.
- Make sure you have adequate water covering the jars (at least 2″ over the tops of the jars). Top up with water from a hot kettle if needed.
- Start the timer for your water bath only after the water is at a rolling boil and all jars are in the canner. Process half-pint and smaller jars for 30 minutes (adjust for altitude if applicable, see recipe notes for chart) and then turn off the heat. There are no tested processing times for pint or quart jars of this salsa.
- Leave the jars in the canner, and set another timer for 5 minutes.
- Remove jars from the canner after the total time is up, and place them back on the towel-covered sheet pan or counter (put down a fresh towel if you spilled while filling the jars).
- Leave jars of processed salsa to cool slowly in a draft-free place. Do not touch the lid rings until the jars are completely cool and sealed (if you are using reusable canning lids, follow manufacturer instructions). Do not stack jars while they are cooling (or in storage).
Notes
- 0-1,000 ft – use recipe time
- 1,001-3,000 ft – increase 5 minutes
- 3,001-6,000 ft – increase 10 minutes
- 6,001-8,000 ft – increase 15 minutes
- 8,001-10,000 ft – increase 20 minutes
Nutrition
Liked this? Try our other salsa recipes!
- Roasted Tomato Salsa Ranchera
- Roasted Tomato & Ancho Salsa Roja
- Fiery Habanero Peach Salsa
- Roasted Tomatillo Salsa Verde
- Festive Cranberry Jalapeno Salsa
- Spicy Habanero Carrot Butter
- Enchilada Roja Sauce (Pressure-Canner or Freezer Recipe)
More Latin American Flavors
- Foolproof Homemade Tortillas
- Venison and Queso Chile Rellenos with Smoky Salsa Roja
- Chilean Quinoa Salad (Ensalada de Quinoa)
- Creamy Chicken Green Chile Tamale Pie with Black Beans and Hominy
- How to Make Turkey Mole Tamales
- Chipotle Barbacoa Beef or Venison (Pressure-Canning Recipe)
- Simple Sheet Pan Nachos
- Taqueria-Style Pickled Jalapenos & Carrots (Jalapenos y Zanhorias Encurtidas)
- Spicy Jalapeno Pickled Eggs (easy refrigerator pickle recipe)