CANNING: Navy Beans with Molasses & Ham
- Serving Ideas and Recipe Suggestions
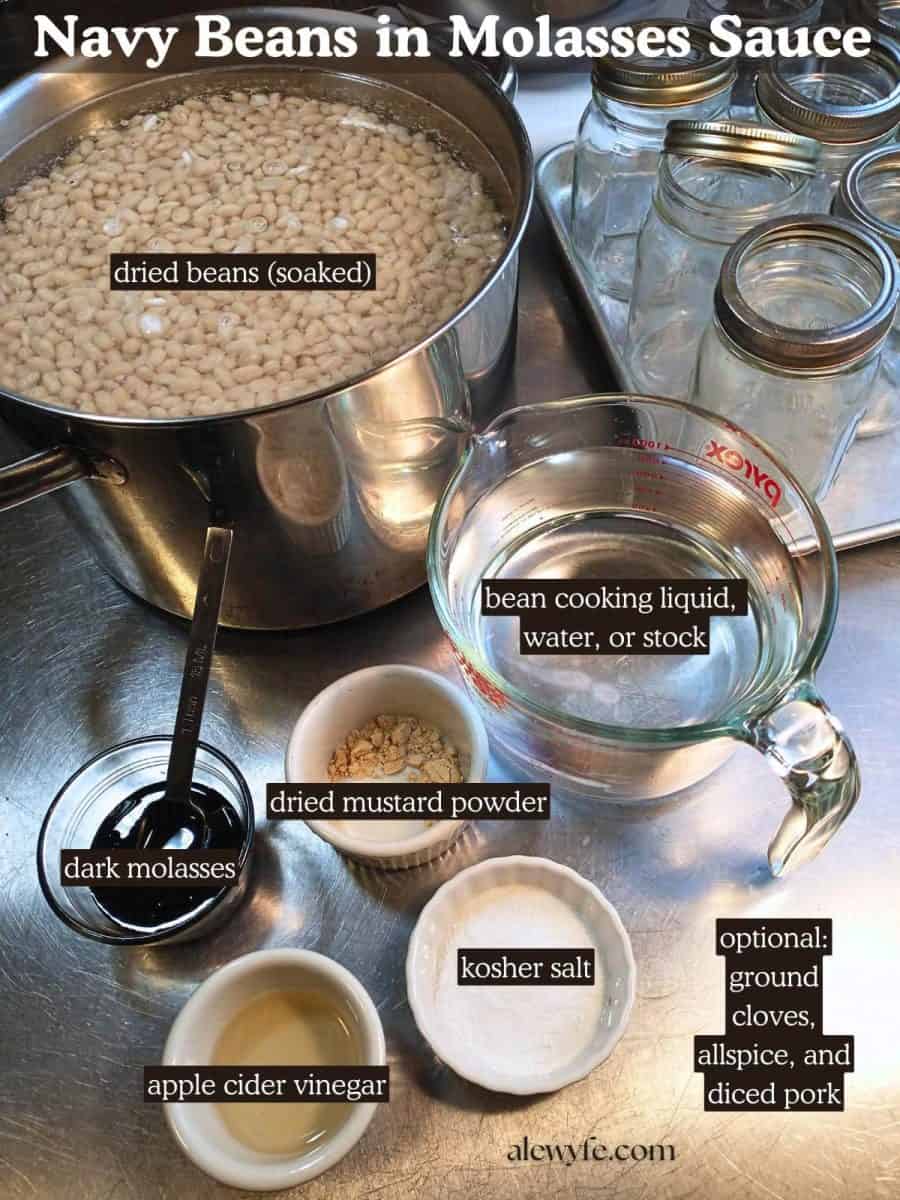
- Ingredients to Can Beans in Molasses Sauce
- Kitchen Equipment Needed
- How to Can Navy Beans with Molasses & Ham
- Pantry Storage & Safety Tips
- Canned Navy Beans with Molasses and Ham
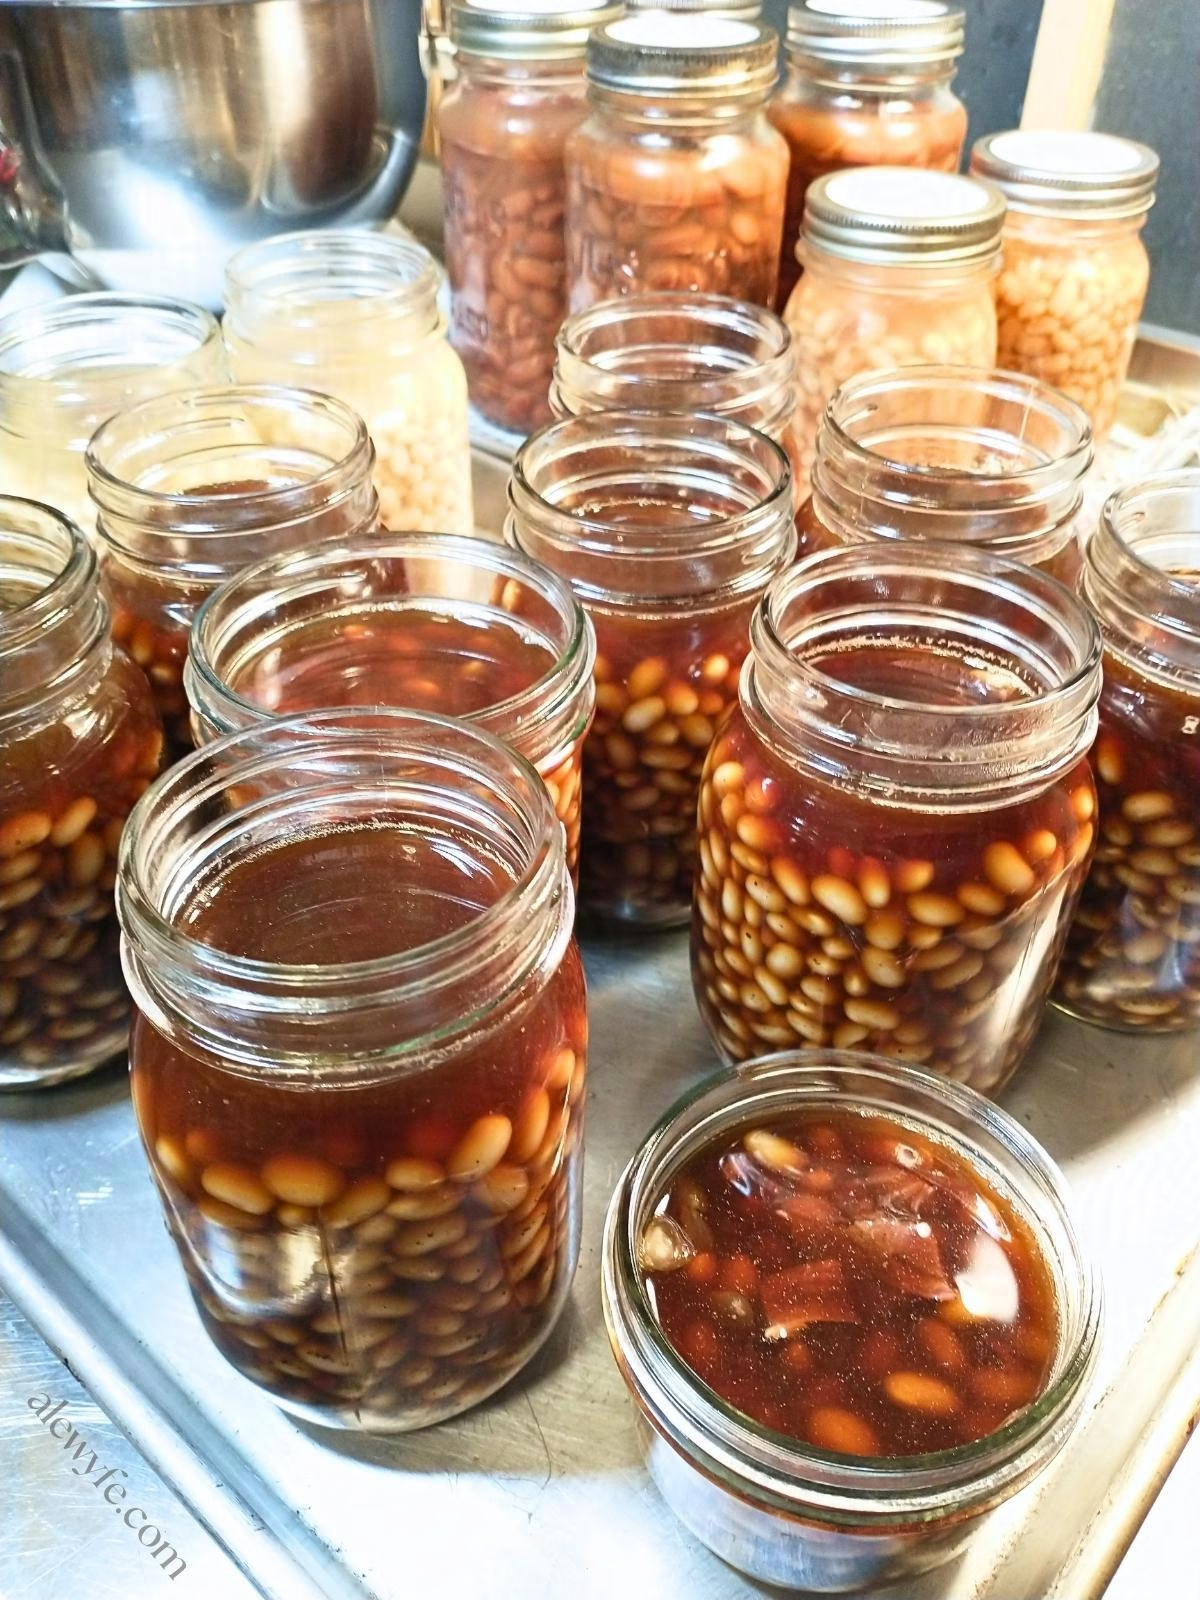
These pressure-canned navy beans have a light molasses sauce and a hint of smoky ham or salt pork for flavor.
They’re a great addition to your pantry stocks to add variety to your meal plans and recipes, especially now that a lot more of us are trying to save money and stock up on healthy basics in these uncertain times.
It’s a tested canning recipe from the USDA, so you know it’s safe (as long as you follow the guidelines and processing instructions)!
Serving Ideas and Recipe Suggestions
Straight from the jar, these molasses beans have a mild smoky flavor and creamy texture and a very subtle sweetness that isn’t cloying. Try them reheated as-is for a simple side dish or light budget-friendly meal, especially when paired with a pan of freshly baked southern cornbread or butter-swim biscuits.
Serve them with a drizzle of maple syrup or some more molasses if you like them sweet, or shake on some hot sauce if you want more of a kick!
These jars of navy beans in molasses broth also make a great simple bean soup… saute half a chopped onion and some diced celery, then add a jar or two of these and a couple cups of ham or chicken stock for a quick bean soup that tastes like it spent all day simmering on the stove.
Or, you can use these canned molasses beans as a base for your favorite fancy homemade baked bean recipes, like our BBQ Baked Beans and Lil’ Smokies (I’ll add a link when I finish writing up this recipe later this week… they’re soooo good, and you can make them in your Instant Pot, slow cooker, or in a dutch oven).
Or, make your own signature combination… Open up a jar, and add your favorite BBQ sauce, more molasses or brown sugar, bacon or onions or whatever else you like in your baked beans to jazz these up for your next BBQ.

Ingredients to Can Beans in Molasses Sauce
I find that I need a double-batch of the molasses sauce recipe as listed on the USDA recipe page for the quantity of beans that they list, so I’ve gone ahead and doubled that in the recipe quantity below.
You can also mix up a half batch of the molasses sauce quantity below (their full-size batch, with four cups of liquid and three tablespoons of molasses) and fill the rest of the jars with plain bean broth or hot water, though the listed processing times are different for these beans. If you do this, use the longer processing times recommended for canning dried beans just to be safe (75 minutes vs 60 minutes for pints, and 90 minutes vs 75 for quarts).
As far as I can tell, the main difference between the methods which would account for the difference in processing times is that for the beans in molasses sauce, they specify filling the jars 3/4 full. Their instructions for plain soaked dry beans leave less headspace, and have a longer processing time than the recipe for molasses beans or the other variations of baked beans.
The molasses sauce and the tomato-based baked bean sauces on the USDA site with a shorter processing time than the plain bean method would both be slightly acidic, but the primary difference is probably the density of the jars. Still, it’s best to follow the longer time that might apply if you’re doing a mixed batch of beans in molasses sauce and beans in plain cooking liquid.
Dry Beans:
Dried white navy beans are best, but you can also use pinto or great northern beans, or really any dried bean that you like and that is on the “safe for canning” bean list (check out our How to Can Dried Beans post for more details on varieties).
Molasses:
I used unsulphered blackstrap molasses for the extra boost of smoky flavor and minerals, but you can use any molasses or treacle that you have in your pantry.
Seasonings:
Dry mustard powder, apple cider vinegar, salt, and optional spices. I add a pinch of ground clove and allspice to mine (this is a safe variation that won’t affect processing time).
You can add up to a 3/4″ cube of ham, bacon, or salt pork to each jar for flavor (omit if you don’t eat pork or want these to be vegetarian-friendly). You could also use ham stock instead of all or part of the water (real stock or flavor base).
The tested recipe uses water or the strained and reserved bean cooking liquid for the molasses sauce. If you want to substitute stock or ham broth, this is an untested modification not in the original USDA recipe.
Adding the cured pork is in the official recipe, as long as you don’t use more than a 3/4″ cube or the equivalent in smaller pieces per jar. Do not use larger pieces, especially as cured meats are denser than regular meats and there is no stand-alone processing time for them.
Vegetarian or Vegan version:
To make these smoky molasses beans vegetarian, omit the pork. Use water or vegetable stock in the molasses sauce. You can add up to a half teaspoon of Liquid Smoke to the molasses sauce (to taste, a little goes a long way), or substitute smoked salt for the regular salt in the jars to add a layer of smoky flavor without adding ham.
Kitchen Equipment Needed
Pressure Canner:
You absolutely must use a pressure canner to safely can dried beans.
If you don’t have a pressure canner, you can freeze your cooked beans in molasses sauce, or use an Instant Pot or crock pot to cook them in the sauce until tender, and keep refrigerated as needed (use or freeze within 4-5 days if you aren’t canning them immediately).
Do not try to water-bath can low-acid foods like beans, meat, or most vegetables!
You also can’t safely can this in an Instant Pot- they do not reliably build up enough pressure to safely can foods, especially low-acid foods like beans, meat, mushrooms, and veggies that require consistent pressure and long processing times.
Botulism isn’t worth the risk… always pressure can low-acid foods like meats and vegetables in a suitable pressure canner.
I love my big All-American pressure canner, but any pressure canner that is large enough to hold at least four quart jars and that has a pressure weight and/or a tested pressure gauge will work (although you may need to adjust the batch size for your canner, or can the sauce in several batches).
For more information about canning basics and equipment, check out our introductory article with recommendations:
Large Stockpot(s):
You’ll need a large, heavy bottomed stockpot to pre-soak and simmer your beans before canning, and a second smaller saucepan (or microwave safe container) to heat up the molasses broth.
Canning Jars & New Lids:
Can your molasses beans in quarts, pints, or smaller jars. You will need clean jars (check for any cracks, chips in the rim, or other damage and discard damaged jars or use for dry storage).
Use new canning jar lids (or reusable lids and rings like Tattler or Harvest Guard, or Weck jars, if you are comfortable with them). You can reuse canning jar rings as long as they aren’t too rusty and aren’t dented or warped.
Quarts take 75 minutes, and pints and smaller jars process for 60 minutes. If you can a mixed batch of jar sizes, process the whole batch for the longer amount of time (75 minutes for any jars over 16 oz).
Note that this USDA-tested recipe has a shorter processing time than their recommended directions for plain soaked dry beans (full jars with 1″ headspace). Make sure you don’t fill the jars more than 3/4 full with soaked & simmered beans before adding the broth.
If you are canning a mixed batch with some jars of beans packed in regular cooking liquid vs the molasses broth, you can process for the longer amount of time if you prefer, in case the acidity of the liquid is part of the shorter tested time for the molasses beans or tomato-based baked beans.
How to Can Navy Beans with Molasses & Ham
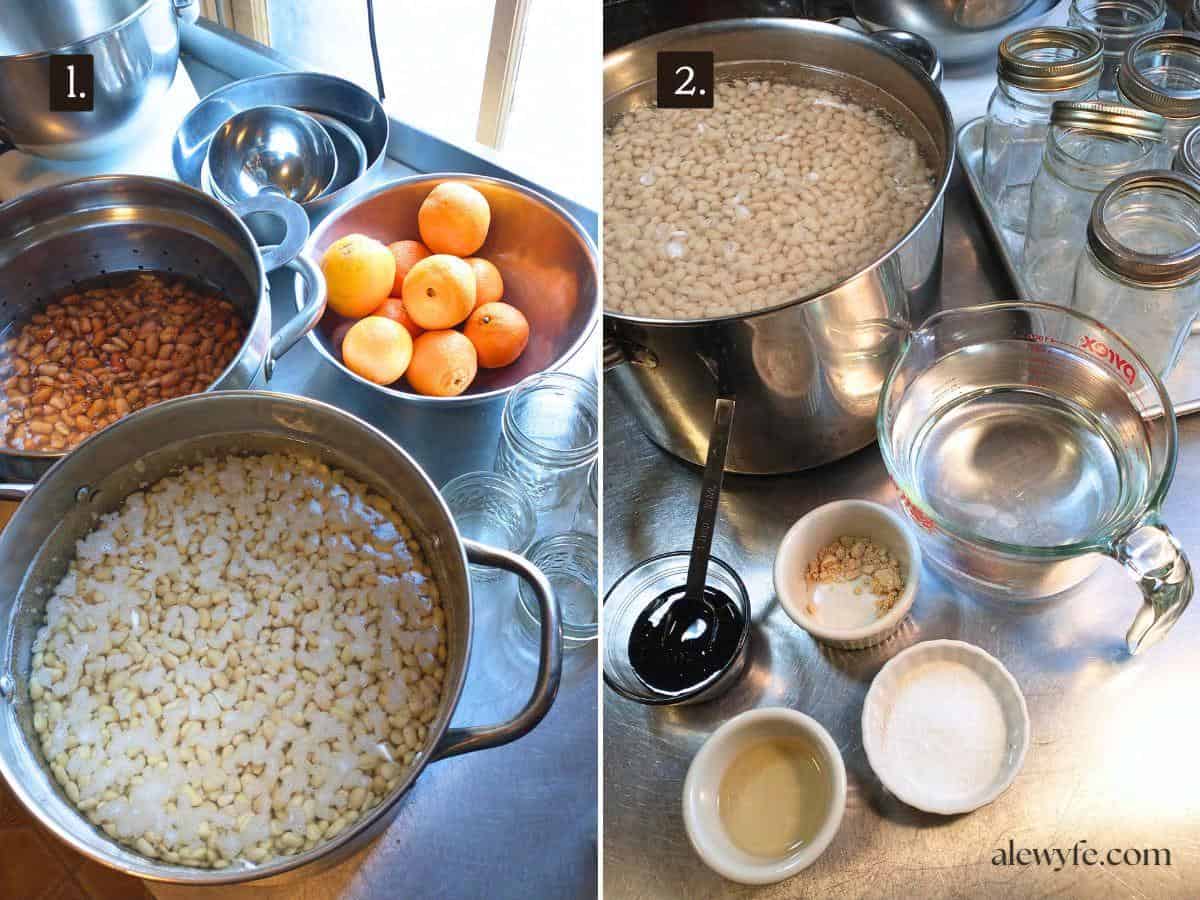
pre-soak your beans:
- Pick through your dried navy beans, checking for any small stones, twigs, or other foreign matter. Remove this and rinse your dried beans thoroughly.
- Stir the pot of water and discard any hollow beans that float (these may have pest damage or be empty hulls).
- Drain the rinse water and then refill and soak your pot of beans using one of the following methods:
- Overnight Soak Method: Soak rinsed beans in a large pot of water with plenty of room for the beans to expand (the pot should be no more than 1/2 to 3/5ths full of dried beans before adding water). Cover and let soak in a cool place for 12-18 hours (refrigerate the pot if your kitchen is hot).
- Quick Soak Method: Proceed as for the overnight soak, but bring the pot of beans and water to a boil on medium-high heat. Boil for two minutes, remove from heat, cover, and let soak for at least an hour.
No-Soak Method:Just kidding! Rebel canners might tell you this is fine, but PLEASE do not do this. It isn’t safe to can unsoaked dry beans or peas, and even if it were, it gives unpredictable and poor results with unevenly rehydrated beans, and can even break your canning jars. If you don’t have time to soak overnight, do the quick soak method or can them tomorrow (after soaking them today)!
simmer the beans:
- After your beans have soaked overnight (or heated and quick-soaked), drain and rinse them gently.
- Refill the pot with clean water to cover the soaked beans by at least 2″.
- Bring to a low boil over medium heat, gently stirring periodically so they don’t scorch on the bottom of the pan.
- Simmer the beans for thirty minutes before hot-packing them into your canning jars.
prep pressure canner & jars:
- Wash your canning jars and new canning lids in hot soapy water and rinse well.
- If you are using reusable lids (like Tattler or Harvest Guard, or Weck jars), follow manufacturer directions to prepare lids and rings.
- Fill your pressure canner with the recommended amount of water (check your canner manual, but at least several inches for this long processing time) and preheat it.
- Preheat the jars in the canner on low-medium heat while the beans simmer, or keep them hot in your oven, dishwasher, or using your preferred method.
prepare molasses sauce:
- Measure molasses, mustard powder, salt, vinegar, optional seasonings (ground spices), and warm water, (stock- unapproved variation), or bean cooking broth into a saucepan (or microwave-safe container).
- Stir until all ingredients are dissolved, and bring up to a low simmer over medium heat (or carefully microwave until hot).
- If you are adding ham, bacon, or salt pork to your jars, cut these into 3/4″ cubes (or an equivalent amount of smaller pieces). Do not use larger chunks than this, as cured meats are dense and the recipe was tested for pieces this size or smaller, and only add one per jar. Keep meat cold until you’re ready to fill the jars.
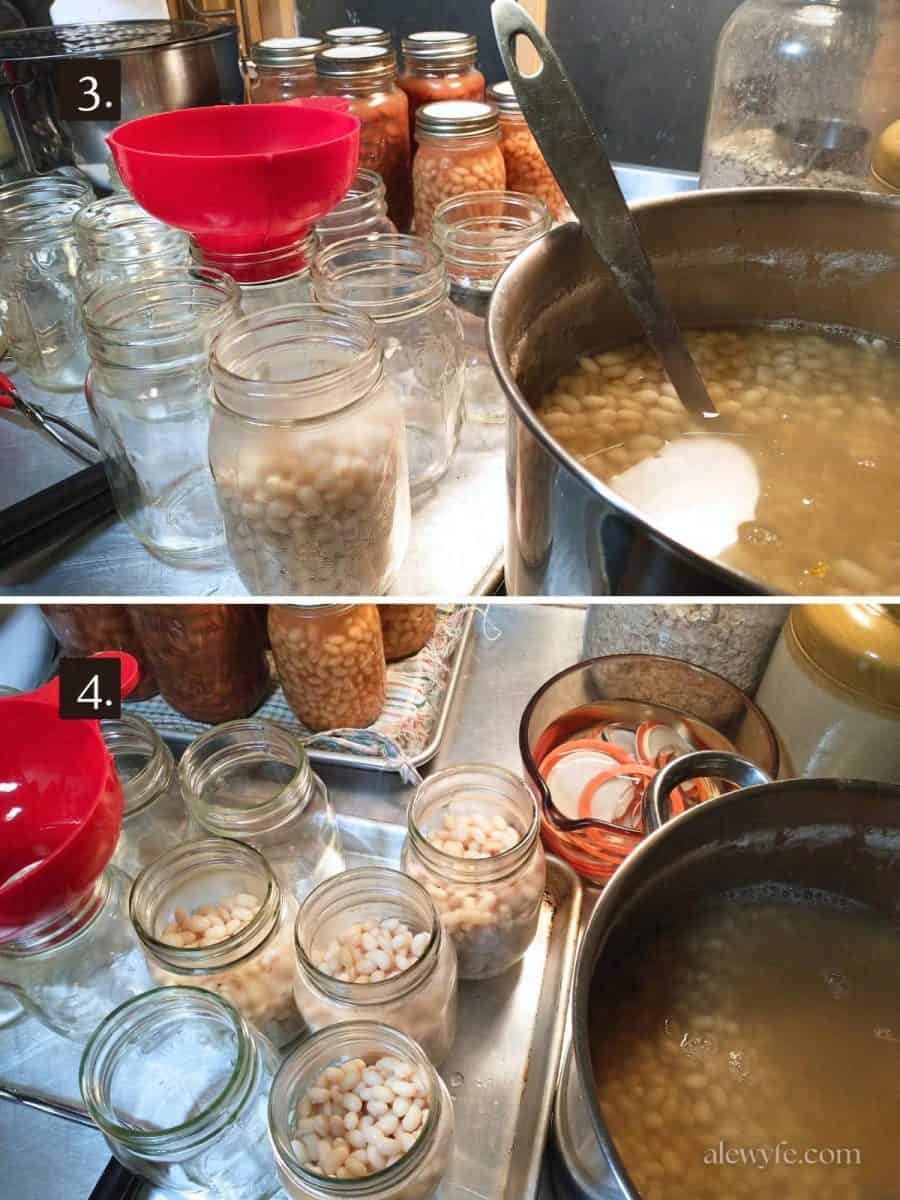
pack beans & sauce in jars:
- Using a jar funnel, fill your quart or pint jars about 3/4 full with the hot simmered beans.
- If you are adding pork, add one 3/4″ cube of diced ham, uncooked bacon, or salt pork (or the equivalent volume of smaller pieces, like stacked sliced bacon) to each jar for a smoky flavor.
- Divide the molasses broth among the jars, leaving 1″ of headspace below the rim at the top of the jar.. If you don’t have enough molasses sauce, you can quickly mix up another batch, or top up the jars with the bean cooking liquid, boiling water or stock. I often will fill some of the bean jars with molasses sauce and some with plain bean liquid or stock for added variety.
- De-bubble the jars with a small spatula, chopstick, or butter knife. Top up with additional liquid if necessary.
- Wipe the jar rims with a clean, damp cloth or paper towel.
- Top with new canning lids (or properly prepared reusable lids). Tighten the rings finger-tight (or according to manufacturer directions).
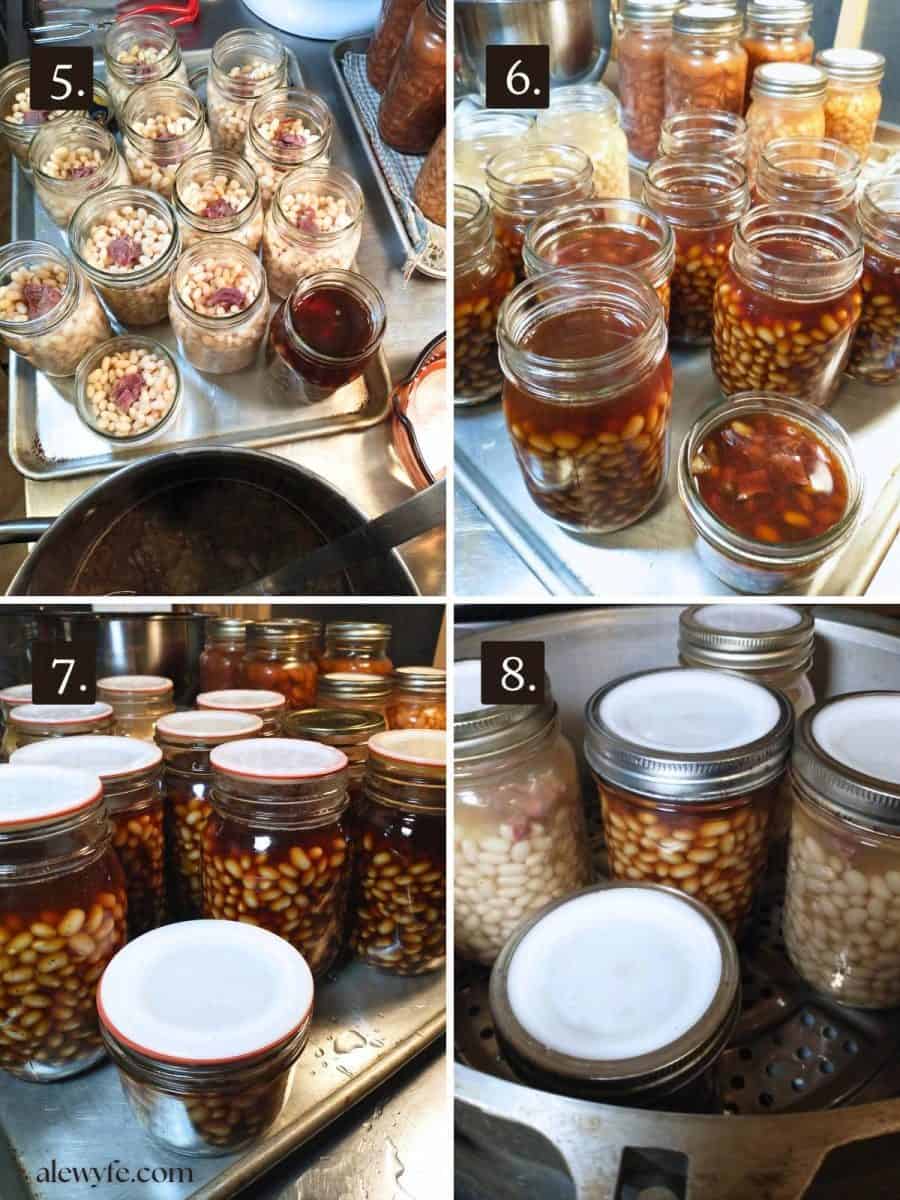
pressure-can the molasses beans:
- Place the hot jars in the preheated pressure canner and seal the lid. Heat on medium heat. Vent the canner for 10 minutes once it starts steaming, then add the weight and bring the canner up to pressure over medium low heat.
- Process at 10 lbs of pressure (weighted canner) or 11 lbs (dial gauge) at 0-1000 ft.
- Adjust pressure as needed for higher altitude canning using the chart below.
- Pro tip: If you don’t know your exact elevation, you can use a topo map or an online map tool like this one to determine the elevation at your location.
| Altitude Feet | Weighted Gauge | Dial Gauge |
|---|---|---|
| 0- 1,000 | 10 | 11 |
| 1,001- 2,000 | 15 | 11 |
| 2,001- 4,000 | 15 | 12 |
| 4,001- 6,000 | 15 | 13 |
| 6,001-8,000 | 15 | 14 |
| 8,001-10,000 | 15 | 15 |
- Reset processing timer to zero if canner pressure drops below minimum at any point during processing.
- Process for a full 60 minutes for pints, or 75 minutes for quarts or mixed batches of pints and quarts.
- Turn off the heat after the processing time is up. Let the canner rest undisturbed until the pressure returns to zero- do not remove the weight early to vent the steam faster do not remove the weight early to vent the steam faster or your jars may siphon or break.
- As soon as the pressure releases completely, carefully remove the canner lid.
- Wait another couple minutes, then remove the jars with jar tongs or hot pads, and place them on a towel or cooling rack.
- Cover jars with a towel if there are cold drafts.
- Leave undisturbed overnight or for at least 8-12 hours when the jars are fully cooled.
Pantry Storage & Safety Tips
Remove the jar rings, check for seals, and wash the cooled jars of canned molasses beans with warm, soapy water. Refrigerate any jars of beans that did not seal and use those jars promptly. You could reprocess them with new lids within 24 hours of the first processing.
However, since the canning time is so long, the reprocessed jars will lose quality, and the flavor will suffer. I prefer to refrigerate any unsealed jars of molasses beans and use them within a few days rather than reprocess. You can also transfer the beans to freezer-safe containers and freeze.
Label the jars and store in a cool, dark place. For best quality, enjoy most home-canned goods within 12-18 months, although they will be safe to eat while the seals are intact. Nutritional value and flavor declines slightly with longer storage (or improper storage conditions).
Discard the contents of any jars that lose seals in storage, smell off, are bubbling, or hiss when opened, and sterilize the jar before using them again.


Canned Navy Beans with Molasses and Ham
Equipment
- large pot
- glass canning jars, rings, and new lids
- canning funnel (optional but helpful)
Ingredients
Navy Beans
- 5 lbs dried navy beans (for 7 quarts or 14-16 pints, approx 12 oz dried beans before soaking per quart jar)
- water to soak
- water or broth to simmer
Molasses Sauce
- 6-8 cups warm water (you can substitute stock, bean cooking liquid, or ham broth for more flavor)
- 6 tbsp dark molasses
- 2 tbsp apple cider vinegar
- 2 tsp salt (substitute smoked salt for vegetarian or vegan beans, or for a deeper smoky flavor)
- 1 ½ tsp dried mustard powder
- ¼ tsp ground allspice (optional)
- ¼ tsp ground clove (optional)
Pork (optional)
- 14 3/4" pieces diced ham (substitute equivalent quantity of bacon or salt pork, no more than a 3/4" cube per jar)
Instructions
clean & pre-soak your beans:
- Pick through your dried beans, checking for any small stones, twigs, or other foreign matter. Remove these if present and rinse your dried beans thoroughly. Stir the pot of water and discard any hollow beans that float (these may have pest damage or be empty hulls).
- Drain the rinse water and then refill and soak your pot of beans using one of the following methods:
- Overnight Soak Method: Soak rinsed beans in a large pot of water with plenty of room for the beans to expand (the pot should be no more than 1/2 to 3/5ths full of dried beans before adding water). Cover and let soak in a cool place for 12-18 hours (refrigerate if your kitchen is hot).
- Quick Soak Method: Proceed as for the overnight soak, but bring the pot of beans and water to a boil on medium-high heat. Boil for two minutes, remove from heat, cover, and let soak for at least an hour.
simmer the soaked beans:
- After your beans have soaked overnight (or heated and quick-soaked), drain and rinse them gently.
- Refill the pot with clean water to cover the beans by at least 2″.
- Bring to a low boil over medium heat, gently stirring periodically so they don’t scorch on the bottom of the pan.
- Simmer the beans for thirty minutes before hot-packing them into your canning jars.
prep pressure canner & jars:
- Wash your canning jars and new canning lids in hot soapy water and rinse well.
- If you are using reusable lids (like Tattler or Harvest Guard, or Weck jars), follow manufacturer directions to prepare lids and rings.
- Fill your pressure canner with the recommended amount of water (check your canner manual, but at least several inches for this long processing time) and preheat it.
- Preheat the jars in the canner on low-medium heat while the beans simmer (see next step), or keep them hot in your oven, dishwasher, or using your preferred method.
prepare molasses sauce:
- Measure molasses, mustard powder, vinegar, optional seasonings (ground spices), and warm water, stock, or bean cooking broth into a saucepan (or microwave-safe container).
- Stir until all ingredients are dissolved, and bring up to a low simmer over medium heat (or carefully microwave until hot).
- If you are adding ham, bacon, or salt pork to your jars, cut these into 3/4" cubes (or an equivalent amount of smaller pieces). Do not use larger chunks than this, as cured meats are dense and the recipe was tested for pieces this size or smaller, and only add one per jar. Keep meat cold until you're ready to fill the jars.
pack beans in jars:
- Using a jar funnel and a slotted spoon, fill your quart or pint jars no more than 3/4 full with the hot simmered beans. You can drain the beans first if this is easier (or if you are using the cooking liquid to make the sauce) but reserve the liquid in case you need to top up the jars after adding the molasses sauce).
- If you are adding pork, add one 3/4" cube of diced ham, bacon, or salt pork to each jar (or an equivalent volume of smaller pieces).
- Divide the hot cooking broth among the jars, leaving 1″ of headspace below the rim at the top of the jar. If you don’t have enough bean cooking liquid, top the jars up with boiling water or stock.
- Debubble the jars with a small spatula, chopstick, or butter knife. Top up with additional molasses sauce, bean cooking liquid, or hot water if necessary to maintain proper 1" headspace.
- Wipe the jar rims with a clean, damp cloth or paper towel.
- Top with new canning lids (or properly prepared reusable lids). Tighten the rings finger-tight (or according to manufacturer directions).
pressure-can the beans:
- Place the hot jars in the preheated pressure canner and seal the lid. Heat on medium heat. Vent the canner for 10 minutes once it starts steaming, then add the weight and bring the canner up to pressure over medium low heat.
- Process at 10 lbs of pressure (weighted canner) or 11 lbs (dial gauge). Adjust pressure as needed for your altitude over 1000 sf (important, see notes below).
- Reset processing timer to zero if canner pressure drops below minimum at any point during processing.
- Process for a full 60 minutes for pints, or 75 minutes for quarts or mixed batches of pints and quarts.
- Turn off the heat after the processing time is up. Let the canner rest undisturbed until the pressure returns to zero- do not remove the weight early to vent the steam faster or your jars may siphon or break.
- As soon as the pressure releases completely, carefully remove the canner lid.
Cool, check seals, and store:
- Wait another couple minutes, then remove the jars with jar tongs or hot pads, and place them on a towel or cooling rack. Cover jars with a towel if there are cold drafts.
- Leave undisturbed overnight or for at least 8-12 hours when the jars are fully cooled.
- Remove the rings, check for seals, and wash the jars with warm, soapy water.
- Refrigerate any jars of canned beans that did not seal and use those jars promptly. You could reprocess them with new lids within 24 hours of the first processing. You can also transfer to freezer-safe containers and freeze.
Notes
Altitude adjustments:
- For weighted canners, use 15 lbs at altitudes over 1000 ft.
- For dial gauge canners, use 11 lbs from 0-2000 ft, 12 lbs from 2001-4000 ft, 13 lb at 4001-6000 ft, and 14 lbs from 6001-8000 ft elevation).
Vegetarian or Vegan version:
Omit the pork. Use water or vegetable stock in the molasses sauce. You can add up to a half teaspoon of Liquid Smoke to the molasses sauce, or substitute smoked salt for the regular salt in the jars to add a smoky flavor.Storage and Safety Tips:
Label the jars and store in a cool, dark place. For best quality, enjoy most home-canned goods within 12-18 months, although they will be safe to eat while the seals are intact. Nutritional value and flavor declines slightly with longer storage (or improper storage conditions). Discard the contents of any jars that lose seals in storage, smell off, are bubbling, or hiss when opened, and sterilize the jar before using them again.Nutrition Information:
Nutritional values are per pint for a yield of 16 pints, and a rough estimate using the suggested ingredients, water or bean cooking liquid in the sauce, and 6 total ounces of ham. All nutritional information should be considered an estimate for informational purposes and not an exact calculation.Nutrition
Liked this? Try these recipes!

- How to Can Dried Beans
- Cajun Red Beans and Sausage (pressure canning recipe)
- Zuppa Toscana – Sausage, Potato, Kale & White Bean Tuscan Soup
- How to Can Meat, Chicken or Turkey Stock
- Homemade Spaghetti Sauce with Meat and Mushrooms (pressure canning recipe)
- How To Can Swedish Meatballs
- Millions of Peaches, Peaches for Free (and a Spicy Peach BBQ Sauce Canning Recipe) (water bath canning recipe)
- Soft Blackstrap Molasses Spice Cookies
- Smoky White Bean Soup with Pork & Collards (Instant Pot Recipe)
- BBQ Beans with Little Smokies