DESIGN: Decluttering and Organizing the Craft Room & Office (Low-Budget Space Makeover)
I rearranged my office & craft cave (and often, my Stardew Valley farm operations management center) to create a much better, more efficient workspace that I love, using just things I already had! I’ve been looking at things to buy to fix this mess for awhile, but it turns out I had almost everything I needed, I just had to look at it in a different way (and get creative to make a couple things work).
Hopefully some of these ideas will help you look at your own space in a new light, and work some organizational magic of your own! I’ve got tips and recommendations at the end of the post for how to declutter and improve your rooms too… now let’s get started, eh?
What was wrong with this office & craft room?
First, here’s what we were working with before. Woof. I’m obviously a maximalist, but this is uhhh little much. So much visual and actual clutter… plus more importantly, the workflow is bad, I hate my sewing & craft table setup, and there are tons of projects out that I’m not actively working on (and things I need to sell but don’t have a space set up with good light to photograph them). This isn’t the best before photo, but trust me, you don’t want to see a better one. This much detail is bad enough.
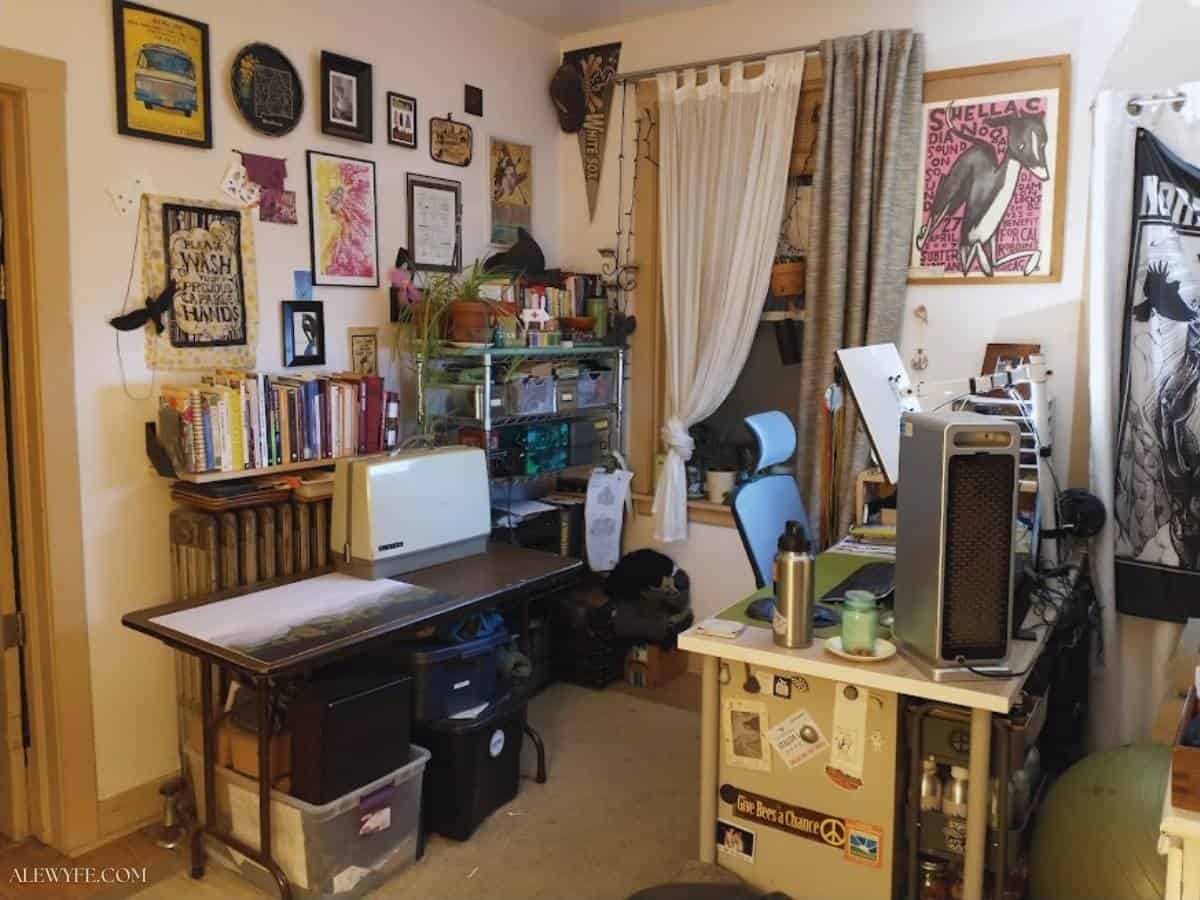
Plus I needed to vacuum that rug and wipe down my air filter like, last week… gross. Black dog + beige carpet= never again, but at least I can tell when I need to clean, sigh. This was actually originally a rug from the AirBNB, but we got a better one for down there and my office inherited this one. Unfortunately something dark and moody (and that will hide the dog hair between weekly-ish vacuuming) isn’t in the budget unless this one completely unravels. Maybe someday? One of those dark and witchy or wonderfully William Morris-inspired Ruggable ones would be amazing, but they’re $$. We keep it real around here. The kitchen is clean though, I promise.
The office was really crowded before and didn’t flow right. The sewing table is an old folding table that has seen better days. It wasn’t inline with my desk chair and stuck too far out into the room, where it would just collect clutter instead of being a work surface, and it doesn’t have a good spot to stash my notions and supplies.
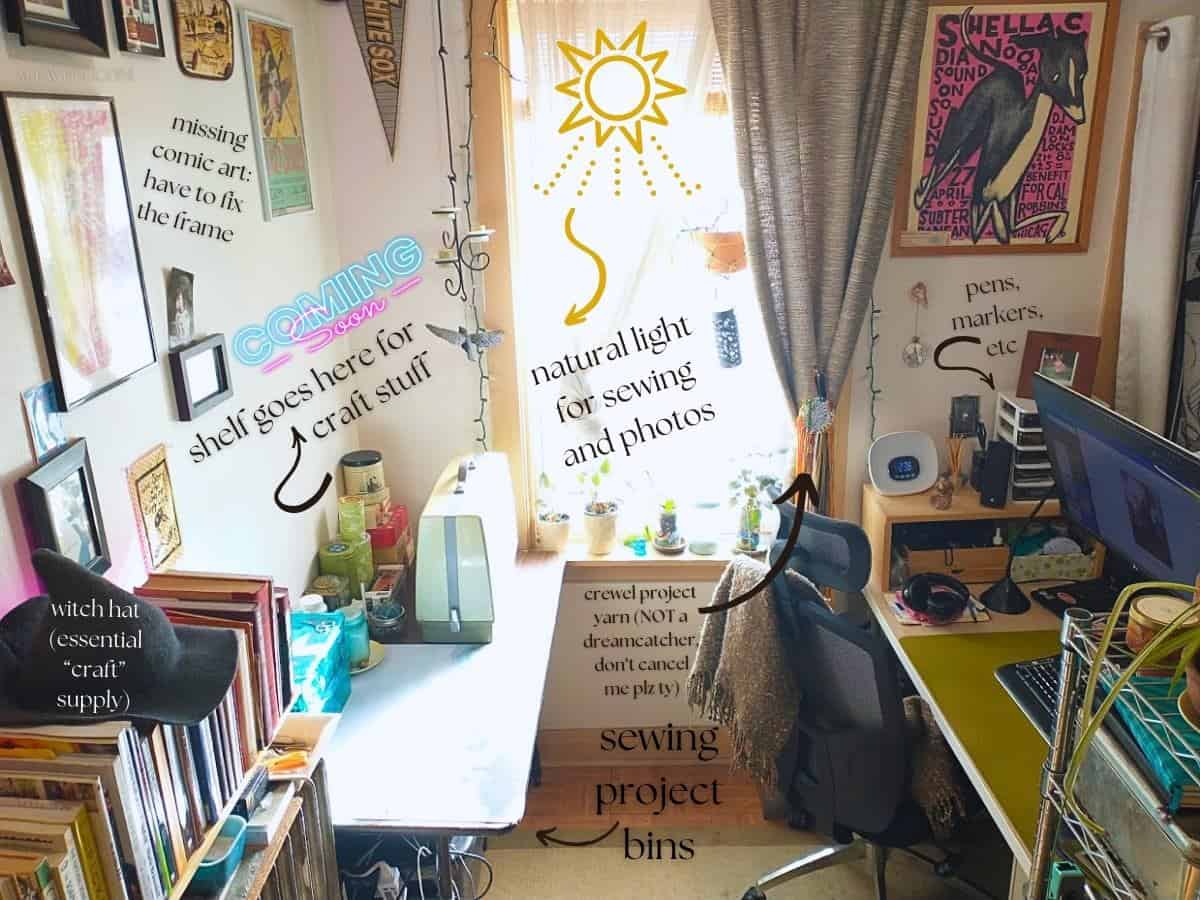
While I love my steel metro shelf that holds all my stationary and recipe binders and doodads and whatnot, I hated having it looming right behind my desk. It’s also a terrible background if I need to do a video call from my desk (and the last time I tried, the fake backgrounds don’t work on the Linux version of Zoom, or at least they don’t on my computer).
Plus, my desk is a pass-thru to the bedroom and pantry from the kitchen and we share a printer, so I’d get annoyed at my partner for distracting me when I was writing. I don’t like closing the door unless I need to be on a call or something so the dog can come and go and I don’t feel so closed off from the rest of the world… but I also don’t like being annoyed at my partner. He wasn’t doing anything wrong, just walking through the room… I’m just easily distracted. #adhdlyfe
Mid-Project Progress:
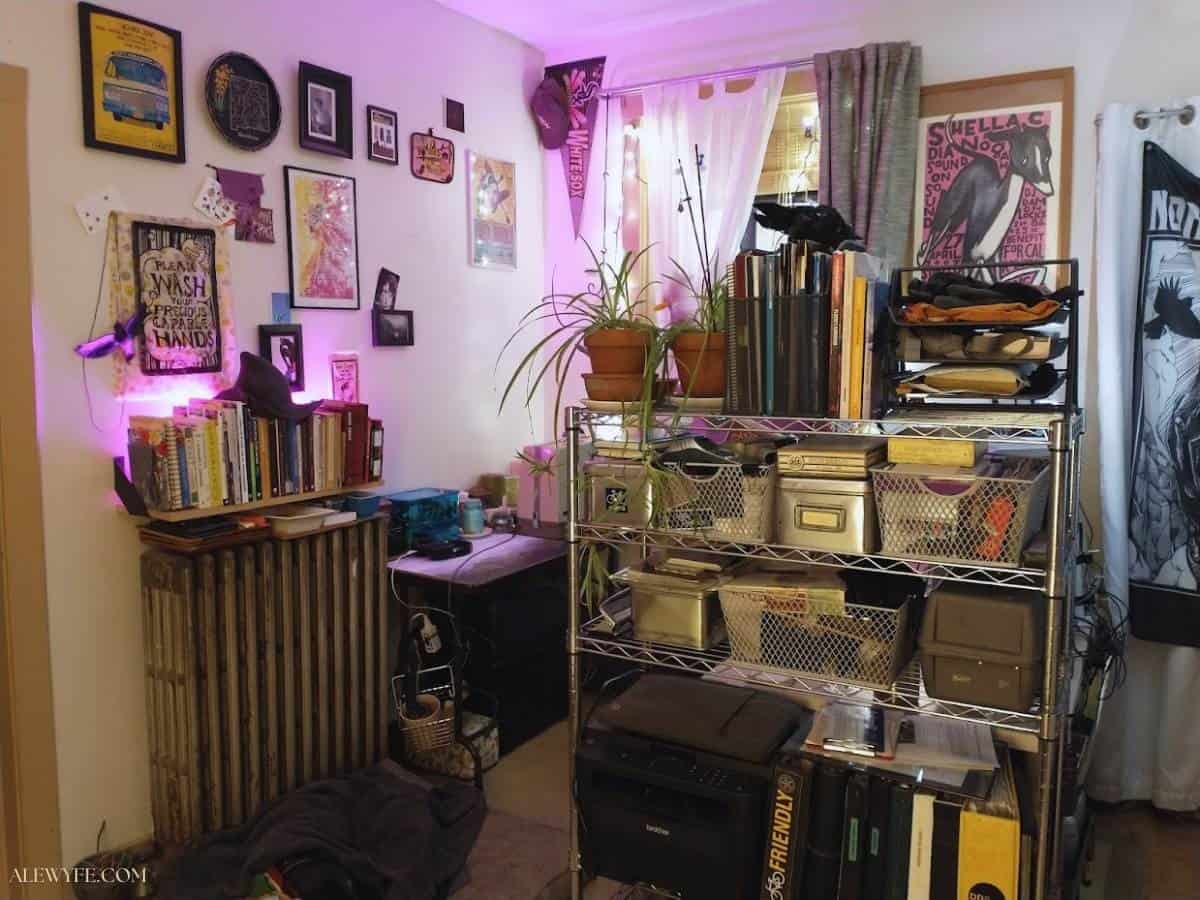
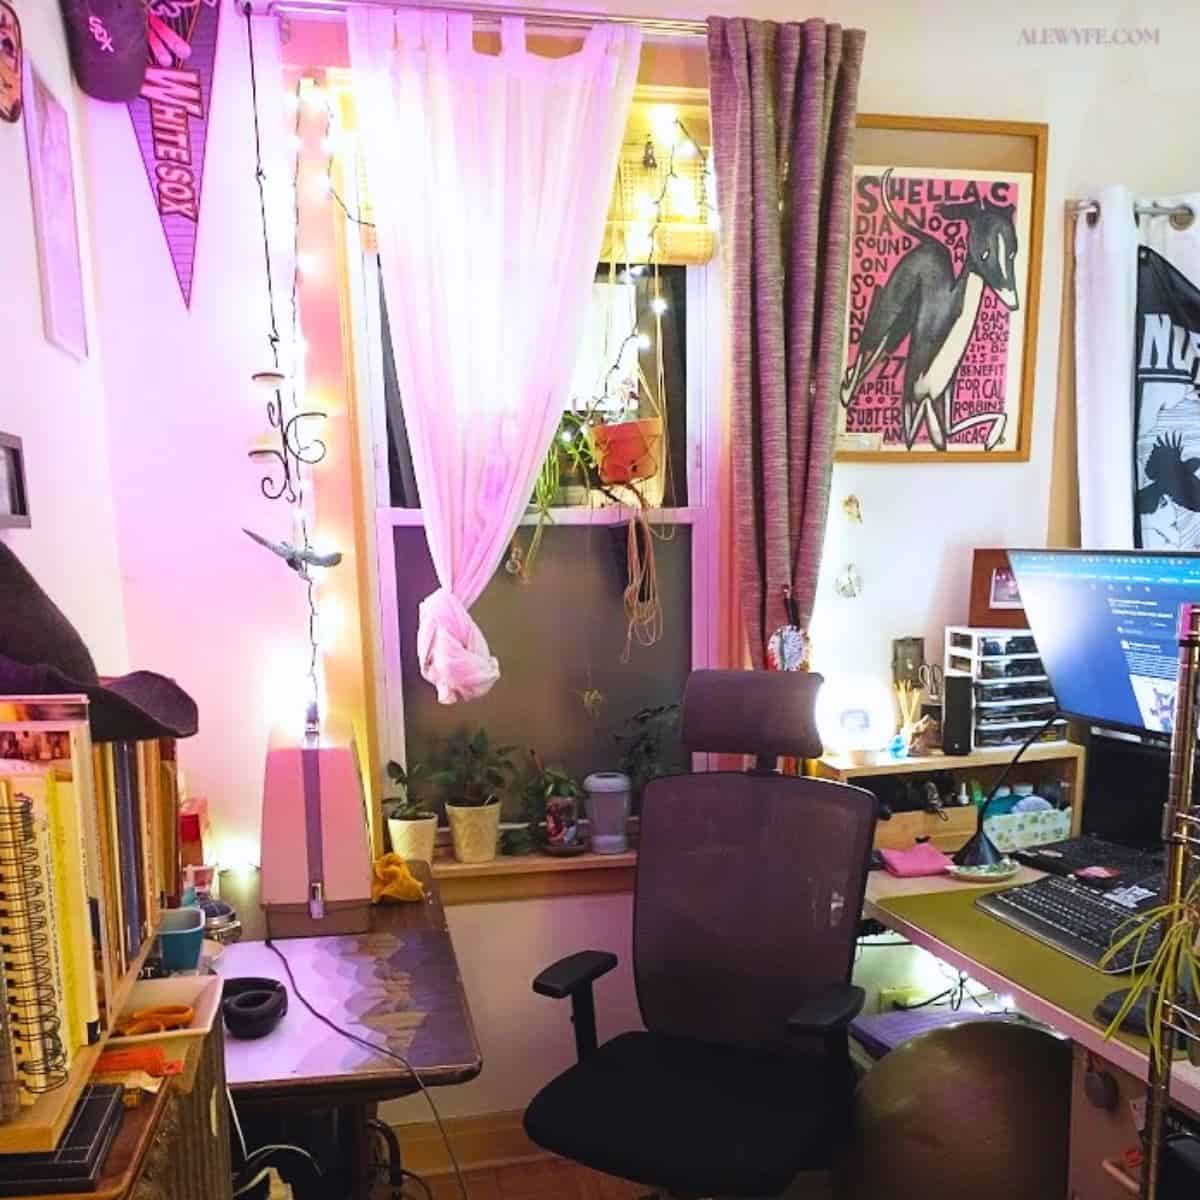
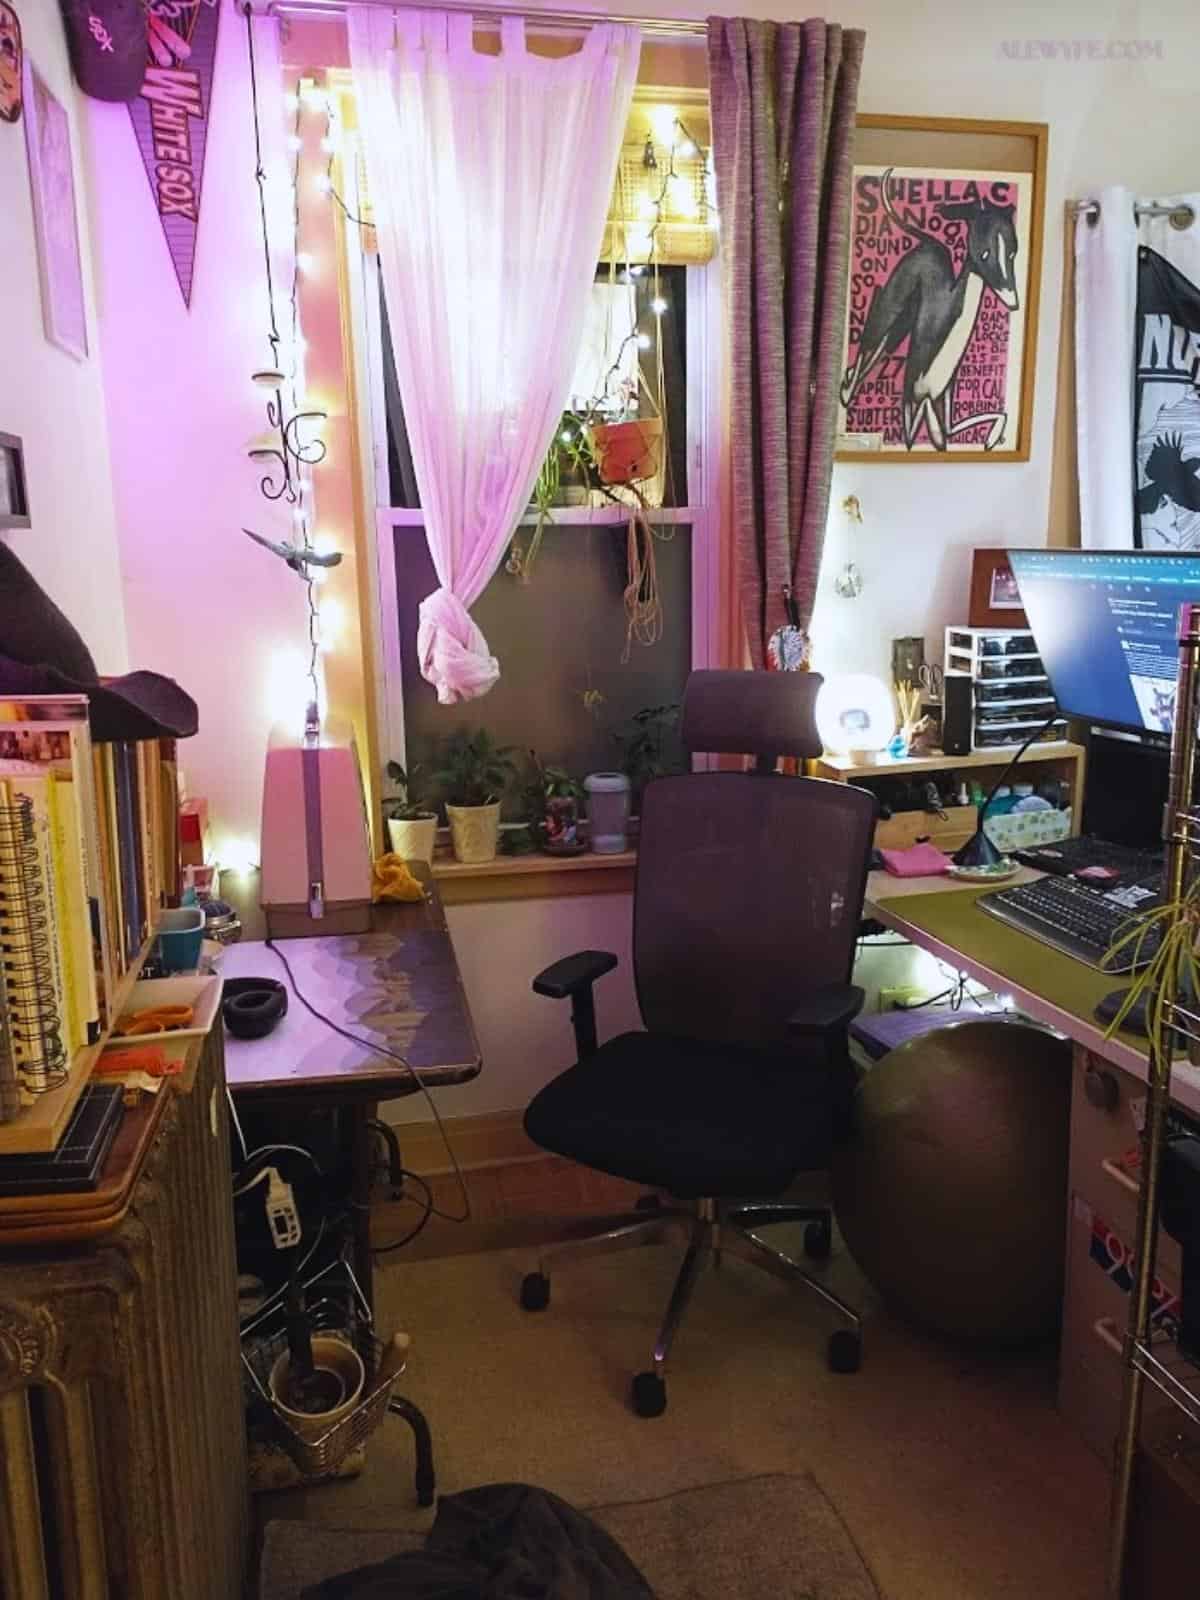
SO! I moved the metro shelf from behind my desk to the side of it. Now I have a visual barrier so I can keep my focus better, and the printer is easier for him to get to instead of having to go behind my chair. Most of my stationary and office supplies are still easy to reach. It’s easier to clip needlework patterns to it for when I am doing an embroidery project while watching something on my computer, and I can clip my desk fan there instead of on the small wooden riser on the left of the desk that I might eventually use elsewhere (on the craft table?) to free up desk space (especially when I can swap my free Ikea desk for a standing desk with a bit of storage).
I might eventually hang a divider curtain (I already have some ceiling rod holders that I bought to put up curtains to separate the fermentation shelves in the basement from the laundry and workshop areas, but decided that would be too dark). That would be a further visual barrier between my workspace and the pass-thru from our rooms to the kitchen, and also from the laundry folding station, err, the futon, that’s on the opposite wall, but that I could open up when I’m not writing to let light from the window through to the rest of the room… it could also hide the metro shelf and office supplies when they’re not in use. I’m going to live with the space as-is for now and see how I feel about that.
I tried to move the sewing table before but it’s like an inch too wide to fit in the spot behind my desk between the radiator and the window trim. Last time I gave up and was going to build a table to go there… But I drilled out some holes in the bottom of the table legs and put some threaded metro-shelf feet on there that I had in the workshop. Now the table is the perfect height to rest on the windowsill and it’s a PERFECT fit! I also hammered some little tacks in to fix the edge-banding that was loose and coming off… I’d taped it, but the tape wasn’t holding. It looked terrible and was getting worse. Now it’s not going anywhere (ok, DAD).
It was one of those little things that you look at everyday that is bothering you, but that you don’t fix, even though it might only take a few minutes? Do you have one of those things? Maybe it’s just the dishes from last night’s dinner, or a light bulb that is flickering and about to burn out?
Quick… GO FIX IT RIGHT NOW. I’LL WAIT, COME BACK WHEN YOU’RE DONE!
OMG don’t you feel a million times better? You did come back, right? Or did you start doing thirty three other projects after tackling that one because it felt so good and now you have MOMENTUM and DOPAMINE? Are you me? *shrug* Hey, sometimes you gotta ride that snake, where the snake=sudden motivation to clean and organize things.
Inexpensive Organization Ideas and DIY Updates:
I ordered some deep forest green spray paint so when the weather is nice enough, I can take that table outside and paint the whole thing (It’s a scratched and paint-marked dark faux wood chipboard folding table, but the paint will help). The legs are glossy metal and the top is MDF, so I’ll have to sand it lightly and do a couple coats, but it should go a long way towards making this less of an eyesore (someday I’ll build a nicer one with better storage or room for drawers underneath, but for now, it’s fine).
Plus I got a cutting mat at Christmas (finally) for sewing & crafts that has a standard cutting grid on one side, but reverses to the cute woodsy scene on the other side that matches with my cork-lined desk pad.
The white and translucent smoke grey organizer drawers on my desk hold all my pens, pencils, markers, highlighters, and small odds and ends. Those used to be in a stack of cigar boxes, but I’d never remember what was in each box and would have to go through the whole stack to find anything, so I’d leave them out and in the way. Not anymore! These are see-thru enough to find things without being totally transparent, which helps them look less busy and cluttered. I have another bamboo organizer tray and drawer on that side of the desk which holds small things that I want close at hand but all over my desk (lip balm, earbuds, a tiny electronics screwdriver set, chargers and cables and remotes).
There’s also a decorative box on my desk (for want of a better home, and for convenience) for vitamins, tinctures, and other miscellaneous stuff. That one’s a DIY/freebie… it’s just a cardboard box with the flaps glued and stapled in to reinforce it, then I covered it in contact paper. A lot of the tins and canisters on my craft table are upcycled cookie or oatmeal tins, spray painted or also covered in contact paper and a neat printed label. So easy, and almost free.
I’d like to make some slip-covers for my recipe binders to keep the dust off and tidy up the metro shelf bookcase (and help my binders last longer). I looked at buying some but DANG are they expensive! Now that I have the cutting mat, it should be easier to make some out of scrap cardboard, and either spray-paint the cardboard cases or cover them in wallpaper or contact paper or fabric.
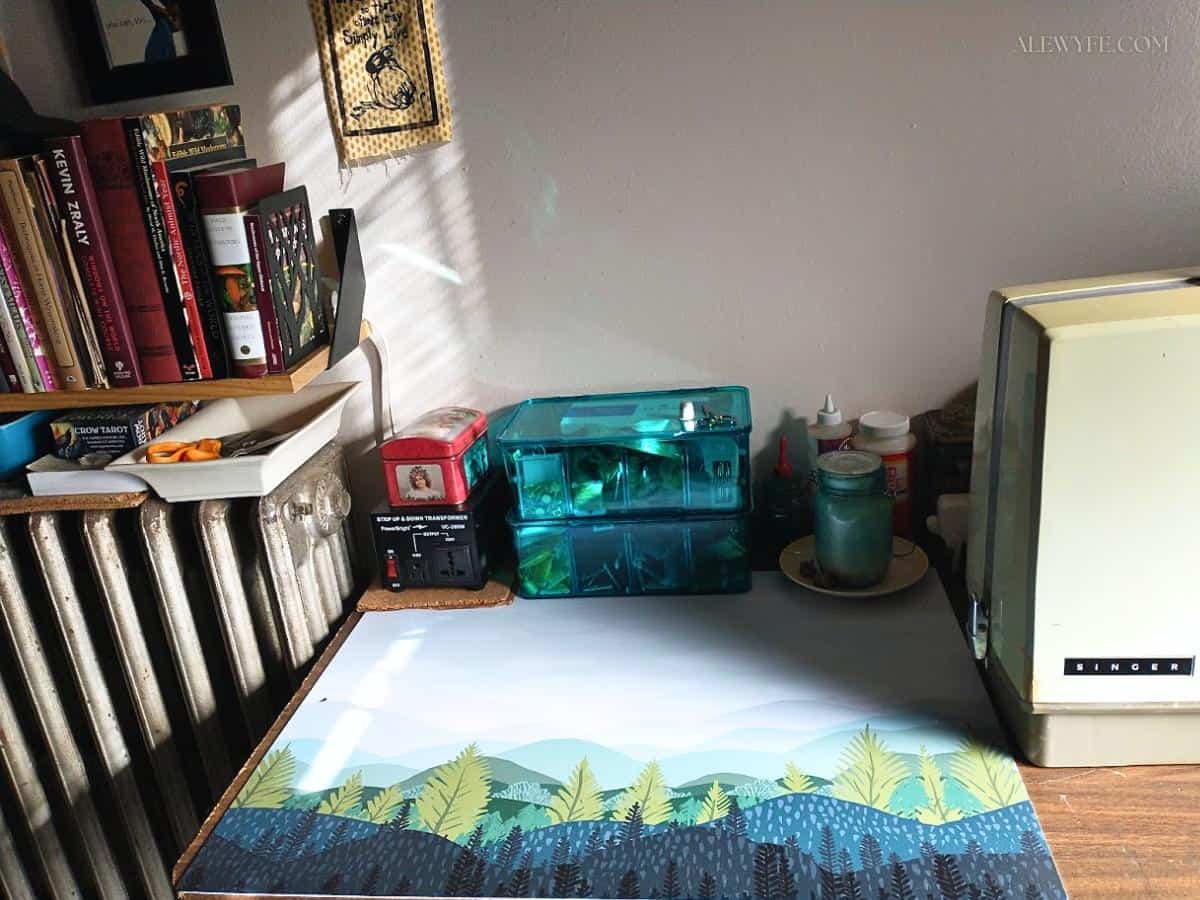
Those bright aqua divided bins behind the cutting mat are designed to hold packets of tea… I had extras after organizing the tea shelf, the AirBNB’s kitchen, and the medicine cabinet. They work quite well for sorting my assorted embroidery thread, bobbins, needles, and notions. I have the smoke colored ones in the kitchen, but these aqua ones are fun and a nice pop of color (and slightly better protection for the threads from fading).
Oh, and that thimble, the first I’ve found that fits perfectly? I found that in a crevice between floorboards of our attic. It’s a promotional item from “John Hancock Mutual Life Insurance, Boston”. Old house treasure!
Next Steps to Make this Better Space and AWESOME one?
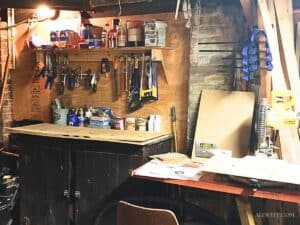
My first thought was to use shelf brackets, but the ones I looked at were either ugly or expensive compared to what I should be able to do with scrap wood and pocket screws. Plus, if I build it with a wood brace & backboard, I can anchor it wherever the studs are without the brackets being off-center. And most importantly, I can add hooks to it for sewing notions and for the wire basket that holds my TPU fabric welding & leather iron (for the DIY Packraft projects), so it can sit up off the work surface.
And now the dog bed is next to the radiator, for maximum canine coziness and hooman proximity (the radiators don’t get hot enough for that to be a safety issue for the pups, and he can nap closer to my desk). It’s also in-line with the window, so even when the boiler isn’t on, they can nap in the sun-beams from this south-facing window.
I also am going to re-hang the white string lights, then the fun purple plant LED light can plug in to the same remote control/timer thingy that I use for the Christmas lights. The plant light switch is hard to reach without moving books on that shelf above the radiator, and the string lights and controller are plugged in under the desk on the wrong side of the window. The LED plant light was on a timer but at some point the timer button got bumped and resetting it is annoying – I’d rather just have them on the same switch since I only use them both at night anyway. I originally had orchids on that shelf, so the timer made sense, but it was too hot above the radiator for them and the light was too bright. Rehanging the string lights will also put most of the end of the light string over the sewing area instead of under my desk, where it will be a lot more useful.
I still need to reroute and rearrange a bunch of other cords to get the printer plugged back in along with everything else, without overloading my two poor little outlets (it’s an old house, so there are only three in this room, and one is behind the futon). But I think that’s a problem for tomorrow-me, as nobody needs to print anything today.
Ok, that’s cool. But how do I fix and declutter MY mess of a room?
- TAKE PHOTOS: I know, sometimes this is hard, but get the good, the bad, and the awful in the before. You’ll want to look back on your hard work and bask in your sense of accomplishment, of course, but more importantly, it’s another set of eyes to re-imagine what your space could be. You don’t have to bare your shame on the internet like I just did- you can delete them and pretend it never happened. But always take the before photos!
- MOOD: Have an idea of where you want to go! Make yourself a mood board, either a physical one or on Pinterest or whatever. Pick out colors that you like or that work with things you already have, and look for inspiration and ideas for creative ways to re-purpose or rearrange your stuff. Would a coat of paint turn something you hate into something great (unless it’s a nice vintage wood piece then plz leave it alone)?
- MEASURE: No, seriously, measure everything. Jot down the dimensions of any furniture you have or want, and the actual dimensions of the room that you’re working with. Don’t forget the tricky stuff like trim and molding that juts out (like the shoe molding and window trim that kept me from doing my project MONTHS ago until I figured out how to modify the table I have rather than build a new one to fit). If you’re techy, make a digital sketch, or freehand it on some notebook or graph paper.
- MOVE: Sometimes nothing works better than actually moving your stuff around in your space to see what feels and flows best. You might need a friend for this one, otherwise lift smart, use straps or moving dollies if you need them, and be careful if your stuff is heavy! Unload your shelves before you move them so they’re lighter and also, so that you can:
- CLEAN: Get your cleaning supplies out and have them handy while you work. All those shelves you emptied? Are they gross? Wipe them down! Vacuum rugs and inaccessible places while you can (you may need to vacuum or sweep again when you’re done, as you clean things. Microfiber cloths are your friend, along with some vinegar & water spray. I also like the “APC” all-purpose cleaner recipe from Midwest Magic Cleaning for hard surfaces- if you like watching cleaning videos and snarky humor, do yourself a favor and go watch his videos- you’ll get a lot more cleaning ideas there or just organizational ASMR (no affiliation, I just like his videos, and he uses the YouTube income to do free house cleaning for people with mental health or other challenges, so go give him some clicks). The recipe for that APC cleaner is just before the 5 minute mark in this video (it’s three ingredients you probably already have, but I won’t give away his secret sauce, go get it from the source). BUT! Don’t get overwhelmed or sidetracked taking everything apart or washing the slipcovers or whatever right now, but do wipe things down as you clean them, dust shelves while they’re empty, and clean behind any furniture that you move.
- PURGE: While you’re cleaning, set aside a box or bin for anything that you no longer need. Is it actually trash? Toss or recycle it! Is it something that you are never going to use, but still useful to someone? Add it to your donation pile. Don’t forget to actually donate it- it doesn’t count until it’s rehomed and out of your house or trunk. Try finding a freecycle group (on facebook or whatever) to post photos of anything you want to give away? But not right now. Focus…
- REARRANGE: Remember, nothing is final (unless you glue and nail it down, I guess… don’t do that lol). Figure out what you like best. Maybe live with it for a day or two before you redecorate and replace everything on the shelves (so it’s easy to move it again). Maybe you instantly know you love it, in which case, congratulations!
- ADD STORAGE: Here’s where you get to have fun buying or upcycling organizers, containers, bins and boxes or whatever, AFTER you know what spaces you have available and what you need to actually store.
- CELEBRATE:

Lots of really great ideas. I liked how you use color to draw your eyes around the different work spaces and organizers. You can stay organized and creative 😉
Thanks! Yeah, the all-beige or greige trend definitely doesn’t work for me… especially in my work space. The rest of the house has a more natural color palate, even if they’re bold naturals like the dining room, but here the colors get to play (and so do I). :)